Note
Access to this page requires authorization. You can try signing in or changing directories.
Access to this page requires authorization. You can try changing directories.
Note: This video contains the old experience. Follow the rest of the article's instructions for the updated AMA experience.
Scenario: Data collection machine has no internet access, so it isn't possible to use OMS Gateway
This article provides guidance on how to assess a completely disconnected environment. Disconnected means there's zero network connectivity from the assessed environment to the internet or to any other machine that has internet access. This scenario requires additional configuration and steps that are listed in this article.
Requirements: For this scenario you need two machines:
- One is a data collection machine, which needs to fulfill prerequisites from the assessment.
- The other is an internet access machine, which has internet access and can upload data to Azure Log Analytics.
- This machine needs to be enrolled into Azure Arc to upload your batch of data from the first machine that isn't connected to the internet.
Important
This connectivity scenario cannot be used for the following On-Demand assessments:
- Office 365 Exchange Online
- Office 365 Skype and Teams
- Office 365 SharePoint Online
- Microsoft Azure
- SharePoint Assessment
To successfully execute On-Demand assessments this way, you need to follow an offline secure file copy process to transfer files to and from your internet connected machine and the environment being assessed.
Internet access machine
After enrollment into Azure Arc and setup of your assessment are complete, follow the next steps on your machine that has internet access.
Open Task Manager.
Open scheduled tasks and drill down to the assessment task.
Set the scheduled task to start manually, removing the weekly schedule.
Start the scheduled task. This downloads the assessment executable and the assessment package.
Go to the Working Directory that you entered in the assessment setup:
\<Working Directory\>\XXAssessment, where XX is different for each assessment.A numbered folder should appear. As soon as you see this folder, stop the
OMSAssessment.exeprocess in Task Manager.Copy the OMSAssessment folder created in
\<working directory\>\XXAssessmentto a USB drive (or another method of your choice) to copy content to the data collection machine.Go to
C:\ODA\Packages. Look for the execpkg for the technology you need (such asADAssessmentPlus.execpkg), then copy that Execpkg file to the same location as where you stored the OMSAssessment folder in Step 6.
This concludes your required actions on the machine with internet access until you want to upload data.
Data collection machine
Create a folder on your local drive that has enough free storage space to store all collected data, up to 10GB. For example:
C:\MicrosoftAssessment.Create a directory for data collection. For example:
C:\MicrosoftAssessment\Collect.Copy the Execpkg file and OMSAssessment folder to the
C:\MicrosoftAssessmentfolder.Open an elevated CMD Prompt and go to
C:\MicrosoftAssessment\OMSAssessment.Run one of the following commands for the your assessment: List of all commands for running assessments. For example, for AD Assessment, run the following commmand:
OmsAssessment.exe -execPackage
C:\MicrosoftAssessment\ADAssessmentPlus.execpkg" -w
"C:\MicrosoftAssessment\Collect" -trace Off -headers False
-assessmentname "ADAssessment" -discoverysettings "AD" -computername
"\<DataCollectionMachine\>" -target ToolsMachine -op "\<Location for
the Recommendation files\>"
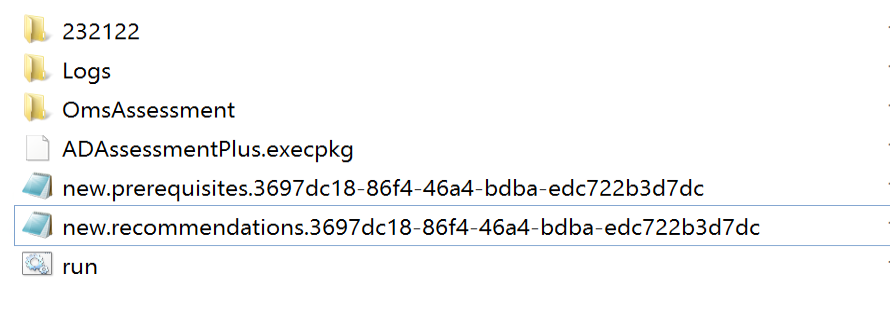
Data collection should then start and generate new files:
new.prerequisite<"assessmentguid">.assessmentrecsnew.recommendations.<"assessment guid">.assessmentrecs
Once the assessment is finished, the command prompt returns at the enter prompt and you shouldn't see anything running.
Copy the files that are named
new.*over to your machine with internet access.Copy the
new.*files in the“<"working directory">\XXAssessment.
Our Azure DCR (data collection rules) then detect the new set of recommendations and upload your data to the Workbooks as soon as possible.
- Review data afterwards on the portal. It can take up to one hour after the data is submitted to show up.
List of all commands for running assessments
AD
.\omsassessment.exe -execPackage
"C:\MicrosoftAssessment\ADAssessmentPlus.execpkg" -w
"C:\MicrosoftAssessment\collect" -trace Off -discoverysettings AD
-computername "<DataCollectionMachine>" -assessmentname ADAssessmentPlus
-recommendationsbatchfile 100000 -headers False -target ToolsMachine -op
"C:\MicrosoftAssessment" WaitForExit: False
AD Security
.\omsassessment.exe -execPackage
"C:\MicrosoftAssessment\ADSecurityAssessment.execpkg" -w
"C:\MicrosoftAssessment\collect" -trace Off -discoverysettings AD;DNS
-computername "<DataCollectionMachine>" -assessmentname ADSecurityAssessment
-recommendationsbatchfile 100000 -headers False -target ToolsMachine -op
"C:\MicrosoftAssessment" WaitForExit: False
Exchange
.\omsassessment.exe -execPackage
"C:\MicrosoftAssessment\ExchangeAssessment.execpkg" -w
"C:\MicrosoftAssessment\collect" -trace Off -discoverysettings AD;EXCH
-computername "<DataCollectionMachine>" -assessmentname ExchangeAssessment
-recommendationsbatchfile 100000 -headers False -target ToolsMachine -op
"C:\MicrosoftAssessment" WaitForExit: False
Skype for Business
.\omsassessment.exe -execPackage
"C:\MicrosoftAssessment\SfBAssessment.execpkg" -w
"C:\MicrosoftAssessment\collect" -trace Off -discoverysettings Lync
-computername "<DataCollectionMachine>" -assessmentname SfBAssessment
-recommendationsbatchfile 100000 -headers False -target ToolsMachine -op
"C:\MicrosoftAssessment" WaitForExit: False
SCCM
.\omsassessment.exe -execPackage
"C:\MicrosoftAssessment\SCCMAssessmentPlus.execpkg" -w
"C:\MicrosoftAssessment\collect" -trace Off -discoverysettings
"ConfigMgr:ConfigMgrServerName=sccm-01,ExcludeDistributionPoints=True"
-computername "<DataCollectionMachine>" -assessmentname SCCMAssessmentPlus
-recommendationsbatchfile 100000 -headers False -target ToolsMachine -op
"C:\MicrosoftAssessment" WaitForExit: False
SCOM
.\omsassessment.exe -execPackage
"C:\MicrosoftAssessment\SCOMAssessmentPlus.execpkg" -w
"C:\MicrosoftAssessment\collect" -trace Off -discoverysettings
"OpsMgr:ServerName=scom-01,IncludeGateways=False" -computername
"<DataCollectionMachine>" -assessmentname SCOMAssessmentPlus
-recommendationsbatchfile 100000 -headers False -target ToolsMachine -op
"C:\MicrosoftAssessment" WaitForExit: False
SQL Server
.\omsassessment.exe -execPackage
"C:\MicrosoftAssessment\SQLAssessmentPlus.execpkg" -w
"C:\MicrosoftAssessment\collect" -trace Off -discoverysettings
"SQL:ServerName=sccm-01" -computername "<DataCollectionMachine>"
-assessmentname SQLAssessmentPlus -recommendationsbatchfile 100000 -headers
False -target ToolsMachine -op "C:\MicrosoftAssessment" WaitForExit: False
Windows Server
.\omsassessment.exe -execPackage
"C:\MicrosoftAssessment\WindowsServerAssessment.execpkg" -w
"C:\MicrosoftAssessment\collect" -trace Off -discoverysettings
"Server:ServerName=cluster-01;cluster-02;cluster-03;
dc-01;dc-02;dc-03;dc-04;hyperv-01;iis-01;sccm-01;scom-01;server-01;server-02;
server-03;sfb-01;sp-01;ex-01;sql-01;sql-02,Server:FindServerRoles=false"
-computername "<DataCollectionMachine>" -assessmentname
WindowsServerAssessment -recommendationsbatchfile 100000 -headers False
-target ToolsMachine -op "C:\MicrosoftAssessment" WaitForExit: False
Windows Client
.\omsassessment.exe -execPackage
"C:\MicrosoftAssessment\WindowsClientAssessmentPlus.execpkg" -w
"C:\MicrosoftAssessment\collect" -trace Off -discoverysettings
"Client:ClientNames=client-01;client-02;client-03,
Client:Domain=fourthcoffee.com,Client:MaxClients=100,
Client:PasswordUpdatedInLast=180,
Client:LdapQueryFilter=(&(!operatingSystem=Windows Server*)
(!operatingSystemVersion=4*)(!operatingSystemVersion=5*)" -computername
"<DataCollectionMachine>" -assessmentname WindowsClientAssessmentPlus
-recommendationsbatchfile 100000 -headers False -target ToolsMachine -op
"C:\MicrosoftAssessment" WaitForExit: False