Note
Access to this page requires authorization. You can try signing in or changing directories.
Access to this page requires authorization. You can try changing directories.
Open Canvas allows you to visualize your support data the way you want. Focus Areas empower you to further filter your data to display in the best way for you and your team. For example, you could create a Focus Area for Support data and Azure events related to only subscriptions that align to a specific application or workload. You could also focus on Support data and Azure events related to only subscriptions in a specific geography. Your opportunities are endless.
Note
Only users with the Manage Open Canvas permissions can create Focus Areas. All Open Canvas users will see and be able to use that Focus Area as well. Learn more about Roles and Permissions within Services Hub by visiting the documentation here.
Create a new Focus Area
Within the Open Canvas feature, select the “Admin” tab.
Select "Add" on the right side of the screen.
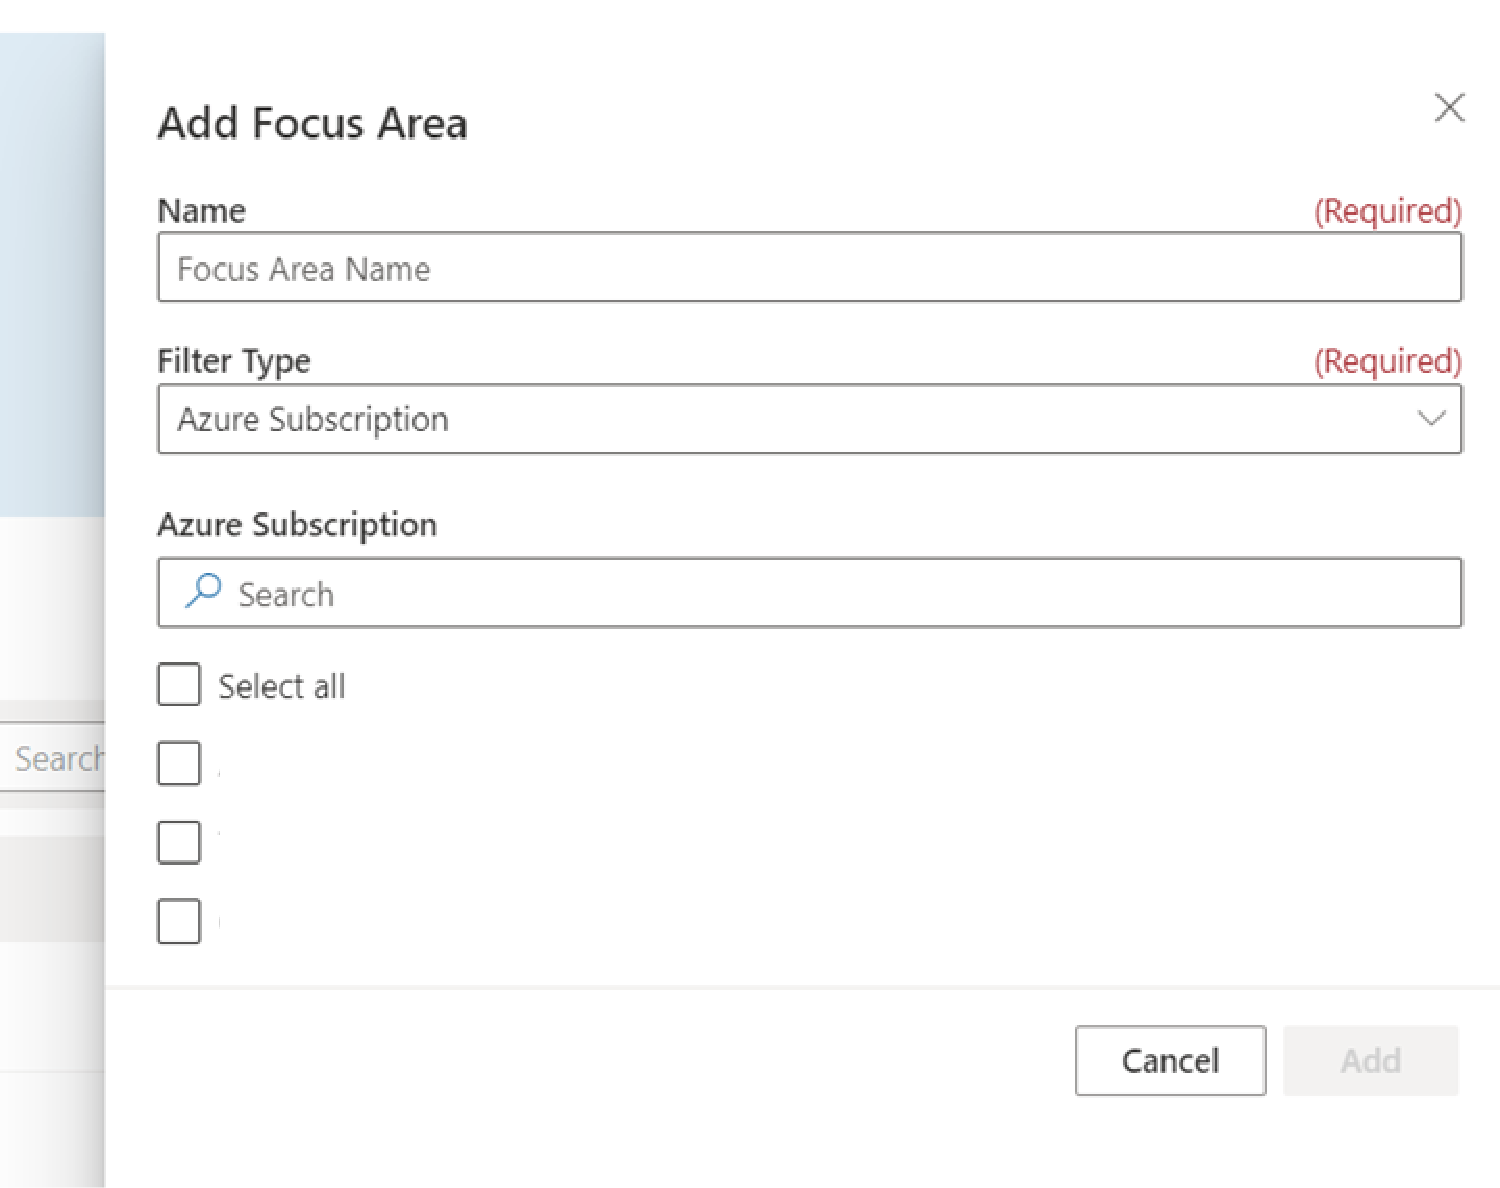
In the flyout pane, type in a Name for the Focus Area. In the Filter Type, choose either “Azure Subscription,” or “Package ID,” then choose the items you want to create a focus on. Once finished, select “Add” to close the flyout. Once you have created a Focus Area, you can apply that to a report in the next step.

Apply Focus Areas
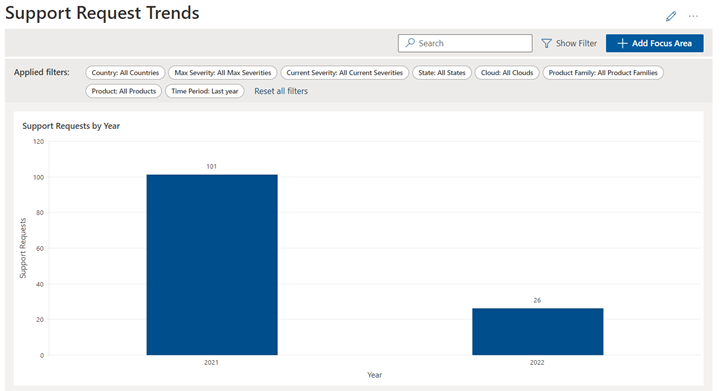
Within the Open Canvas feature, navigate to the "Home" tab and select one of the reports.
Note
Notice the numbers on the report before you add the Focus Area.
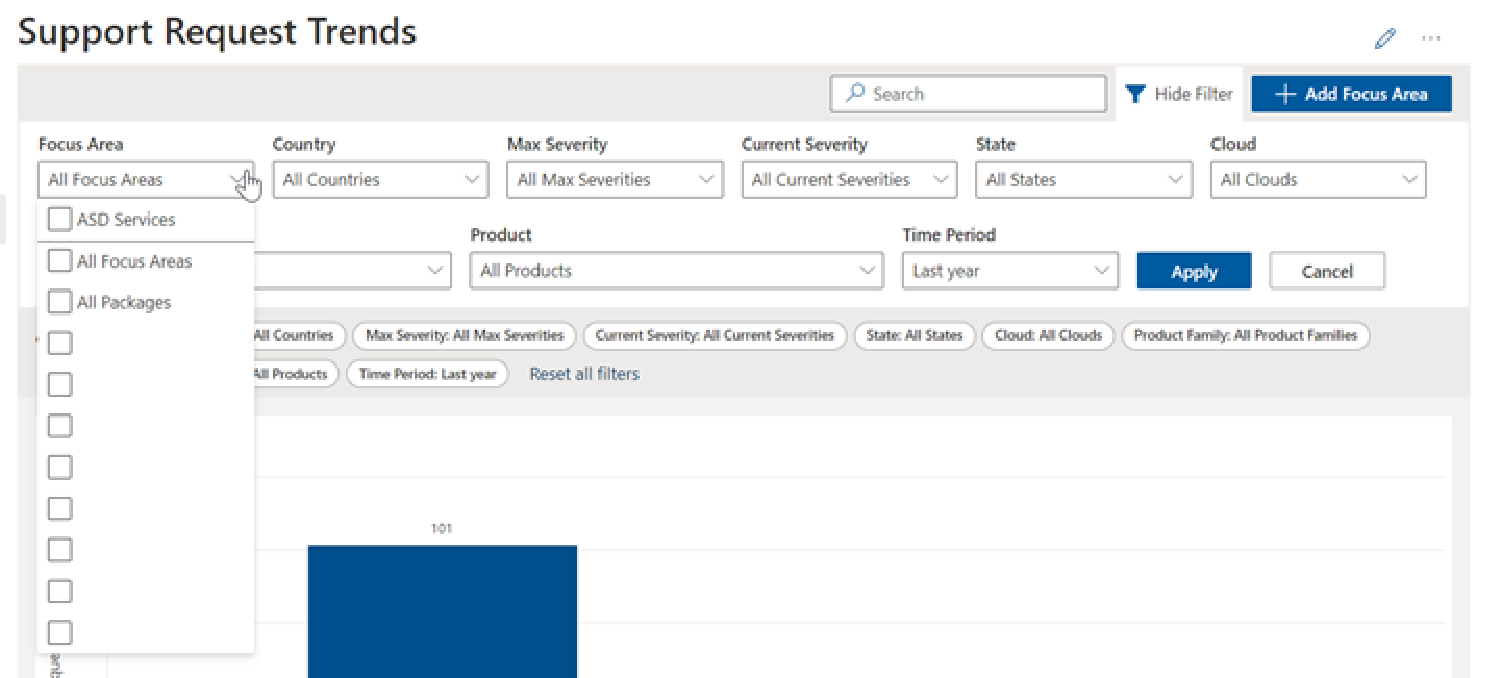
Once the report is open, select “Show Filters”. Choose the Focus Area you want filter with from the Focus Area drop-down. Once selected, select “Apply”.