Note
Access to this page requires authorization. You can try signing in or changing directories.
Access to this page requires authorization. You can try changing directories.
Integrate Fluid Framework and SharePoint Embedded to seamlessly and efficiently incorporate document collaboration into your applications.
Background
Fluid Framework is a collection of client libraries for distributing, synchronizing, and saving shared data. These libraries allow multiple clients to simultaneously create and operate on shared data structures in real-time. Fluid Framework allows developers to use the same practices with shared data as with local data--for example, a Fluid object works in the same way as a local TypeScript object.
Quickstart
Start building in the Fluid Sample Apps Directory. You need to create a SharePoint Embedded application first.
Get started with SharePoint Embedded
Try SharePoint Embedded for free by creating a container type for trial purposes.
- Set up a free trial Microsoft 365 tenant. Alternatively, you can use an existing tenant if you have admin credentials.
- Sign into the SharePoint Embedded Visual Studio Code Extension and follow the steps to create an application and container type for trial purposes.
Prerequisites
To get started building with Fluid Framework, you need:
- Admin Credentials: You need administrative credentials for a Microsoft 365 tenant.
- SharePoint Embedded Application: Ensure that you register your application in Microsoft Entra ID. If you don't have a SharePoint Embedded application, refer to the earlier section.
- Application (Client) ID: Obtain the
ClientIDfor your SharePoint Embedded Application. - Container Type Information:
- Identify the
ContainerTypeIdassociated with your app’s container type.
- Identify the
- Containers:
- Make sure you have at least one container created of the same container type linked to your SharePoint Embedded Application.
Get started with Fluid
Access App information
You need the ClientID from your application and the ContainerTypeId associated with the containers created on that application.
The ClientID is essential for acquiring the correct access tokens when working with Fluid Framework and documents. The ContainerTypeId is necessary for accessing containers associated with your SharePoint Embedded application.
If you used the Visual Studio Code Extension, you can export your Postman Environment to easily view your both your ContainerTypeId and ClientID.
Otherwise, you can access your ContainerTypeId by using the Get-SPOContainerType PowerShell cmdlet. Your ClientID is available in Microsoft Entra ID by navigating to Identity > App Registrations > Applications > All applications to view your application overview.
Run Fluid Sample App: Item Counter
Now you can test out and start building with the Fluid Sample App Item Counter.
Steps:
Gather your
ClientIDandContainerTypeIdof your SharePoint Embedded Application and tenant admin credentialsChange to the directory where you'd like to clone the Fluid Examples repo
Clone the repository by executing the command:
git clone https://github.com/microsoft/FluidExamples.gitNavigate to the Item Counter directory
cd .\FluidExamples\item-counter-spe\Create an empty .env file and input your
ClientIDandContainerTypeIdwith no spaces like so:SPE_CLIENT_ID=YOUR_CLIENTID SPE_CONTAINER_TYPE_ID=YOUR_CONTAINERTYPE_IDnpm installnpm run devOnce Webpack is completed, go to
https://localhost:8080Sign in with the Admin credentials for your tenant
Grant admin consent for your app in the pop-up window
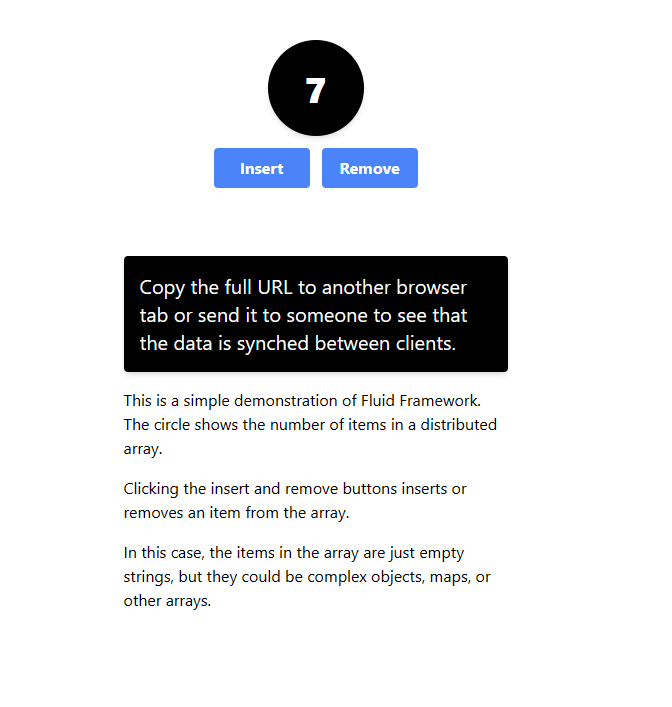
Copy the full URL to another browser tab or send it to someone who has credentials to the same tenant. These can be user credentials as long as they are on the same tenant. The live changes to the Item Counter on both browsers show that the data is synced between clients.
Congrats on getting your first Fluid App to run! More details can be found in the Item Counter README.