Note
Access to this page requires authorization. You can try signing in or changing directories.
Access to this page requires authorization. You can try changing directories.
Important
The SharePoint Add-In model in SharePoint Online has been deprecated as of November 27th 2023, checkout the full retirement announcement to learn more.
Deprecation means that the feature will not get any new investments, but it's still supported. SharePoint add-in model is retired fully on April 2nd, 2026 and is no longer available after that time. Primary replacement technology for the SharePoint add-in model is SharePoint Framework (SPFx) which continues to be supported also in future.
This is the ninth in a series of articles about the basics of developing SharePoint-hosted SharePoint Add-ins. You should first be familiar with SharePoint Add-ins and the previous articles in this series, which you can find at Get started creating SharePoint-hosted SharePoint Add-ins | Next steps.
Note
If you have been working through this series about SharePoint-hosted add-ins, you have a Visual Studio solution that you can use to continue with this topic. You can also download the repository at SharePoint_SP-hosted_Add-Ins_Tutorials and open the BeforeRibbon.sln file.
All SharePoint Add-ins can be run from the Site Contents page of the host web by selecting the add-in's tile. The functionality of a SharePoint Add-in can also be exposed on the host web through custom actions, which are custom ribbon buttons or custom menu items. In this article you add a button to the ribbon on a host web.
Prepare the host web
To add the button to the ribbon of a calendar on the host web, take the following steps in the UI of your SharePoint developer site.
From the home page of the site, select Site Contents > add and add-in > Calendar.
In the Adding Calendar dialog, for the Name, enter Employee Orientation Schedule, and then select Create.
When the calendar opens, put the cursor on any date until the Add link appears on the date, and then select Add.
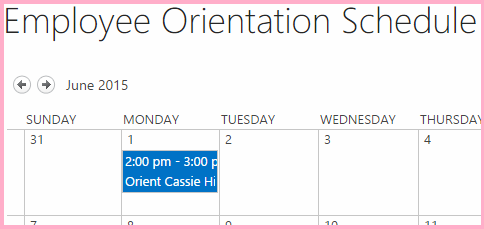
In the Employee Orientation Schedule - New Item dialog, for the Title, enter Orient Cassi Hicks. Leave the other fields at their defaults, and then select Save.
The calendar should look similar to the following:
Figure 1. Custom calendar
Important
The next procedure requires that the calendar be visible in the UI of Visual Studio, but it won't be if Visual Studio was open when you created the calendar. Before you continue, close Visual Studio, and sign out of any browser windows and PowerShell consoles where you are signed in to your developer site.
Add a ribbon custom action
In Solution Explorer, right-click the EmployeeOrientation project, and select Add > New Item > Office/SharePoint > Ribbon Custom Action. Name it RunOrientationAdd-in, and then select Add.
The Create Custom Action for Ribbon Wizard asks you a series of questions. Give the answers from the following table, and then select Finish.
Property question Answer Where do you want to expose the custom action? Select Host Web. Where is the custom action scoped to? Select List Instance (not List Template). Which particular item is the custom action scoped to? Select Employee Orientation Schedule. Where is the control located? Do not use the drop-down selections. Instead, enter Ribbon.Calendar.Events.Actions.Controls._children. (The third part, Events, identifies the tab of the ribbon, and the fourth part, Actions, identifies the button group.)What is the text on the menu item? Enter Employee Orientation. Where does the custom action navigate to? Do not use the drop-down selections. Instead, enter ~appWebUrl/Lists/NewEmployeesInSeattle. This is the list view page for the list, which is on the add-in web, so the ribbon button on the host web opens a page on the add-in web.
Inspect the add-in web feature
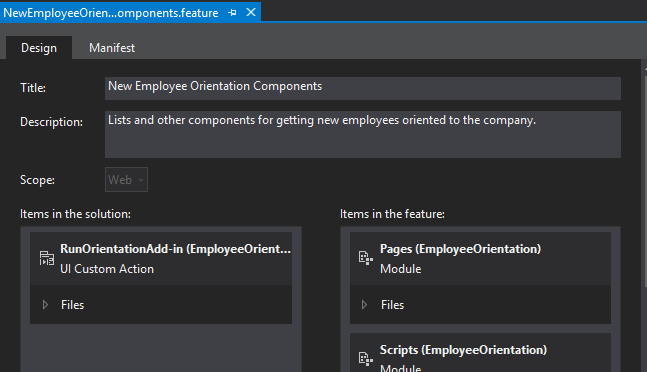
In Solution Explorer, expand the Features folder, and select the NewEmployeeOrientationComponents feature. The Feature designer opens.
Notice that the custom action that you created, RunOrientationAdd-in, is listed in Items in the solution, but not in Items in the feature. This is because the feature is deployed to the add-in web, but your custom action is deployed to the host web.
When you package the add-in in Visual Studio for deployment to production, or when you select F5 in Visual Studio, the Office Developer Tools for Visual Studio creates a special host web feature, adds the custom action to it, and deploys it to the host web. You should never edit the host web feature; that is why it is not created until packaging time.
Figure 2. Feature designer
Run and test the add-in
Use the F5 key to deploy and run your add-in. Visual Studio makes a temporary installation of the add-in on your test SharePoint site and immediately runs the add-in.
The default page of the SharePoint Add-in opens. Go to the home page of your developer site (which is the host web). There is a breadcrumb link to it in the upper-left corner of the page.
On the host web's home page, select Site Contents, and on the Site Contents page, select the Employee Orientation Schedule calendar (not the Employee Orientation add-in).
When the calendar opens, select the event Orient Cassie Hicks. If the Events tab on the ribbon doesn't open automatically, open it. It should look similar to the following:
Figure 3. Events ribbon tab with custom button
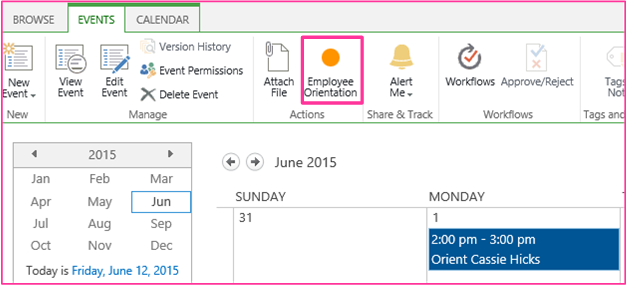
In the Actions group on the ribbon, select Employee Orientation. The list view page for New Employees in Seattle opens.
To end the debugging session, close the browser window or stop debugging in Visual Studio. Each time that you select F5, Visual Studio will retract the previous version of the add-in and install the latest one.
You will work with this add-in and Visual Studio solution in other articles, and it's a good practice to retract the add-in one last time when you are done working with it for a while. Right-click the project in Solution Explorer and select Retract.
Next steps
In the next article in this series, you'll add JavaScript to the SharePoint Add-in and access SharePoint data with SharePoint's JavaScript object model: Use the SharePoint JavaScript APIs to work with SharePoint data.