Note
Access to this page requires authorization. You can try signing in or changing directories.
Access to this page requires authorization. You can try changing directories.
You may find it necessary to reinstall the Migration Manager agent on one of your computers, especially if it encounters issues.
- From the new SharePoint admin center, select Migration center. You need to sign in with an account that has admin permissions for your organization.
- Under For file shares, select "Get started" or "View Tasks."
- Select the Agents tab, and highlight the agent you want to delete. Select Delete.
- Remaining on the Agents tab, select + Add.
- Select Download agent setup file.
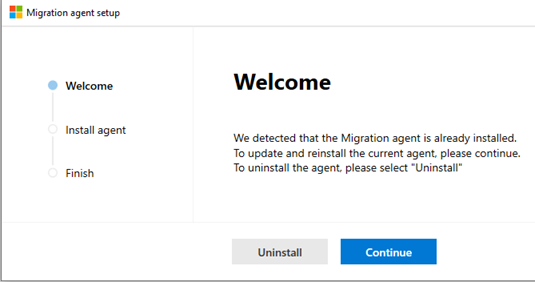
- Select Continue to reinstall the agent.
- Select Next.
- Enter the SharePoint admin username and password of the environment you want to migrate your content to. Select Next.
- Enter Windows credentials to provide access to all the file shares that contain the content you want to migrate. Select Install.
- Test agent access (optional) or select Close. After the setup is completed, the new agent is added to the available agents that can be assigned tasks.