Note
Access to this page requires authorization. You can try signing in or changing directories.
Access to this page requires authorization. You can try changing directories.
Important
Azure Data Studio is retiring on February 28, 2026. We recommend that you use Visual Studio Code. For more information about migrating to Visual Studio Code, visit What's happening to Azure Data Studio?
Applies to: ![]() SQL Server
SQL Server ![]() Azure SQL Database
Azure SQL Database ![]() Azure SQL Managed Instance
Azure SQL Managed Instance
With the help of the SQL Database Projects extension, SQL projects (including tables, views, and stored procedures) can be edited without the need to be connected to a server instance in Azure Data Studio. The tutorial below shows you how to:
Create a SQL Database Project of the
AdventureWorks2022database.Make and deploy changes to a table in the
AdventureWorks2022database using SQL Database Projects and confirming this change in the locally connected server instance where this database resides.
This article requires the AdventureWorks2022 sample database, which you can download from the Microsoft SQL Server Samples and Community Projects home page.
You will also need to have the SQL Database Projects extension installed. Refer to the SQL Database Projects documentation to learn more about this extension.
Create a SQL Database Project
Navigate to the
AdventureWorks2022database object located in the object explorer, right-click on it and select Create Project from Database: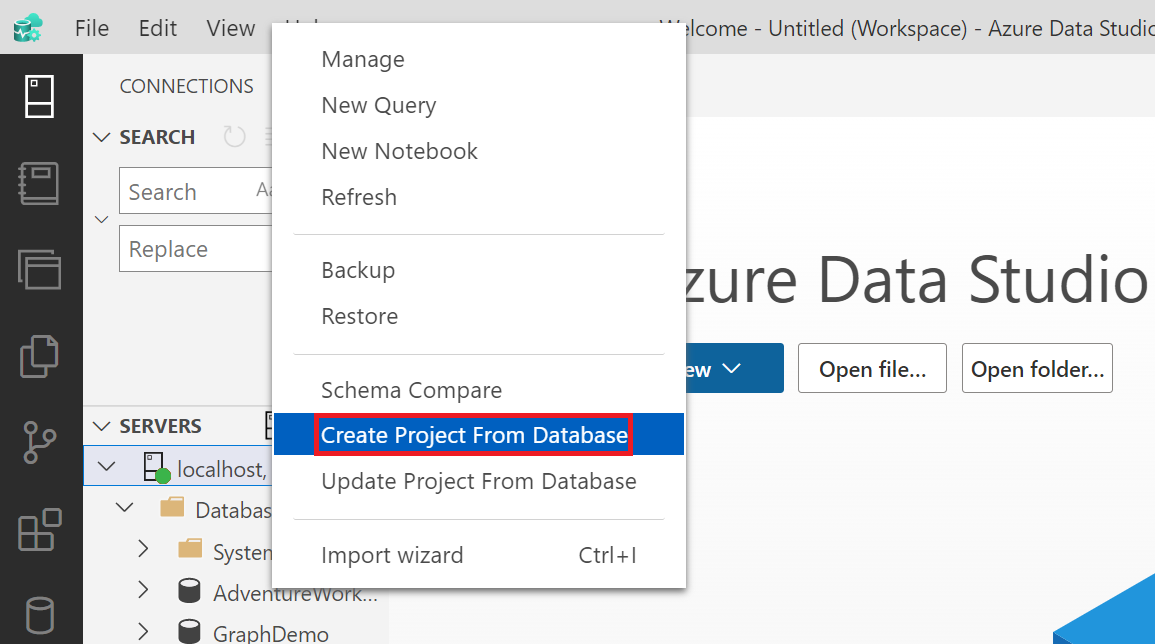
Select the location in which you want to store your Target project in and name the file containing the project to your preference. You can also configure the Folder structure settings to any of the provided options in the drop-down. In this tutorial, we will use the Schema/Object type folder structure. When done, select Create. When this project has been extracted, you will see a Extract project files succeeded message.
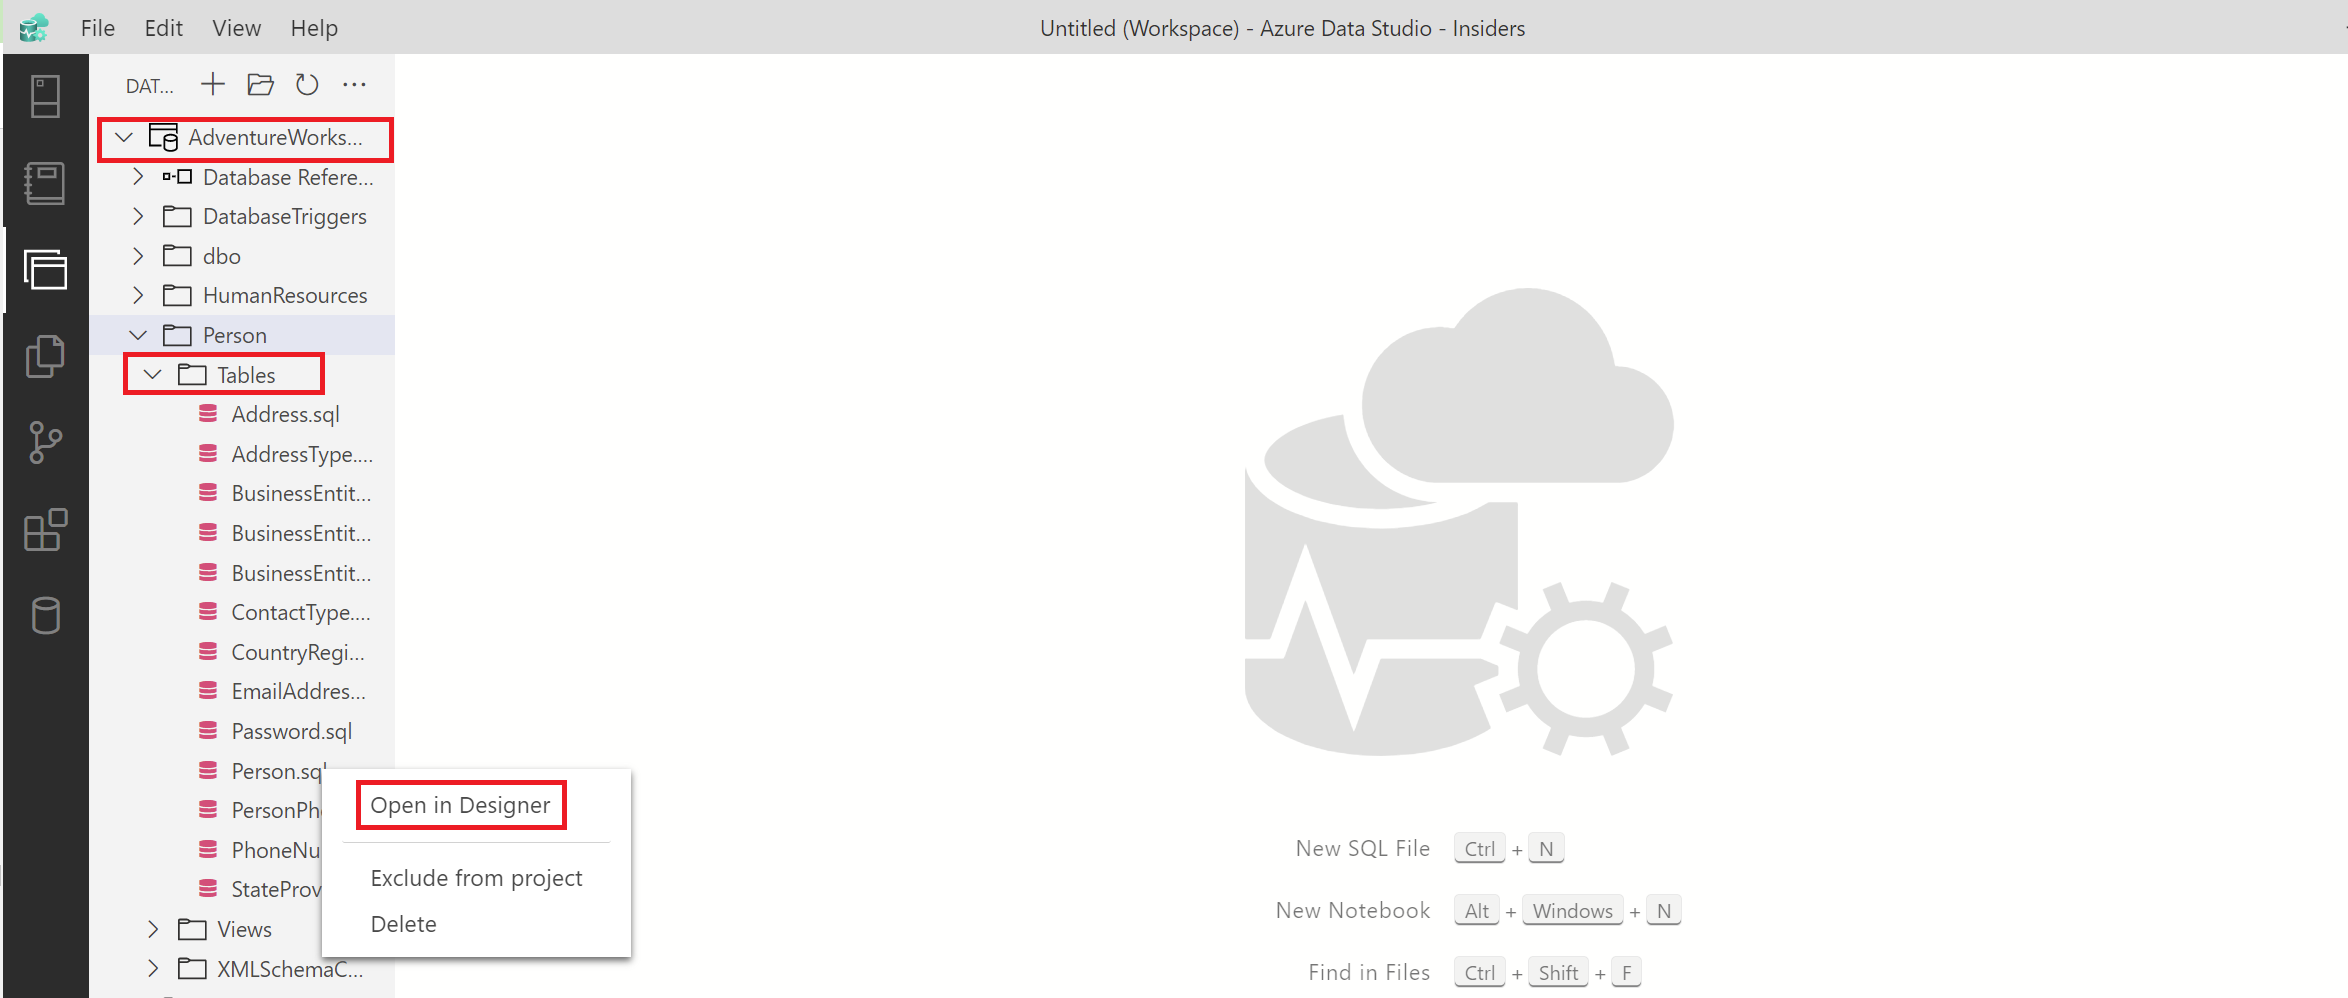
From the Azure Data Studio sidebar menu, select the Database Projects icon to open the SQL Database Projects extension. Navigate to the database project folder you created. Then, in the Person schema folder in this project, navigate to the Tables folder, and expand the drop-down of this folder. Right-click and open any of the tables in the designer mode to open the table design of this table. In this example, we work on the Person.sql table.
Note
Please note that the project file's location could vary depending on the folder structure defined in Step 2 above.
Deploy Changes to the Database from the Project
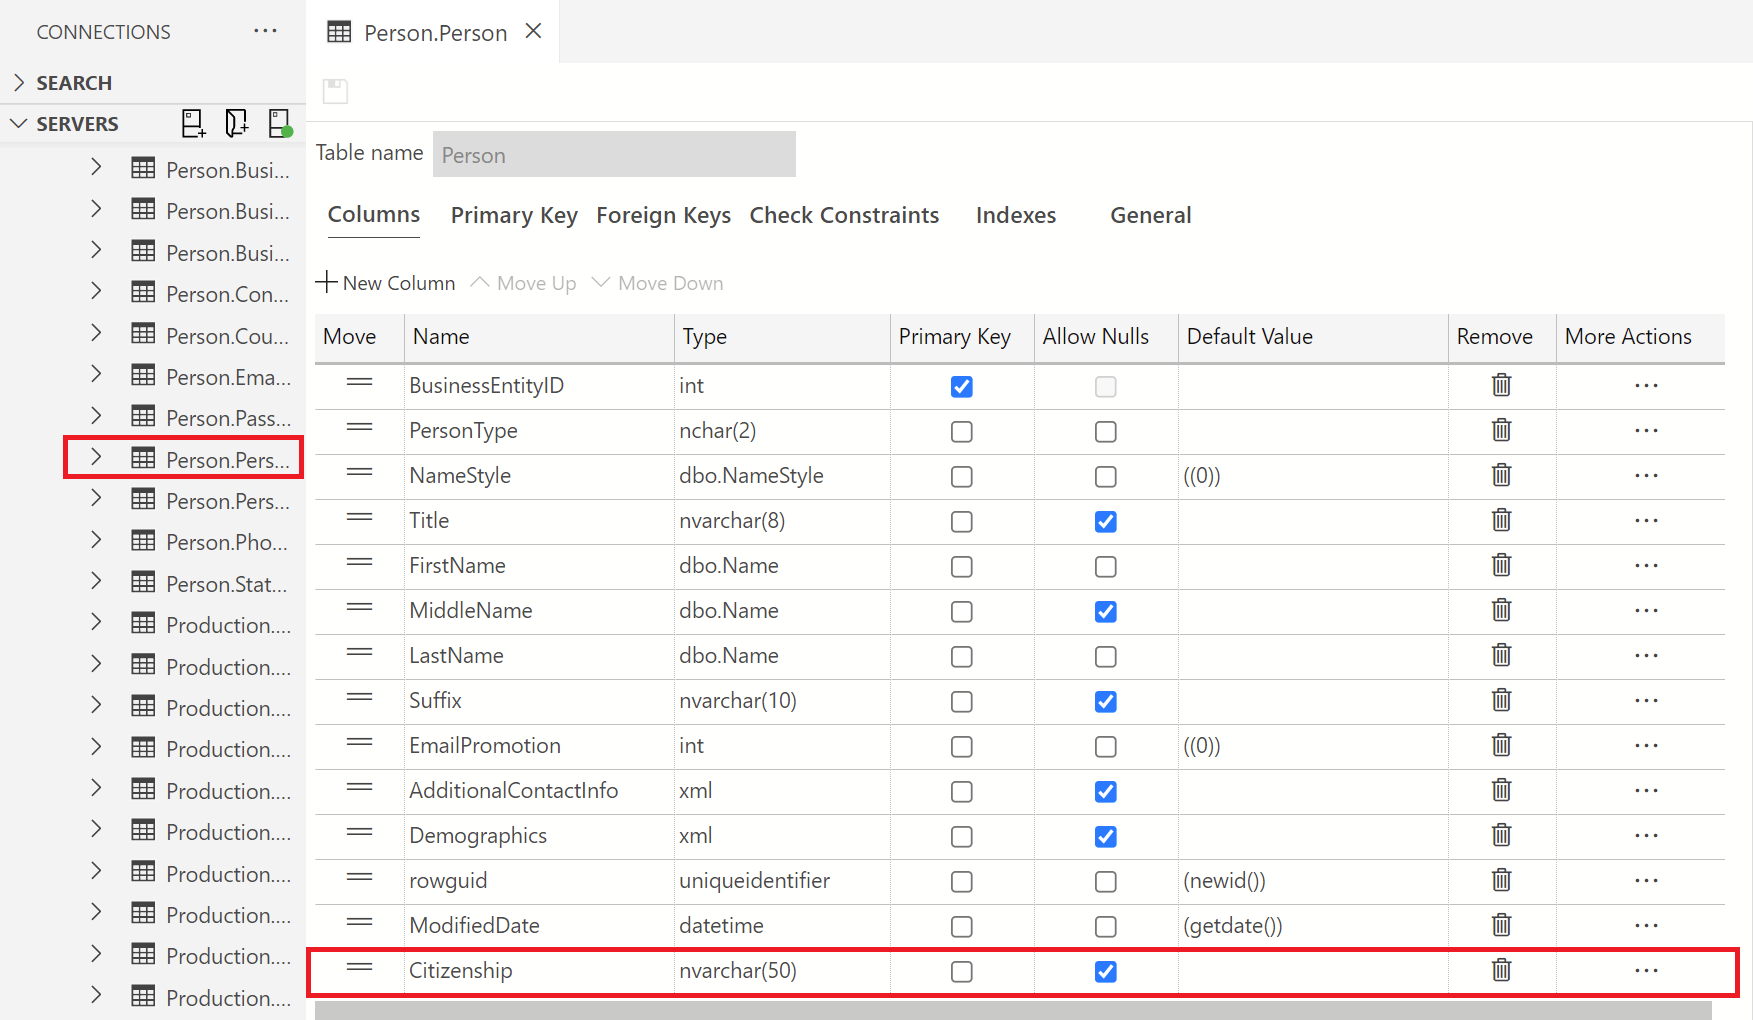
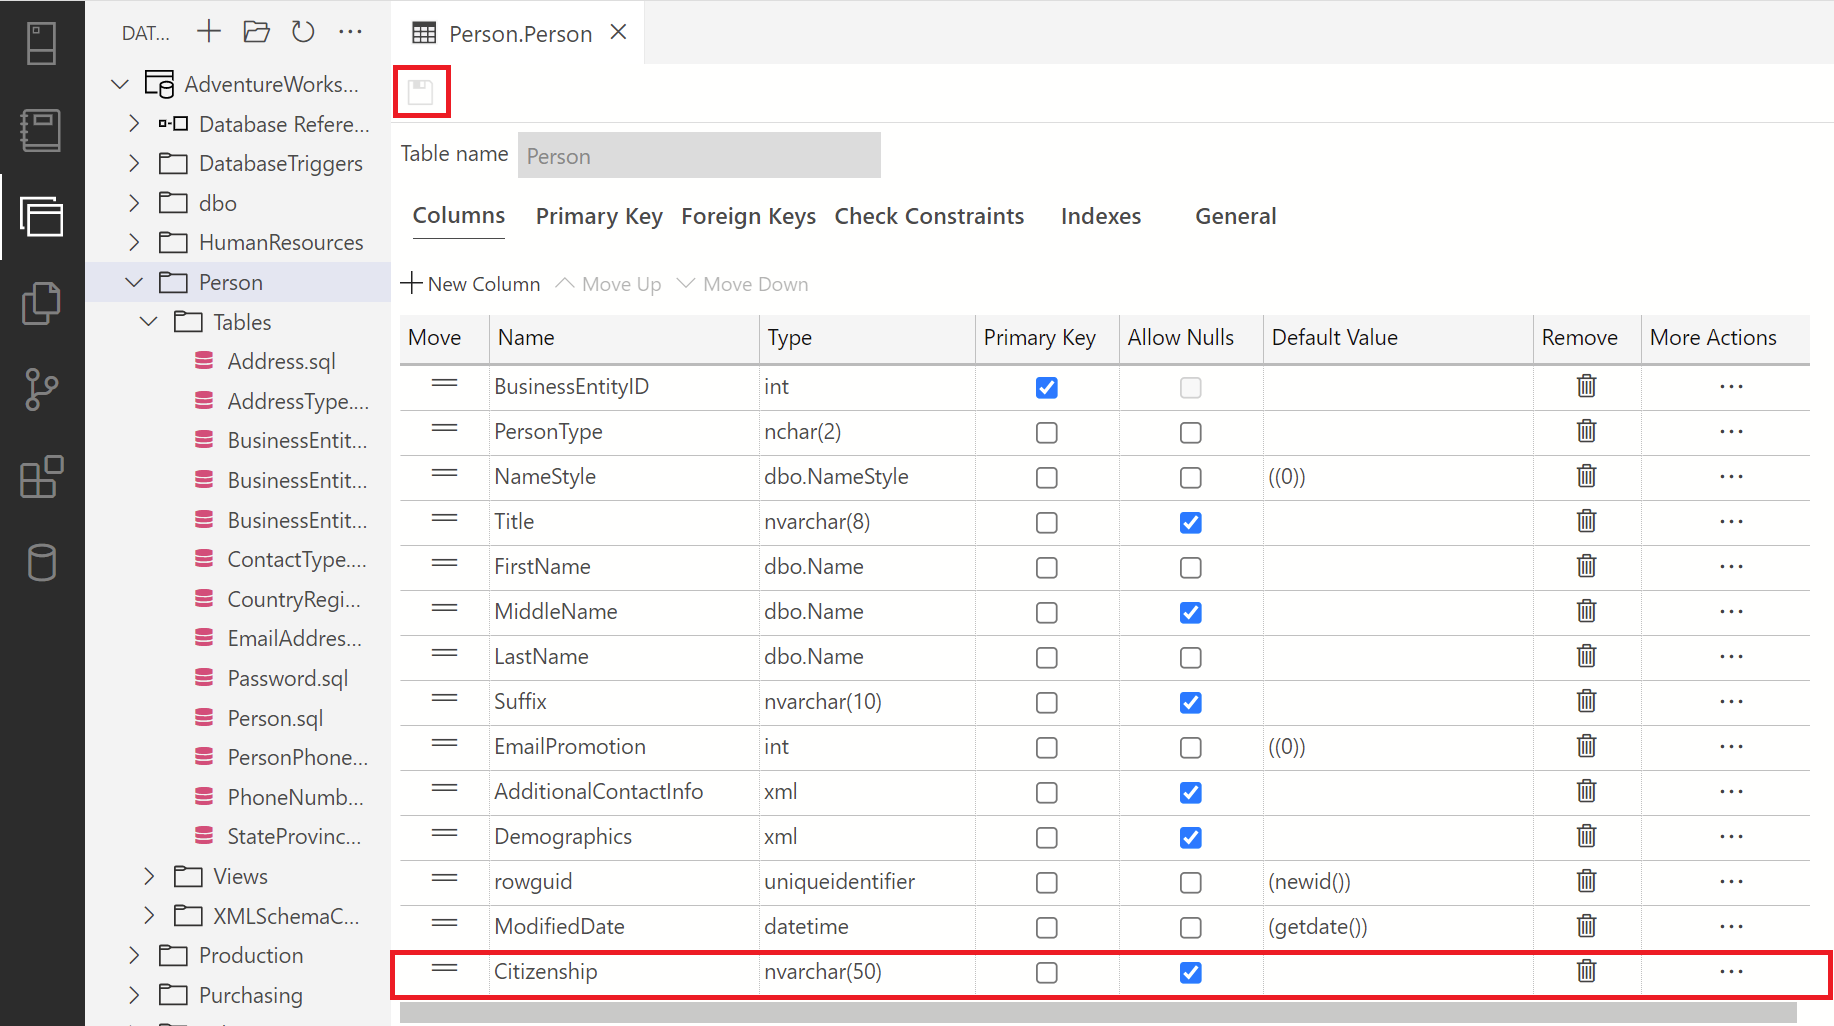
The original table shows the table design of the Person table with thirteen (13) column names, starting from BusinessEntityID and ending with ModifiedDate. Add another column named Citizenship of type nvarchar(50) and publish this change:
From the file menu in the Database Projects, right-click on the project root node in which your project resides, and select Build to build this project. You should see a success or error message in the output terminal for a successful or failed build. When finished, right-click this same folder and select Publish to publish this project to the
AdventureWorks2022database in your local host server connection.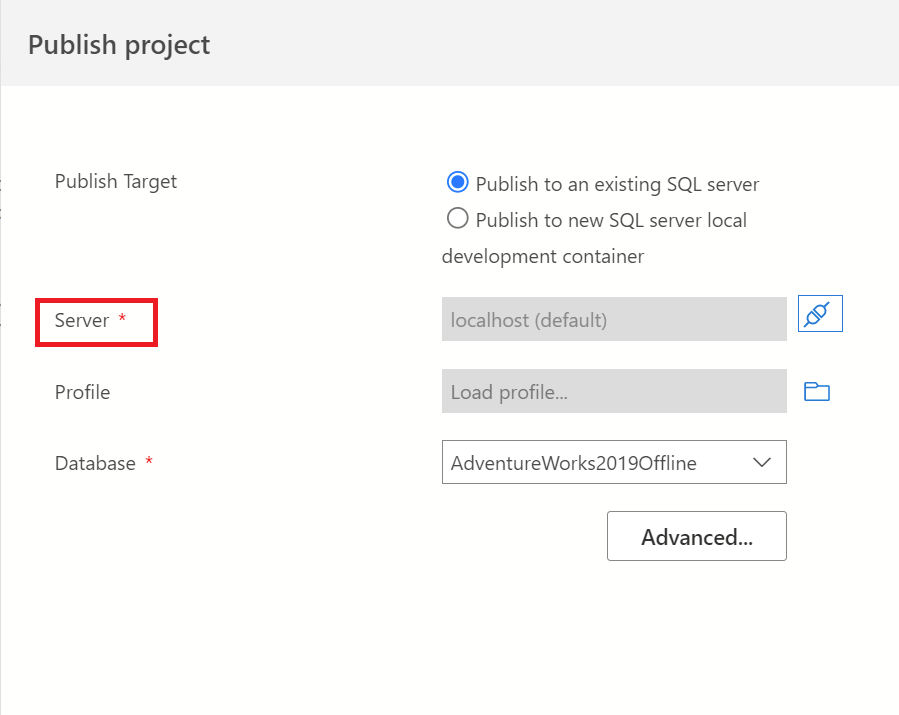
Note
Please note that you must be connected to your local host for this step. This can be done by clicking the plug icon in Publish Project dialog box.
Exit the SQL Database Projects view. Then, go to the object explorer in your server connection and navigate to the Tables folder of
AdventureWorks2022database. Open the table design of the table you made changes to and confirm the change made. In this case, we added a new column, Citizenship to the Person.Person table: