Note
Access to this page requires authorization. You can try signing in or changing directories.
Access to this page requires authorization. You can try changing directories.
Important
Azure Data Studio is retired as of February 28, 2026. You should migrate to Visual Studio Code. For more information, see What's happening with Azure Data Studio.
Applies to: ![]() SQL Server 2019 (15.x)
SQL Server 2019 (15.x)
This tutorial demonstrates how to create and run a notebook in Azure Data Studio using SQL Server.
Prerequisites
- Azure Data Studio installed
- SQL Server installed
Create a notebook
The following steps show how to create a notebook file in Azure Data Studio:
In Azure Data Studio, connect to your SQL Server.
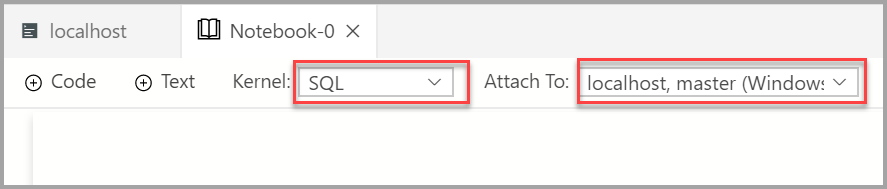
Select under the Connections in the Servers window. Then select New Notebook.
Wait for the Kernel and the target context (Attach to) to be populated. Confirm that the Kernel is set to SQL, and set Attach to for your SQL Server (in this example it's localhost).
You can save the notebook using the Save or Save as... command from the File menu.
To open a notebook, you can use the Open file... command in the File menu, select Open file on the Welcome page, or use the File: Open command from the command palette.
Change the SQL connection
To change the SQL connection for a notebook:
Select the Attach to menu from the notebook toolbar and then select Change Connection.

Now you can either select a recent connection server or enter new connection details to connect.
Run a code cell
You can create cells containing SQL code that you can run in place by clicking the Run cell button (the round black arrow) to the left of the cell. The results are shown in the notebook after the cell finishes running.
For example:
Add a new code cell by selecting the +Code command in the toolbar.

Copy and paste the following example into the cell and click Run cell. This example creates a new database.
USE master
GO

-- Drop the database if it already exists
IF  EXISTS (
        SELECT name
        FROM sys.databases
        WHERE name = N'TestNotebookDB'
   )
DROP DATABASE TestNotebookDB
GO

-- Create the database
CREATE DATABASE TestNotebookDB
GO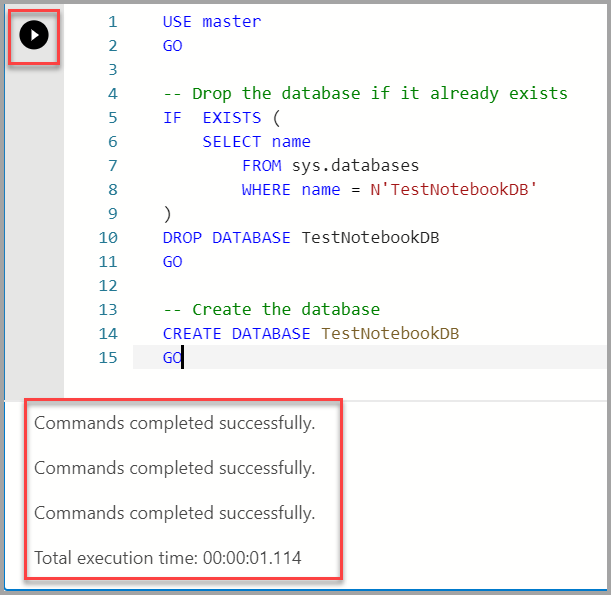
Save the result
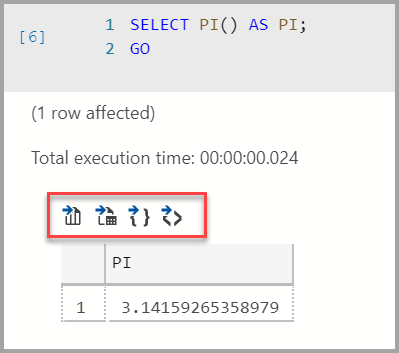
If you run a script that returns a result, you can save that result in different formats using the toolbar displayed above the result.
- Save As CSV
- Save As Excel
- Save As JSON
- Save As XML
For example, the following code returns the result of PI.
SELECT PI() AS PI;
GO
Next steps
Learn more about notebooks: