Tutorial: Query Oracle from SQL Server Big Data Cluster
Applies to: ![]() SQL Server 2019 (15.x)
SQL Server 2019 (15.x)
Important
The Microsoft SQL Server 2019 Big Data Clusters add-on will be retired. Support for SQL Server 2019 Big Data Clusters will end on February 28, 2025. All existing users of SQL Server 2019 with Software Assurance will be fully supported on the platform and the software will continue to be maintained through SQL Server cumulative updates until that time. For more information, see the announcement blog post and Big data options on the Microsoft SQL Server platform.
This tutorial demonstrates how to Query Oracle data from a SQL Server 2019 big data cluster. To run this tutorial, you will need to have access to an Oracle server. An Oracle user account with read privileges to the external object is required. Oracle Proxy user authentication is supported. If you do not have access, this tutorial can give you a sense of how data virtualization works for external data sources in SQL Server big data cluster.
In this tutorial, you learn how to:
- Create an external table for data in an external Oracle database.
- Join this data with high-value data in the master instance.
Tip
If you prefer, you can download and run a script for the commands in this tutorial. For instructions, see the Data virtualization samples on GitHub.
Prerequisites
- Big data tools
- kubectl
- Azure Data Studio
- SQL Server 2019 extension
- Load sample data into your big data cluster
Create an Oracle table
The following steps create a sample table named INVENTORY in Oracle.
Connect to an Oracle instance and database that you want to use for this tutorial.
Run the following statement to create the
INVENTORYtable:CREATE TABLE "INVENTORY" ( "INV_DATE" NUMBER(10,0) NOT NULL, "INV_ITEM" NUMBER(10,0) NOT NULL, "INV_WAREHOUSE" NUMBER(10,0) NOT NULL, "INV_QUANTITY_ON_HAND" NUMBER(10,0) ); CREATE INDEX INV_ITEM ON HR.INVENTORY(INV_ITEM);Import the contents of the inventory.csv file into this table. This file was created by the sample creation scripts in the Prerequisites section.
Create an external data source
The first step is to create an external data source that can access your Oracle server.
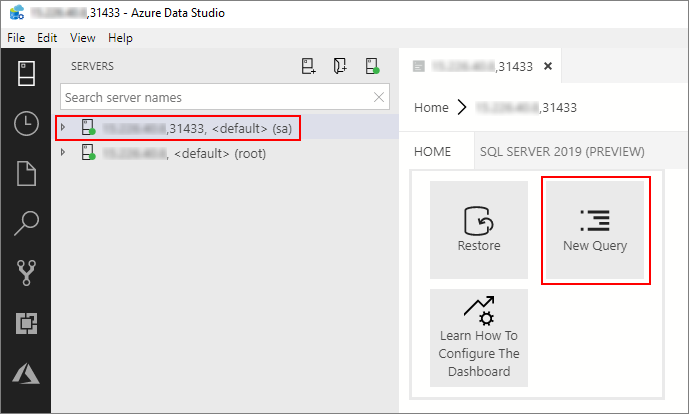
In Azure Data Studio, connect to the SQL Server master instance of your big data cluster. For more information, see Connect to the SQL Server master instance.
Double-click on the connection in the Servers window to show the server dashboard for the SQL Server master instance. Select New Query.
Run the following Transact-SQL command to change the context to the Sales database in the master instance.
USE Sales
GO
Create a database scoped credential to connect to the Oracle server. Provide appropriate credentials to your Oracle server in the following statement.
CREATE DATABASE SCOPED CREDENTIAL [OracleCredential]
WITH IDENTITY = '<oracle_user,nvarchar(100),SYSTEM>', SECRET = '<oracle_user_password,nvarchar(100),manager>';
Create an external data source that points to the Oracle server.
CREATE EXTERNAL DATA SOURCE [OracleSalesSrvr]
WITH (LOCATION = 'oracle://<oracle_server,nvarchar(100)>',CREDENTIAL = [OracleCredential]);
Optional: Oracle proxy authentication
Oracle supports proxy authentication to provide fine grain access control. A proxy user connects to the Oracle database using its credentials and impersonates another user in the database.
A proxy user can be configured to have limited access compared to the user being impersonated. For example, a proxy user can be allowed to connect using a specific database role of the user being impersonated. The identity of the user connecting to Oracle database through proxy user is preserved in the connection, even if multiple users are connecting using proxy authentication. This enables Oracle to enforce access control and to audit actions taken on behalf of the actual user.
If your scenario requires the usage of an oracle proxy user, replace the previous steps 4 and 5 with the following.
Create a database scoped credential to connect to the Oracle server. Provide appropriate oracle proxy user credentials to your Oracle server in the following statement.
CREATE DATABASE SCOPED CREDENTIAL [OracleProxyCredential]
WITH IDENTITY = '<oracle_proxy_user,nvarchar(100),SYSTEM>', SECRET = '<oracle_proxy_user_password,nvarchar(100),manager>';
Create an external data source that points to the Oracle server.
CREATE EXTERNAL DATA SOURCE [OracleSalesSrvr]
WITH (LOCATION = 'oracle://<oracle_server,nvarchar(100)>',
CONNECTION_OPTIONS = 'ImpersonateUser=%CURRENT_USER',
CREDENTIAL = [OracleProxyCredential]);
Create an external table
Next, create an external table named iventory_ora over the INVENTORY table on the Oracle server.
CREATE EXTERNAL TABLE [inventory_ora]
    ([inv_date] DECIMAL(10,0) NOT NULL, [inv_item] DECIMAL(10,0) NOT NULL,
    [inv_warehouse] DECIMAL(10,0) NOT NULL, [inv_quantity_on_hand] DECIMAL(10,0))
WITH (DATA_SOURCE=[OracleSalesSrvr],
        LOCATION='<oracle_service_name,nvarchar(30),xe>.<oracle_schema,nvarchar(128),HR>.<oracle_table,nvarchar(128),INVENTORY>');
Note
Table names and column names will use ANSI SQL quoted identifier while querying against Oracle. As a result, the names are case-sensitive. It is important to specify the name in the external table definition that matches the exact case of the table and column names in the Oracle metadata.
Query the data
Run the following query to join the data in the iventory_ora external table with the tables in the local Sales database.
SELECT TOP(100) w.w_warehouse_name, i.inv_item, SUM(i.inv_quantity_on_hand) as total_quantity
  FROM [inventory_ora] as i
  JOIN item as it
    ON it.i_item_sk = i.inv_item
  JOIN warehouse as w
    ON w.w_warehouse_sk = i.inv_warehouse
 WHERE it.i_category = 'Books' and i.inv_item BETWEEN 1 and 18000 --> get items within specific range
 GROUP BY w.w_warehouse_name, i.inv_item;
Clean up
Use the following command to remove the database objects created in this tutorial.
DROP EXTERNAL TABLE [inventory_ora];
DROP EXTERNAL DATA SOURCE [OracleSalesSrvr] ;
DROP DATABASE SCOPED CREDENTIAL [OracleCredential];
Next steps
Learn how to ingest data into the data pool:
Feedback
Coming soon: Throughout 2024 we will be phasing out GitHub Issues as the feedback mechanism for content and replacing it with a new feedback system. For more information see: https://aka.ms/ContentUserFeedback.
Submit and view feedback for