Upgrade SQL Server using the Data Migration Assistant
Important
Data Migration Assistant (DMA) is deprecated. For migration options from SQL Server to Azure SQL, see the migration options for SQL Server to Azure SQL.
The Data Migration Assistant provides seamless assessments of SQL Server on-premises and upgrades to later versions of SQL Server or migrations to SQL Server on Azure VMs or Azure SQL Database.
This article provides step-by-step instructions for upgrading SQL Server on-premises to later versions of SQL Server or to SQL Server on Azure VMs by using the Data Migration Assistant.
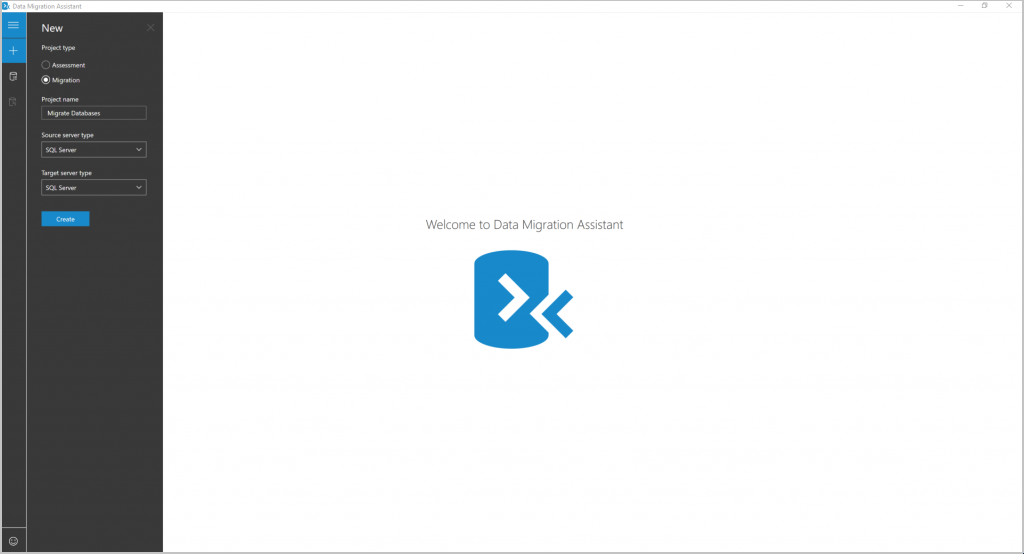
Create a new migration project
On the left pane, select New (+), and then the Migration project type.
Set the source and target server type to SQL Server if you're upgrading an on-premises SQL Server to a later version of on-premises SQL Server.
Select Create.

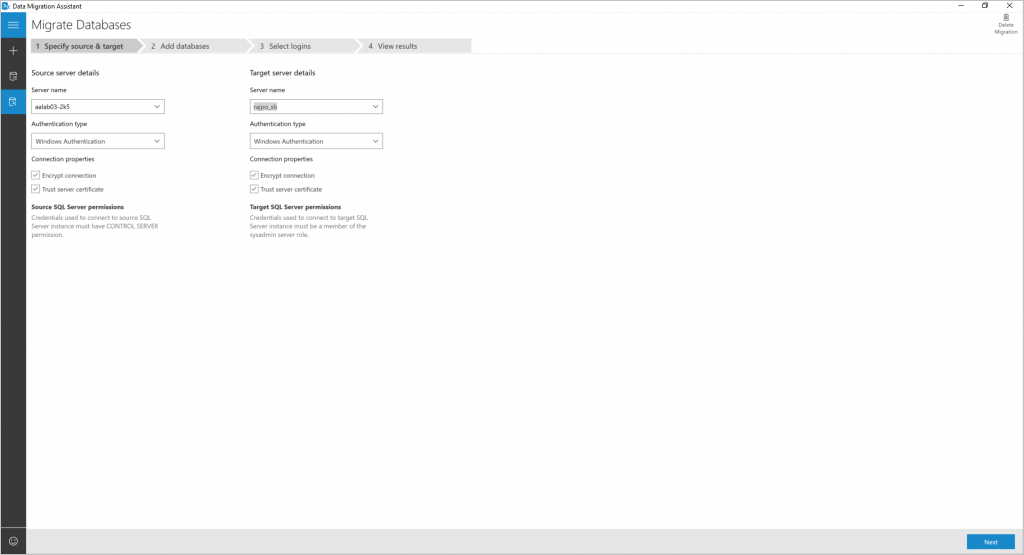
Specify the source and target
For the source, enter the SQL Server instance name in the Server name field in the Source server details section.
Select the Authentication type supported by the source SQL Server instance.
For the target, enter the SQL Server instance name in the Server name field in the Target server details section.
Select the Authentication type supported by the target SQL Server instance.
It's recommended that you encrypt the connection by selecting Encrypt connection in the Connection properties section.
Select Next.

Add databases
Choose the specific databases that you want to migrate by only selecting those databases, in the left pane of the Add databases page.
By default all the user databases on the source SQL Server instance are selected for migration
Use the migration settings on the right side of the page to set the migration options that are applied to the databases, by doing the following.
Note
You can apply the migration settings to all the databases that you're migrating, by selecting the server in the left pane. You can also configure an individual database with specific settings by selecting the database in the left pane.
a. Specify the Shared location accessible by source and target SQL servers for backup operation. Make sure that the service account running the source SQL Server instance has write privileges on the shared location and the target service account has read privileges on the shared location.
b. Specify the location to restore the data and transactional log files on the target server.
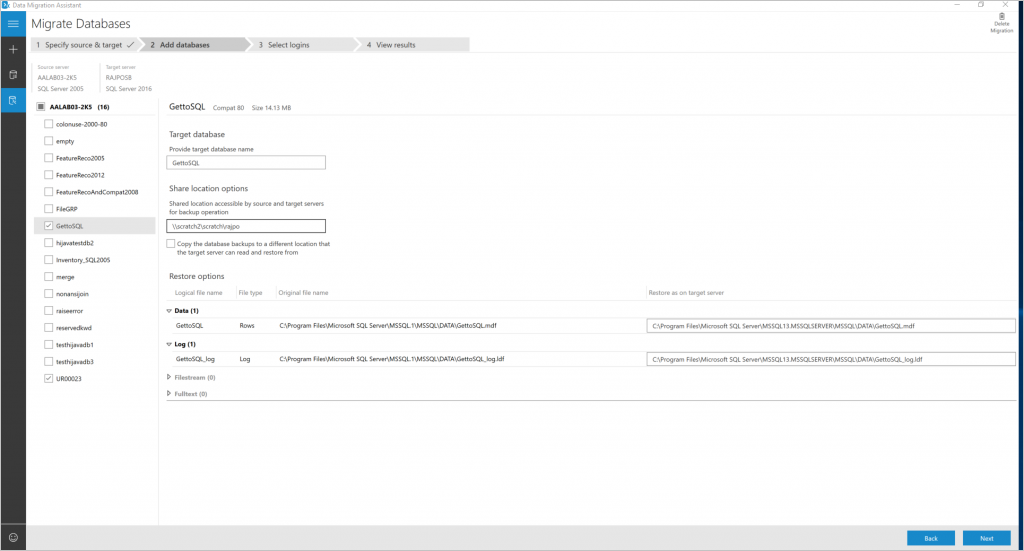
Enter a shared location that the source and target SQL Server instances have access to, in the Share location options box.
If you can't provide a shared location that both the source and target SQL Server instances have access to, select Copy the database backups to a different location that the target server can read and restore from. Then, enter a value for the Location for backups for restore option box.
Make sure that the user account running Data Migration Assistant has read privileges to the backup location and write privileges to the location from which the target server restores.
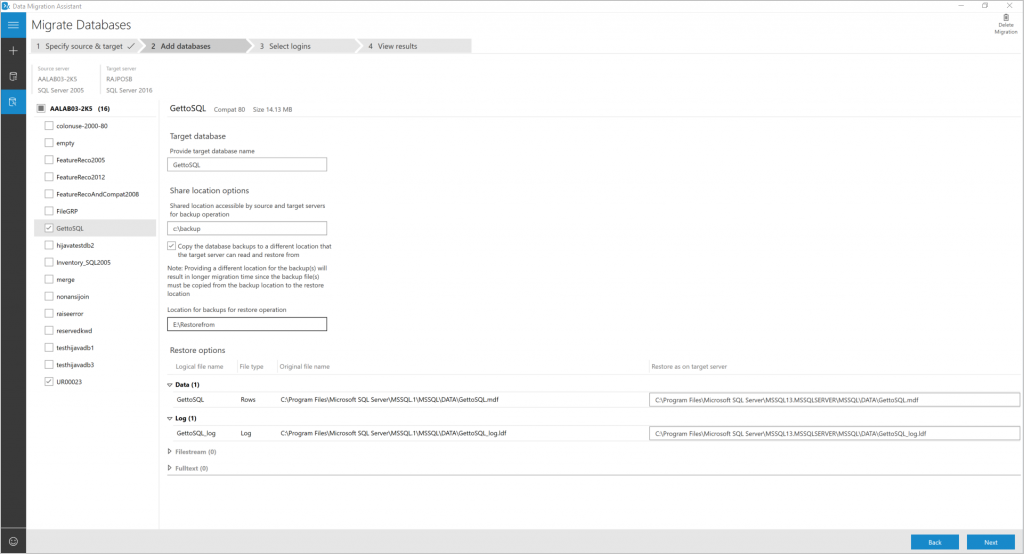
Select Next.


The Data Migration Assistant performs validations on the backup folders, data, and log file locations. If any validation fails, fix the options, and then select Next.
Select logins
Select specific logins for migration.
Important
Make sure to select the logins that are mapped to one or more users in the databases selected for migration.
By default, all the SQL Server and Windows logins that qualify for migration are selected for migration.
Select Start Migration.


View results
You can monitor the migration progress on the View results page.

Export migration results
Select Export report at the bottom of the View results page to save the migration results to a CSV file.
Review the saved file for details about the login migration, and then verify the changes.