Note
Access to this page requires authorization. You can try signing in or changing directories.
Access to this page requires authorization. You can try changing directories.
Applies to: ![]() SQL Server 2022 (16.x) and later versions
SQL Server 2022 (16.x) and later versions
Linked servers can now be configured using authentication with Microsoft Entra ID (formerly Azure Active Directory), and it supports three mechanisms for providing credentials:
- Password
- Access token
- Managed identity (SQL Server 2025 and later)
This article covers password and access token authentication. For SQL Server 2025 and later, you can also use managed identity authentication for linked servers. For more information, see Configure managed identity for linked servers.
This article assumes there are two SQL Server instances (S1 and S2). Both have been configured to support Microsoft Entra authentication, and they trust each other's SSL/TLS certificate. The examples in this article are executed on server S1 to create a linked server to server S2.
Prerequisites
- Fully operational Microsoft Entra authentication for SQL Server. For more information, see Microsoft Entra authentication for SQL Server and Tutorial: Set up Microsoft Entra authentication for SQL Server.
- SQL Server Management Studio (SSMS) version 18.0 or higher.
Note
The subject name of the SSL/TLS certificate used by S2 must match the server name provided in the provstr attribute. This should either be the Fully Qualified Domain Name (FQDN) or hostname of S2.
Linked server configurations for Microsoft Entra authentication
We'll go over configuring linked servers using password authentication and using an Azure application secret or access token.
Linked server configuration using password authentication
Note
While Microsoft Entra ID is the new name for Azure Active Directory (Azure AD), to prevent disrupting existing environments, Azure AD still remains in some hardcoded elements such as UI fields, connection providers, error codes, and cmdlets. In this article, the two names are interchangeable.
For password authentication, using Authentication=ActiveDirectoryPassword in the Provider string will signal the linked server to use Microsoft Entra password authentication. A linked server login must be created to map each login on S1 to a Microsoft Entra login on S2.
In SSMS, connect to
S1and expand Server Objects in the Object Explorer window.Right-click Linked Servers and select New Linked Server.
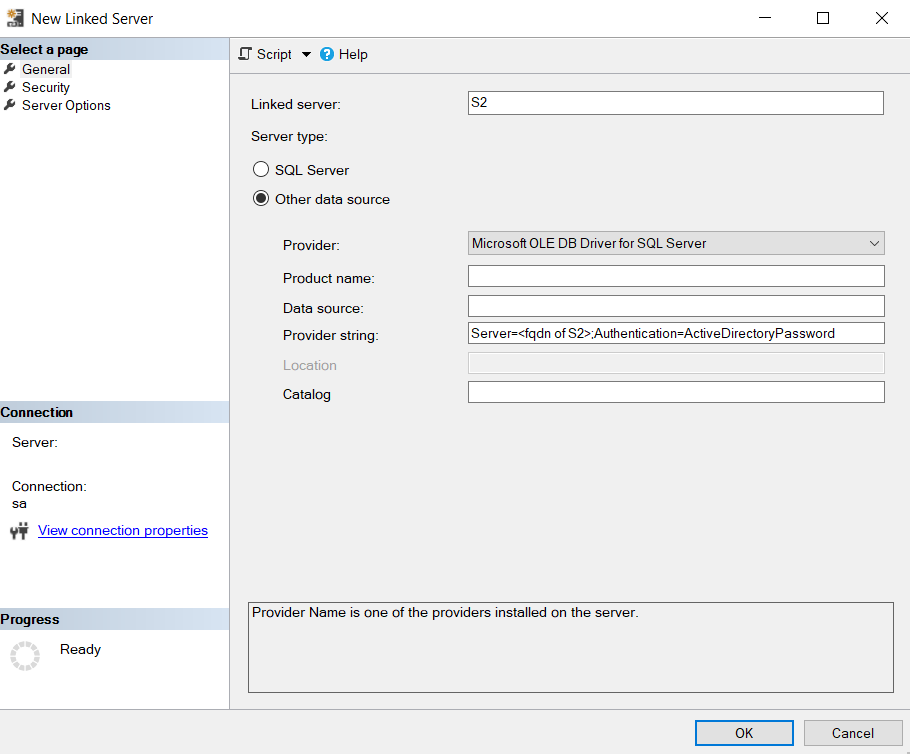
Fill in your linked server details:
- Linked server:
S2or use the name of your linked server. - Server type:
Other data source. - Provider:
Microsoft OLE DB Driver for SQL Server. - Product name: leave empty.
- Data source: leave empty.
- Provider string:
Server=<fqdn of S2>;Authentication=ActiveDirectoryPassword. - Catalog: leave empty.
- Linked server:
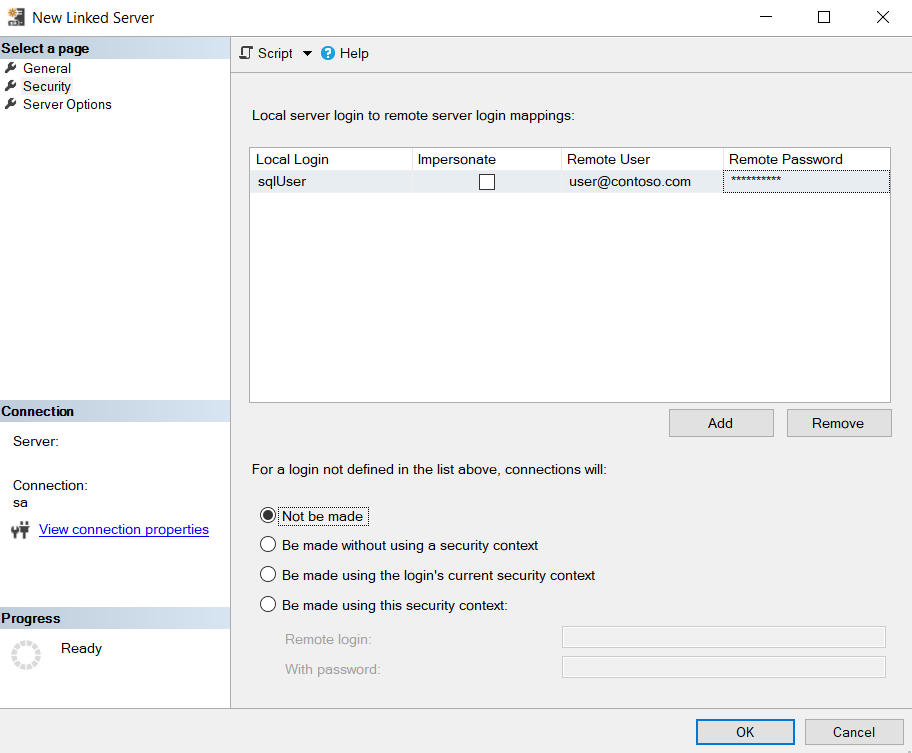
Select the Security tab.
Select Add.
- Local Login: specify the login name used to connect to
S1. - Impersonate: leave unchecked.
- Remote User: username of the Microsoft Entra user used to connect to S2, in the format of
user@contoso.com. - Remote Password: password of the Microsoft Entra user.
- For a login not defined in the list above, connections will:
Not be made
- Local Login: specify the login name used to connect to
Select OK.


Linked server configuration using access token authentication
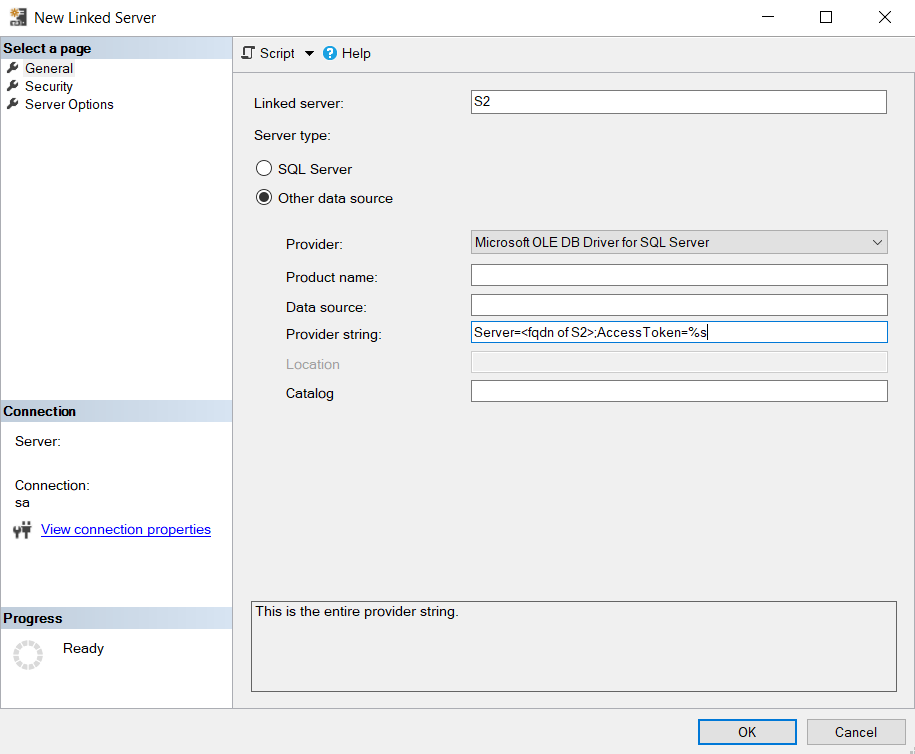
For access token authentication, the linked server is created with AccessToken=%s in the Provider string. A linked server login is created to map each login in S1 to a Microsoft Entra application, which has been granted login permissions to S2. The application must have a secret assigned to it, which will be used by S1 to generate the access token. A secret can be created by navigating to the Azure portal > Microsoft Entra ID > App registrations > YourApplication > Certificates & secrets > New client secret.

In SSMS, connect to
S1and expand Server Objects in the Object Explorer window.Right-click Linked Servers and select New Linked Server.
Fill in your linked server details:
- Linked server:
S2or use the name of your linked server. - Server type:
Other data source. - Provider:
Microsoft OLE DB Driver for SQL Server. - Product name: leave empty.
- Data source: leave empty.
- Provider string:
Server=<fqdn of S2>;AccessToken=%s. - Catalog: leave empty.
- Linked server:
Select the Security tab.
Select Add.
- Local Login: specify the login name used to connect to
S1. - Impersonate: leave unchecked.
- Remote User: client ID of the Microsoft Entra application used to connect to S2. You can find the Application (client) ID in the Overview menu of your Microsoft Entra application.
- Remote Password: Secret ID obtained from creating a New client secret for the application.
- For a login not defined in the list above, connections will:
Not be made
- Local Login: specify the login name used to connect to
Select OK.
