Note
Access to this page requires authorization. You can try signing in or changing directories.
Access to this page requires authorization. You can try changing directories.
Applies to: ![]() SQL Server 2022 (16.x) and later versions
SQL Server 2022 (16.x) and later versions
Strict connection encryption enforces good security practices and makes SQL Server traffic manageable by standard network appliances.
In this article, learn how to connect to SQL Server 2022 (16.x) and later versions using the strict connection type.
Prerequisite
- SQL Server 2022 (16.x) or later
- ODBC or OLE DB Driver for SQL Server
- ODBC Driver for SQL Server version 18.1.2.1 or higher
- OLE DB Driver for SQL Server version 19.2.0 or higher
- Create and install a TLS certificate to SQL Server. For more information, see Enable encrypted connections to the Database Engine
Connect to SQL Server using a .NET application
For information on building and connecting to SQL Server using the strict encryption type, see Connection String Syntax on how to properly build the connection string. For more information on the new connection string properties, see Additional changes to connection string encryption properties.
Connect using an ODBC DSN
You can test a connection with the Strict connection encryption type using an ODBC DSN to SQL Server.
Search for the ODBC Data Sources app in Windows.
Make sure you have the latest ODBC driver by looking in the Drivers tab of ODBC Data Source Administrator.
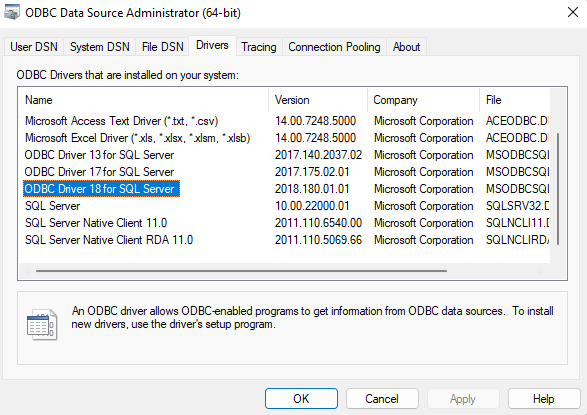
In the System DSN tab, select Add to create a DSN. Then select the ODBC Driver 18 for SQL Server. Select Finish. We're going to use this to test our connection.
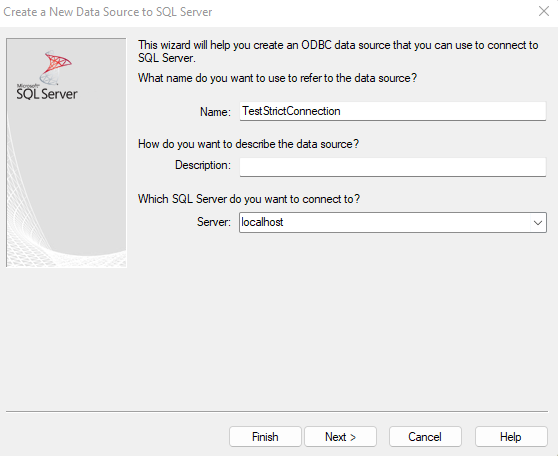
In the Create a New Data Source to SQL Server window, provide a name for this data source, and add your SQL Server 2022 (16.x) server name to Server. Select Next.
Use all default values for all the settings until you get to the screen that has Connection Encryption. Select Strict. If the server name that you entered differs from that in the certificate or if the IP address is used instead, set HostName in certificate to the one used in your certificate. Select Finish.
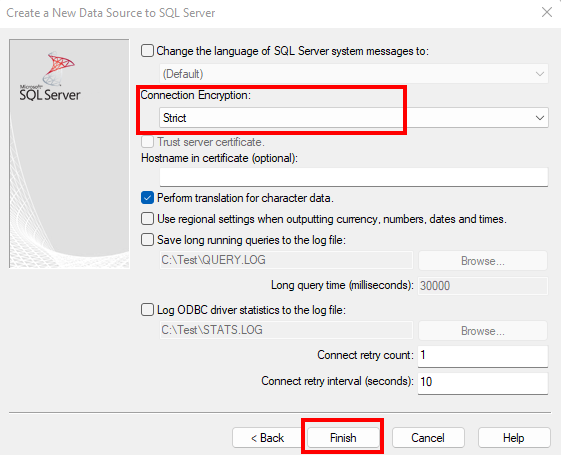
When the dialog box ODBC Microsoft SQL Server Setup pops up, select the Test Data Source... button to test the connection. This should enforce the
strictconnection to SQL Server for this test.
Connect using Universal Data Link
You can also test the connection to SQL Server with strict encryption using the OLE DB Driver with Universal Data Link (UDL).
To create a UDL file to test your connection, right-click on your desktop, and select New > Text Document. You'll need to change the extension from
txttoudl. You can give the file any name you want.Note
You'll need to be able to see the extension name in order to change the extension from
txttoudl. If you cannot see the extension, you can enable viewing the extension by opening File Explorer > View > Show > File name extensions.Open the UDL file that you created, and go over to the Provider tab to select the Microsoft OLE DB Driver 19 for SQL Server. Select Next >>.

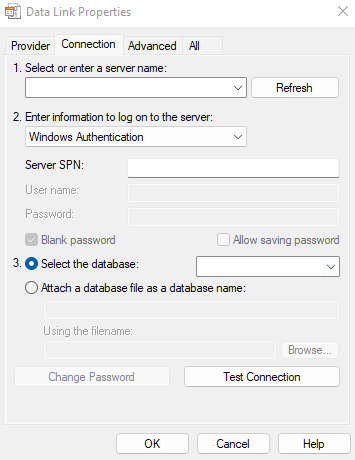
On the Connection tab, enter your SQL Server server name, and select the authentication method you use for logging into SQL Server.
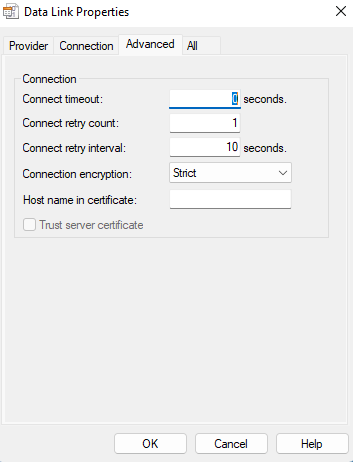
In the Advanced tab, select Strict for Connection encryption. If the server name that you entered differs from that in the certificate or if the IP address is used instead, set Host name in certificate to the one used in your certificate. Go back to the Connection tab when you're done.
Select Test Connection to test the connection with the
strictconnection encryption.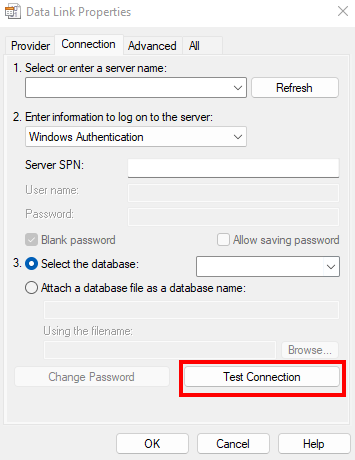
Connect with SSMS
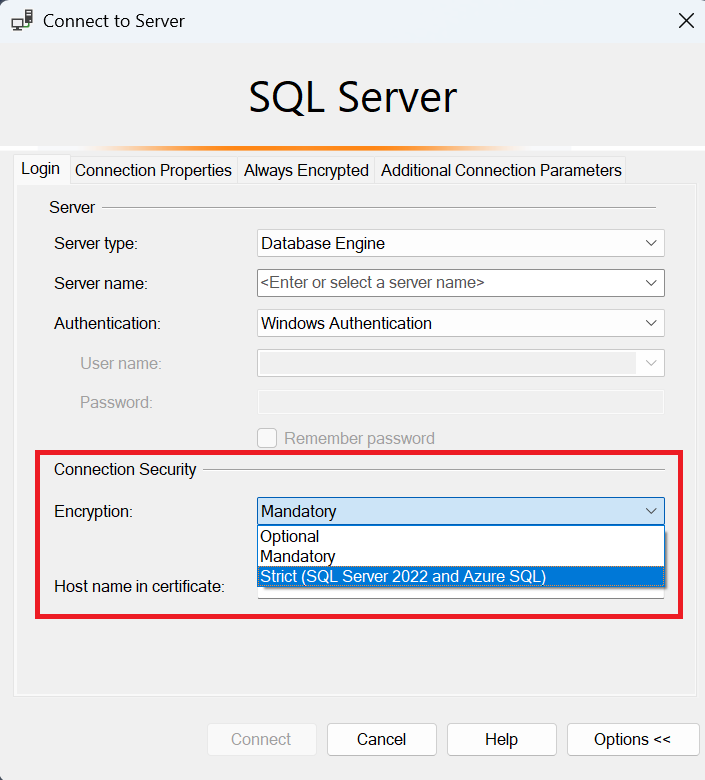
Starting with version 20, you can enforce strict encryption in SQL Server Management Studio (SSMS) on the Logins tab of the Connect to Server dialog box:
Connect to an Always On availability group
Starting with SQL Server 2025 (17.x), you can encrypt communication between the Windows Server Failover Cluster and an Always On availability group replica using the Strict or Mandatory connection encryption type. Your availability group can only enforce encryption if it's based on a Windows Server Failover Cluster. Other types of availability groups don't support strict encryption.
The steps differ based on whether or not your availability already exists.
To force strict encryption to a new availability group, follow these steps:
- If you haven't already, import the TLS certificate to every replica of the availability group, as defined by certificate requirements. Restart each SQL Server instance after importing the certificate.
- Test connections to each SQL Server replica by using one of the methods mentioned in this article that enforces encryption.
- CREATE AVAILABILITY GROUP with the
Encryptproperty set toStrictin theCLUSTER_CONNECTION_OPTIONSclause for the availability group. This ensures that all connections to the availability group use the specified encryption type. - If the availability group is currently online, then fail the availability group over to a secondary replica to apply the new encryption settings to the availability group. If the availability group fails to come online, it could be the
ClusterConnectionOptionsis not set correctly. Check the cluster.log for ODBC errors related to the cluster failing to connect to the SQL Server replica. Optionally, you can fail the availability group back to the original primary replica after the new secondary replica is online and connected to the availability group. - (Optional) You can further enforce encryption by setting the Force Strict Encryption option to
Yesin SQL Server Configuration Manager properties for the connection protocol for each replica. This setting ensures that all connections to the availability group replicas use strict encryption. Restart each SQL Server replica after changing this setting.
Connect to a failover cluster instance
Starting with SQL Server 2025 (17.x), you can encrypt communication between your Windows Server Failover Cluster and an Always On failover cluster instance using the Strict or Mandatory connection encryption type. To do this, follow these steps:
- If you haven't already, import the TLS certificate to every node of the failover cluster, as defined by certificate requirements. Restart the SQL Server instance after importing the certificate.
- Test connections to the failover cluster instance by using one of the methods mentioned in this article that enforces encryption.
- ALTER SERVER CONFIGURATION with the
CLUSTER_CONNECTION_OPTIONSclause to set theEncryptproperty toMandatoryorStrict. This ensures that all connections to the failover cluster instance use the specified encryption type. - Fail the instance over to a secondary node to apply the new encryption settings to the failover cluster instance. If the failover cluster instance fails to come online, it could be the
ClusterConnectionOptionsis not set correctly. Check the cluster.log for ODBC errors related to the cluster failing to connect to the SQL Server instance. Optionally, you can fail the instance back to the original primary node after the new secondary node is online and connected to the failover cluster instance. - (Optional) You can further enforce encryption by setting the Force Strict Encryption option to
Yesin SQL Server Configuration Manager properties for the connection protocol for each node in the cluster. This setting ensures that all connections to the failover cluster instance use strict encryption. Make this change on the secondary node, fail the instance over to it, and then make the change on the primary node.
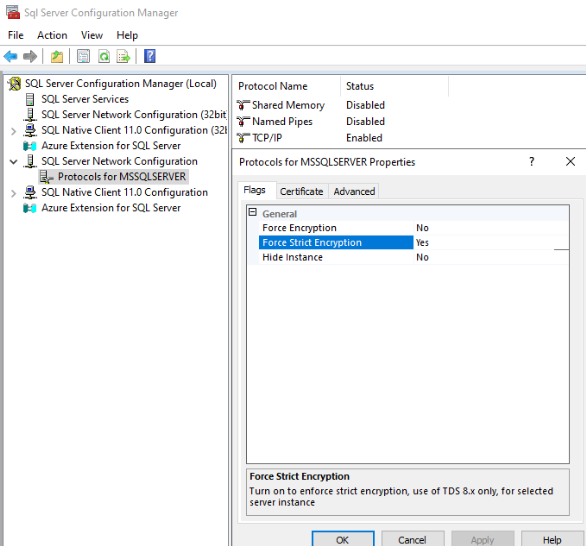
Force strict encryption with SQL Server Configuration Manager
You can enforce strict encryption using the SQL Server Configuration Manager starting with SQL Server 2022 (16.x). To do so, follow these steps:
Open SQL Server Configuration Manager.
In the left pane, expand SQL Server Network Configuration, and select Protocols for [InstanceName].
Right-click on TCP/IP, and select Properties.
In the TCP/IP Properties dialog, go to the Flags tab, and then select Yes for the Force Strict Encryption option:
Restart the SQL Server instance during a maintenance window to apply the changes.
Remarks
If you see SSL certificate validation failed, validate that:
- Server certificate is valid on the machine you're using for testing
- At least one of the following is true:
- Provider SQL Server matches CA name or one of the DNS names in the certificate.
HostNameInCertificateconnection string property matches CA name or one of the DNS names in the certificate.