Note
Access to this page requires authorization. You can try signing in or changing directories.
Access to this page requires authorization. You can try changing directories.
The MSSQL extension for Visual Studio Code includes an integrated UI for Data API builder, so you can create REST, GraphQL, and MCP endpoints for your SQL database tables without writing configuration files or leaving Visual Studio Code. You can select which tables to expose, configure CRUD permissions, choose API types, preview the generated configuration, and deploy a local backend powered by Data API builder, all from a visual interface.

Tip
Data API builder is currently in preview and might change based on feedback. Join the community at GitHub Discussions to share ideas or report issues.
Important
This feature has known limitations, including SQL authentication-only support for container deployment and restricted data type compatibility. Review Known limitations and Known issues before deploying.
Features
Data API builder integration offers these capabilities:
- Select database entities (tables) to expose as API endpoints, organized by schema with collapsible grouping.
- Configure Create, Read, Update, and Delete (CRUD) permissions independently for each entity.
- Choose API types to generate: REST, GraphQL, MCP, or any combination.
- Configure advanced entity settings including custom REST paths, custom GraphQL type names, and authorization roles.
- Preview the generated Data API builder JSON configuration in a read-only Definition panel.
- Deploy Data API builder locally as a Docker container with automated prerequisite checks.
- Test running APIs directly in Visual Studio Code using the built-in Simple Browser.
- Use GitHub Copilot chat to configure entities through natural language prompts.
Prerequisites
Before you use Data API builder, ensure the following requirements are met:
- The MSSQL extension for Visual Studio Code is installed. For installation steps, see the MSSQL extension for Visual Studio Code overview.
- An active database connection is established through the MSSQL extension. For connection steps, see Quickstart: Connect to and query a database with the MSSQL extension for Visual Studio Code.
- Docker Desktop is installed and running on your machine (required for local deployment).
- (Optional) GitHub Copilot and GitHub Copilot Chat extensions are installed for AI-assisted entity configuration.
Open Data API builder
You can open the Data API builder configuration view from two entry points:
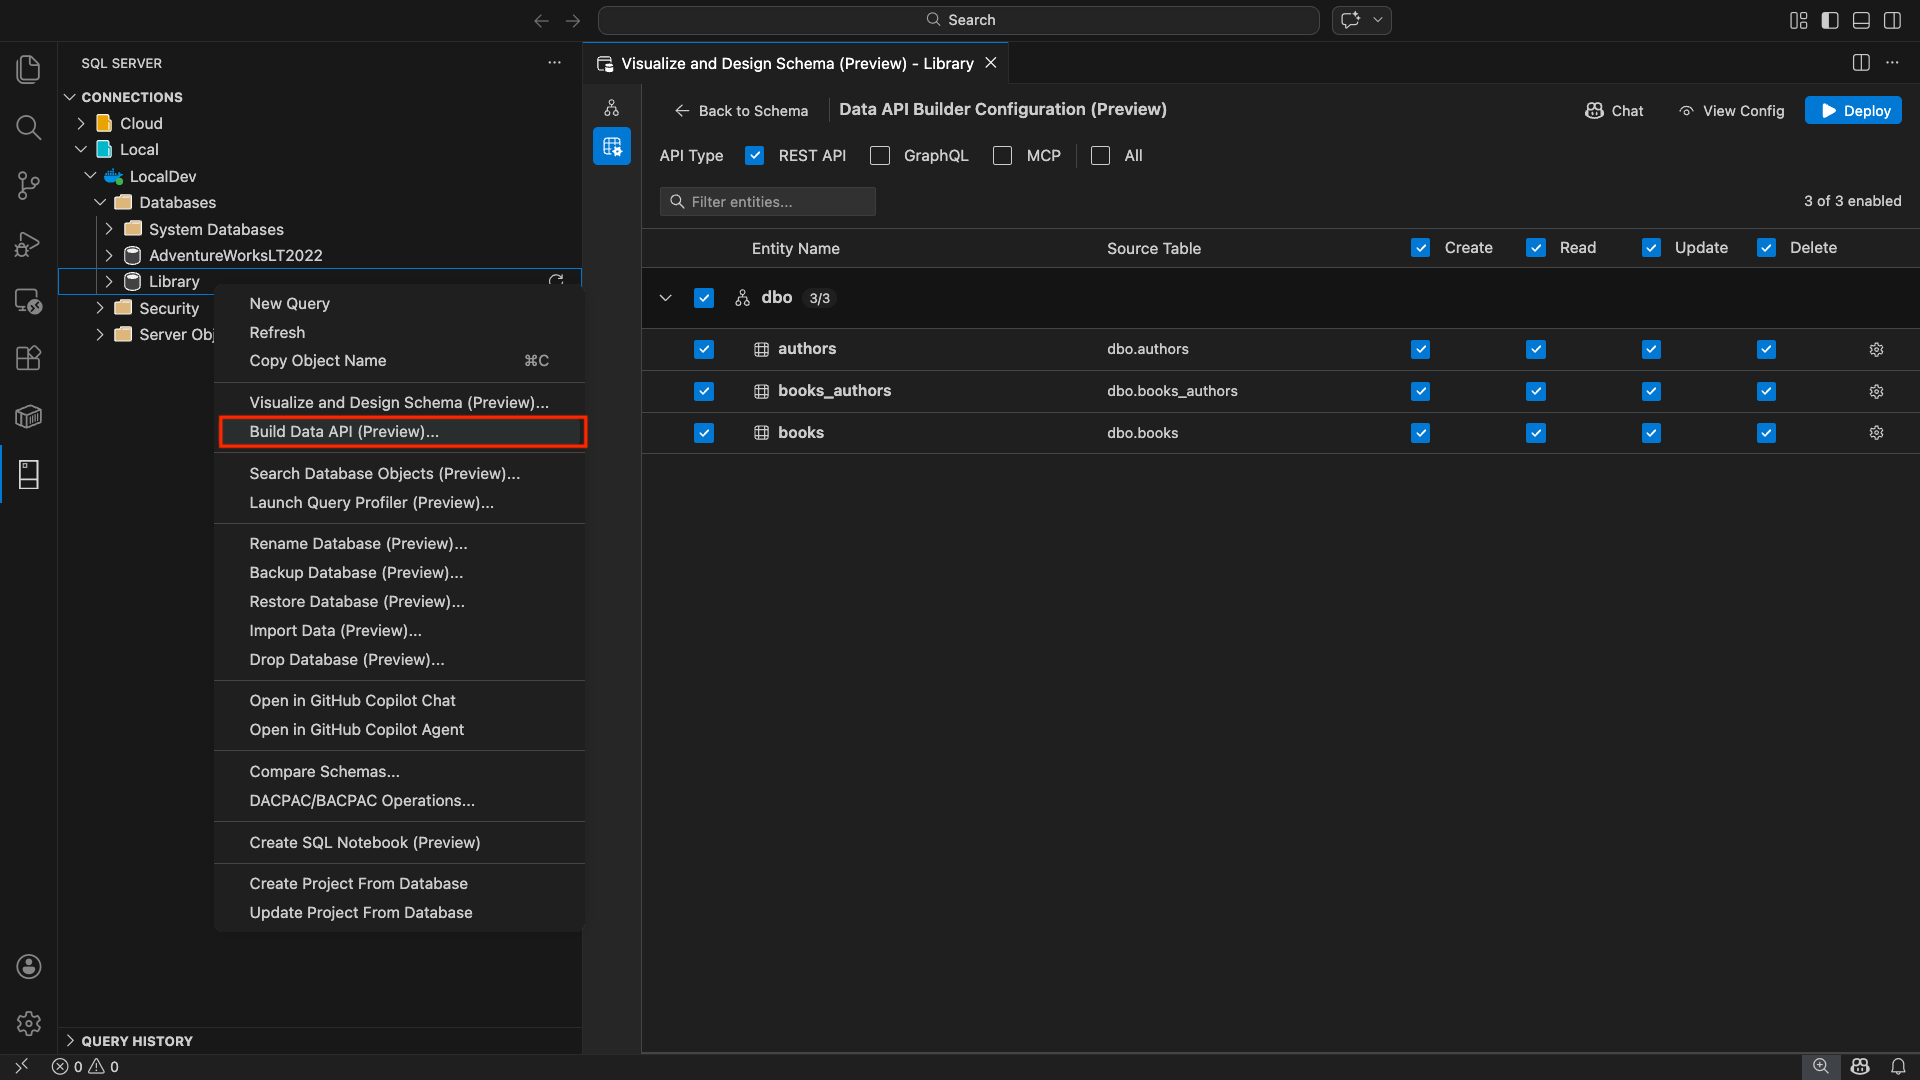
From the Object Explorer: Right-click on a database node and select Build Data API (Preview)....
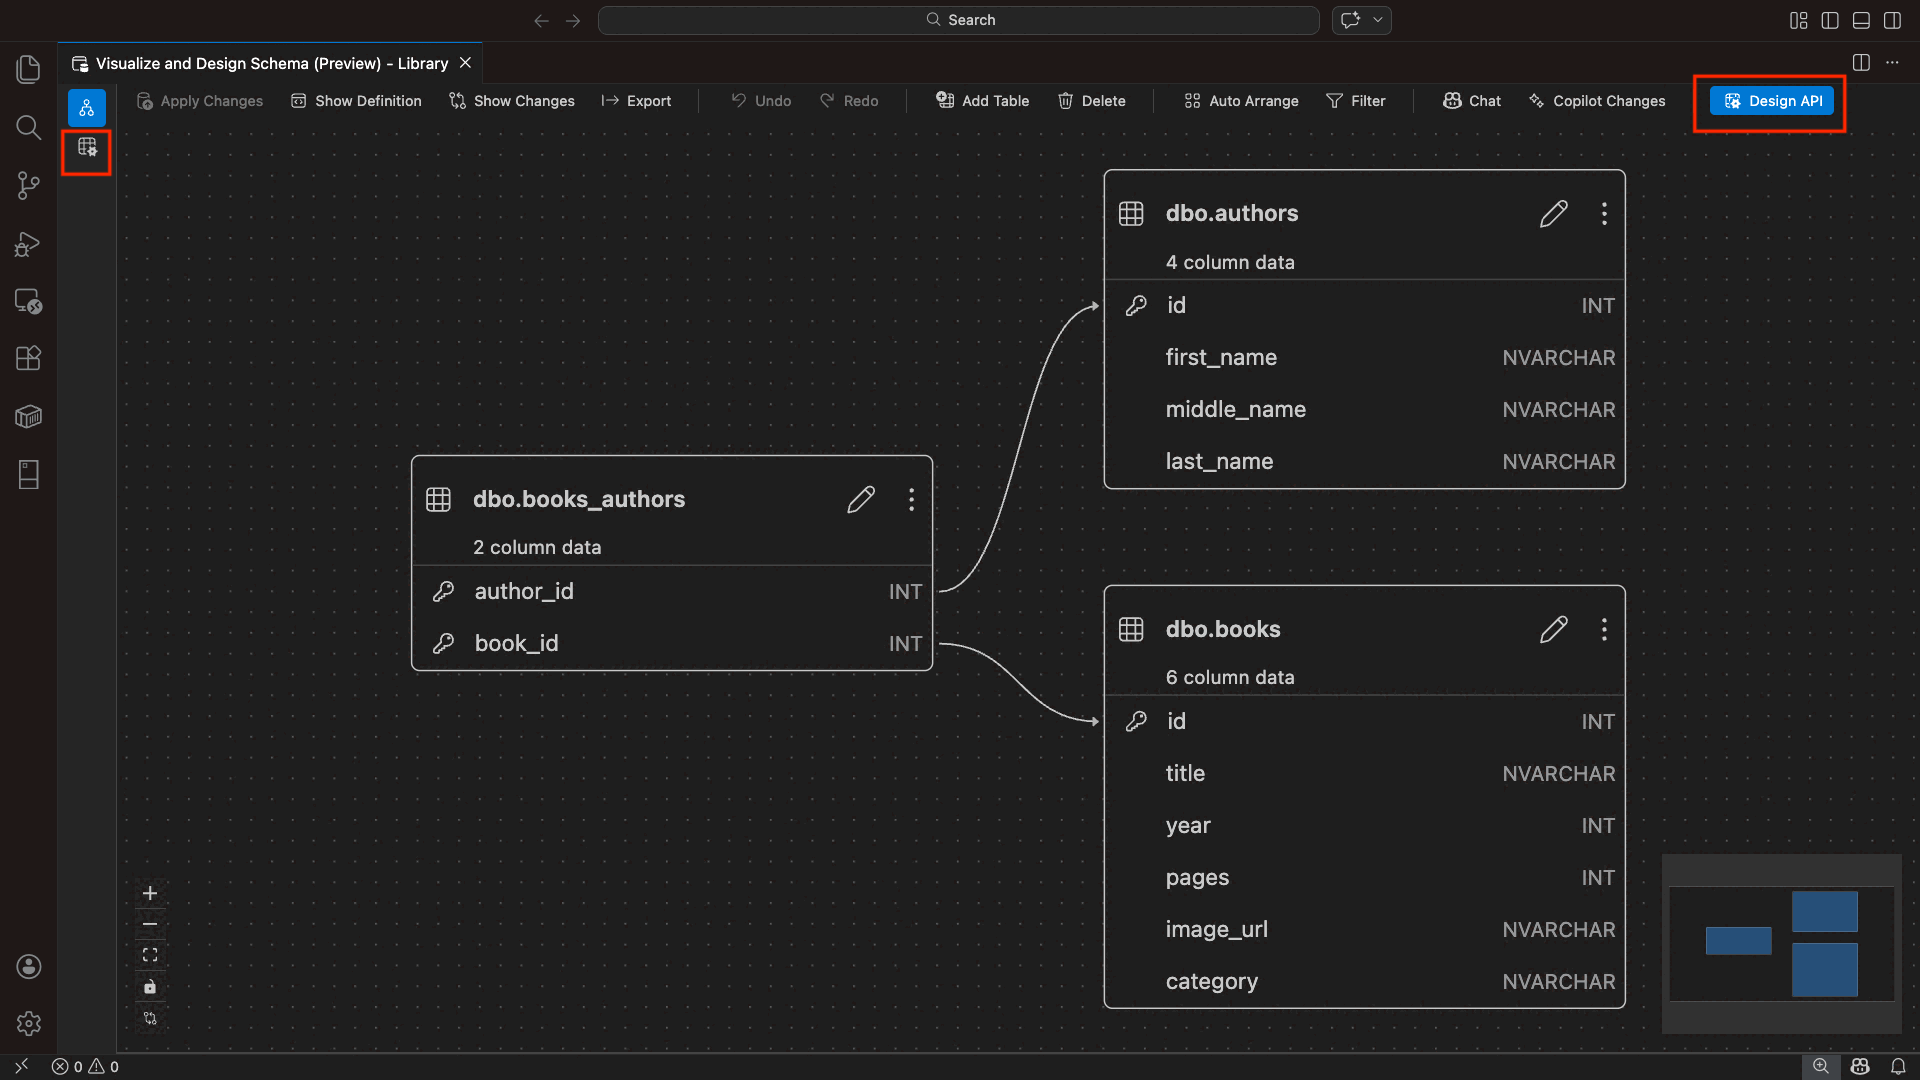
From the Schema Designer: Select the Design API button (button in the top-right corner of the toolbar), or select the Backend icon in the left-side panel.

The Data API builder configuration view opens, displaying your database entities, API type options, and configuration controls.
Select entities
The entity selection view lists all tables from your connected database, grouped by schema.
- Each schema row is collapsible and shows a count badge indicating how many entities are enabled (for example, "3/5").
- Select a schema-level checkbox to toggle all entities in that schema. The checkbox supports tri-state selection: all, none, or mixed.
- Each entity row displays: the enable checkbox, entity name, source table, CRUD checkboxes, and a settings button.
- Disabling an entity grays out its row and disables the CRUD checkboxes and settings button.
Use the filter box at the top to search entities by name, schema, or source table. The filter is case-insensitive, and the enabled count updates based on filtered results.

Configure permissions and API types
CRUD permissions
Toggle individual Create, Read, Update, and Delete checkboxes for each entity. The header-level CRUD checkboxes toggle that action for all enabled entities and support tri-state selection.
API type selection
At the top of the configuration view, select the API types to generate:
- REST API: Generates REST endpoints with Swagger UI for testing.
- GraphQL: Generates GraphQL endpoints with Nitro GraphQL playground.
- MCP (Preview): Generates Model Context Protocol endpoints.
- All: Selects or deselects all API types.
Select at least one API type.

Advanced entity configuration
Select the gear icon on an entity row to open the Advanced Entity Configuration dialog, where you can configure:
- Entity Name: The name used in API routes and responses (defaults to the table name).
- Authorization Role: Toggle between Anonymous (no authentication required) and Authenticated (requires user authentication).
- Custom REST Path: Optional override for the default
api/entityNamepath. - Custom GraphQL Type: Optional override for the default GraphQL type name.
Select Apply Changes to save your configuration, or Cancel to discard.

Preview configuration
Select the View Config button in the toolbar to open the Definition panel at the bottom of the configuration view. This panel shows the generated Data API builder JSON configuration file in a read-only format.
The Definition panel:
- Reflects the current entity selection, API types, and advanced settings.
- Stays in sync with the UI and GitHub Copilot chat: changes made in either location immediately update the preview.
- Only includes enabled entities in the configuration output.
- Shows REST, GraphQL, and MCP runtime sections based on selected API types.
Select Open in Editor to view the configuration in a full Visual Studio Code editor tab. Select Copy to copy the configuration to the clipboard.

Deploy locally with Docker
Data API builder deploys as a local Docker container. The deployment wizard guides you through the process:
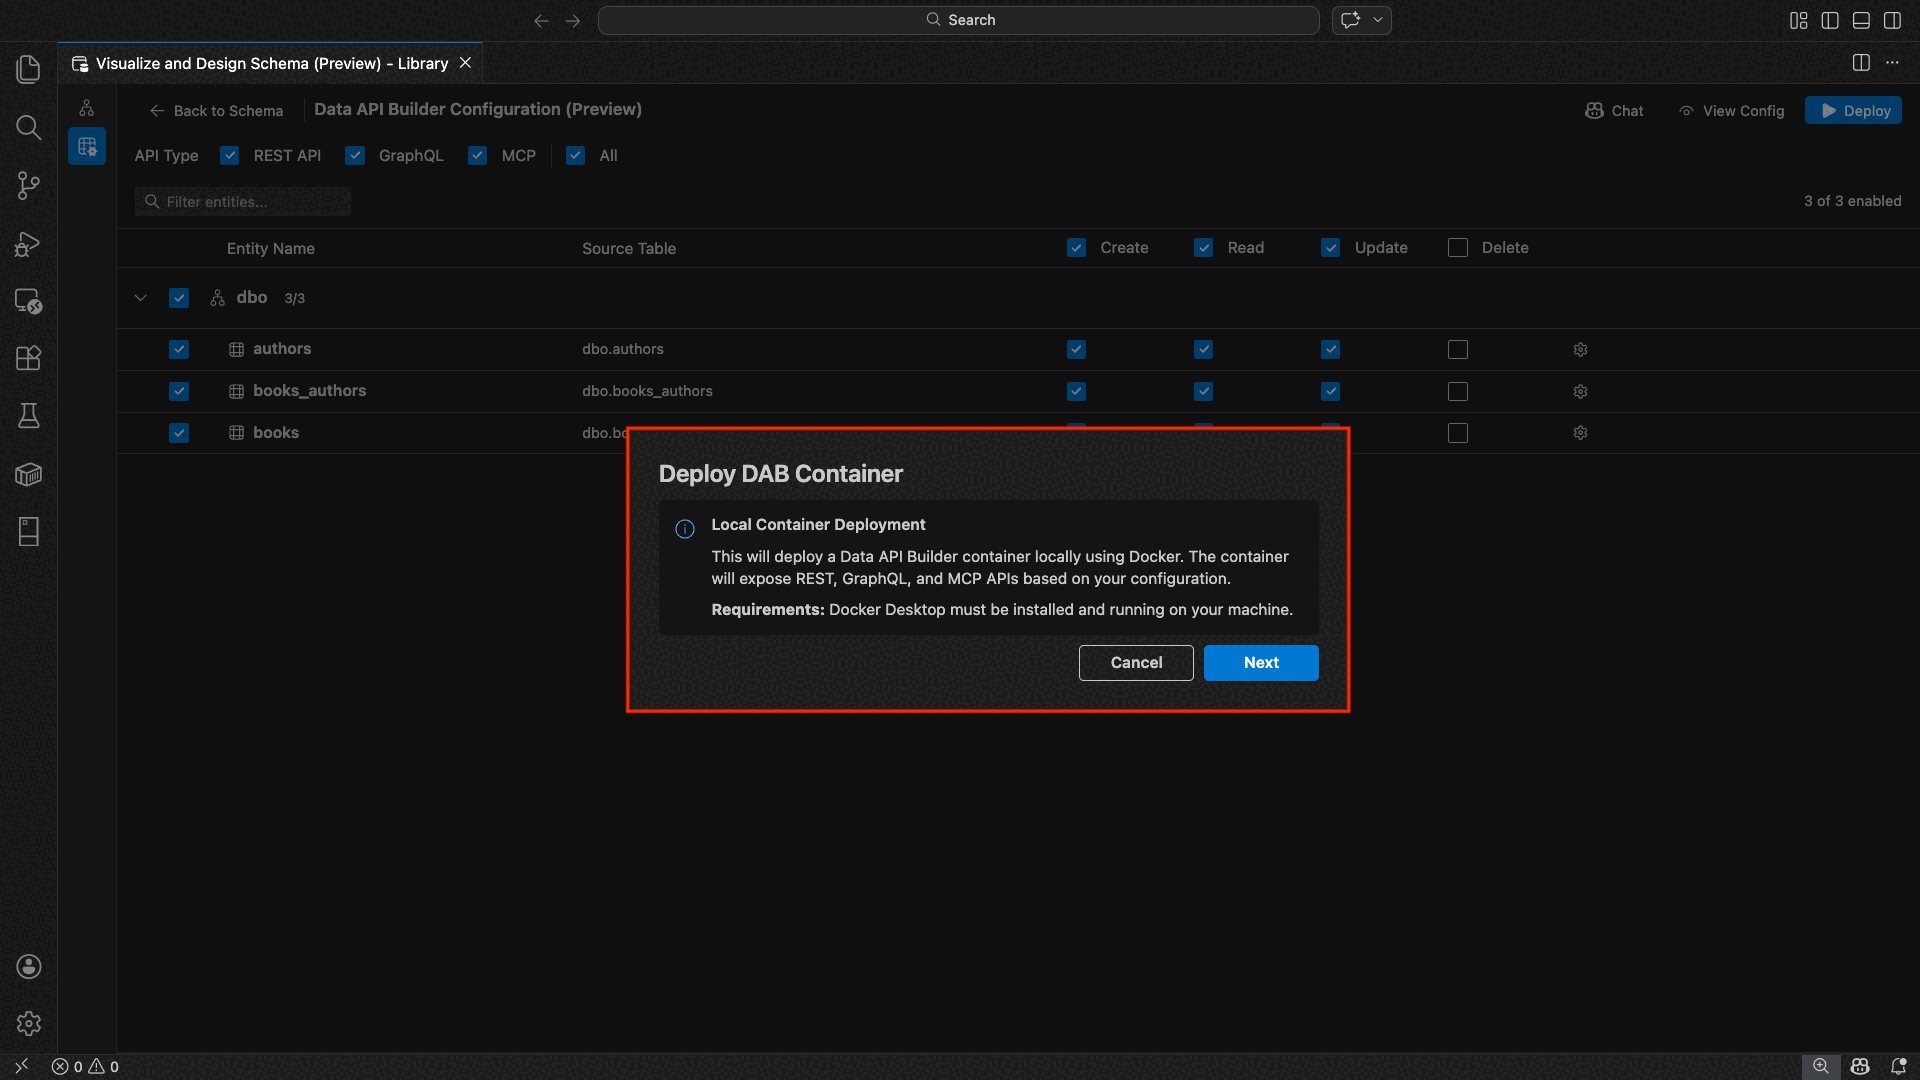
Select the Deploy button in the toolbar.
The Deploy DAB Container dialog opens, describing the local container deployment. Select Next.
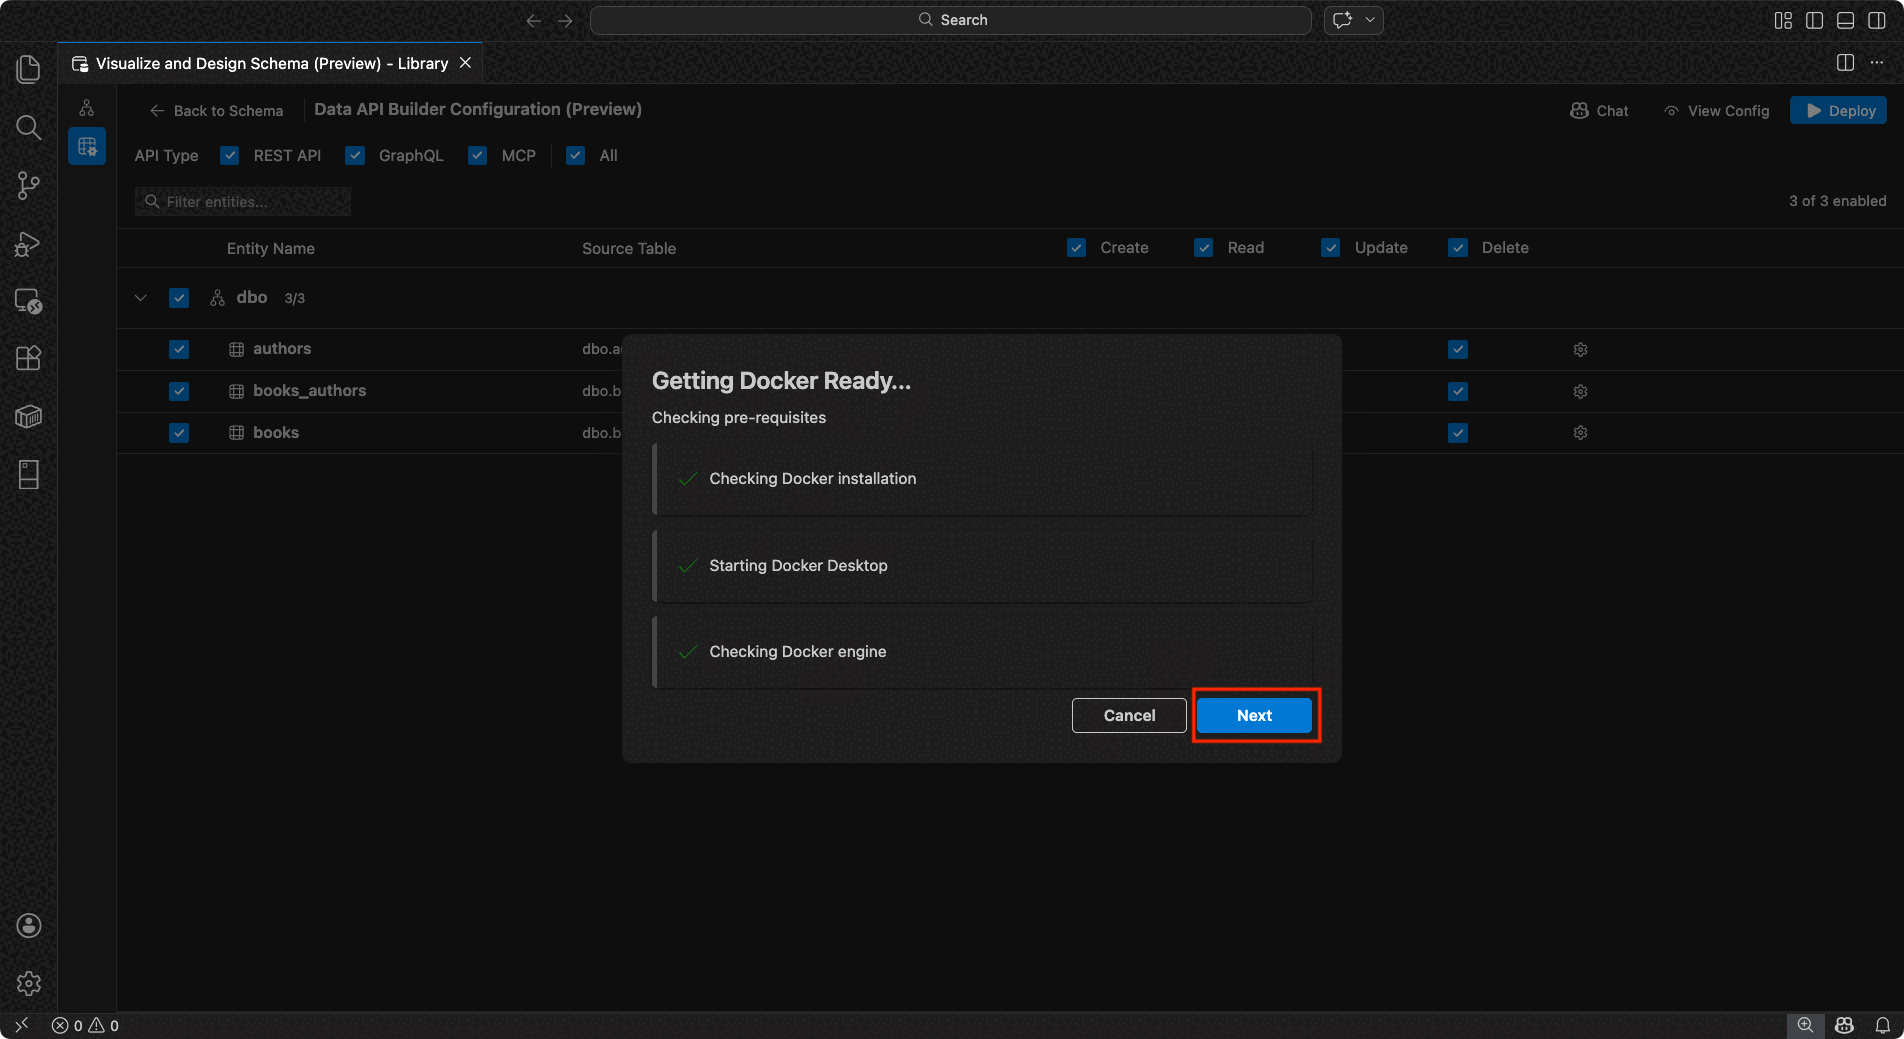
The Getting Docker Ready screen runs prerequisite checks sequentially:
- Checking Docker installation: Verifies Docker is installed on your system.
- Starting Docker Desktop: Ensures Docker Desktop is running.
- Checking Docker engine: Verifies the Docker engine is ready.

Select Next to proceed once all checks are complete.
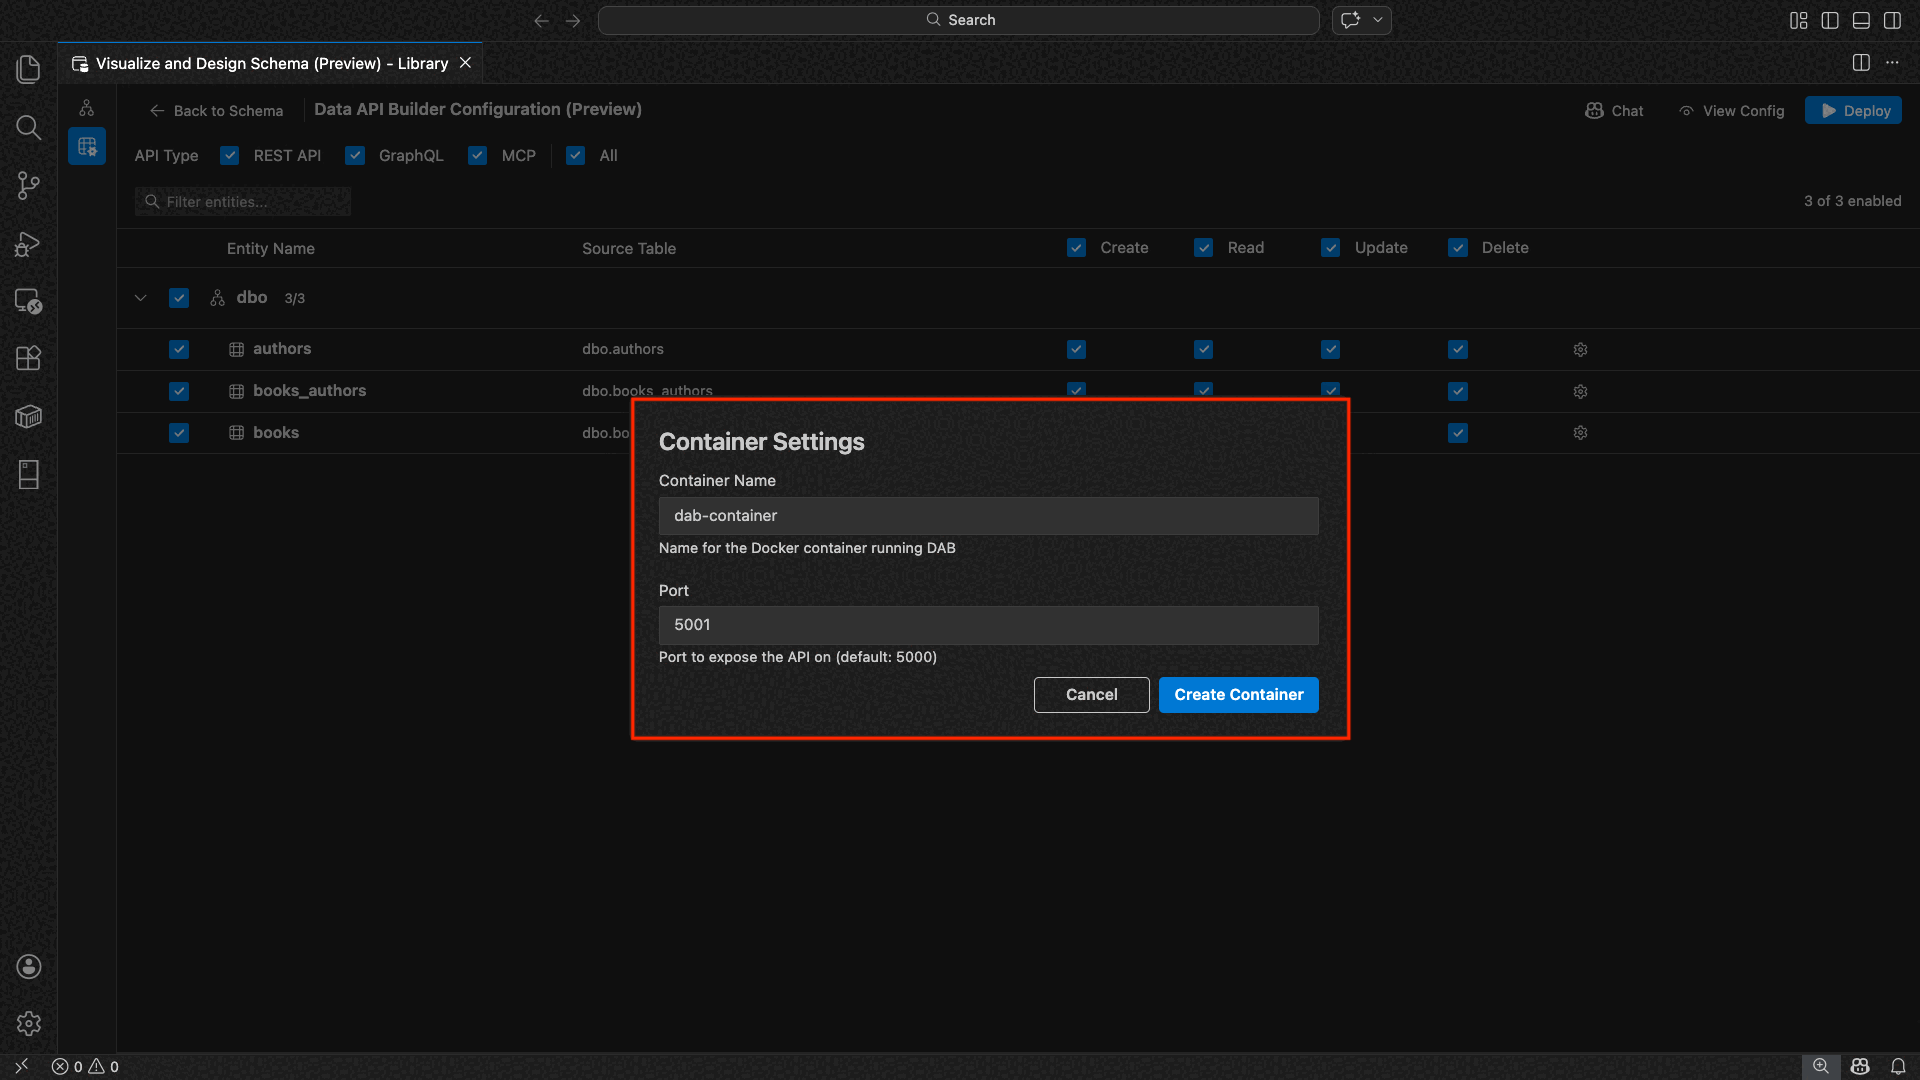
The Container Settings screen appears:
- Container Name: Optional name for the Docker container (an autogenerated default is provided).
- Port: The port to expose the API on (default:
5000). - The container reuses the connection string from the active database connection.
Select Create Container.
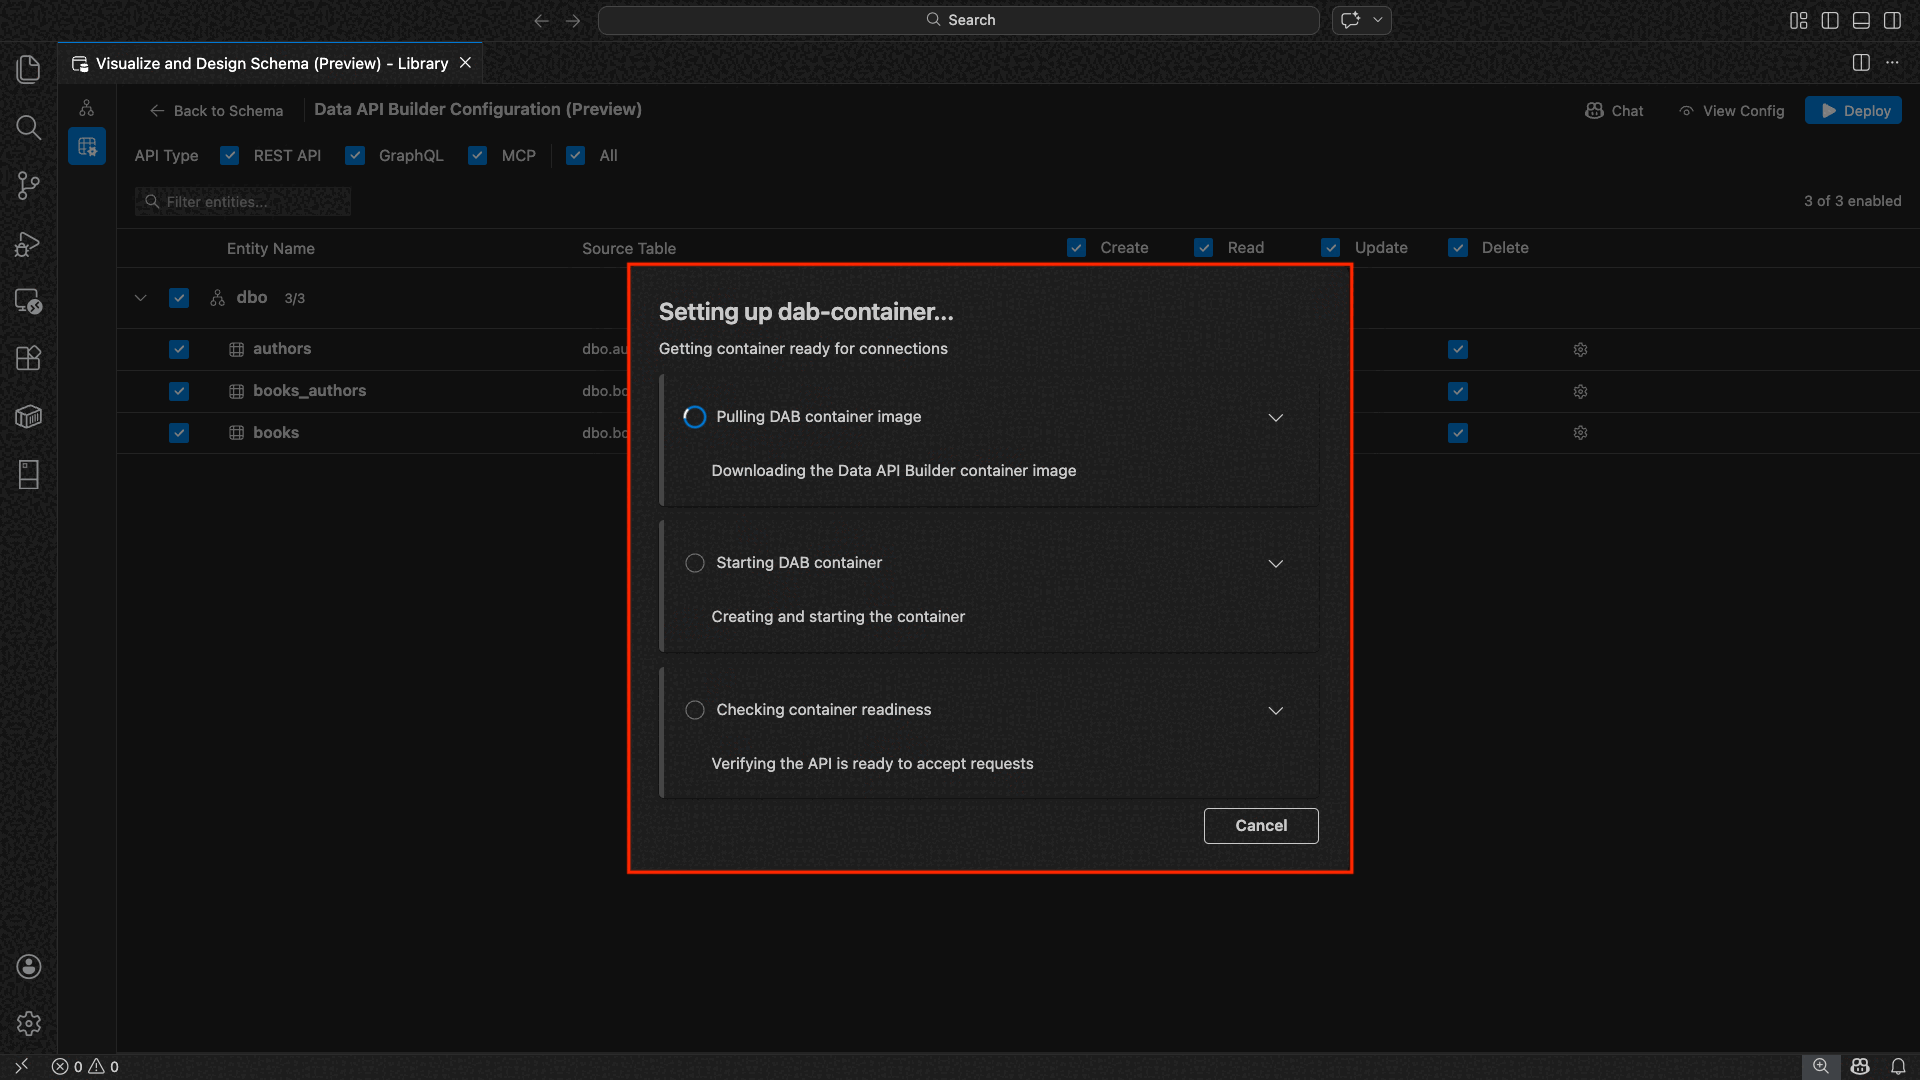
The deployment executes three steps sequentially: pull image, start container, and check readiness.
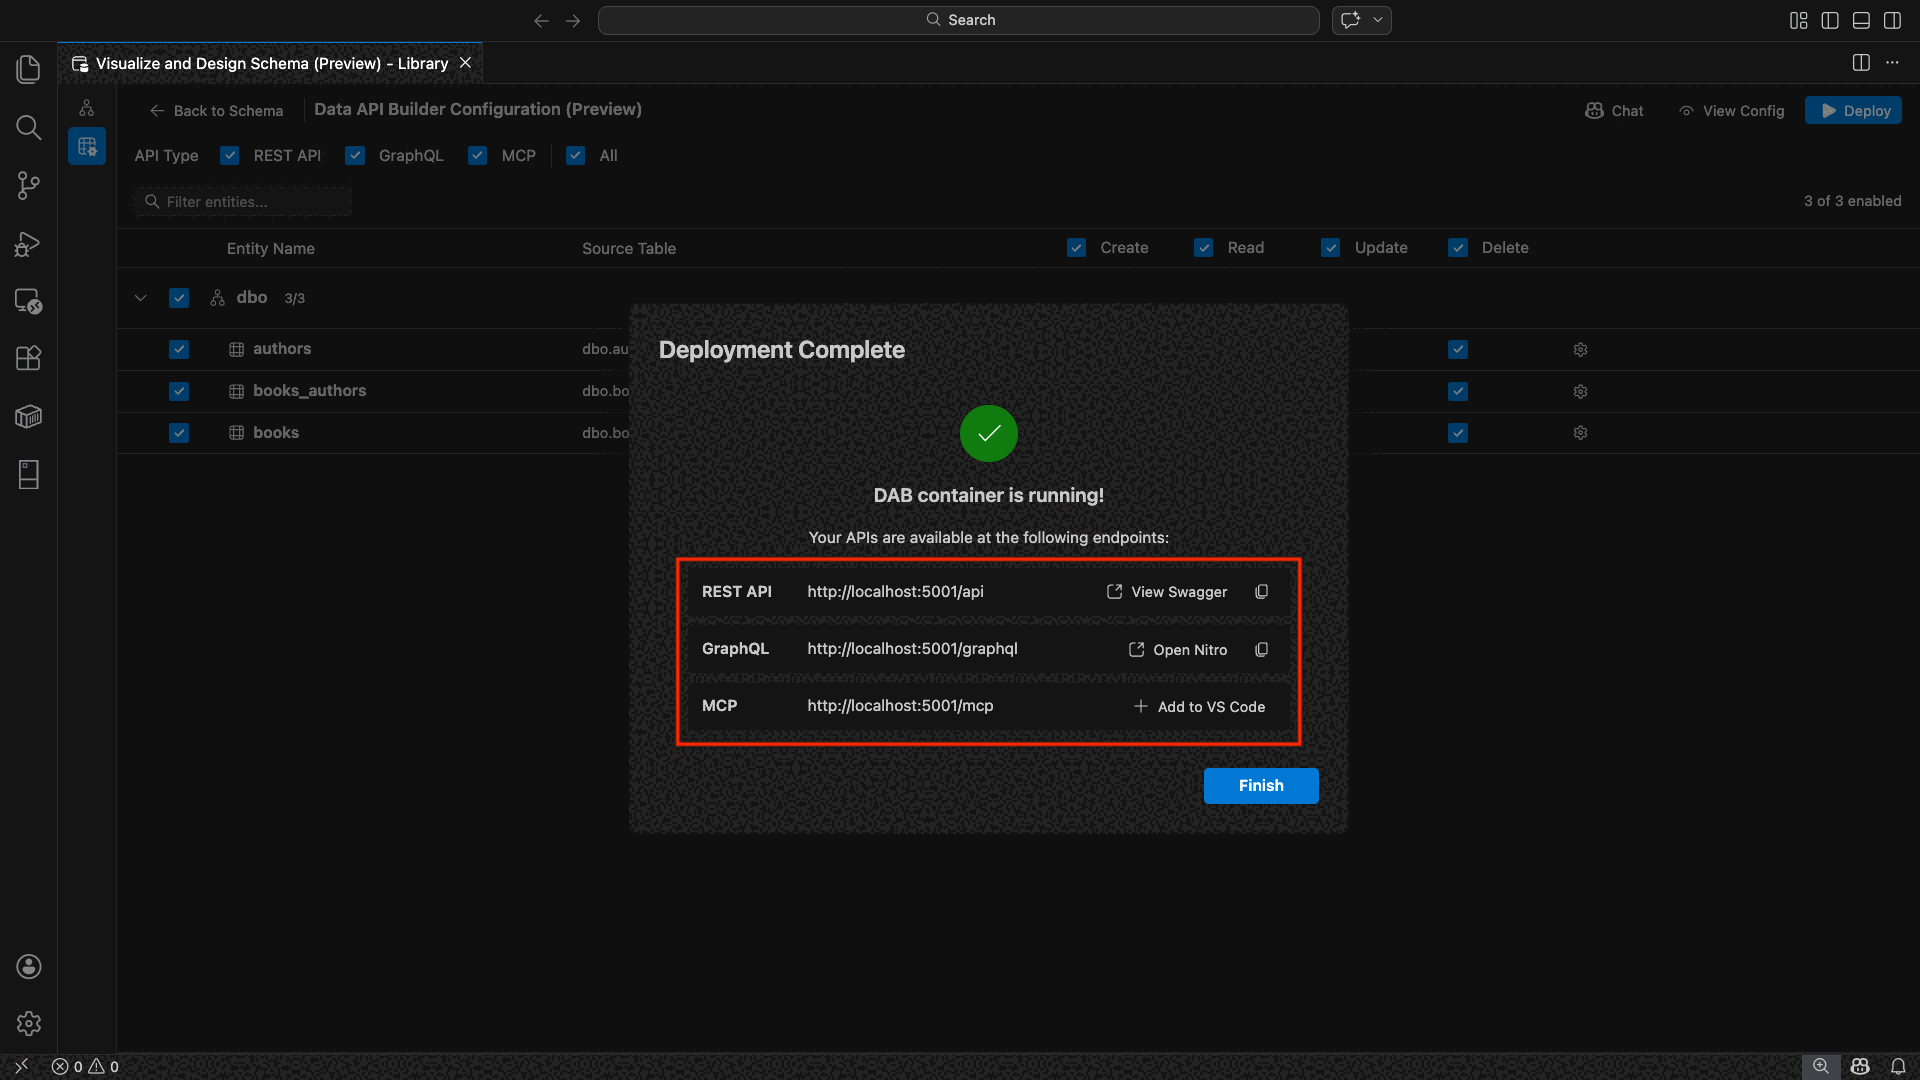
On successful deployment, the wizard displays the endpoint URLs for each enabled API type:
API type Endpoint Action REST http://localhost:{port}/apiView Swagger opens the Swagger UI GraphQL http://localhost:{port}/graphqlNitro opens the GraphQL playground MCP http://localhost:{port}/mcpAdd to VS Code writes the MCP server configuration to .vscode/mcp.jsonSelect any link to open the testing interface in the Visual Studio Code built-in Simple Browser.
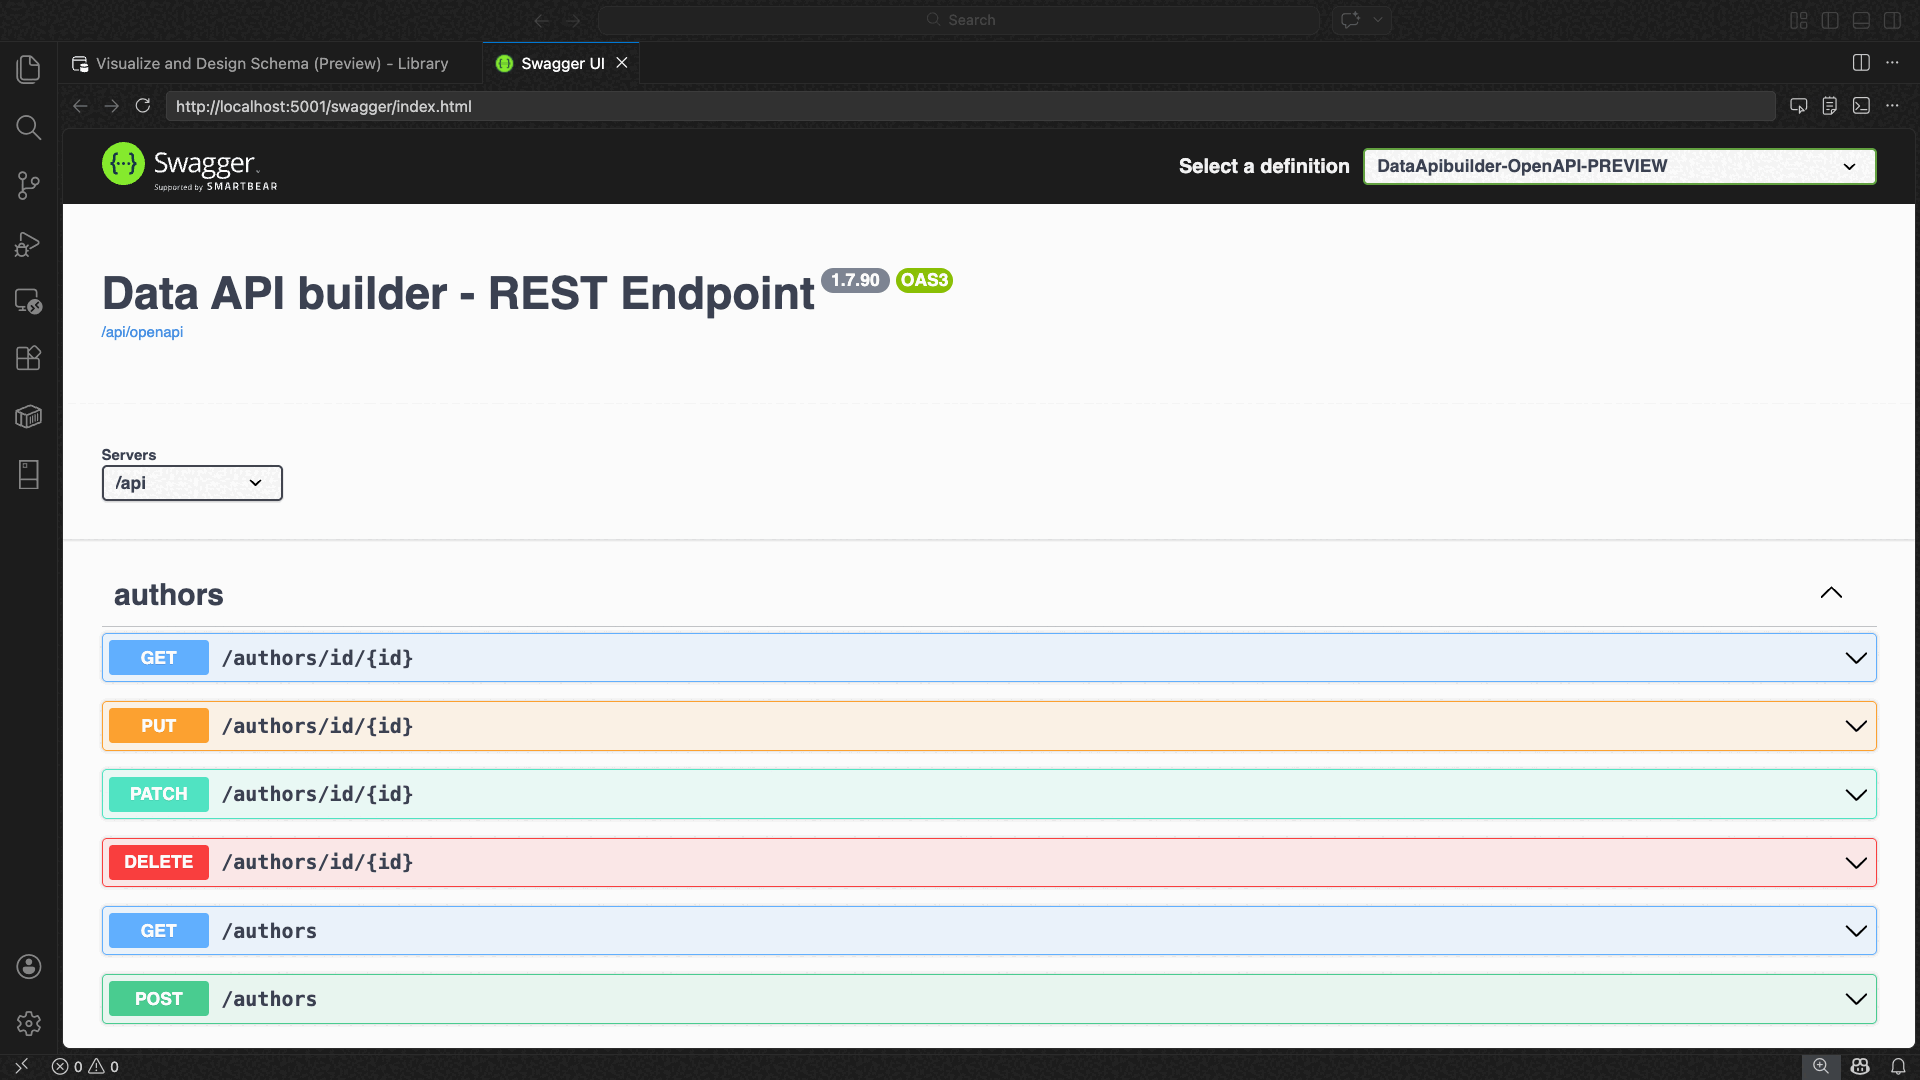
The following example shows the Swagger UI for testing REST endpoints directly in Visual Studio Code:
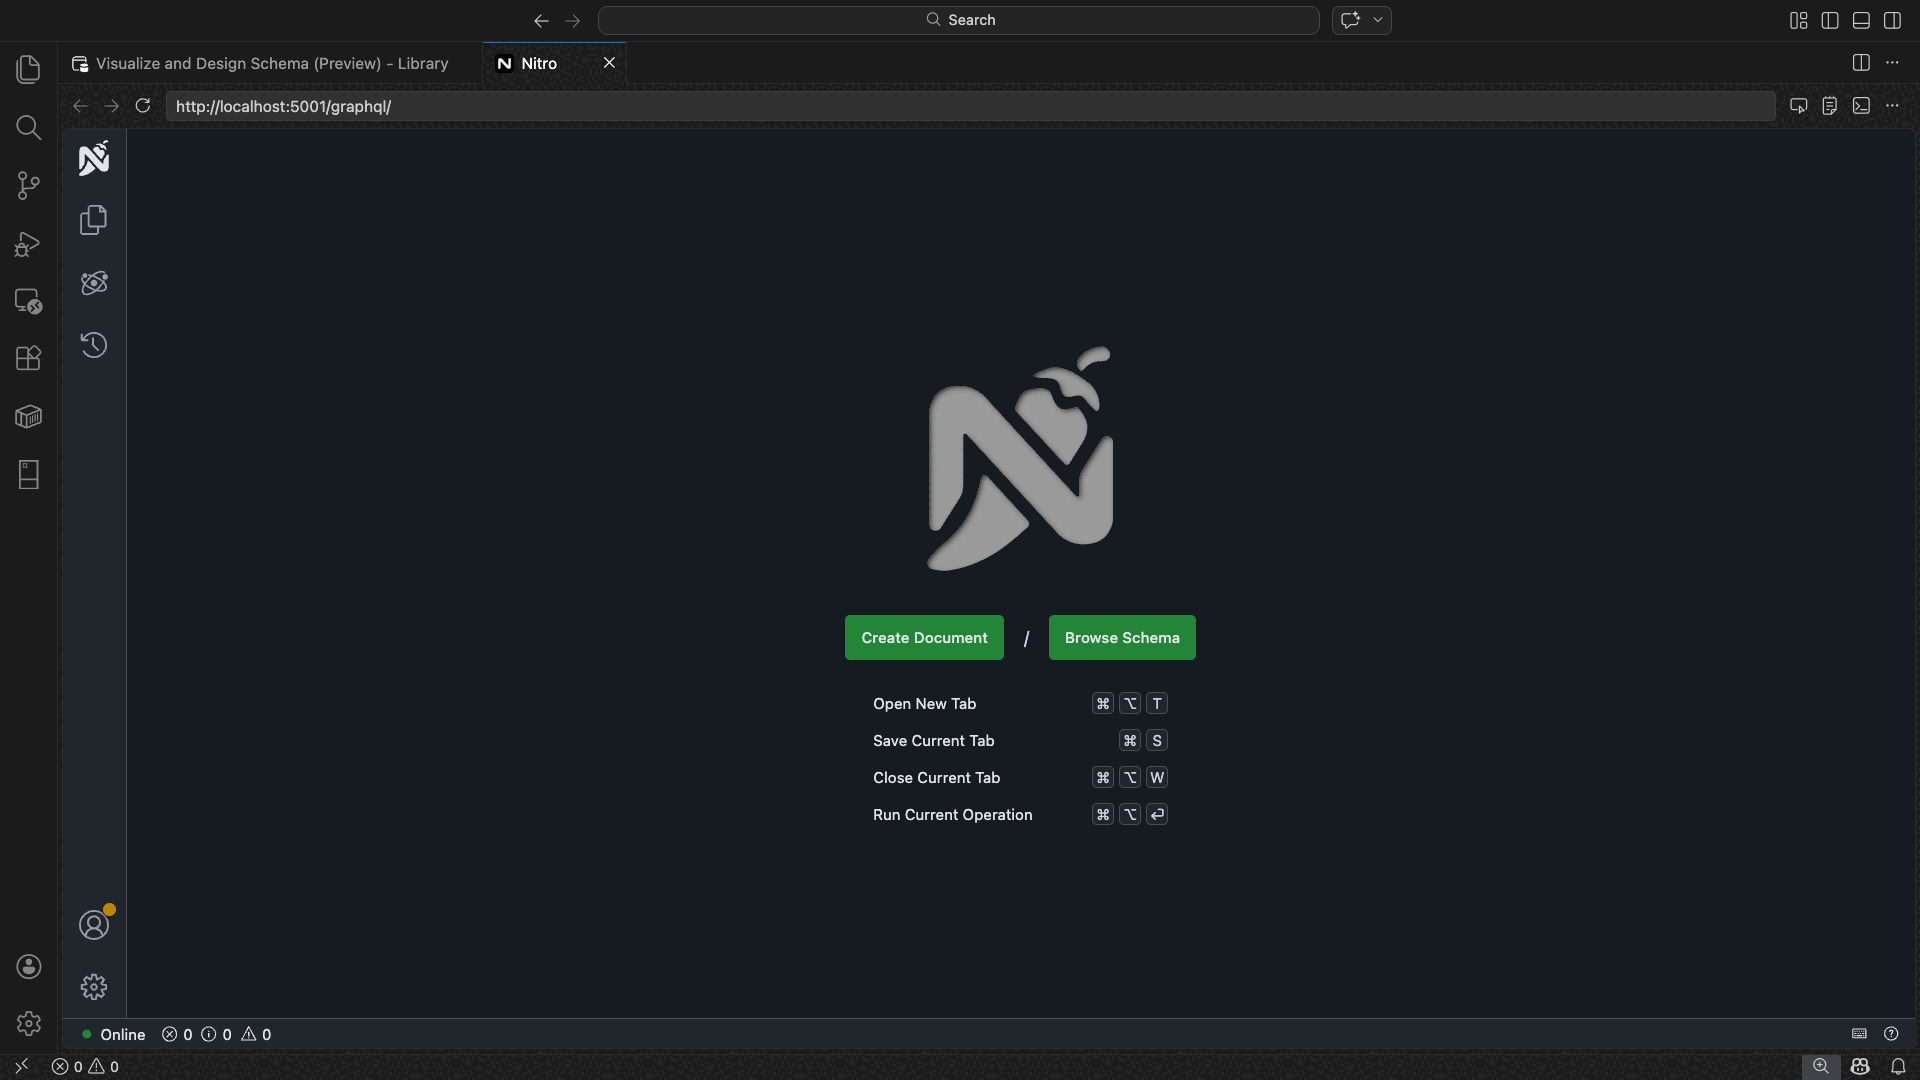
The following example shows the Nitro GraphQL playground for testing GraphQL queries and mutations:


Test the running API
After deployment, you can test your APIs directly from the deployment completion dialog using the Visual Studio Code built-in Simple Browser.
REST API
Select View Swagger to open the Swagger UI, an interactive visual interface for exploring and testing REST endpoints. You can browse available entities, view request and response schemas, and execute API calls directly.
Data API builder generates the following REST endpoints for each enabled entity:
| Method | Endpoint | Description |
|---|---|---|
GET |
/api/{entity} |
List all records for an entity |
GET |
/api/{entity}/{primaryKey}/{value} |
Get a single record by primary key |
POST |
/api/{entity} |
Create a new record |
PUT |
/api/{entity}/{primaryKey}/{value} |
Replace an existing record |
PATCH |
/api/{entity}/{primaryKey}/{value} |
Update specific fields on a record |
DELETE |
/api/{entity}/{primaryKey}/{value} |
Delete a record |
For more information on REST endpoints, see Data API builder REST API.
GraphQL
Select Nitro to open the Nitro GraphQL playground, where you can write and test GraphQL queries and mutations interactively.
For more information on GraphQL endpoints, see Data API builder GraphQL API.
MCP
Select Add to VS Code to write the MCP server configuration to .vscode/mcp.json. This configuration makes the Data API builder endpoint available as an MCP server within Visual Studio Code. AI tools such as GitHub Copilot can then interact with your database through the Data API builder API.
For more information about MCP in Visual Studio Code, see Use MCP servers in Visual Studio Code.
Terminal testing
You can also test endpoints from the terminal:
REST API:
Get all records from a specific entity:
curl http://localhost:{port}/api/{entityName}
Create a new record (if Create permission is enabled):
curl -X POST http://localhost:{port}/api/{entityName} \
  -H "Content-Type: application/json" \
  -d '{"Column1": "Value1", "Column2": "Value2"}'
GraphQL:
curl -X POST http://localhost:{port}/graphql \
  -H "Content-Type: application/json" \
  -d '{"query": "{ {entityName} { items { Column1 Column2 } } }"}'
Tip
Replace {port} with the port you configured during deployment (default: 5000).
GitHub Copilot integration
For developers who prefer natural language, GitHub Copilot is built into the Data API builder experience. Select the Chat button in the toolbar to open a GitHub Copilot chat session scoped to the Data API builder configuration context. GitHub Copilot and the UI stay in sync: changes made through chat are immediately reflected in the UI and vice versa.
Here are some example prompts:
"Enable all SalesLT entities for read operations""Expose only the Customer and Product tables with full CRUD permissions""Set all entities in the dbo schema to read-only""Disable the BuildVersion and ErrorLog entities""Can you also enable MCP for the Data API builder API?"
The following example shows GitHub Copilot enabling entities and configuring CRUD permissions through a chat prompt:

The following example shows GitHub Copilot enabling MCP endpoints for the Data API builder configuration:

Note
GitHub Copilot integration requires the GitHub Copilot and GitHub Copilot Chat extensions to be installed and signed in. For setup instructions, see Set up GitHub Copilot.
Known limitations
- Tables only: The configuration UI supports tables only. Views and stored procedures aren't available in the designer at this time.
- Docker Desktop required: Local deployment requires Docker Desktop to be installed and running.
- SQL authentication only: Local Docker containers don't support Microsoft Entra ID authentication methods, such as
ActiveDirectoryInteractive, because the container environment can't open a browser for the interactive sign-in flow. The extension displays a notification if your current connection uses an unsupported authentication type. - SQL database in Microsoft Fabric isn't supported: SQL database in Microsoft Fabric requires Microsoft Entra authentication exclusively and doesn't support SQL authentication. Because local container deployment requires SQL authentication, deploying against SQL database in Fabric isn't a viable scenario.
- Primary key required: Every table entity exposed through Data API builder must have a primary key constraint defined at the database level. Tables without a primary key cause the Data API builder engine to fail at startup.
- AI-generated output should be reviewed: GitHub Copilot might produce incorrect or suboptimal configurations. Always review generated configurations before deploying.
Known issues
- Unsupported SQL Server data types: Data API builder can't serialize certain SQL Server data types. Tables containing columns with unsupported types can cause the engine to fail at startup. Unsupported types include
geography,geometry,hierarchyid,rowversion,sql_variant, andxml. The extension marks affected entities with a warning icon and prevents them from being selected for deployment. For the latest information on data type support, see GitHub issue #3181. - Interactive Microsoft Entra ID authentication not supported for container deployment: The Data API builder container can't perform interactive Microsoft Entra authentication. Connections using interactive Microsoft Entra ID methods are blocked with a notification. For more information, see GitHub issue #3246.
- MCP is in preview: The Data API builder MCP experience is currently in preview. For more information, see Data API builder MCP Preview.
Feedback and support
If you have ideas, feedback, or want to engage with the community, join the discussion at https://aka.ms/vscode-mssql-discussions. To report a bug, visit https://aka.ms/vscode-mssql-bug. To request a new feature, go to https://aka.ms/vscode-mssql-feature-request.
Related content
- What is Data API builder?
- Data API builder documentation
- GitHub Copilot for MSSQL extension for Visual Studio Code
- Schema Designer
- GitHub Copilot integration in Schema Designer (preview)
- Quickstart: Connect to and query a database with the MSSQL extension for Visual Studio Code
- Local SQL Server container
- Visual Studio Code documentation
- MSSQL extension for Visual Studio Code repository on GitHub