Extend tiered volume
This article provides information about how to extend tiered volume in Data Protection Manager (DPM).
Before you resize a volume, ensure that you have enough capacity in the storage pool to accommodate its new, larger footprint. For example, when resizing a three-way mirror volume from 1 TB to 2 TB, its footprint would grow from 3 TB to 6 TB. For the resize to succeed, you would need at least (6 - 3) = 3 TB of available capacity in the storage pool. For additional capacity, you can add a new disk using the steps in the add disk to storage pool section.
For the virtual disk that uses storage tiers, you can resize each tier separately using the Resize-StorageTier cmdlet.
Step 1 – Resize the virtual disk
Run the following PowerShell cmdlets to get the names of the storage tiers by following the associations from the virtual disk:
Get-VirtualDisk <FriendlyName> | Get-StorageTier | Select FriendlyName
Then, for each tier, provide the new size in the -Size parameter.
Get-StorageTier <FriendlyName> | Resize-StorageTier -Size <Size>
Note
If your tiers are different physical media types (such as MediaType = SSD and MediaType = HDD ), ensure that you have enough capacity of each media type in the storage pool to accommodate the new, larger footprint of each tier.
When you resize the StorageTier (s), the VirtualDisk and Disk follow automatically and are resized too.
Step 2 – Resize the partition
Next, resize the partition using the Resize-Partition cmdlet. The virtual disk is expected to have two partitions: the first partition is reserved and shouldn't be modified; the one you need to resize is PartitionNumber = 2 and Type = Basic.
Provide the new size in the -Size parameter. We recommend using the maximum supported size, as shown below:
# Choose virtual disk
$VirtualDisk = Get-VirtualDisk <FriendlyName>

# Get its partition
$Partition = $VirtualDisk | Get-Disk | Get-Partition | Where PartitionNumber -Eq 2

# Resize to its maximum supported size
$Partition | Resize-Partition -Size ($Partition | Get-PartitionSupportedSize).SizeMax
Add disk to storage pool
You can add more capacity to the tiered volume by adding new disks. Based on the requirement, you can add additional HDDs or SSDs. Follow the step below to add disks to a storage pool.
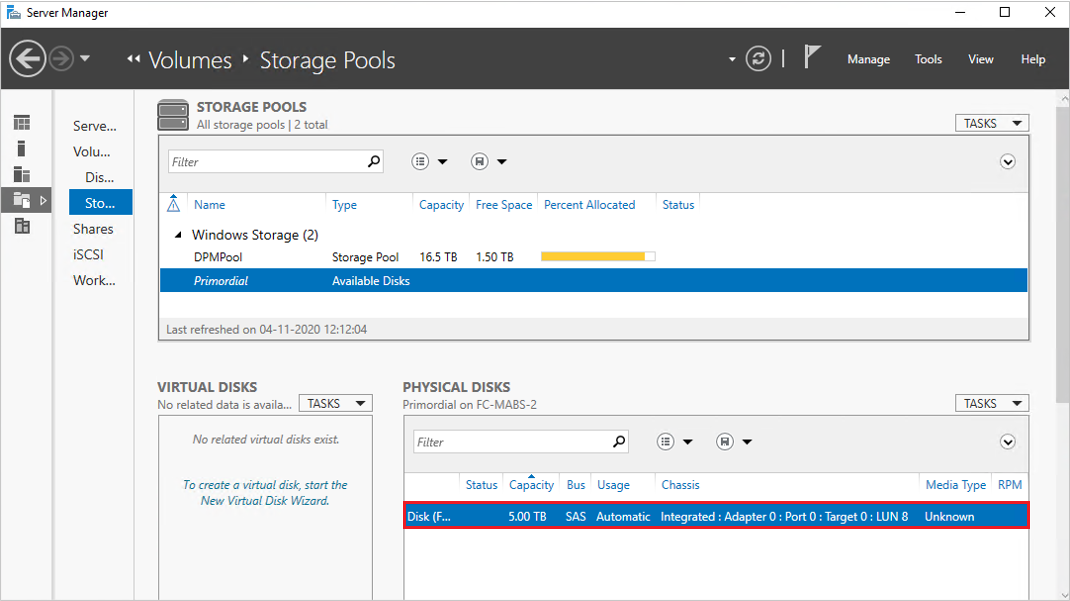
Physically connect the additional disks that you want to add, and initialize these disks. After initialization, the newly added disks appear in the Primordial storage pool.
To add a new disk to an existing storage pool used for DPM, right-click the storage pool name, and then select Add Physical Disk….
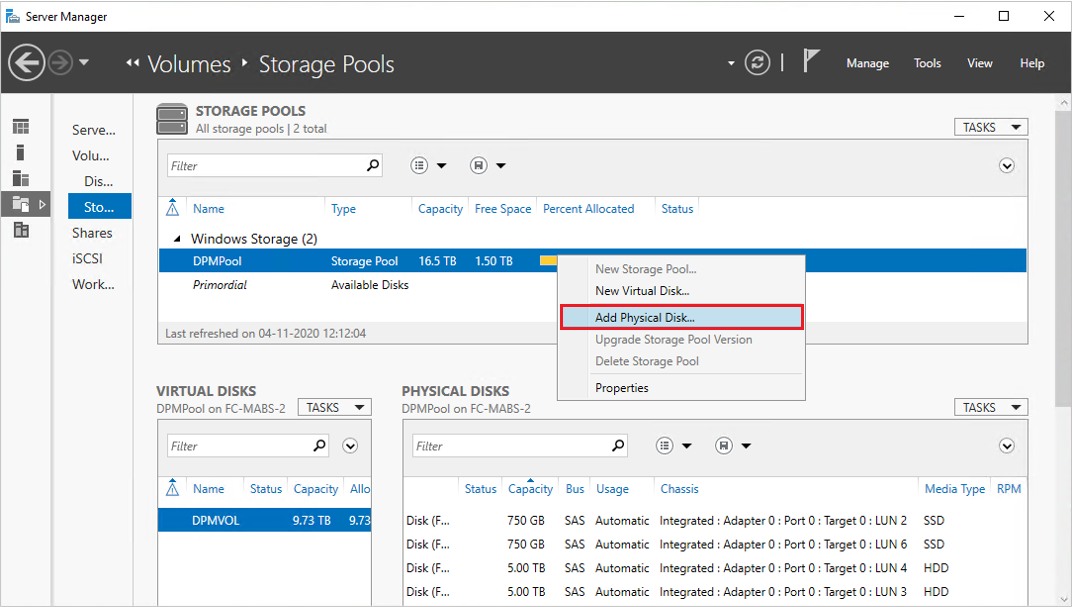
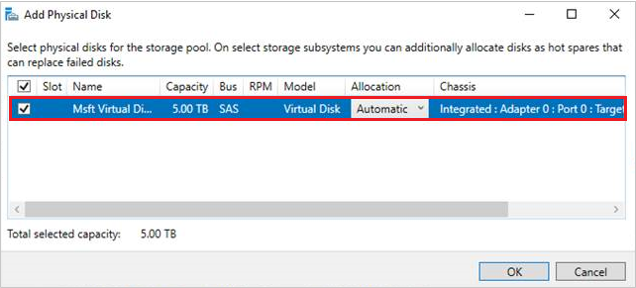
Select the disk from the list of available disks and select OK.
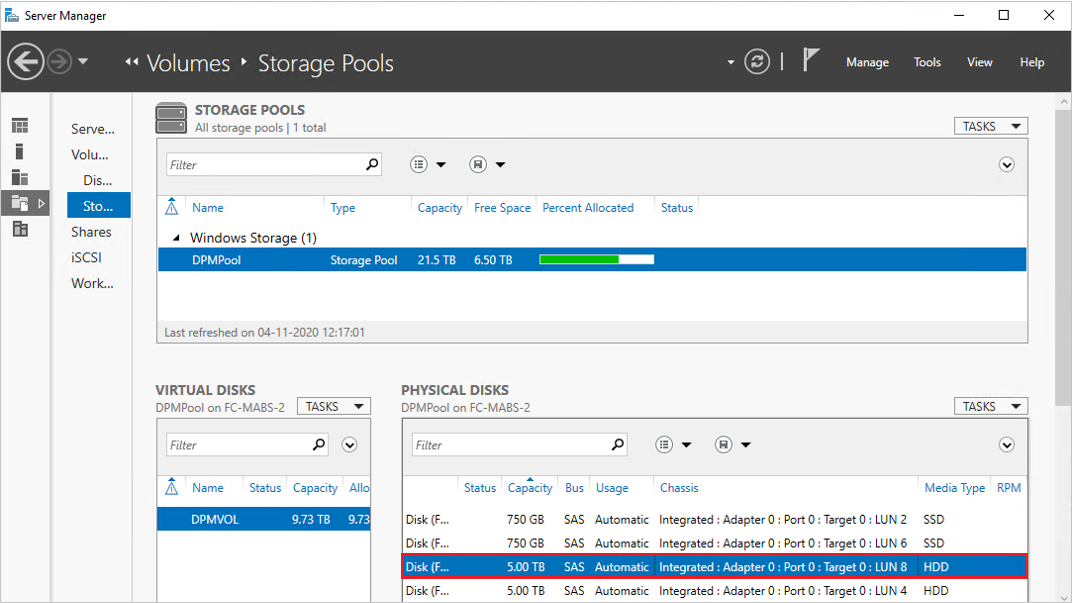
Server Manager displays the updated capacity. Now, you can extend the volume size.
Note
In some cases, MediaType for the newly added disk might be displayed as unassigned. You can run the following PowerShell command to set the MediaType:
Set-PhysicalDisk -UniqueId <Unique ID of the Disk> -MediaType <HDD/SSD>
Feedback
Coming soon: Throughout 2024 we will be phasing out GitHub Issues as the feedback mechanism for content and replacing it with a new feedback system. For more information see: https://aka.ms/ContentUserFeedback.
Submit and view feedback for