Note
Access to this page requires authorization. You can try signing in or changing directories.
Access to this page requires authorization. You can try changing directories.
This article describes the types of monitoring that are available in Management Pack for Azure SQL Database.
Azure REST API monitoring vs. T-SQL monitoring
The main difference between Azure REST API monitoring and T-SQL monitoring is that in T-SQL, the entire set of workflows is available for you to use.
In the Azure REST API, the following workflows aren't available due to API limitations:
- Rules
- Azure SQL DB: DB Transactions Locks Count
- Azure SQL DB: DB Sessions Count
- Azure SQL DB: DB Sessions Average Memory Consumption (MB)
- Azure SQL DB: DB Sessions Rows Returned
- Azure SQL DB: DB Sessions Total CPU Time (ms)
- Azure SQL DB: DB Sessions Total Read/Write Operations
- Azure SQL DB: DB Sessions Total Memory Consumption (MB)
- Azure SQL DB: DB Transactions Max Log Usage (MB)
- Azure SQL DB: DB Transactions Max Running Time (minutes)
- Azure SQL DB: DB Blocked by Firewall Count
- Azure SQL DB: DB Failed Connections Count
- Azure SQL DB: DB Successful Connections Count
- Azure SQL DB: DB Deadlocks Count
- Monitors
- Transaction Locks Count
- Sessions Count
- Sessions Average Memory
- Sessions Rows Returned
- Sessions Total CPU Time
- Sessions Total I/O
- Sessions Total Memory
- Transaction Log Space Used
- Transaction Execution Time
- Count of Failed Connection
- Count of connections blocked by the Firewall
To make these workflows available in the Azure REST API, select the Use T-SQL monitoring checkbox when you set up Azure REST API monitoring, and run required T-SQL scripts.
Note
To connect Microsoft System Center Operations Manager to Azure resources, your server must have the TLS 1.2 protocol enabled. To learn how to check the protocol status on your server, see TLS 1.2 enforcement for Microsoft Entra Connect.
Set up Azure REST API monitoring
Azure REST API monitoring provides a wide range of monitoring targets.
When you use the Azure REST API, the Management Pack for Azure SQL Database uses a Microsoft Entra application (that is, a service principal name) for authentication in Microsoft Entra. The service principal name (SPN) gives access to the Azure Resource Management API. The account that you use must have either the Owner role (or greater) or any of the following roles:
- Administrator
- Service Administrator
- Co-Administrator
For more information, see Create a Microsoft Entra application and service principal that can access resources.
To monitor Azure SQL Database instances by using the Azure REST API:
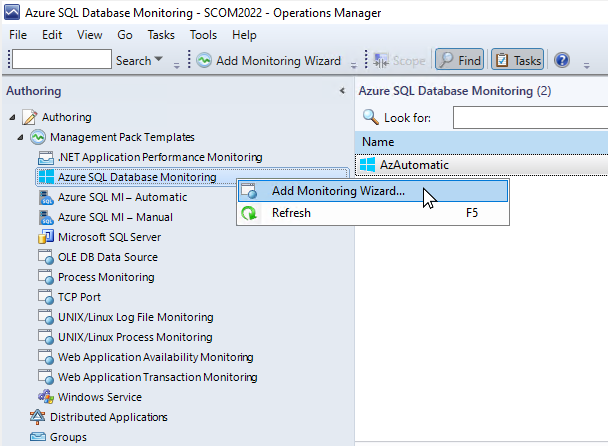
In the Operations Manager console, go to Authoring > Management Pack Templates. Right-click Azure SQL Database Monitoring and select Add Monitoring Wizard.
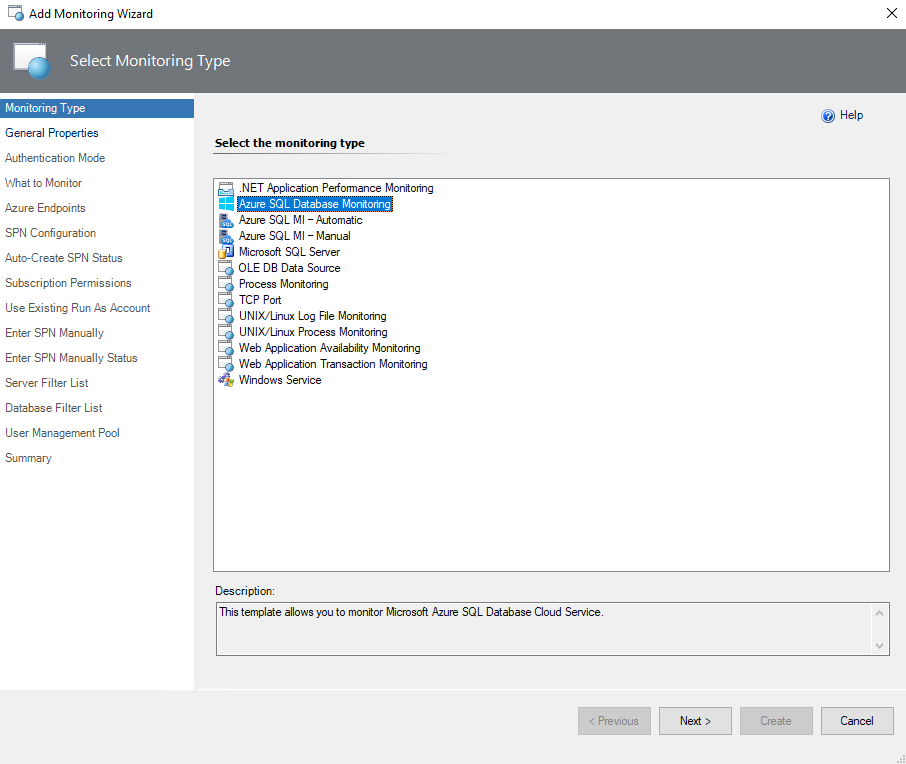
On Monitoring Type, select Azure SQL Database Monitoring, and then select Next.
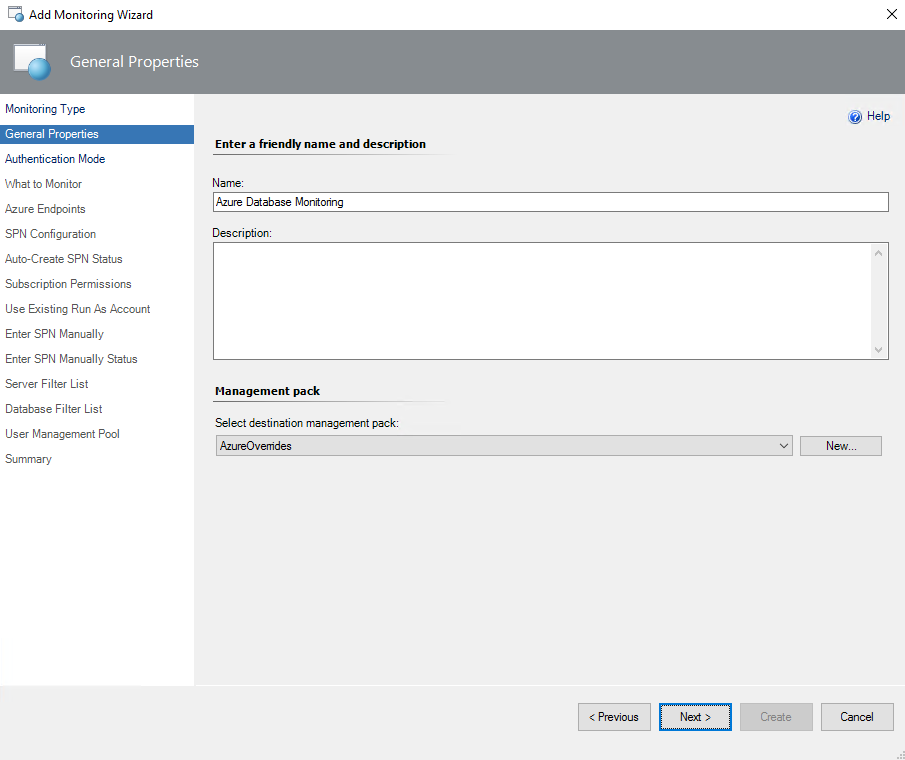
On General Properties, enter a new name and description. For Select destination management pack, select a management pack to use to store the template. Then select Next.
To create a new management pack, select New, and then follow the instructions in the wizard.
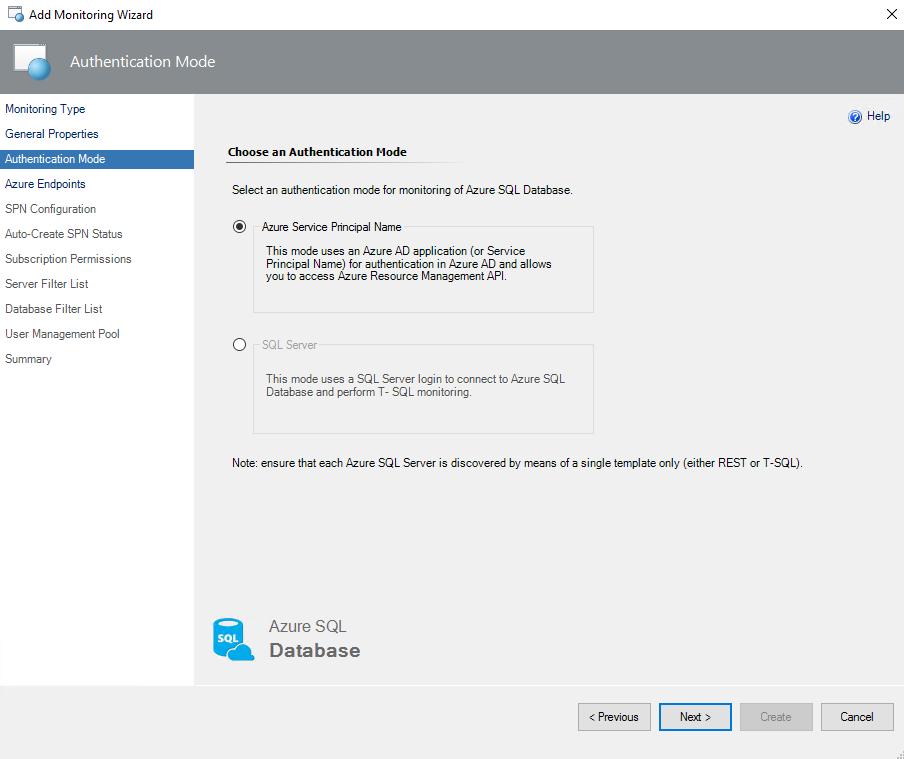
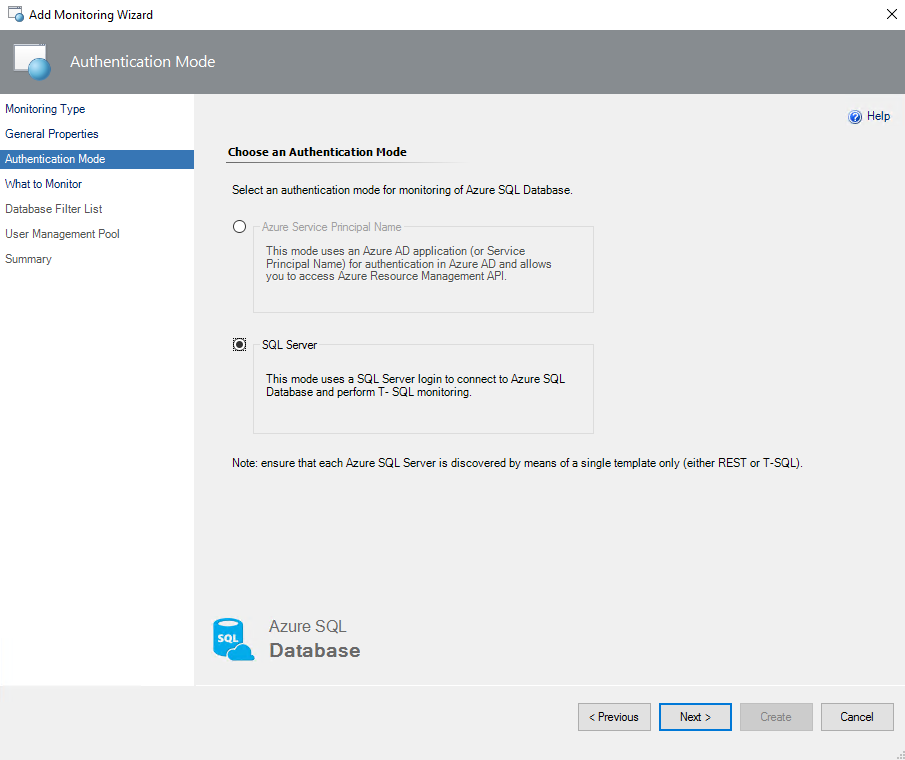
On Authentication Mode, select Azure Service Principal Name, and then select Next.
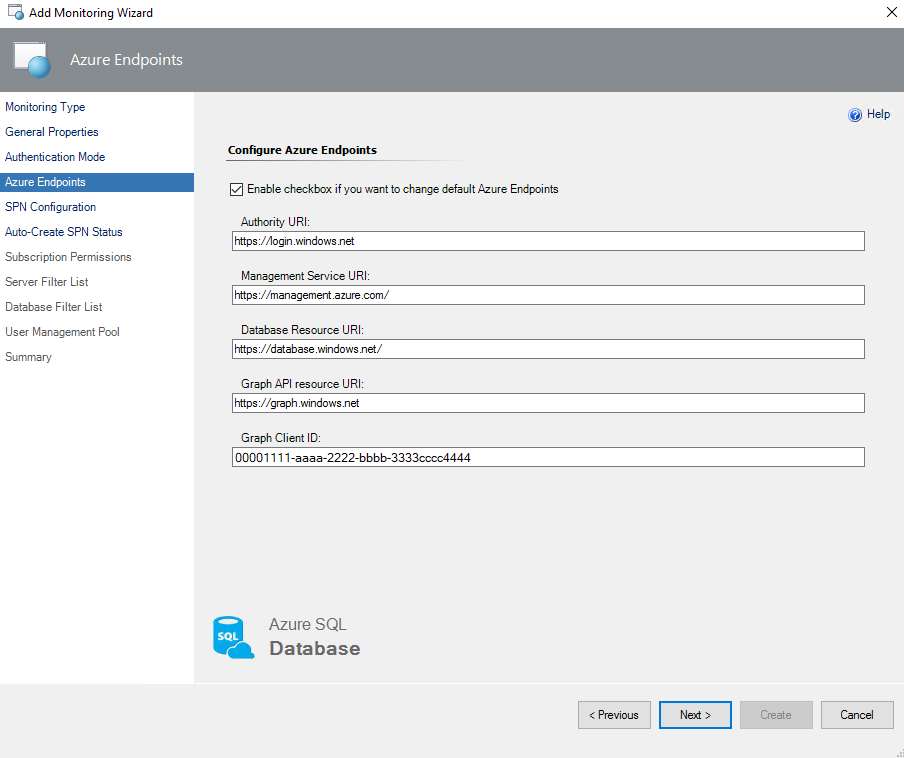
On Azure Endpoints, select the Enable checkbox if you want to change default Azure Endpoints checkbox and modify the default Azure endpoints if necessary. Then select Next.
Here are the default endpoints for creating the Azure SPN:
Authority URI:
https://login.windows.netManagement Service URI:
https://management.azure.comAs described in Ports beyond 1433 for ADO.NET 4.5, the firewall port should be port 1433. This endpoint is also used for Azure REST API.
Database Resource URI:
https://database.windows.netGraph API Resource URI:
https://graph.windows.net
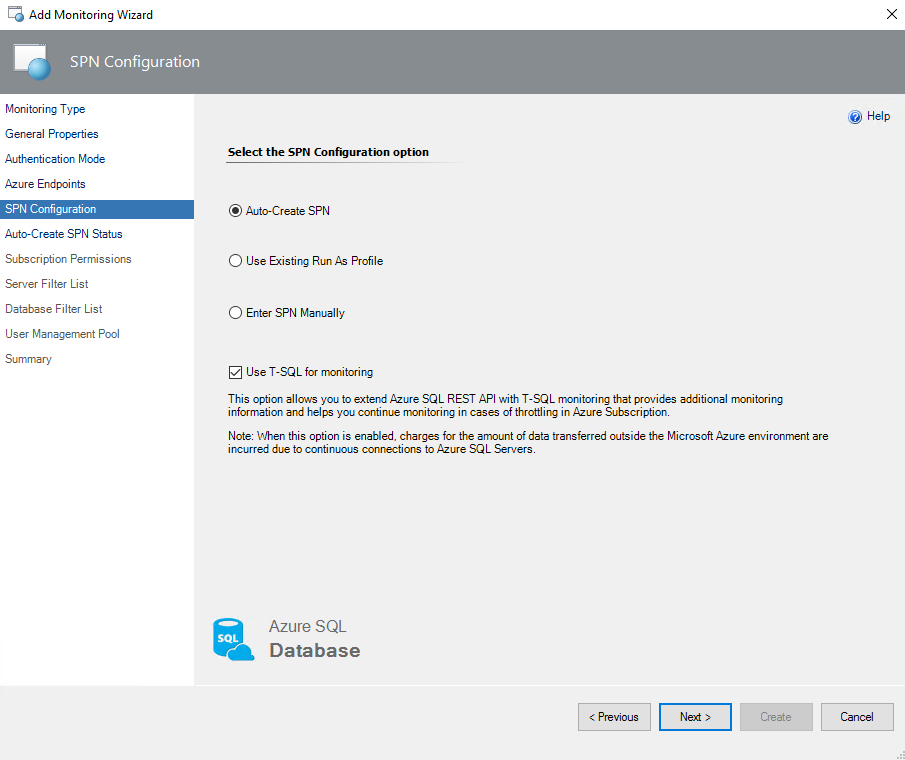
On SPN Configuration, select Auto-Create SPN.
The following list describes the options that you can choose from:
Auto-Create SPN: Select this option if you want to create the Azure SPN automatically via the management pack library by using the Azure REST API. When this option is selected, a new Run As account that uses the specified Azure SPN is created.
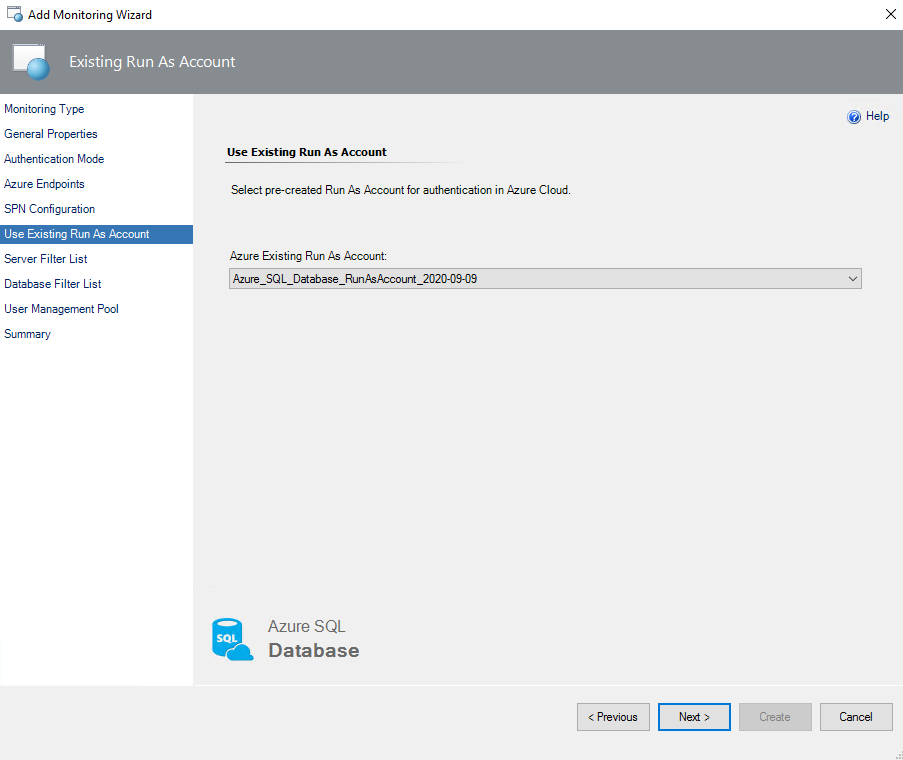
Use Existing Run As Profile: Select this option if you want to use your own Azure SPN.
If you select the Use an existing Run As profile, select Next, and then select an existing Run As account that's associated with an Azure SPN. This account is used for authentication in Azure Cloud Services.
Enter SPN Manually: Select this option if you already created a Run As profile (for example, by using PowerShell) that has Azure SPN credentials.
To register the application and create the SPN manually by using the Azure portal, see Create a Microsoft Entra application and service principal that can access resources.
Tip
You can skip the web URI redirection. The parameter is not needed for monitoring.
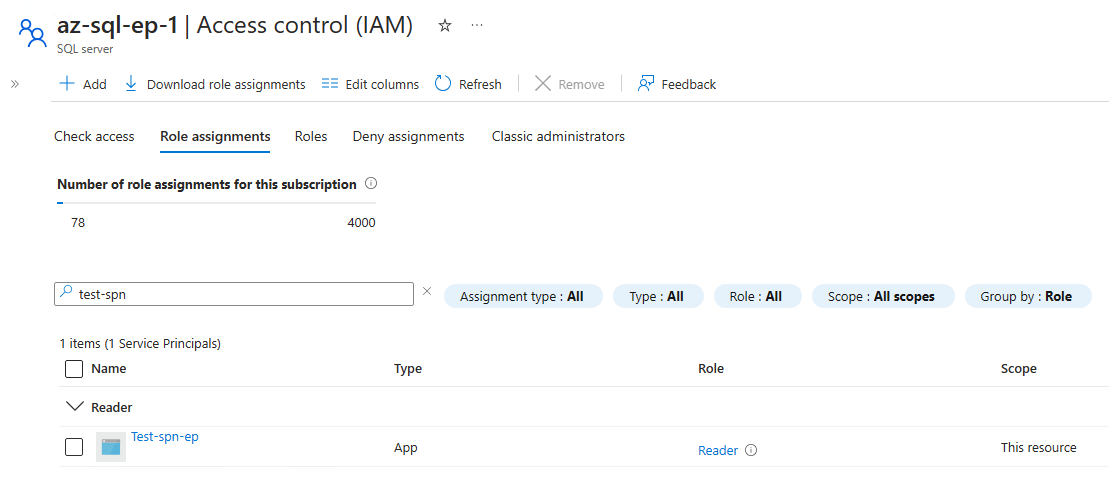
In the Azure portal, on the Access control (IAM) pane, assign the Reader role to the SPN for the respective Azure SQL Database server. The role assignment flow is similar to the flow that is described in Grant a user access to Azure resources by using the Azure portal.
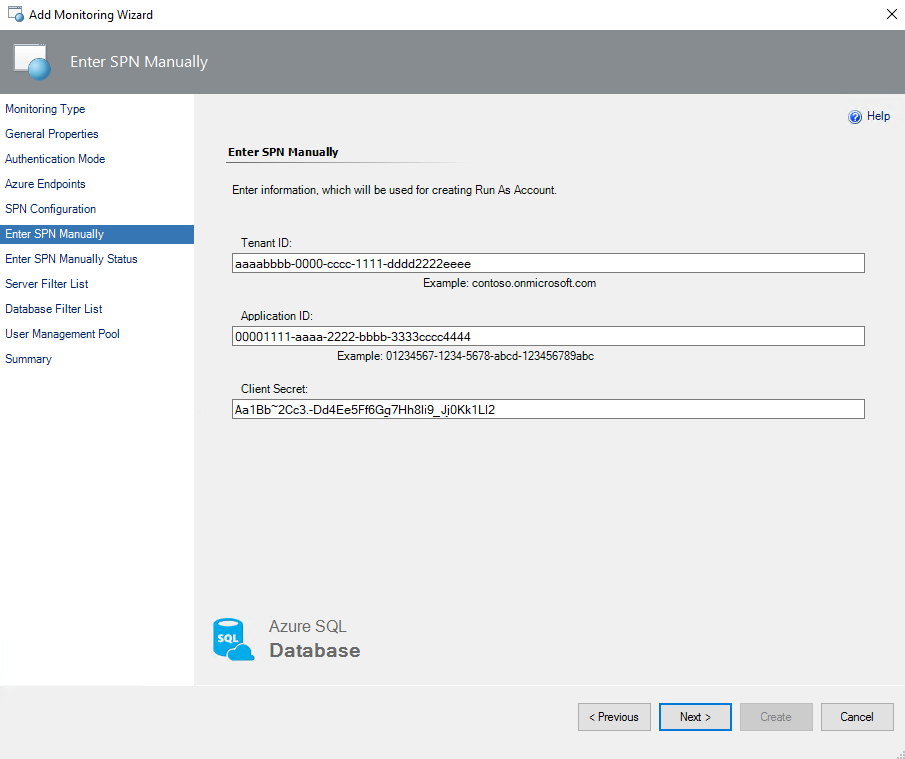
On SPN Configuration, select the Enter SPN Manually option, and then select Next. Enter this information for your Azure SPN:
- Tenant ID: The directory (tenant) ID from the SPN overview section.
- Application ID: The application (client) ID from the SPN overview section.
- Client Secret: The client secret value for the specific SPN.
Note
The client secret value is visible only once after you create it. Copy the value to a secure location to use later.
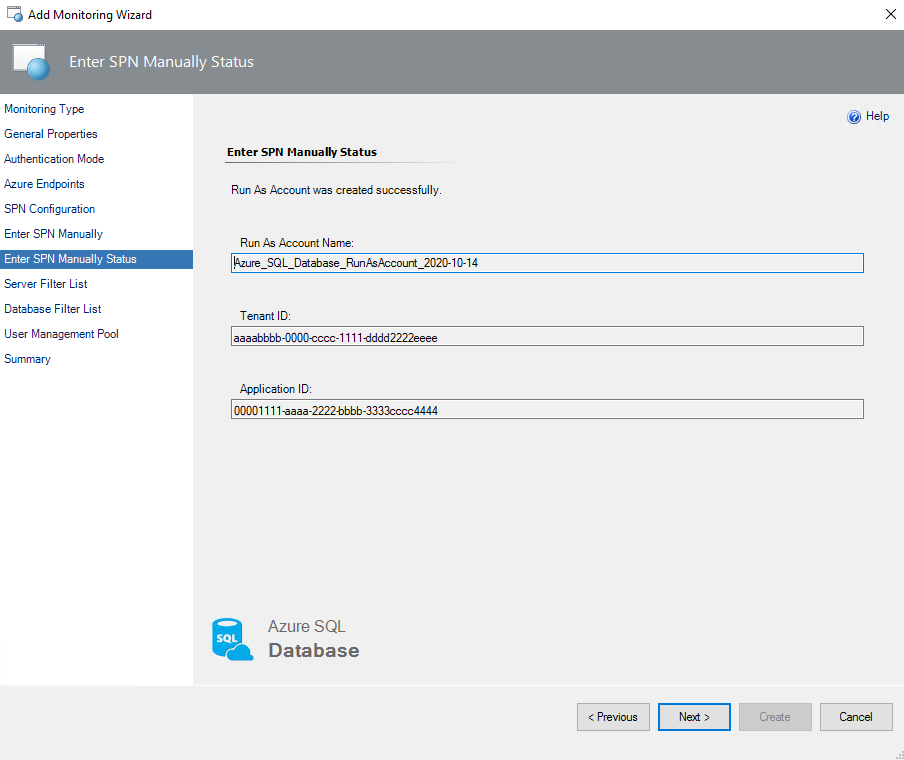
The information is used to create a new Run As account for authentication in Azure Cloud Services.
If needed, you can create and configure a new Microsoft Entra ID application and Azure SPN by using Azure PowerShell. For more information, see Use Azure PowerShell to create a service principal with a certificate.
When you create a Run As account on Enter SPN Manually Status, review the status, and then select Next.
Optionally, on Server Filter List, select the filtering mode, which can be either Exclude or Include. Select the filtering mask type, which can be either Wildcard or Regular Expression. Enter filtering masks, which should match SQL Server names that you want to exclude from or include in the monitoring list. Then select Add > Next.
The Wildcard filtering mask type can contain only a server name. The value can contain only lowercase letters, numbers, and the
-character, but it can't start with or end with the\character, and it can't contain more than 63 characters. A server exclude list filter mask ignores whitespaces.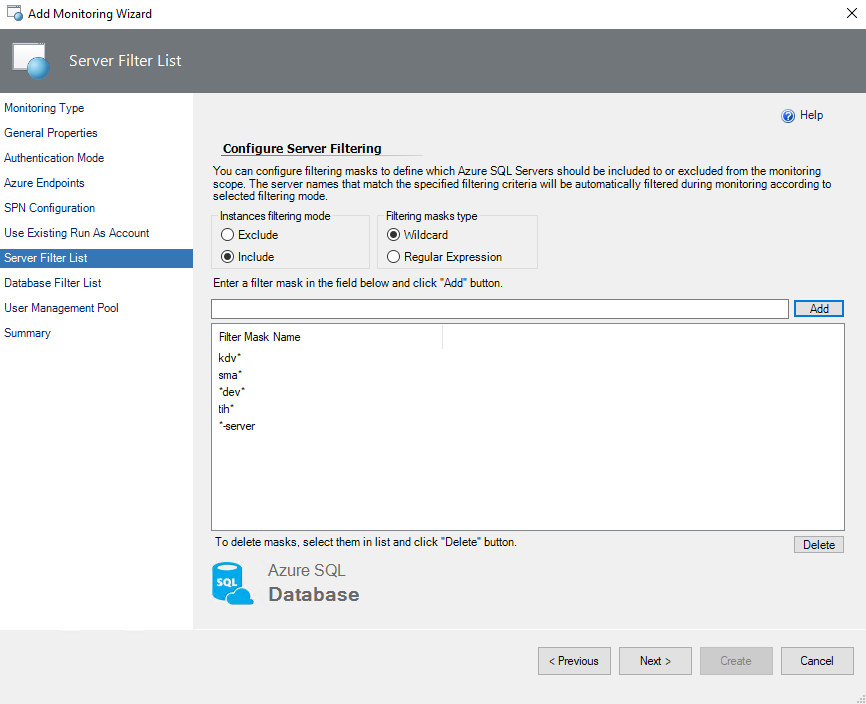
The Regular Expression filtering mask type supports .NET regular expression patterns.
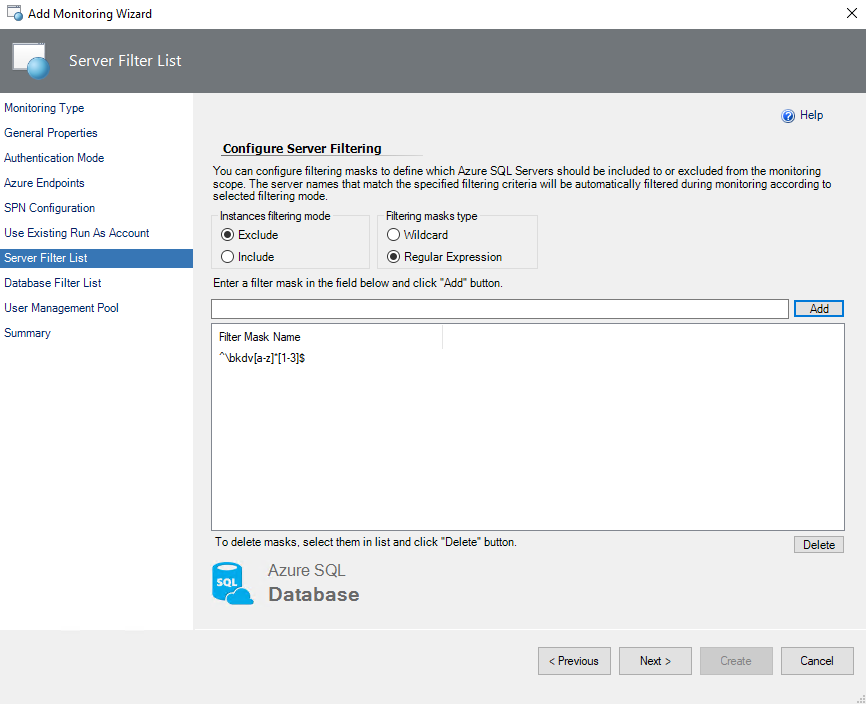
If you want to remove an existing mask, select the mask type, and then select Delete.
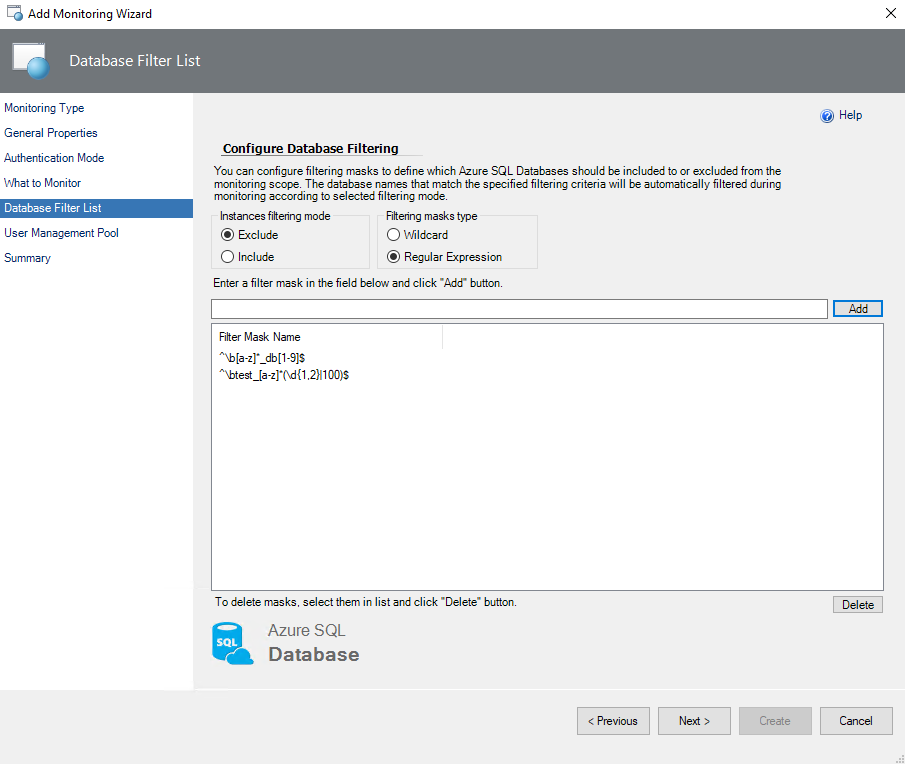
Optionally, on Database Filter List, select the filtering mode, which can be either Exclude or Include. Select the filtering mask type, which can be either Wildcard or Regular Expression. Enter filtering masks, which should match database names that you want to exclude from or include in the monitoring list. Then select Add > Next.
The Wildcard filtering mask type can't end with
.or space characters, it can't contain<,>,%,&,:,\,/,?, or control characters, and it can't have more than 128 characters.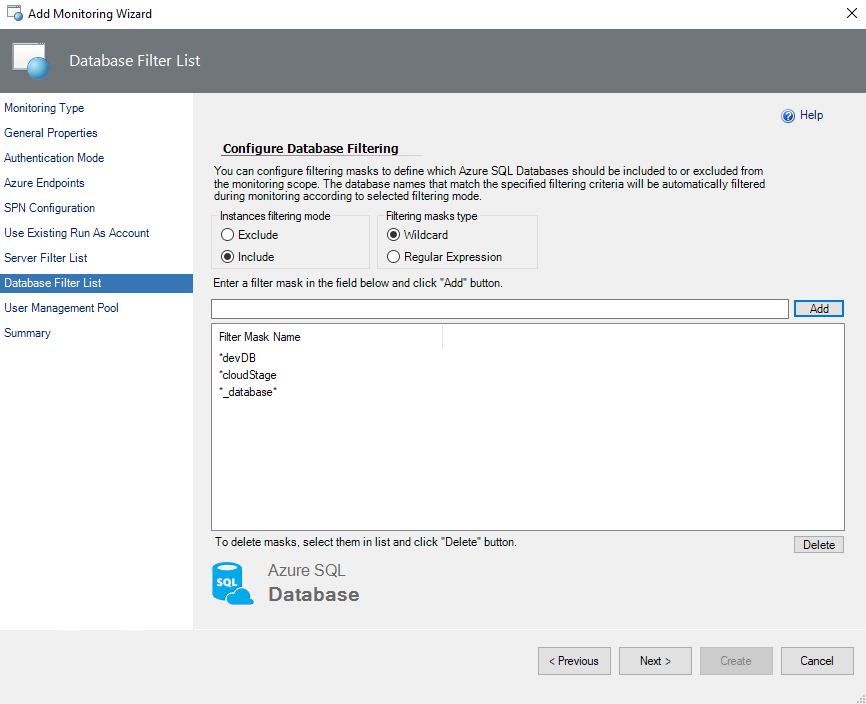
For example, if you select the Exclude option and set the dev, test, stage, and dbnotmon masks, the monitoring behavior works as described in the following table:
Database name Monitored status dev Not monitored dev_sales Not monitored sales_dev Monitored test Not monitored test_sales Not monitored sales_test Not monitored stage Not monitored stage_dev Monitored dev_stage Not monitored dbnotmon Not monitored dbnotmon_sales Monitored sales_dbnotmon Monitored
The Regular Expression filtering mask type supports .NET regular expression patterns.
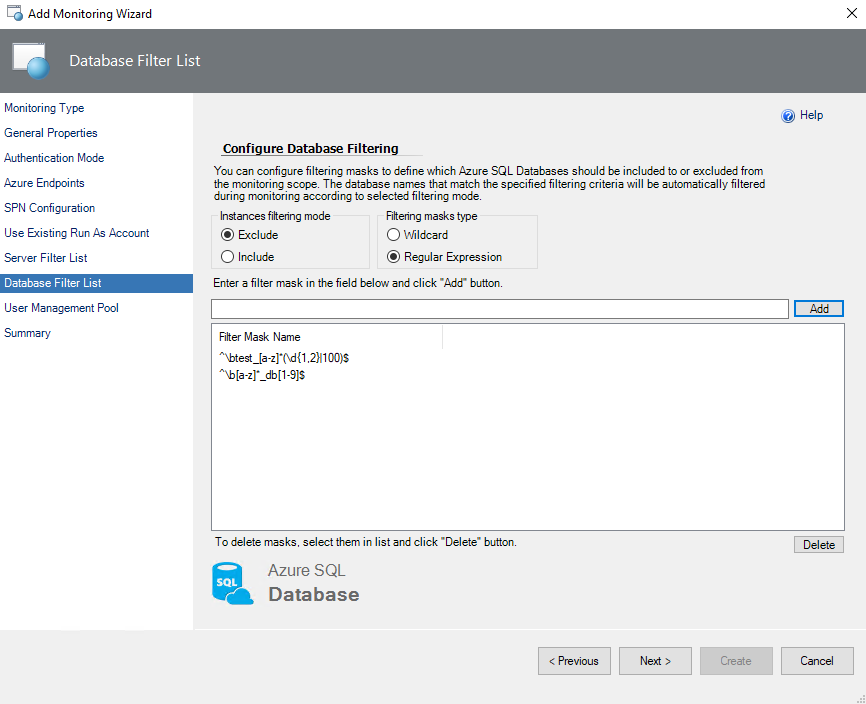
To remove an existing mask, select the mark, and then select Delete.
For more information about any of these options and to learn how to reduce Azure subscription throttling, select the Use T-SQL for monitoring checkbox and see Azure REST API monitoring vs. T-SQL monitoring.
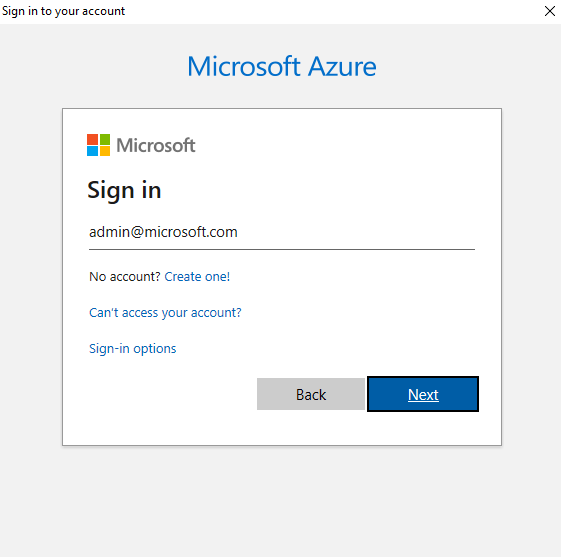
When you select the Auto-Create SPN option, the Microsoft Azure sign-in pane appears. Enter your work, school, or personal Microsoft account credentials, and then select Next and complete the form.
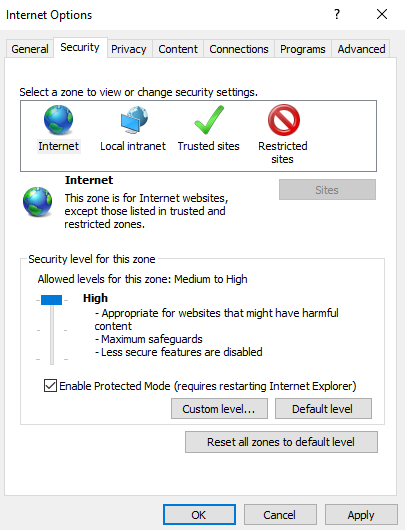
At this step, an internet security alert might appear. To resolve the issue, go to Internet Options, select the Security tab, and then set a lower internet zone security level.
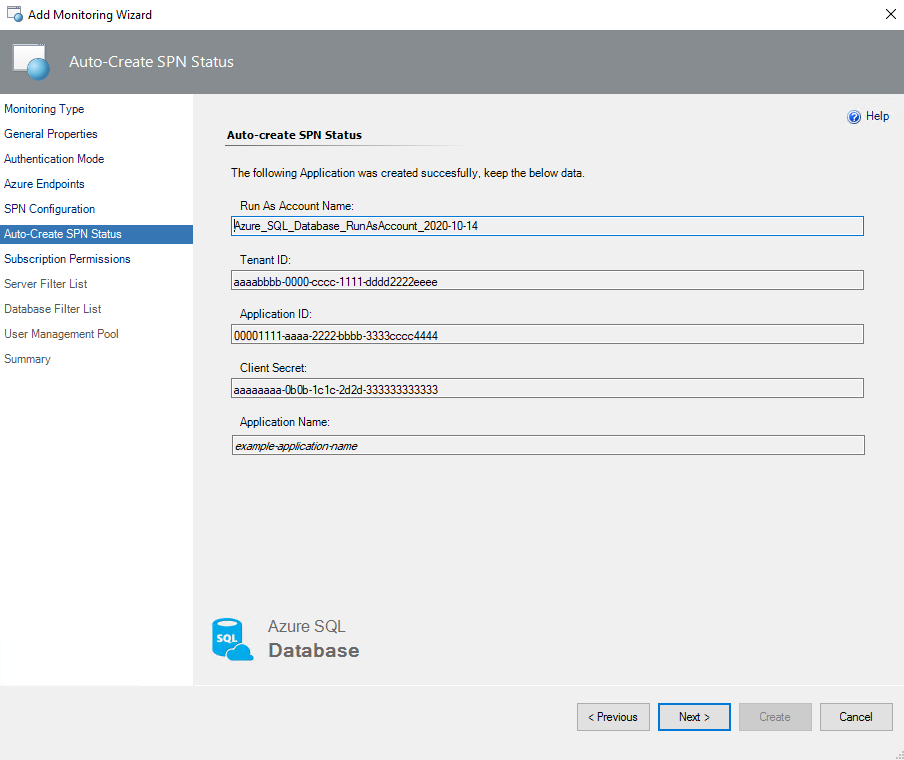
When the Microsoft Entra application is successfully created, authentication information appears on Auto-create SPN Status.
Warning
The authentication information is available only once. Be sure to save this information to a secure location to use it later.
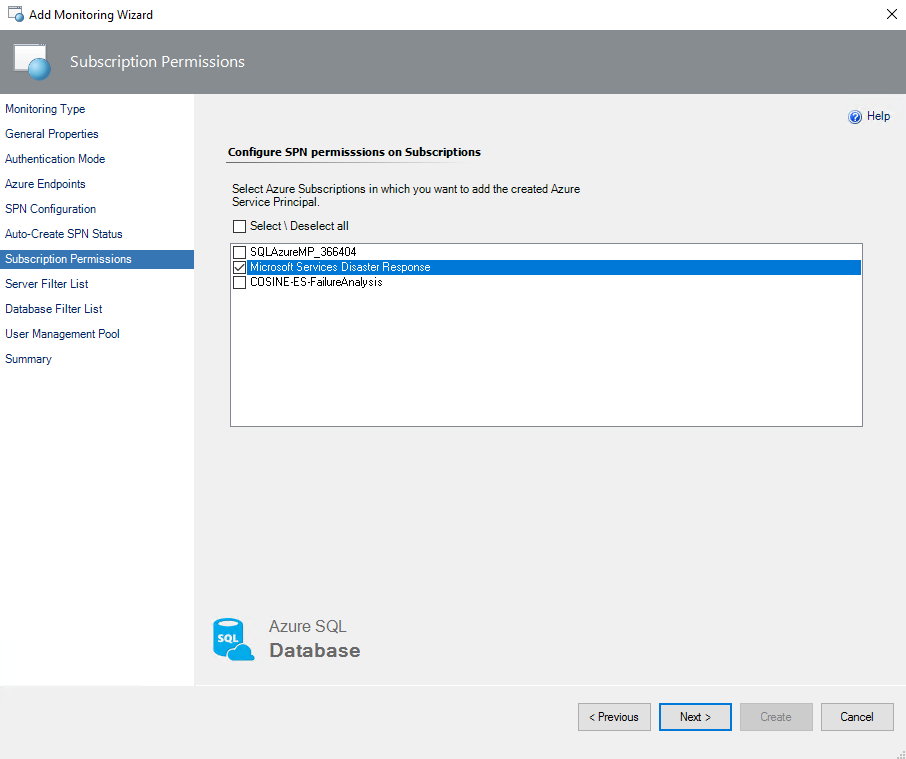
On Subscription Permissions, select the Azure subscriptions where you want to add the Azure SPN. Then select Next.
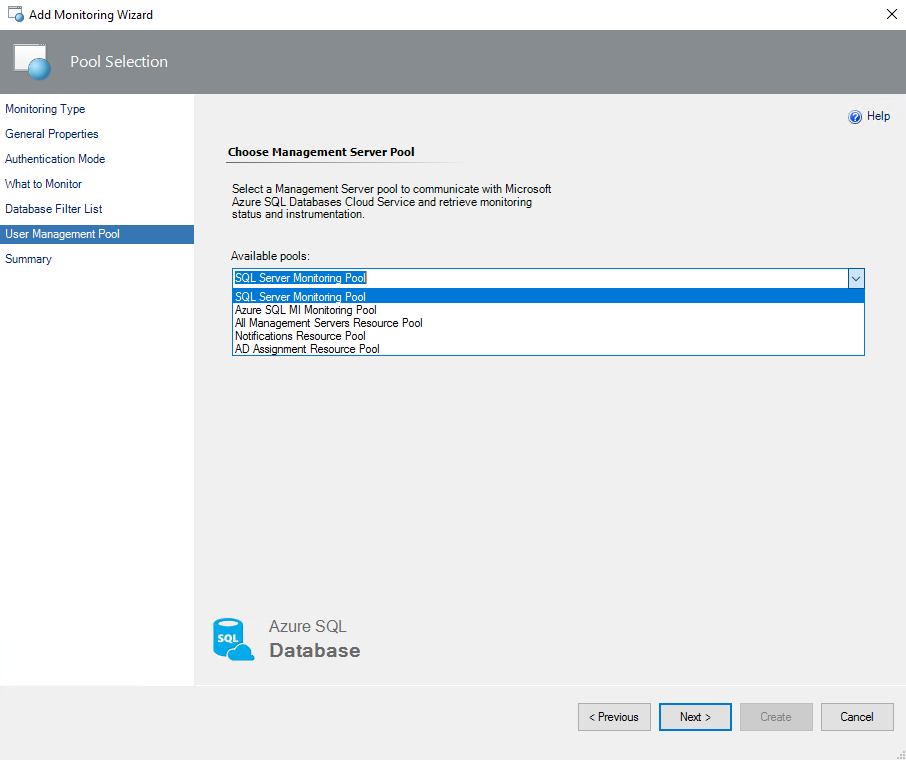
On User Management Pool, select a pool that has management servers, and then select Next.

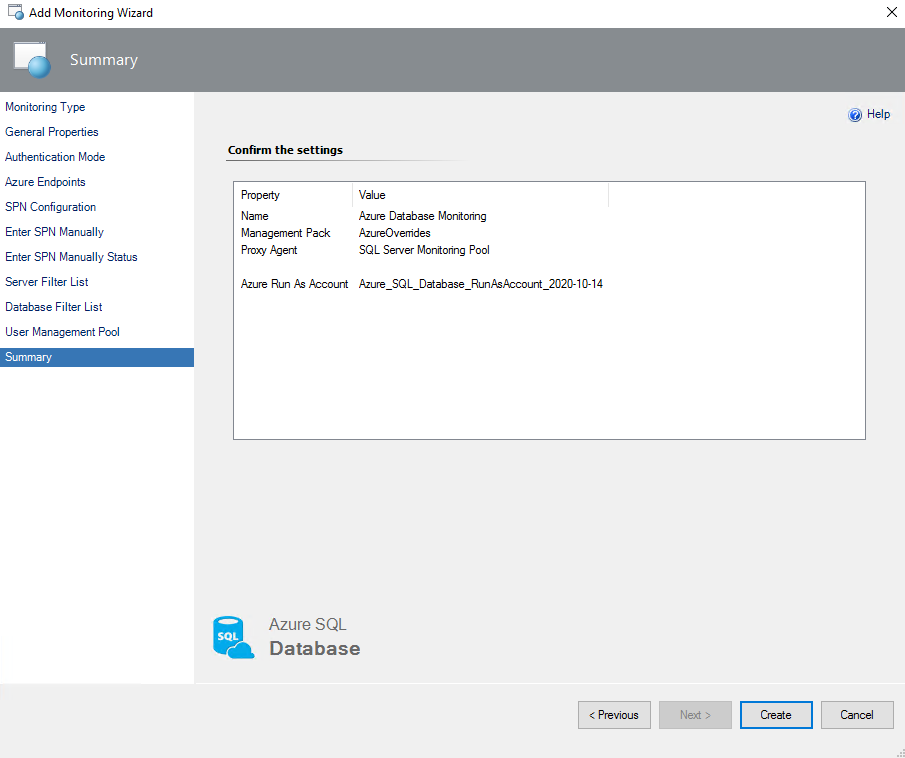
On Summary, review the connection settings, and then select Create.
To set up T-SQL monitoring when you use Azure SPN, create a separate user for every monitored database. Grant the user the dbmanager role by running the following queries:
/*Run this on [master] database.
Replace the 'ApplicationName' parameter with that specified in the Application Name field. See figure above.*/
CREATE USER [ApplicationName] FROM EXTERNAL PROVIDER;
exec sp_addrolemember 'dbmanager', 'ApplicationName';

/*Run this on all [user] databases.
Replace the 'ApplicationName' parameter with that specified in the Application Name field. See figure above.*/
CREATE USER [ApplicationName] FROM EXTERNAL PROVIDER;
GRANT VIEW DATABASE STATE TO [ApplicationName];
To run these queries in SQL Server Management Studio, connect to the Azure SQL Server instance as Administrator for Microsoft Entra.
After you assign permissions to the Azure SPN on each database, T-SQL monitoring works in REST and T-SQL mode.
For the correct T-SQL monitoring of geo replicas, grant the SQL Administrator right on each replica server.
Set up T-SQL monitoring
T-SQL is intended to monitor specific Azure SQL Database servers. When you select this mode, the monitoring workflows, including discoveries, rules, and monitors, use T-SQL queries in data sources.
Note
Each workflow data source creates a new SQL connection for every pair of SQL Server credentials (username and password). SQL connections are counted for database transaction units and affect billing. For more information, see Resource limits for Azure SQL Database and Azure Synapse Analytics servers.
To monitor Azure SQL Database instances by using T-SQL queries:
In the System Center Operations Manager console, go to Authoring > Management Pack Templates. Right-click Azure SQL Database Monitoring and select Add Monitoring Wizard.
On Select Monitoring Type, select Azure SQL Database Monitoring, and then select Next.
On General Properties, enter a new name and description. For Select destination management pack, select a management pack to store the template. Then select Next.
For Management pack, to create a new management pack, select New and follow the instructions in the wizard.
On Authentication Mode, select SQL Server, and then select Next.
On What to Monitor, select Add Server, and then select Next.
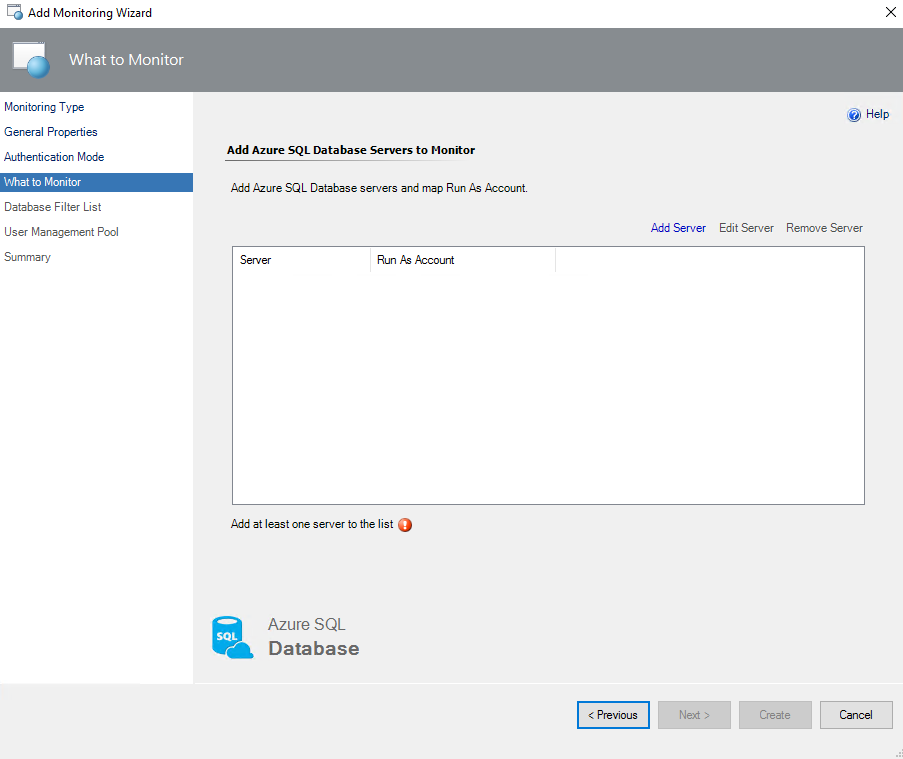
On Server Configuration, for Server Name, enter the name of the Azure SQL Database server that you want to monitor, select a Run As account that's associated with the SQL Server credentials, and then select OK. The serveradmin role is required.
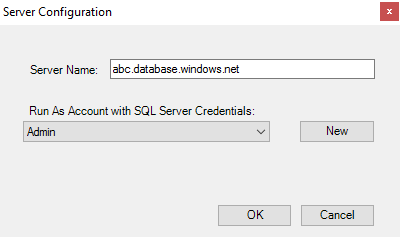
If you want to create a new Run As account, select New, and then enter a new Run As account name and credentials for the SQL Server instance that you want to monitor.
For more information on how to create a new SQL Server authentication login, see Authorize database access to SQL Database, SQL Managed Instance, and Azure Synapse Analytics.
Select Next.
Optionally. on Database Filter List, select the filtering mode, which can be either Exclude or Include. Select a filtering mask type, which can be either Wildcard or Regular Expression. Enter filtering masks, which should match database names that you want to exclude from or include in the monitoring list. Select Add, and then select Next.
A Wildcard filtering mask type can't end with
.or space characters, can't contain<,>,%,&,:,\,/,?, or control characters, and it can't have more than 128 characters.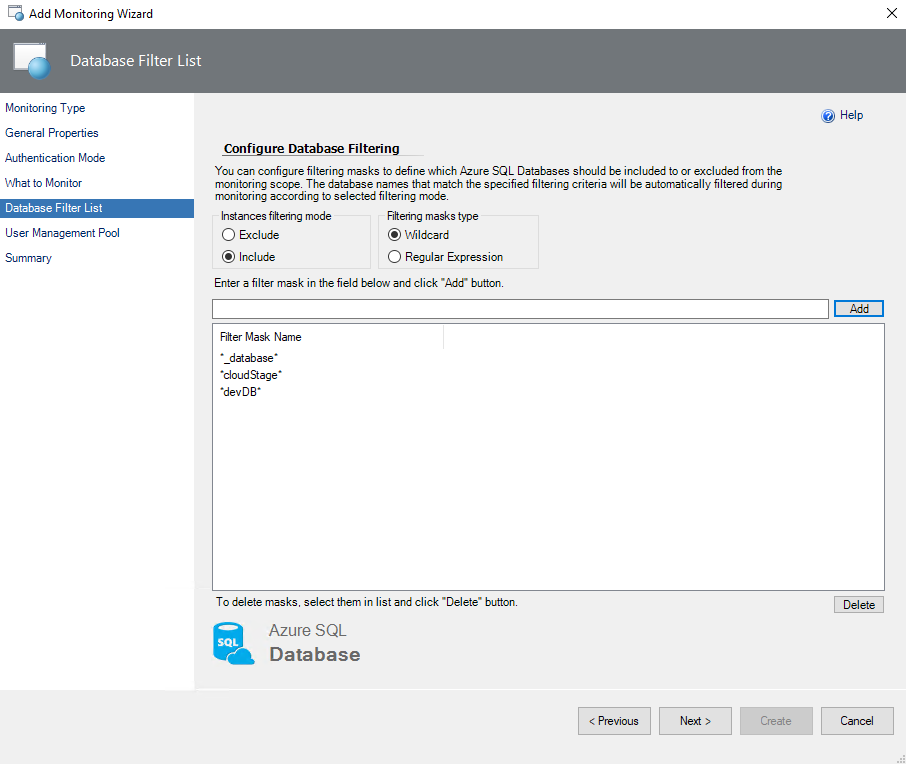
For example, if you select the Exclude option and set the dev, test, stage, and dbnotmon masks, the monitoring behavior works as described in the following table:
Database name Monitored status dev Not monitored dev_sales Not monitored sales_dev Monitored test Not monitored test_sales Not monitored sales_test Not monitored stage Not monitored stage_dev Monitored dev_stage Not monitored dbnotmon Not monitored dbnotmon_sales Monitored sales_dbnotmon Monitored The Regular Expression filtering mask type supports .NET regular expression patterns.
If you want to remove an existing mask, select the mask name, and then select Delete.
On User Management Pool, select a pool that has management servers, and then select Next.
On Summary, review the connection settings, and then select Create.