Configure guest clusters in SDN through VMM
This article explains how to configure guest clusters in SDN using System Center Virtual machine Manager (VMM).
With the introduction of the network controller, VMs that are connected to the virtual network are only permitted to use the IP address that network controller (NC) assigns for communication. NC doesn't support floating IP addresses, which are essential for technologies such as Microsoft Failover Clustering to work.
You can enable this feature by emulating the floating IP functionality through the Software Load Balancer (SLB) in SDN.
VMM supports guest clustering in SDN through an Internal Load Balancer (ILB) Virtual IP (VIP). The ILB uses probe ports, which are created on the guest cluster VMs to identify the active node. At any given time, the probe port of only the active node responds to the ILB and all the traffic directed to the VIP is routed to the active node.
Before you start
Ensure the following prerequisite:
Guesting clustering is managed through the SDN NC. Ensure you have set up SDN and deployed NC and SLB.
Procedure - configure guest clusters
Use the following steps:
Create a cluster for your VMs using the information provided in this article.
Note
Cluster must have a ProbePort parameter set to a port of your choice. This port is required while configuring the VIP template in the next step. Note the reserved IP address you're using for this cluster. This IP will be required later while creating a VIP using the VIP template.
Create a VIP template. In the VMM console > Fabric > Networking > VIP Templates, right-click and select Add VIP Template.
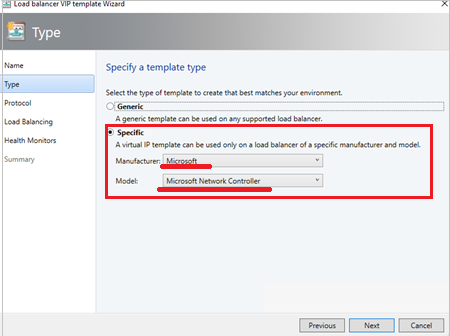
In Type, under Specify a template type, select Specific. Select Microsoft from the Manufacturer dropdown and Microsoft Network Controller from the Model dropdown.
Select Next.
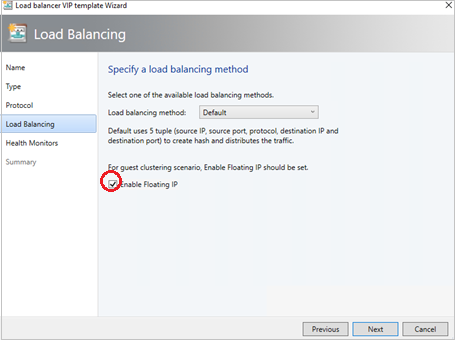
In Load Balancing, select the Enable Floating IP checkbox.
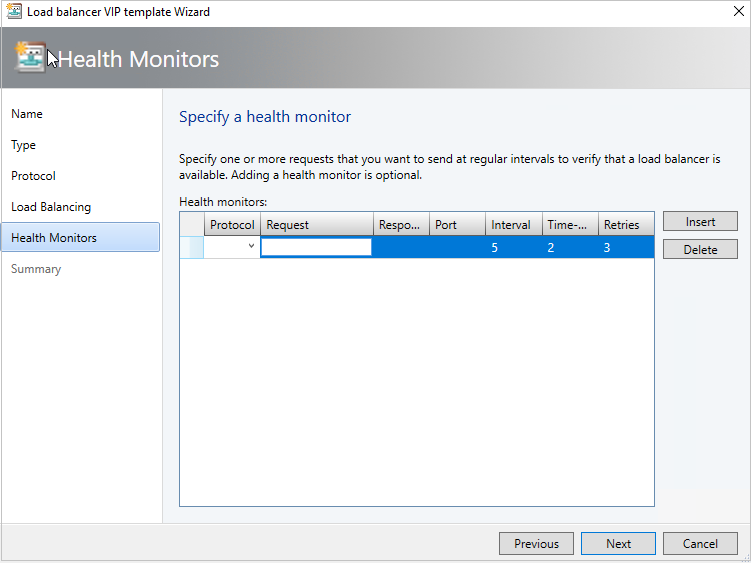
In Health Monitor, add the probe that would be used on the guest cluster VMs. Here, you must add the same port that was configured while clustering the hosts in the previous step.
Using PowerShell, create a VIP using the VIP template.
Note
As explained at the beginning of this article, an Internal Load Balancer VIP is being implemented to support Guest Clustering. The PowerShell script for creating a VIP from the VIP template to Load Balance Internal Network traffic is provided below.
Use the sample script here to create a VIP and load balance the internal network. Modify the parameters as required, based on the following details:
- LBServiceName – Name of the Network Controller service.
- VipMemberNames – Names of the VMs in the cluster.
- VipNetworkName – Name of the tenant network.
- VipAddress – The reserved IP address from the tenant network, which was used in step 2 as the IP address for the VM cluster.
- VipTemplateName – Name of the VIP template created in step 3 above.
- VipName – Any friendly name you want to refer to the VIP by.
Feedback
Coming soon: Throughout 2024 we will be phasing out GitHub Issues as the feedback mechanism for content and replacing it with a new feedback system. For more information see: https://aka.ms/ContentUserFeedback.
Submit and view feedback for