Access data from Azure Blob Storage by using the SFTP protocol
You can use the SFTP protocol to access, transfer, and manage files on remote systems. SFTP enables your company to more securely collaborate with external consultants who need to transfer the log files in an encrypted form.
SFTP support for Azure Blob Storage
The SFTP protocol transfers data using an SSH connection. For authentication, you can use public-key authentication with certificates or Azure-generated passwords.
Blob Storage supports the SFTP protocol on storage accounts enabled with a hierarchical namespace, such as a Data Lake Storage Gen2 account. You can use SFTP clients such as OpenSSH or PuTTY to connect securely from anywhere and to interact with Azure Blob Storage account as a file system.
Note
For SFTP-enabled Azure storage accounts, you can't use GRS or geo-zone-redundant storage (GZRS).
With an SFTP-enabled storage account, you can create local users and grant them access to multiple root containers. You can specify Read, Write, Create, List, and Delete permissions for each container. The SFTP clients use these local users for authentication purposes. You can also configure a user's home directory so the SFTP client can connect to that directory.
Note
SFTP clients can't use Microsoft Entra authentication or Shared Access Signature (SAS).
Use the following procedure to enable support for SFTP and create local users and then configure their container permissions:
In the Azure portal, navigate to your storage account (you can also enable SFTP in the account-creation process).
Under Settings, select SFTP, and then select Enable SFTP.
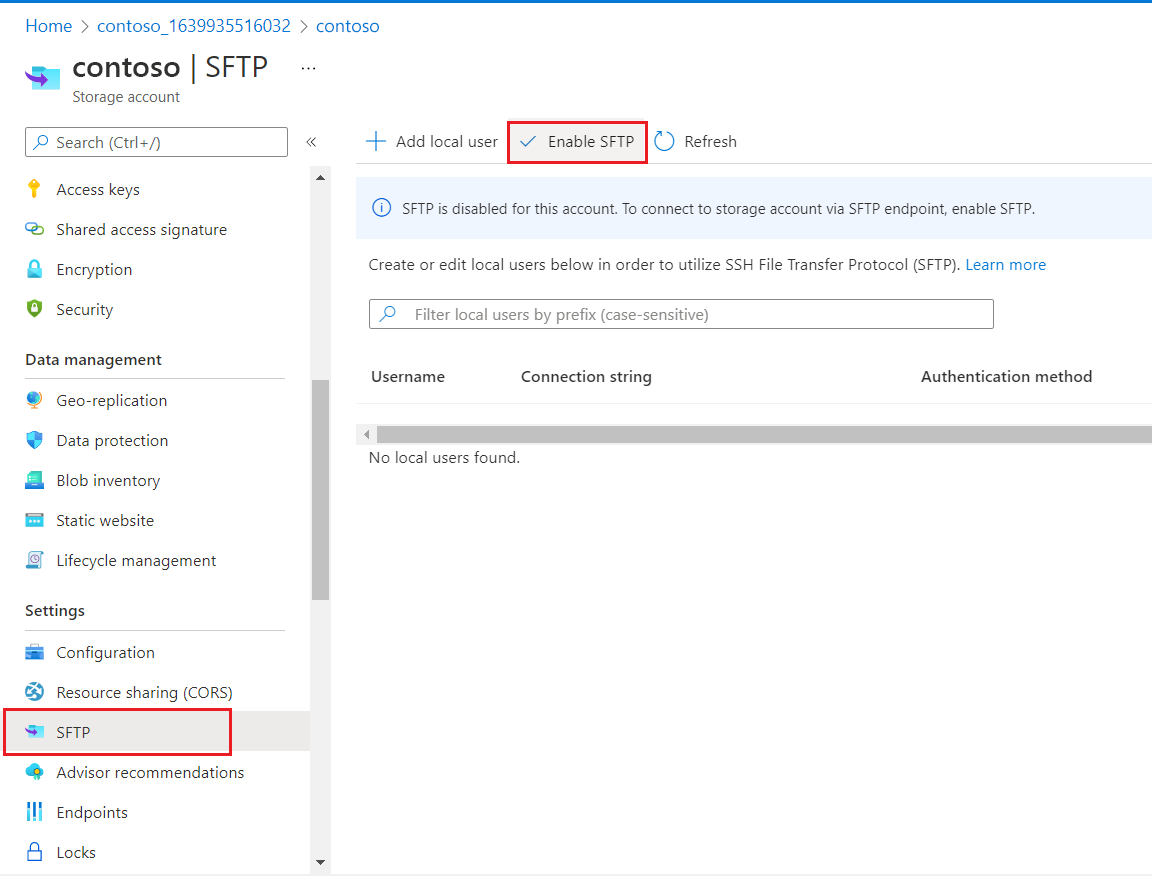
While you're still in the SFTP settings, select Add local user.
In the Add local user configuration pane, add the name of a user, and then select the method (or methods) of authentication that you'd like to associate with this local user. You can associate a password and/or an SSH key.
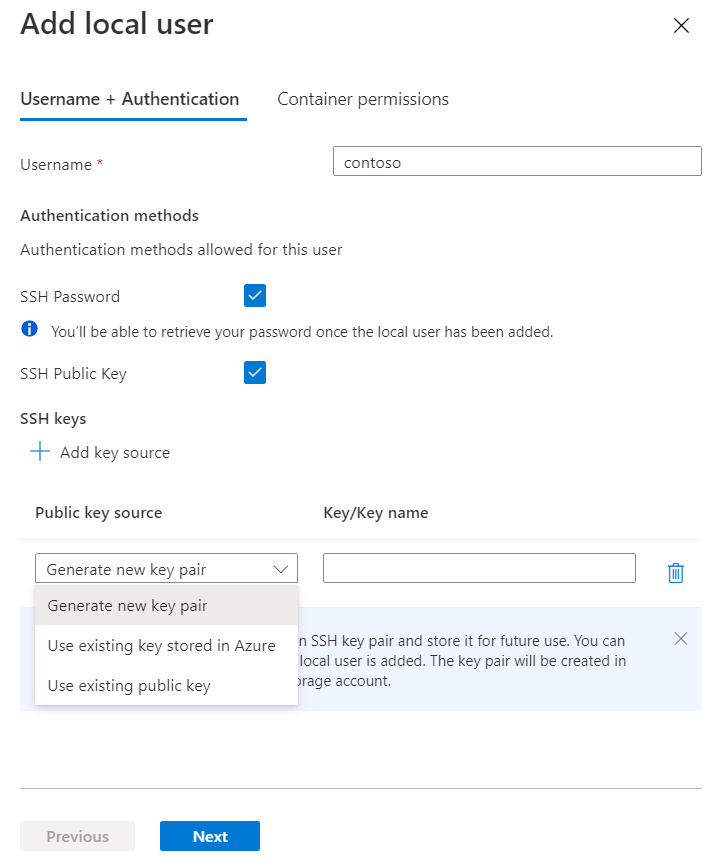
Select Next to open the Container permissions tab.
On the Container permissions tab, select the containers that you want to make available to this local user, then select the types of operations that you want to enable this local user to perform.
In the Home directory edit box, enter the name of the container or the directory path (including the container name) that will be the default location associated with this local user.
Select the Add button to add the local user.
Note
If you enabled password authentication, the Azure-generated password appears in a dialog box after the local user has been added. You can't retrieve this password later, so make sure to copy the password and store it in a place where you can find it.
Use an SFTP client to establish an SSH connection to your Azure storage account.
# Connect to Blob Storage account with a local user that has a home directory

sftp <myaccount>.<myusername>@<myaccount>.blob.core.windows.net

# Connect to Blob Storage account with a local user that doesn’t have a home directory

sftp <myaccount>.<mycontainer>.<myusername>@<myaccount>.blob.core.windows.net

# List the content in the azure storage account container

ls

# Download files from the storage account

Get <nameoftheblob>
Note
Accounts that have SFTP enabled don't support GRS, GZRS, read-access geo-redundant storage (RA-GRS), and read-access geo-zone-redundant storage (RA-GZRS).
To access Blob Storage using SFTP, your firewall must allow traffic on TCP port 22. You can optimize performance if you're using an SFTP client that supports multiple concurrent connections. Some SFTP clients support a higher buffer size, which improves the upload performance. However, the maximum upload file size is limited by the client message size.