Exercise – Set up agent settings and access
In this exercise, you play the role of Reed and configure how agents operate in your tenant using the Agent settings. You set up agents created by Microsoft, external publishers, and your organization. These centralized controls help enforce security, compliance, and governance while enabling collaboration and productivity.
For example, if an agent is published with sharing set to Specific users and groups only those users can access it. If you update the setting after publishing, access updates accordingly.
In this exercise, you configure the following settings:
Agent types: Set up what types of agents users can view in your organization. By managing agent types, you can control which types of agents users can create and use in your organization.
Set up users to access these agents: Control who can create and use agents, enabling a staged rollout of agents by using security groups. You can allow all users, no users, or specific users and groups.
Set up sharing of agents: Control who can share agents with others in the organization. You can allow all users, no users, or specific users and groups.
Set up the agent types for user access
In this task, you set up the agent types that users can view and use in the store. For example, you can allow agents built by Microsoft and your organization while blocking agents from external partners. Users can view and use only the agents types that are allowed in these settings.
Open the Microsoft 365 admin center in your browser.
Select Agents > Settings > Allowed agent types.
In Choose which types of apps and agents users can install, select one of the following options:
Allow apps and agents built by Microsoft
Allow apps and agents built by your organization
Allow apps and agents built by external publishers, and then select All external publishers
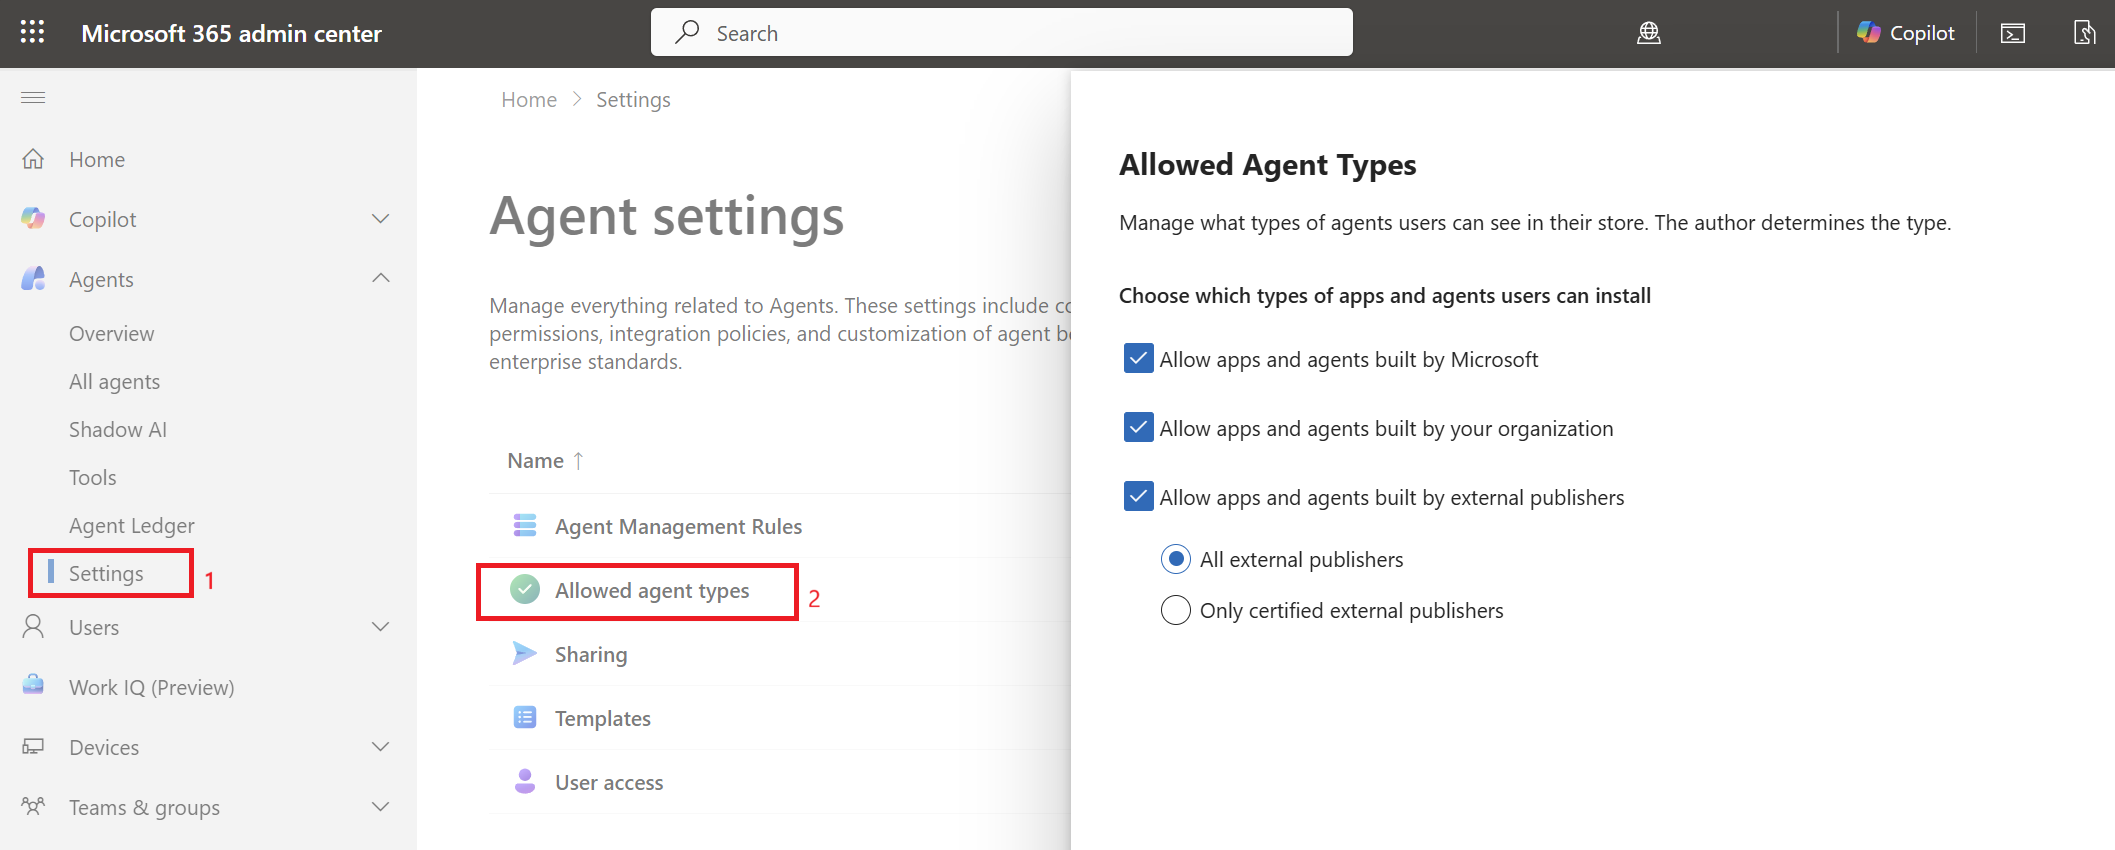
Select Save.

Set up user access
In this task, you set up which users or groups can use agents. For example, when you want to do a staged rollout of agents by security groups. Users who are restricted from accessing agents can't view or use any agents in the store. You set up the Zava Procurement team to have access to agents.
Open the Microsoft 365 admin center in your browser.
Select Agents > Settings > User access.
Select Specific users and groups.
Search for the Procurement team group and select it. You can also add groups such as Marketing, and HR.
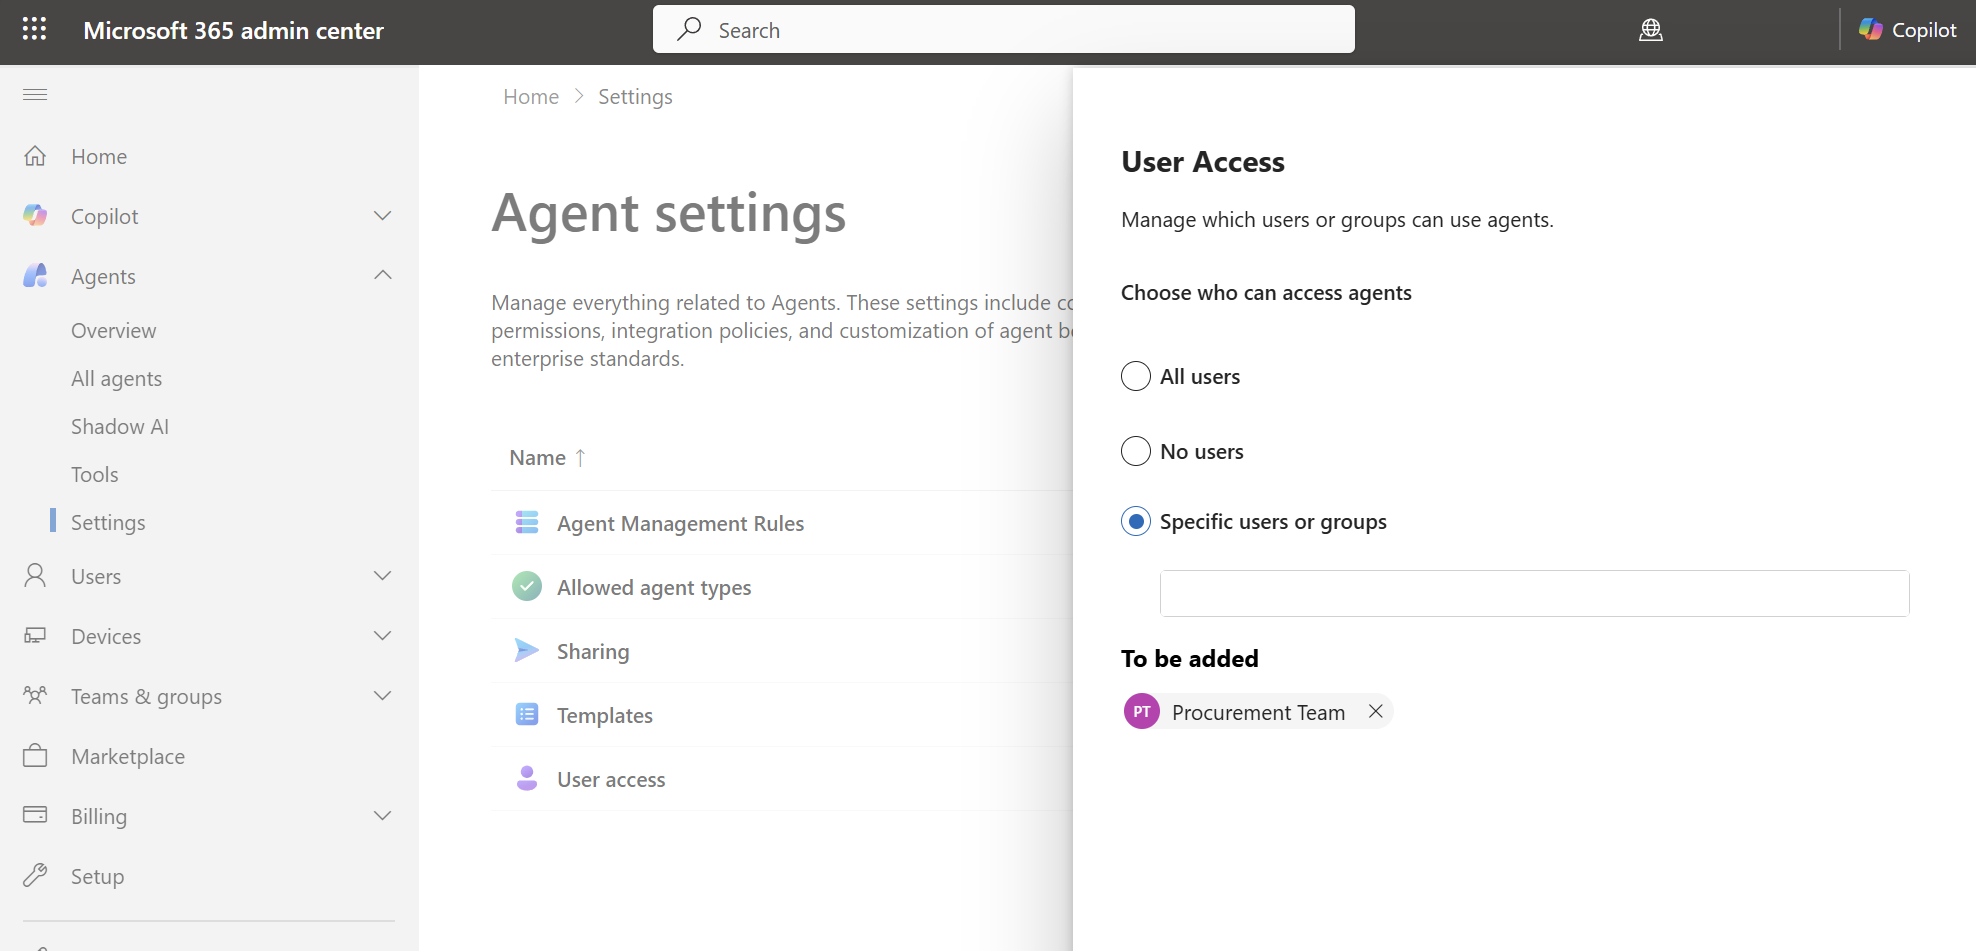
Select Save.

Set up the agent sharing
In this task, you configure who can share agents across the organization. Users who are restricted from sharing with the entire organization can still share agents with individual users. Only agents created with Microsoft 365 Copilot Agent Builder are available for sharing.
Open the Microsoft 365 admin center in your browser.
Select Agents > Settings > Sharing.
Select Specific users and groups.
Search for the Procurement team group and select it. You can also add groups such as Marketing, and HR.
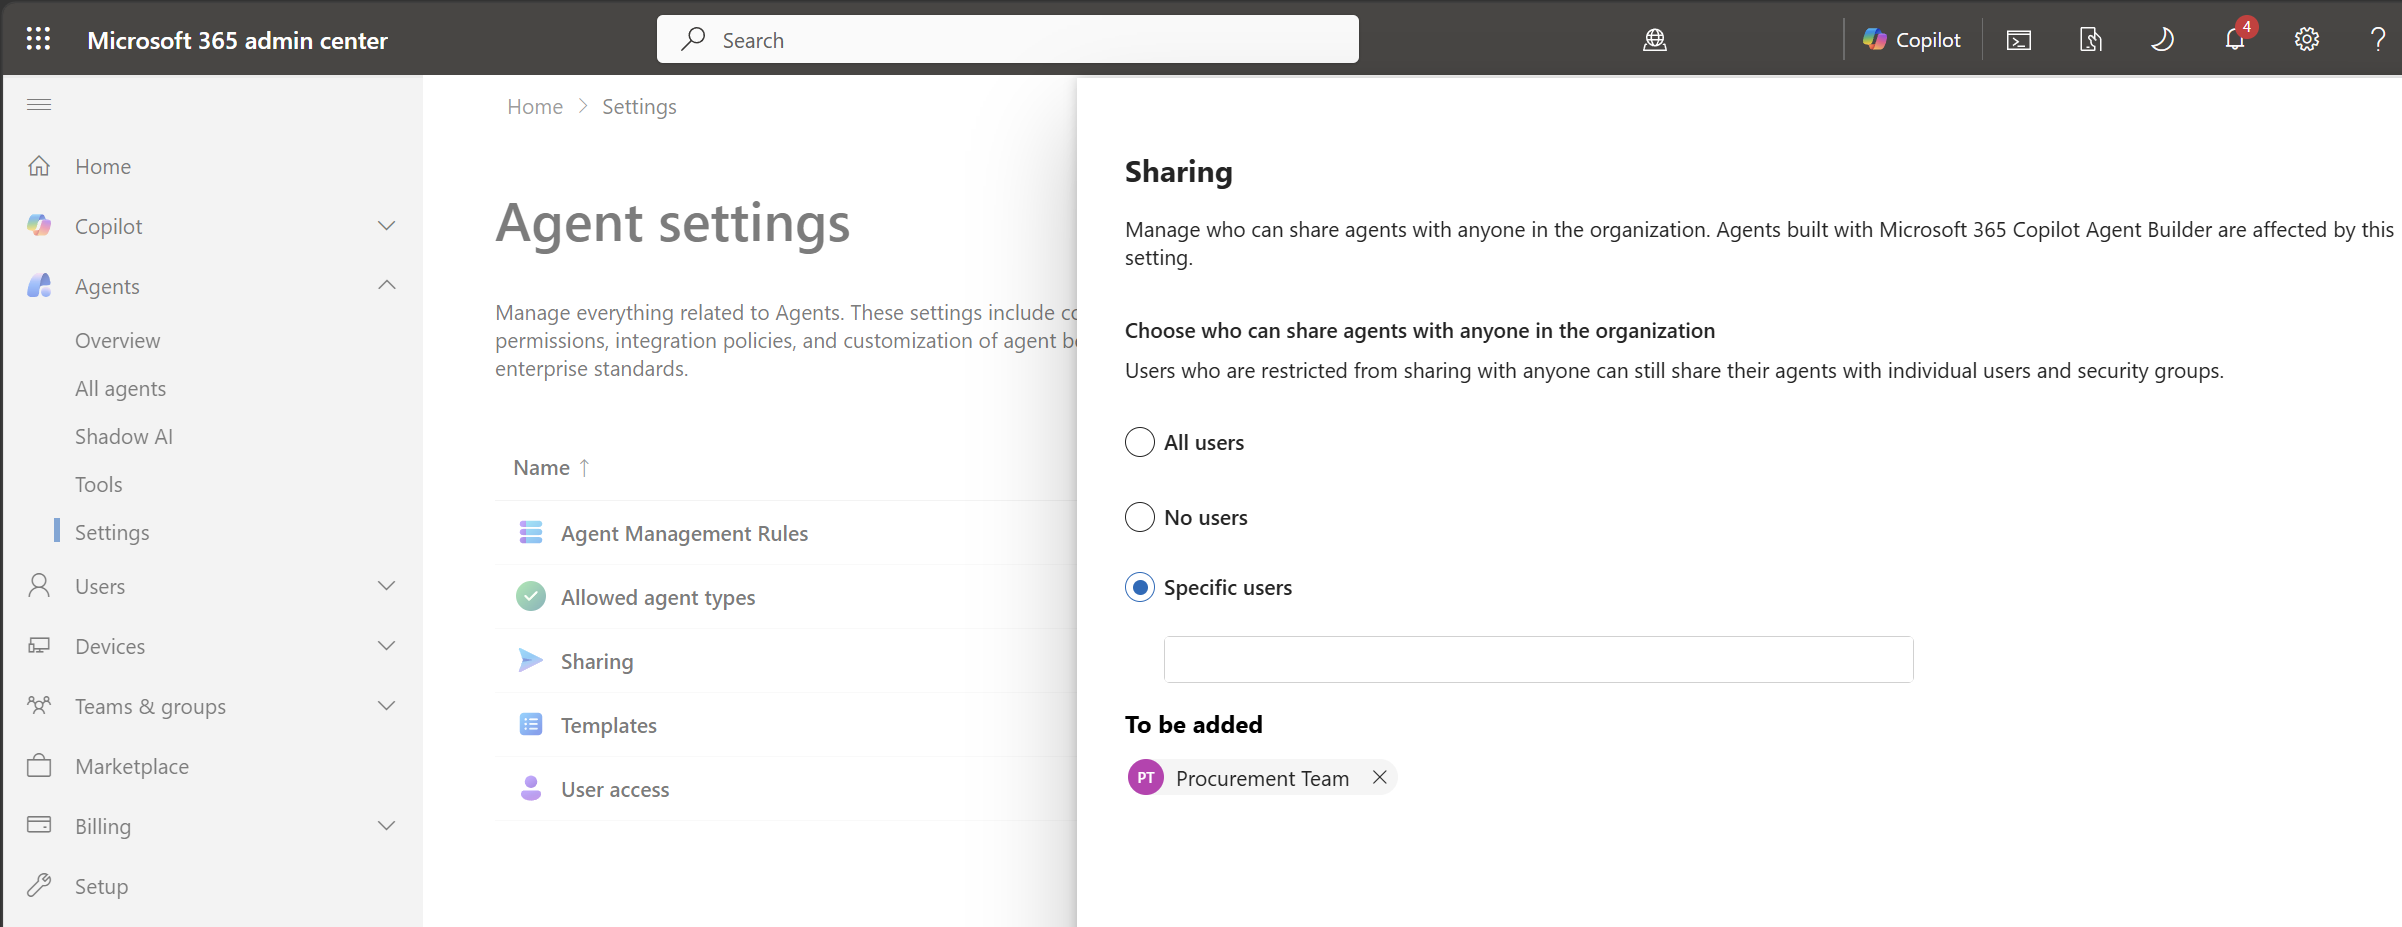
Select Save.

When an agent is activated or published, these settings apply automatically.