Check compliance status using Azure Policy
In the previous section, you saw how Azure policies can be used to easily govern your cluster by using a built-in Policy and Initiative. We also noted that the policy doesn't terminate already existing pods. We want to discover noncompliant pods so that we can take actions on them. In this exercise, we do just that.
Note
This exercise is optional. If you want to complete this exercise, you'll need to create an Azure subscription before you begin. If you don't have an Azure account or you don't want to create one at this time, you can read through the instructions so you understand the information that's being presented.
Using the Azure portal to see noncompliant pods
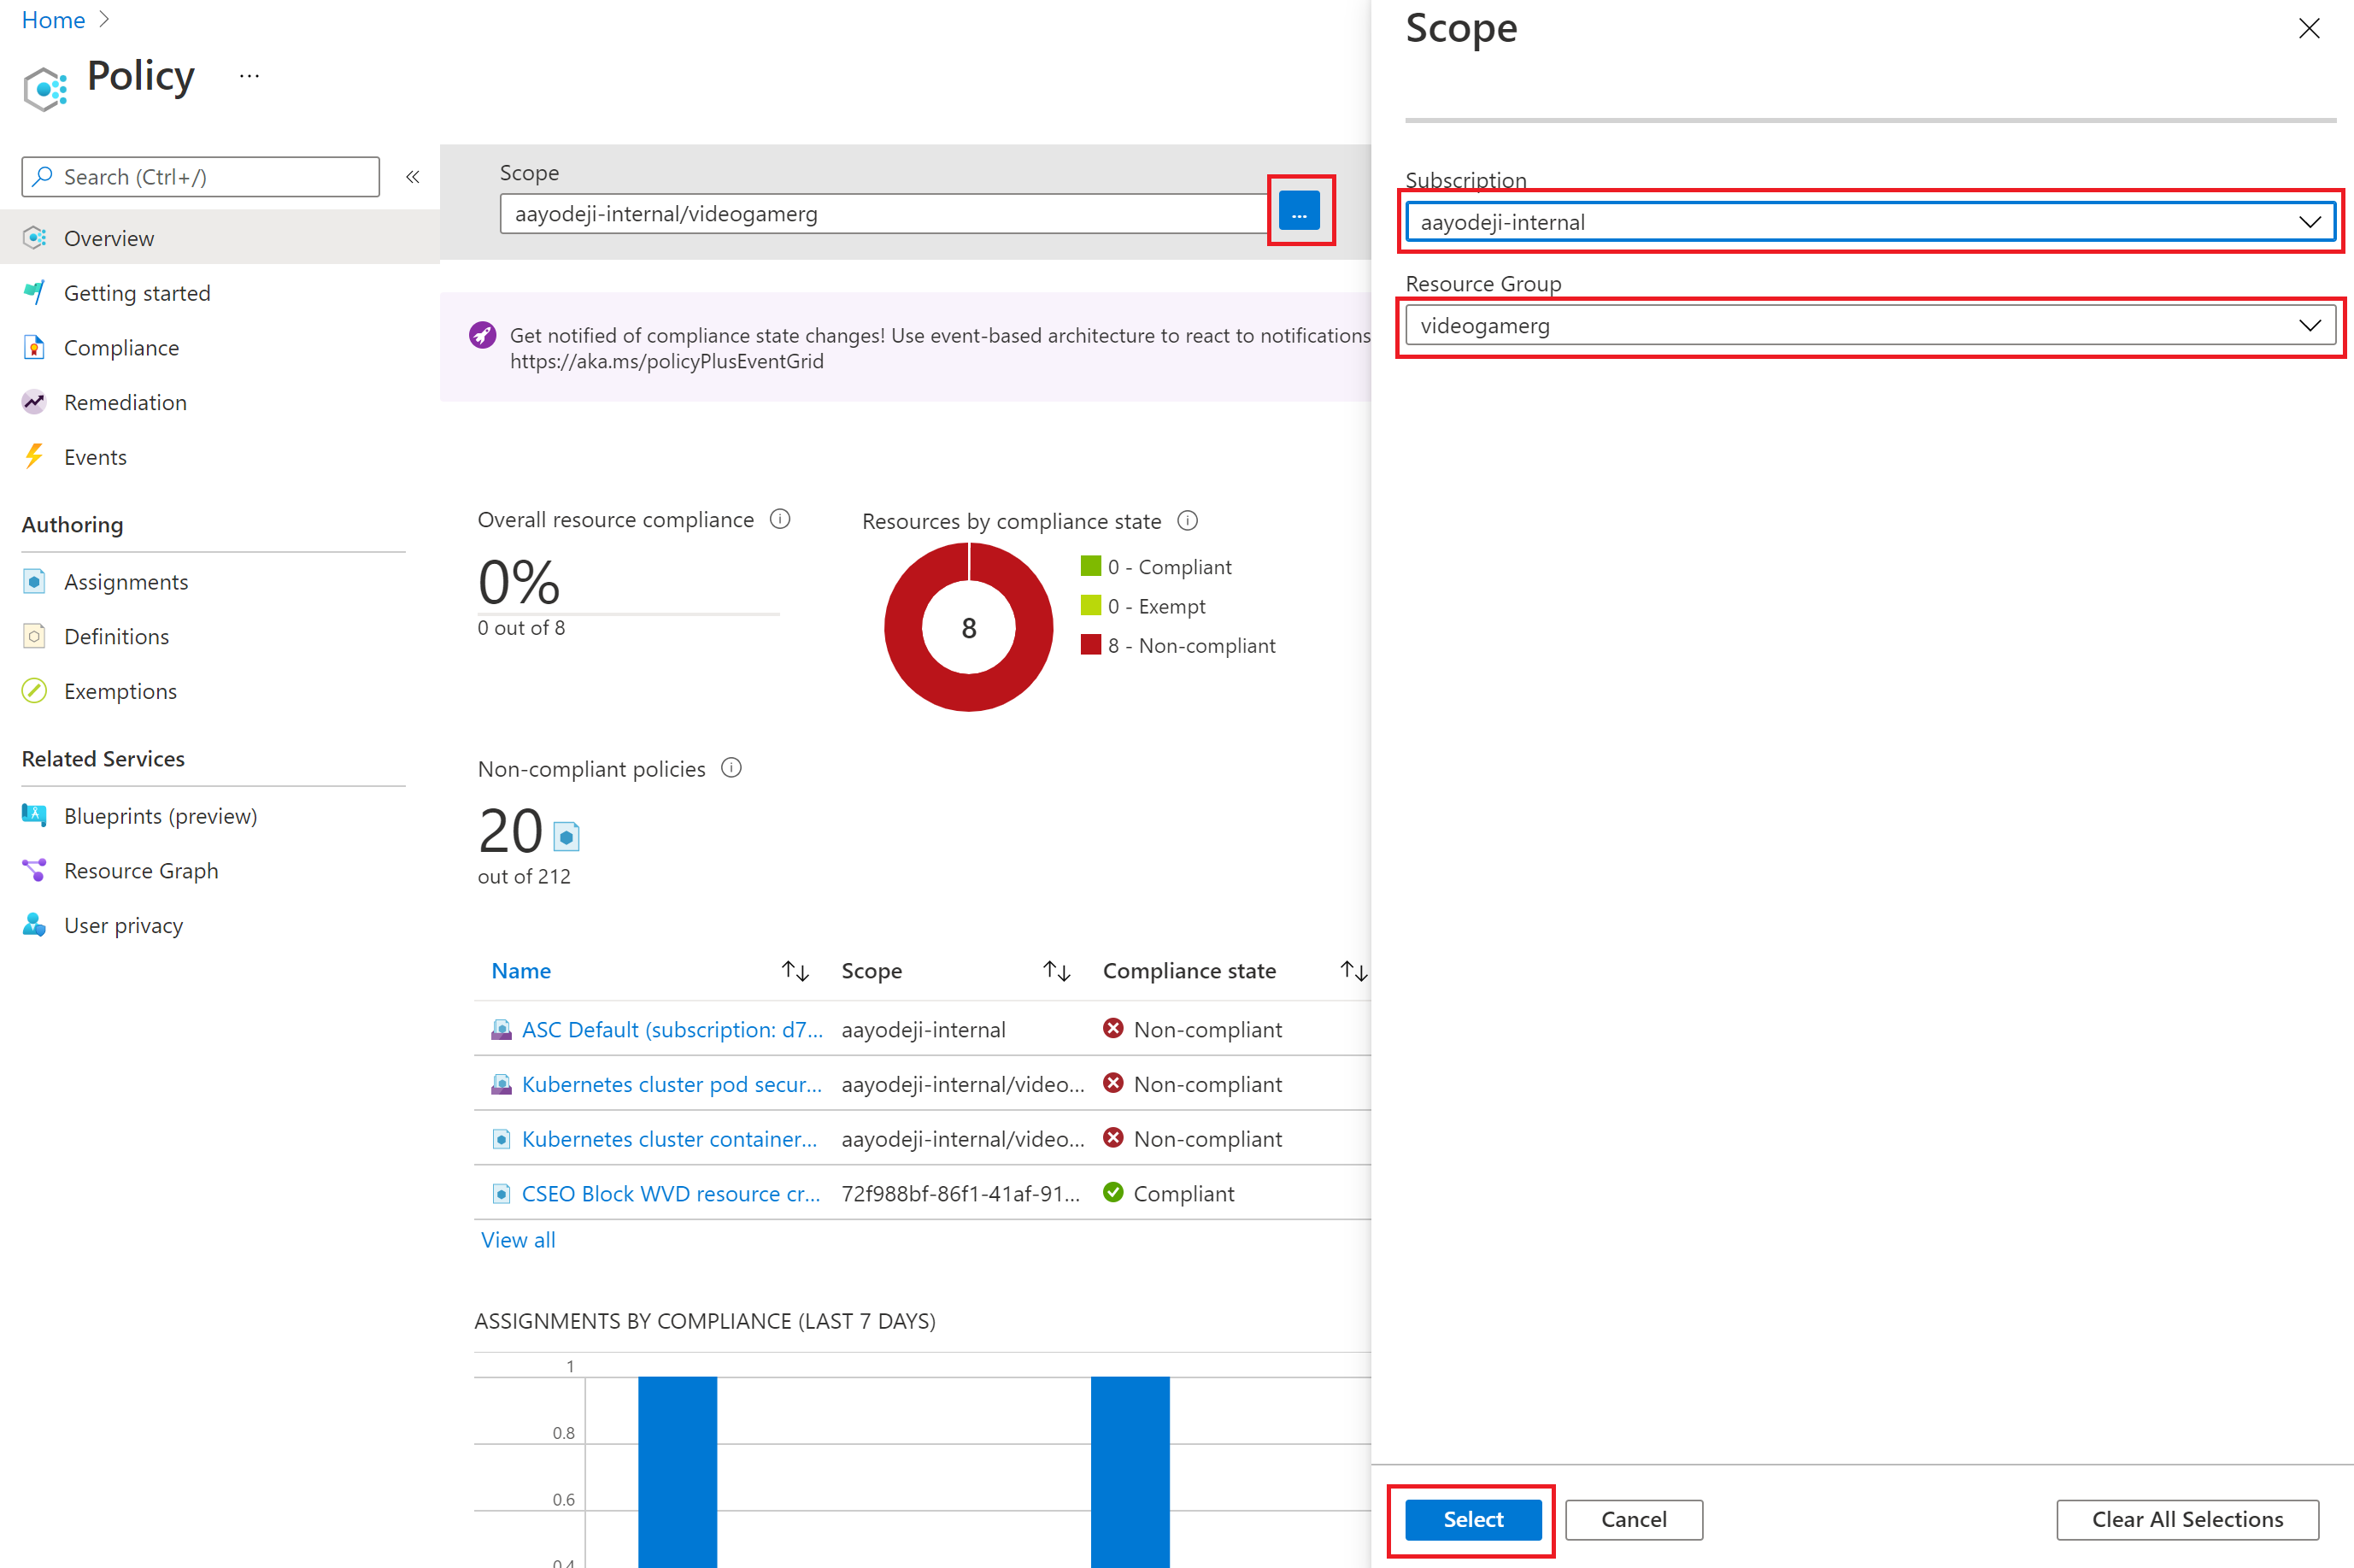
Go to the Policy page in Azure portal.
At the top, you can set the scope to your cluster resource group by clicking on the .... Select the Subscription and the resource group where the Azure Kubernetes Service (AKS) cluster is sitting and choose Select at the bottom of the page.
Note
It may take a few minutes for the non-compliant pods to show up in the portal.
Here we see that we have noncompliant resources for both the Policy and the Initiative we deployed. The resources aren't compliant with three of the policies from the Kubernetes cluster pod security restricted standards for Linux-based workloads for videogamerg initiative. Selecting that initiative shows which of the eight policies are the three that aren't compliant.
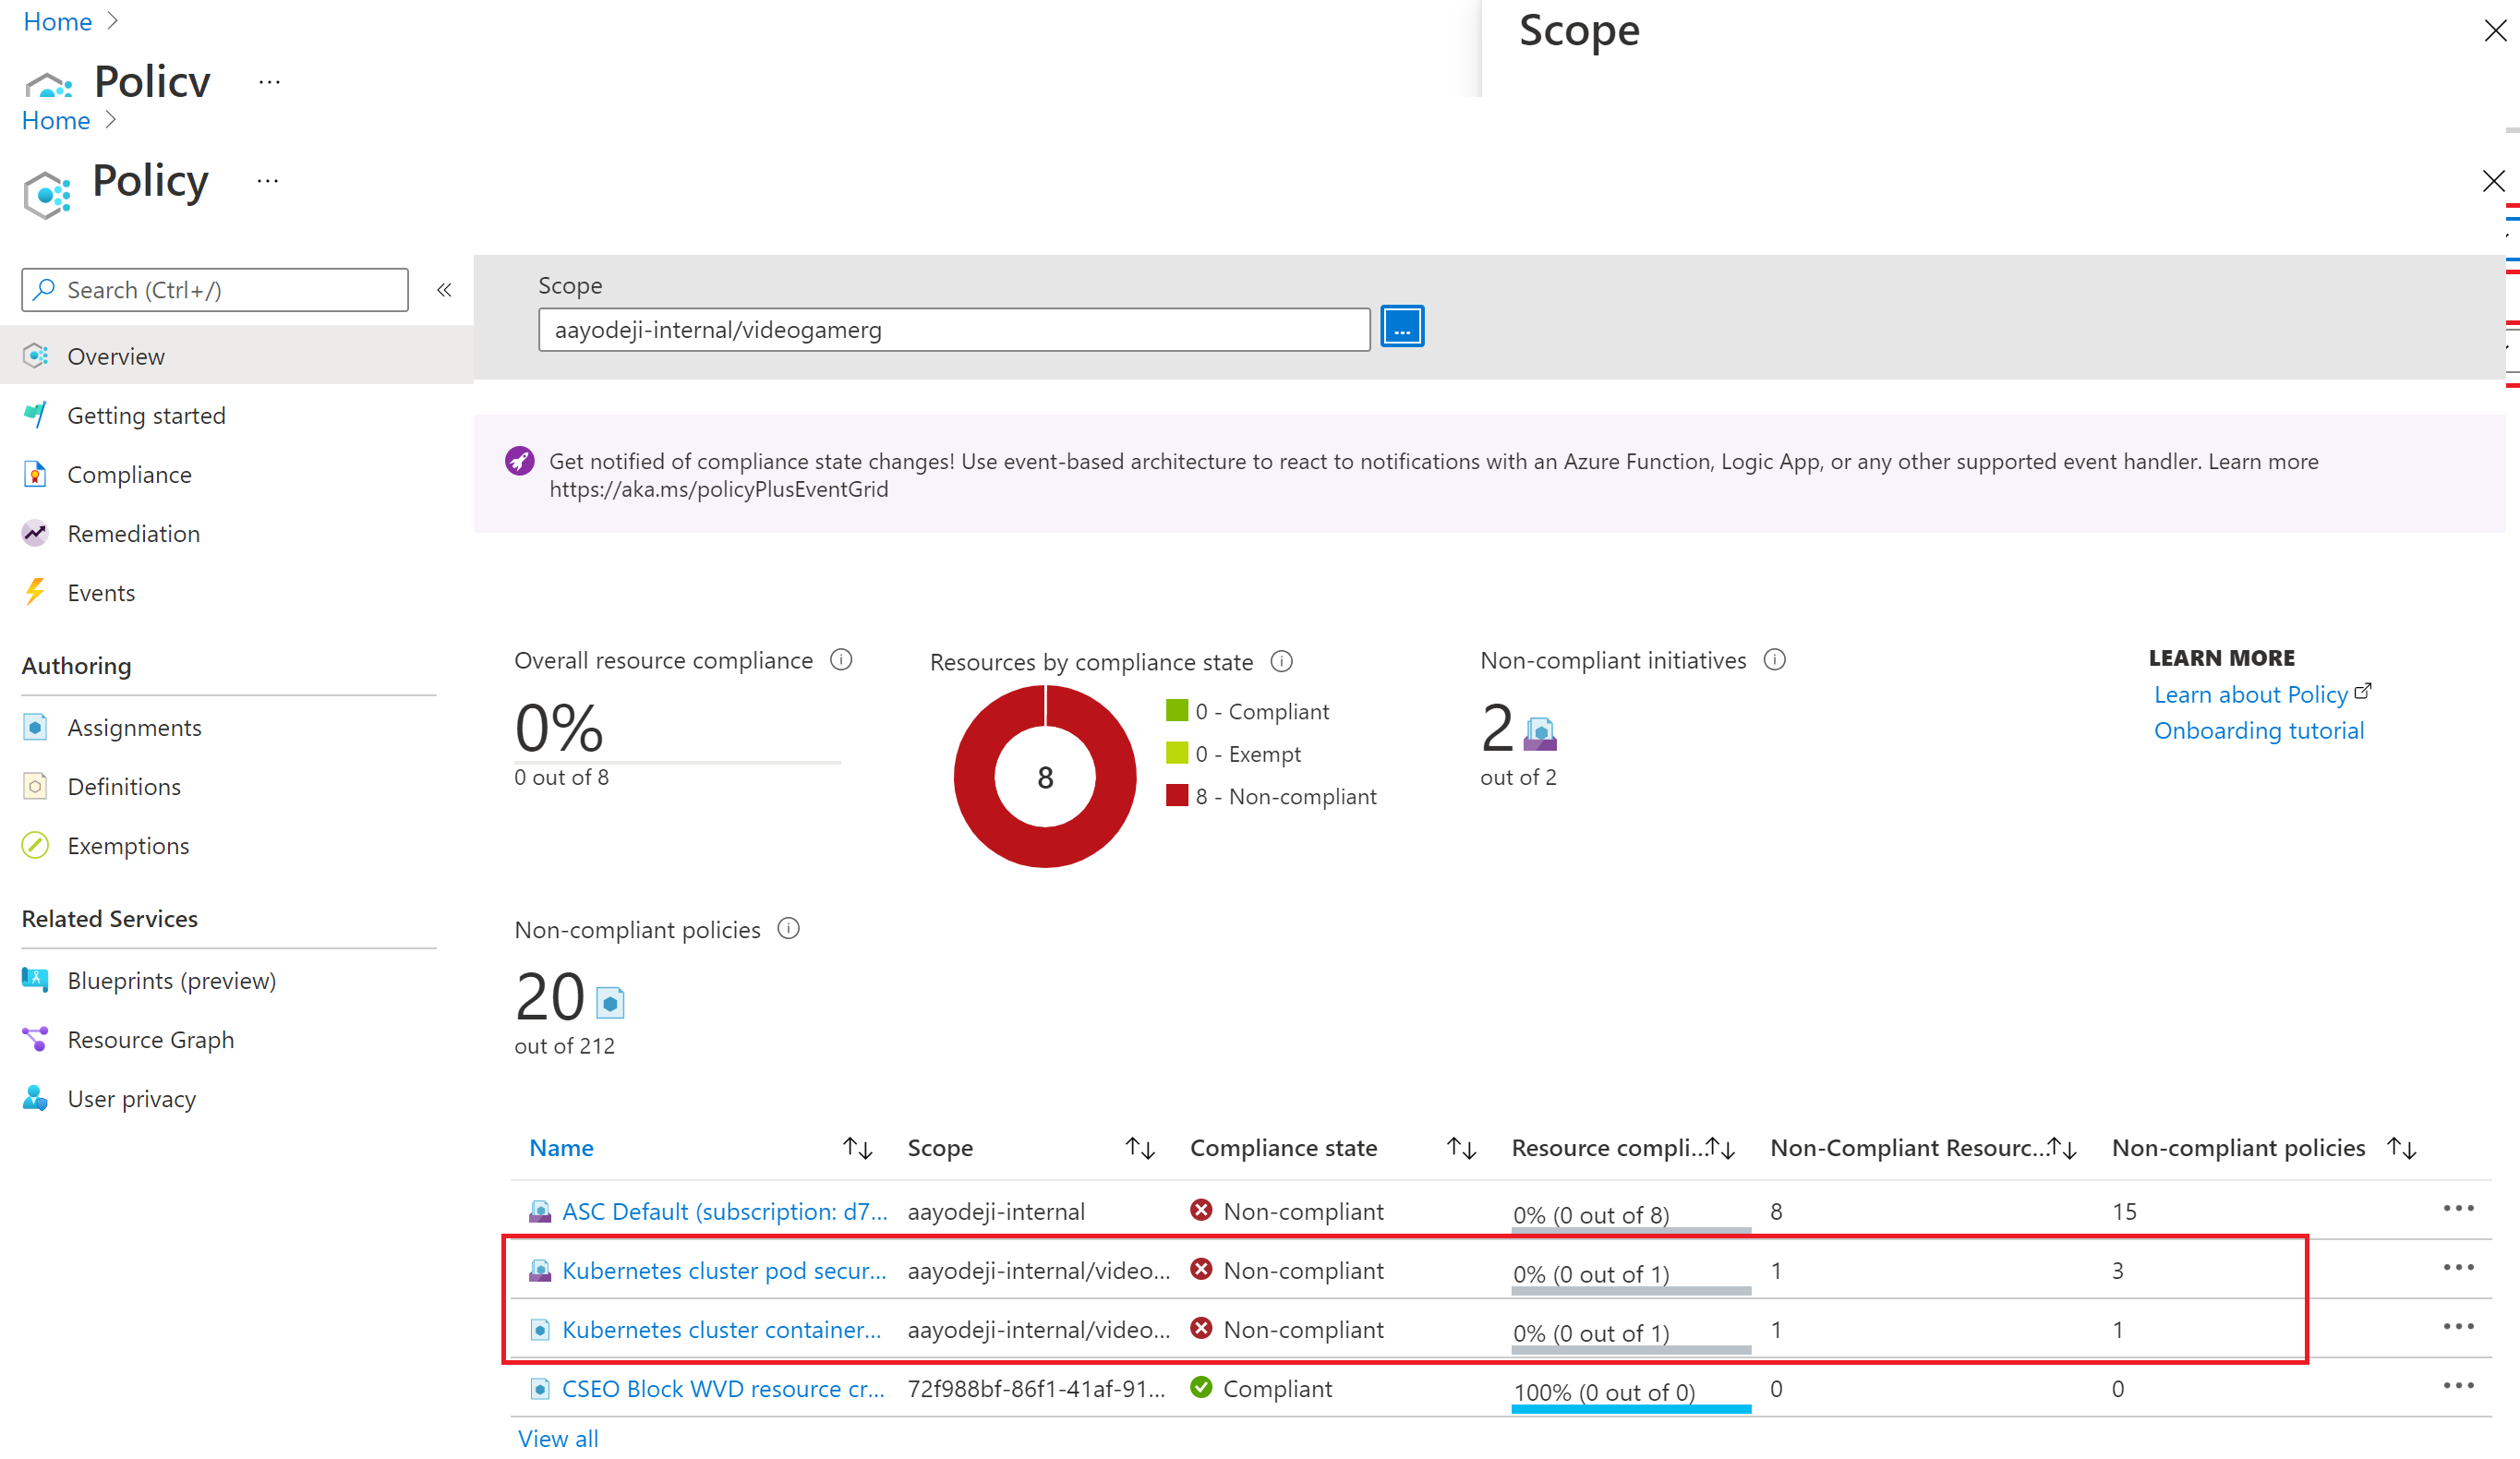
Select the Kubernetes cluster containers should only use allowed images Policy. You see the cluster that has the noncompliant pod in it
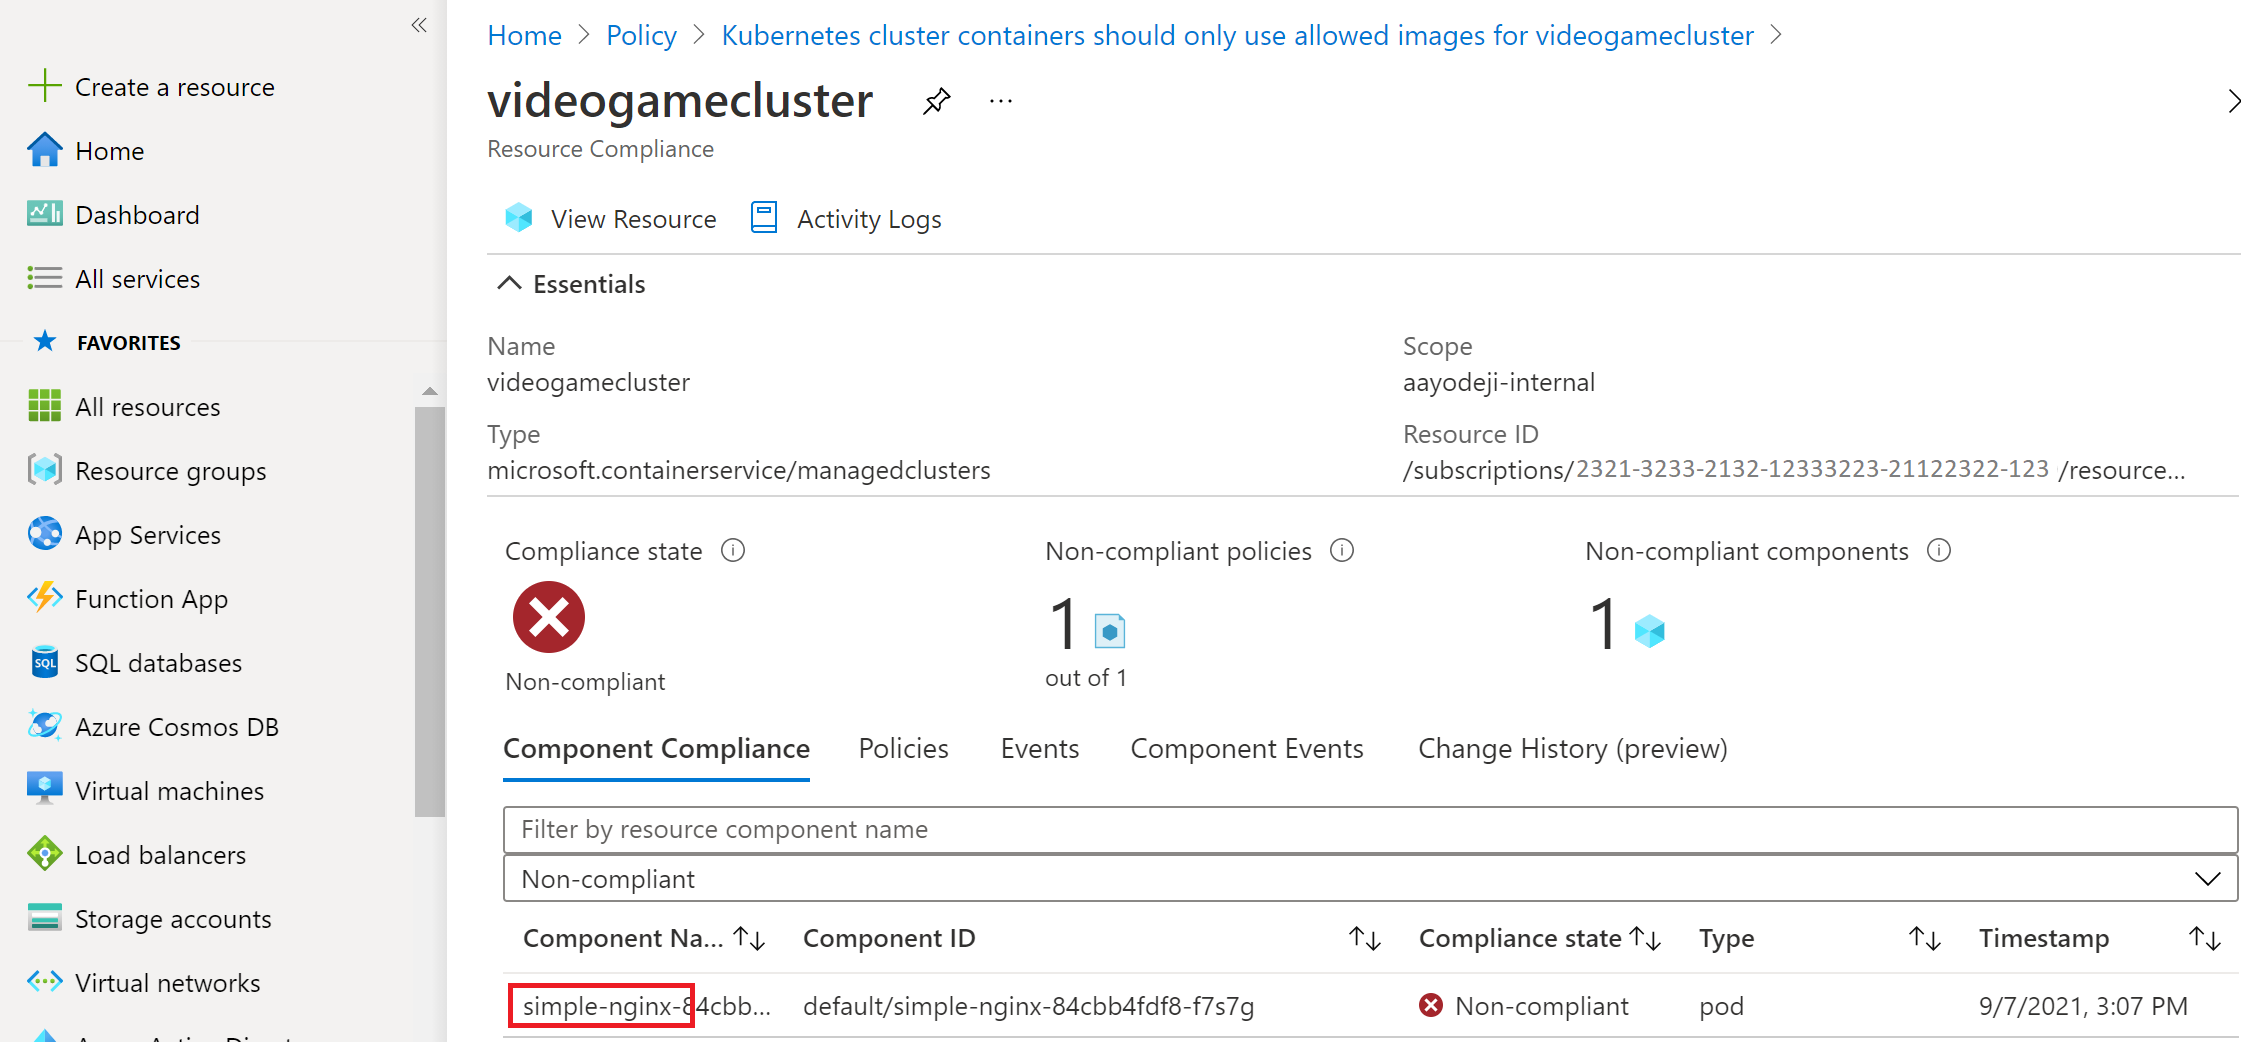
Select the cluster to get more details on which pod isn't compliant. Here you see the name of the specific pod that isn't compliant. You see that it's only the first pod that was deployed that isn't compliant. You can see that viewing these policy pages is an effective way to audit the compliance status of your cluster.


Remove the noncompliant pod and recheck compliance
Now that we found the pod that isn't compliant, we can go ahead and delete that pod. Once the pod is deleted, the Policy prevents future pods that aren't compliant with it from being deployed. The Kubernetes cluster pod security restricted standards for Linux-based workloads for videogamerg initiative is set to audit, meaning we can identify pods that aren't compliant, but wouldn't prevent the pods from being deployed. Getting our pods to comply with that initiative is beyond the scope of this course, so here we focus on fixing the Policy that we set to have the deny effect.
Open the Cloud Shell again and delete the noncompliant deployment.
kubectl delete deployment simple-nginx
It might take up to 45 minutes for the changes to reflect on the portal. After waiting, head back to the Policy to see if there are still any uncompliant pods under it. You find that your cluster is now in compliance with the Policy.

Summary
In this unit, you learned about how to use Azure portal to identify pods that aren't compliant with your policies. Then, you went ahead and deleted a pod that wasn't compliant with one of the policies. You also learned how to troubleshoot your deployments and identify pods that aren't being deployed because of a deny Policy. You learned how to use Azure portal to see noncompliant resources and which policies they aren't compliant with. You also resolved one of the issues by deleting the uncompliant pod you first created. Now that you know how to add and test a Policy and an Initiative, you can go through the other in-built policies for Kubernetes to find the ones that suit your business needs.