Summary
In this module, you learned the basics of using the Approvals Kit. You learned the difference between the Business Approvals Kit and the Approvals Connector. Additionally, you learned that using the business scenarios can help you select the Approvals Kit as the approval process, considering the requirement features for this approval scenario.
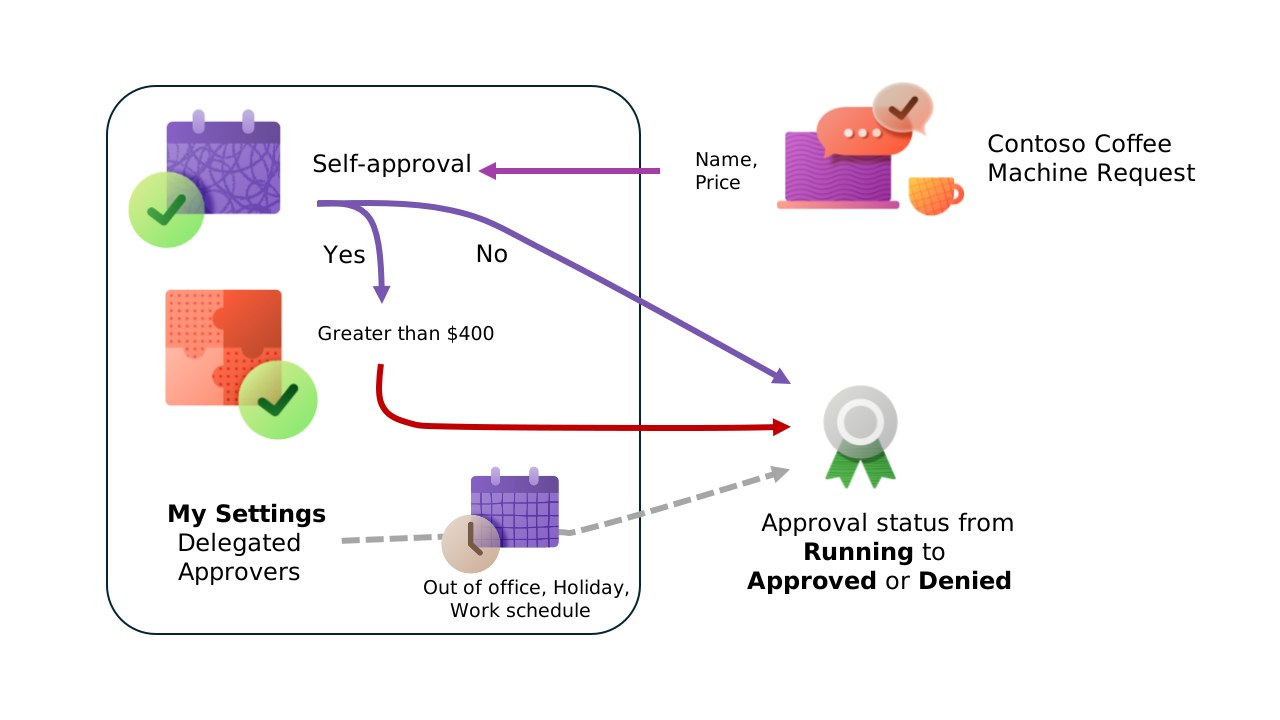
The exercises in this module demonstrated how a published workflow is combined in a Power Automate cloud flow to start the approval workflow. This cloud flow is expanded to include passing in name and price as defined application data. Then, the system uses the application data to add conditional stages to allow a manager approval stage to be requested when the value of the machine request is greater than USD 400.00.
You also completed tasks to edit and test the out-of-office and delegation settings of the Approval Kit to demonstrate handling of approval requests by delegates.
Next steps
Now that you've been introduced to using Dataverse as a trigger, another area to consider exploring would be the hundreds of templates that come with Power Automate. These templates are excellent starting points for you to build a flow that you can customize as needed when you're triggering an approval process.
Another area to explore is creating a Dataverse trigger that watches for outcomes in Dataverse approvals. One way to achieve this task is by using the Business Approval Workflow runtime table. The Approvals Kit uses the Business Approval Workflow table to manage all incoming approval requests and the related tables that are used for the request. By adding a Dataverse trigger for updates on this table, you can create a Power Automate cloud flow that's triggered on update. After using the approval data, you can use this information to update the original data source based on the outcome of the approval process.