Manage data retention
As Dataverse environments accumulate data over months and years, storage costs grow and query performance can degrade. Data retention gives administrators tools to manage the data lifecycle, so they can move inactive records to cost-efficient long-term storage or delete obsolete data entirely.
Understand data lifecycle stages
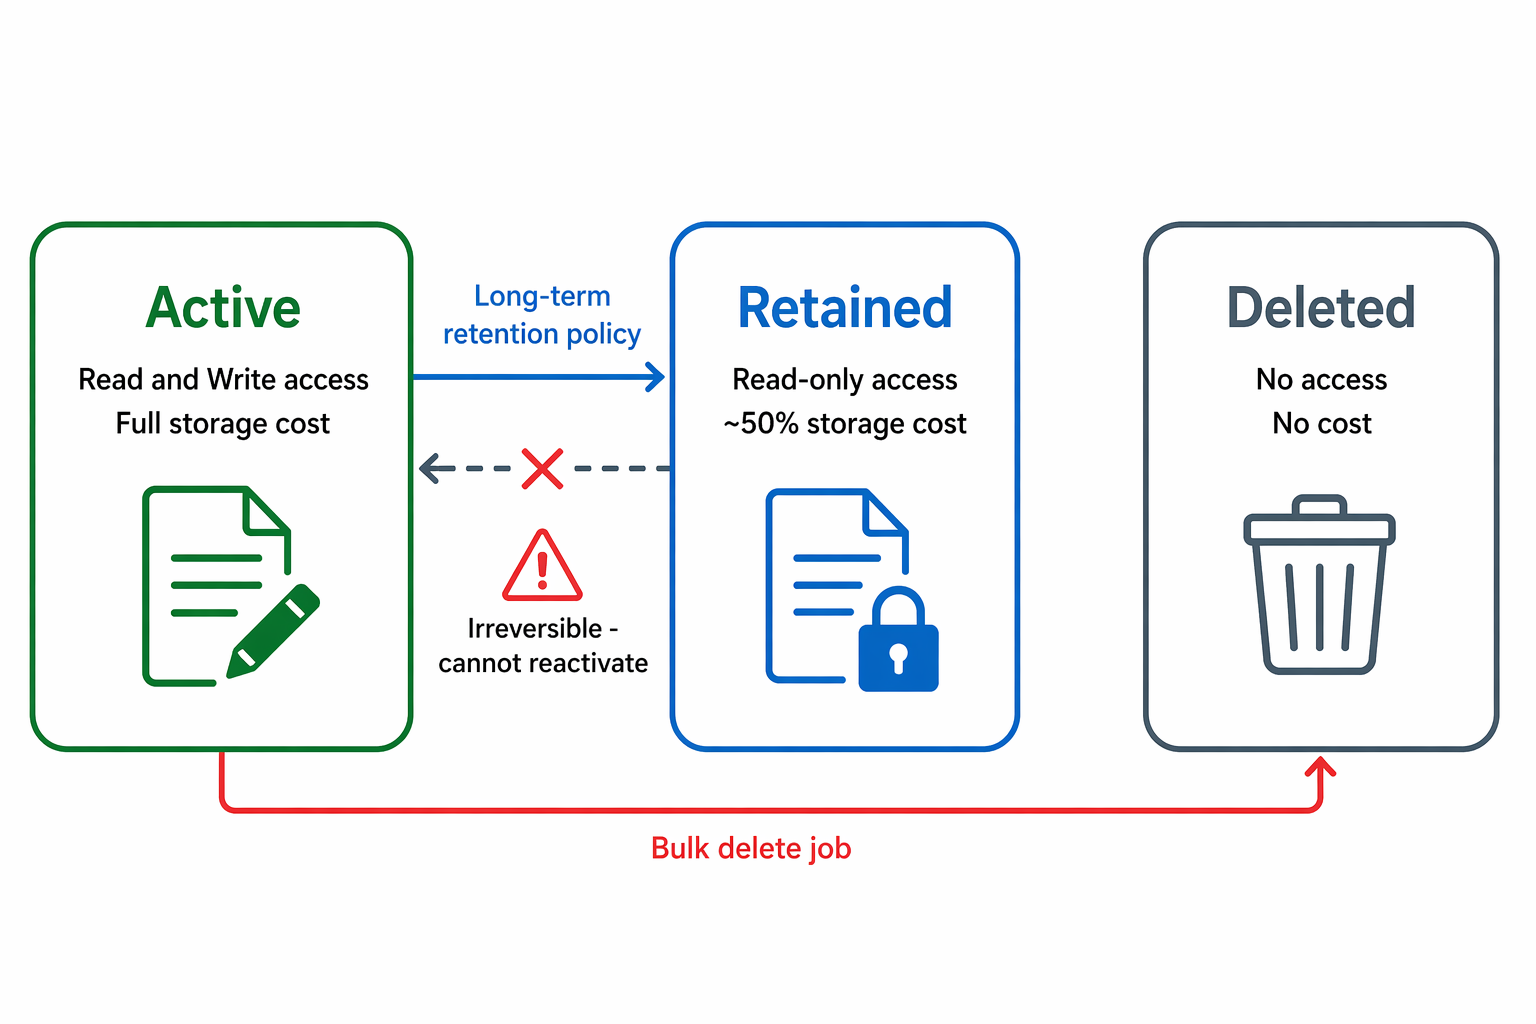
Dataverse data moves through three stages:
| Stage | State | Access | Storage cost |
|---|---|---|---|
| Active | Live, read/write | Full app access, real-time queries | Standard database capacity |
| Retained | Immutable, read-only | Advanced Find, Power Automate, OData API, Fabric | ~50% of active storage (compressed) |
| Deleted | Permanently removed | None | None |
Long-term retention moves data from Active to Retained. Bulk delete moves data from Active directly to Deleted. Choose the right approach based on whether you need to keep the data accessible for compliance.
Important
You can't move data from the retained state back to active. Plan carefully before retaining records - this operation is one way.
Requirements for long-term retention
Before configuring retention policies, verify these prerequisites:
- Managed Environment - The environment must be a Managed Environment. Policies created in non-managed environments are disabled automatically.
- Supported tables - Standard tables (except system tables), custom tables, and their attachments/images can be retained. Audit tables and elastic tables can't be retained.
- No customer-managed keys - Environments encrypted with customer-managed encryption keys (CMK) don't support long-term retention.
- Environment admin or System Administrator role - Required to create and manage retention policies.
Create a long-term retention policy
To configure retention:
Enable long-term retention on the parent table:
- In Power Apps maker portal, go to Tables.
- Select the table and open Table properties > Advanced options.
- Enable Set long term data retention.
- Save and publish. When you enable this setting on the parent table, it automatically enables for all child tables and attachments.
Create the retention policy:
- Go to Power Apps maker portal Retention policies. If you don't see Retention Policies on your left navigation, expand More and locate it. If it's still not immediately visible, select Discover all. Retention policies are in the tile Data Management.
- Select + New retention policy.
- Choose the table and define filter criteria for which records to retain. Use a system view with the criteria defined for the policy (for example, records where
Status = InactiveandModified Onis older than two years). - Set the policy to run manually or on a schedule.
- Save and activate the policy.
Policy execution details:
- Runs asynchronously over 72–96 hours regardless of data volume.
- Executes at low priority to avoid impacting active platform operations.
- Steps: Mark rows → Copy to data lake → Purge from source → Roll back if purge fails.
- Consumes API requests counted toward your plan's limits.
Access retained data
Retained data is read-only but accessible through several channels:
| Access method | Use case |
|---|---|
| Advanced Find | Ad-hoc queries by compliance users |
| Power Automate cloud flows | Automated compliance reporting |
| Dataverse OData APIs | Custom applications needing historical data |
| Microsoft Fabric + Power BI | Analytics and trend reporting |
Note
The standard Dataverse connector for Power BI doesn't support retained data. Use Microsoft Fabric or the OData API directly for retained data reporting.
Manage storage capacity
Monitor how retention affects your capacity:
- Database capacity reports show both live and retained storage.
- Tables appear as "Table" and "Table-Retained" (for example, "Case" and "Case-Retained").
- On average, retained data uses 50% of the active storage (compression benefit).
- File and image attachments don't receive compression savings.
- Capacity reports can take several days to weeks to reflect changes after a policy run.
At Zava, the admin team retained four years of closed transaction records from Zava Pay. The 12 GB of active transaction data compressed to approximately 6 GB in retained storage, freeing significant database capacity for active operations.
Configure bulk delete for data removal
When data has no retention requirement and you want to permanently remove it, use bulk delete:
- In the Power Platform admin center, select the environment.
- Go to Settings > Data management > Bulk Record Deletion.
- Select New to create a deletion job.
- Define criteria for records to delete (for example, all test records, import errors, or records older than a threshold).
- Configure scheduling:
- Run once immediately
- Schedule recurring daily or weekly execution
- Set email notification for completion.
- Submit the job.
Bulk delete of retained data:
To permanently delete data already in the retained state, use the Dataverse SDK BulkDelete action with the DataSource property set to "retained" in the QueryExpression. You can't perform this action through the admin center UI.
Design Zava's data lifecycle strategy
For Zava's data governance, apply different lifecycle treatments based on data sensitivity and compliance requirements:
| Data category | Lifecycle approach | Retention period |
|---|---|---|
| Zava Pay transactions (closed) | Long-term retain | 7 years |
| Customer interactions (resolved) | Long-term retain | 3 years (business value) |
| Marketing campaign records (completed) | Bulk delete | Delete after 18 months |
| Test/sandbox data | Bulk delete | Delete immediately after testing |
| Import error logs | Bulk delete | Delete after 30 days |
Package retention policies in solutions
Retention policies are solution-aware for deployment across environments:
- Create the policy in your development environment.
- Add to a solution (Add existing > More > Other > Data Life Cycle Config).
- Export and import the solution to target environments.
- Run the policy in each target environment - only the policy definition transfers, not the actual data retention execution.
Tip
Combine long-term retention with Azure Synapse Link for maximum flexibility. Set up Azure Synapse Link for your tables first to get data into your data lake for analytics, then retain in Dataverse to reduce capacity costs. Retaining data doesn't remove it from your Synapse-linked data lake.
Register custom logic for retention events
For environments with complex business rules, register plug-ins on retention messages to add validation or cascading behavior:
Retain- Fires when individual records are retainedBulkRetain- Fires during bulk retention operationsRollbackRetain- Fires if retention fails and rolls backPurgeRetainedContent- Fires when retained data is permanently deleted
Use these messages to log retention actions to external systems, validate that records meet retention criteria before processing, or notify downstream systems that data moved to read-only state.