User authorization
After a user successfully authenticates through your identity provider (IdP) by using SAML single sign-on (SSO), the next critical step is authorization—granting tools like personal access tokens (PATs), SSH keys, or OAuth apps with the ability to access organization resources.
Automating User Authorization with SAML SSO and SCIM
Security assertion markup language (SAML) SSO enables enterprise and organization owners to control access to GitHub resources like repositories, issues, and pull requests. Integrating SCIM (System for Cross-domain Identity Management) enhances access control by automating user provisioning and deprovisioning.
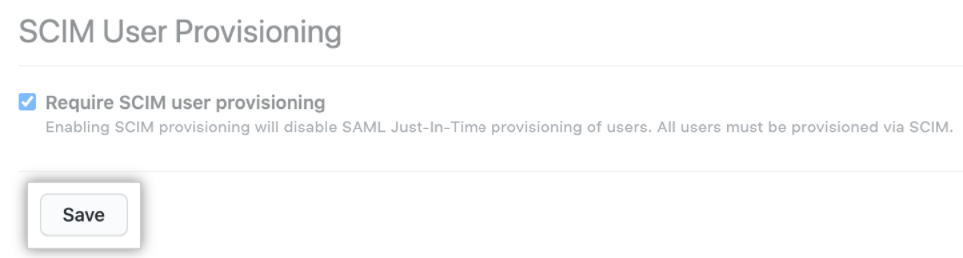
With SCIM, new employees added to your IdP are granted access to GitHub automatically, while departing users are removed, reducing manual steps and improving security.
Note
Without SCIM, SAML SSO alone doesn't support automatic deprovisioning of organization members.
SCIM also revokes stale tokens after a session ends, reducing security risks. Without SCIM, revoking stale tokens must be done manually.
Managing SSH Keys and PATs with SAML SSO
SAML SSO and SCIM work together to reflect identity changes in GitHub. To support this cohesion:
NameIDanduserNamemust match between the SAML IdP and SCIM client.- Group changes in your IdP trigger SCIM updates in GitHub.
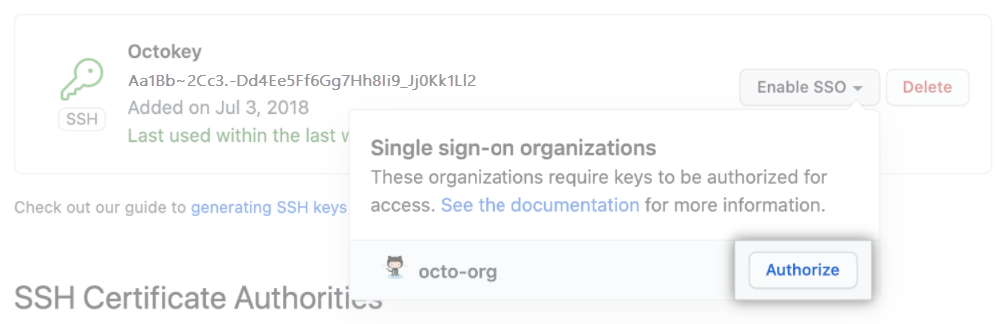
Users accessing APIs or Git must use an authorized PAT or SSH key. These methods are auditable and securely tied to SAML SSO.
To simplify onboarding, provision users using: https://github.com/orgs/ORGANIZATION/sso/sign_up. Display this link in your IdP dashboard.
When users first authenticate, GitHub links their account and SCIM data to your organization. Admins can later audit or revoke sessions and credentials to automate offboarding.
SCIM Integration with GitHub
SCIM streamlines identity management in GitHub Enterprise Cloud by supporting both native integrations and custom configurations.
Supported SCIM Providers
GitHub natively supports:
- Okta
- Microsoft Entra ID
- OneLogin
- Ping Identity
- Google Workspace
These integrations ensure reliable configuration and compatibility.
Custom SCIM Integrations
If your IdP isn't natively supported, use GitHub’s SCIM API to build custom integrations.
SCIM API Overview
The SCIM 2.0 API allows you to:
- Create, update, and delete users
- Manage groups
Example Request to Provision a User
POST /scim/v2/Users
Content-Type: application/json

{
  "userName": "jdoe",
  "name": {
    "givenName": "John",
    "familyName": "Doe"
  },
  "emails": [
    {
      "value": "jdoe@example.com",
      "primary": true
    }
  ]
}
GitHub processes this request and adds the user to your organization.
Getting Started
For Supported Providers
- Sign in to your IdP admin console.
- Enable SCIM provisioning.
- Provide GitHub’s SCIM base URL and bearer token.
For Custom IdPs
- Use GitHub's SCIM REST API.
- Authenticate with a PAT.
- Test the integration with sample requests.
Key Benefits of SCIM Integration
- Provisioning: Automatically create accounts.
- Updates: Synchronize roles and departments.
- Deprovisioning: Remove access promptly upon user exit.
SCIM vs. Manual User Management
| Aspect | SCIM-Based Management | Manual Management |
|---|---|---|
| Automation | Automates provisioning and deprovisioning | Manual intervention required |
| Consistency | Standardized user data across systems | Risk of inconsistencies |
| Security | Timely deactivation of access | Delayed or missed revocations |
| Scalability | Scales with large user bases | Cumbersome at scale |
| Compliance | Helps meet policy and audit requirements | Harder to track and report |
Connecting Your IdP to GitHub
You can use a supported identity provider or bring your own SAML 2.0 IdP.
Supported (Paved Path) IdPs
- Okta
- Microsoft Entra ID
- Google Workspace
Some advantages of using the supported IdPs are:
- Seamless integration
- GitHub-supported
- Lower setup effort
Bring Your Own IdP
Bring your own IdP requires SAML 2.0 support. It has the advantage of allowing for full flexibility.
Integration Steps
| Type | Steps |
|---|---|
| Paved Path: | 1. Navigate to enterprise security settings. 2. Select your IdP. 3. Follow setup instructions. |
| Custom IdP: | 1. Go to security settings. 2. Choose custom IdP. 3. Enter SAML metadata. 4. Validate the connection. |
Comparing IdP Integration Paths
| Feature | Paved Path | Bring Your Own IdP |
|---|---|---|
| Setup Process | ✅ Guided setup | ⚠️ Manual configuration |
| Flexibility | ⚠️ Limited to listed IdPs | ✅ Any SAML 2.0 IdP |
| Maintenance | ✅ GitHub-managed | ⚠️ Organization-managed |
| Customization | ⚠️ Minimal | ✅ Fully customizable |
| Support & Updates | ✅ GitHub-supported | ⚠️ Self-managed |
Managing Identities and Access
SAML SSO Configuration
- Configure your SAML SSO URL.
- Provide your public certificate.
- Add IdP metadata.
Credential Management
PATs and SSH keys must be explicitly authorized and linked to IdP identities to access organization resources securely.
Auditing SAML Sessions
- View active sessions in settings.
- Revoke individual sessions as needed.
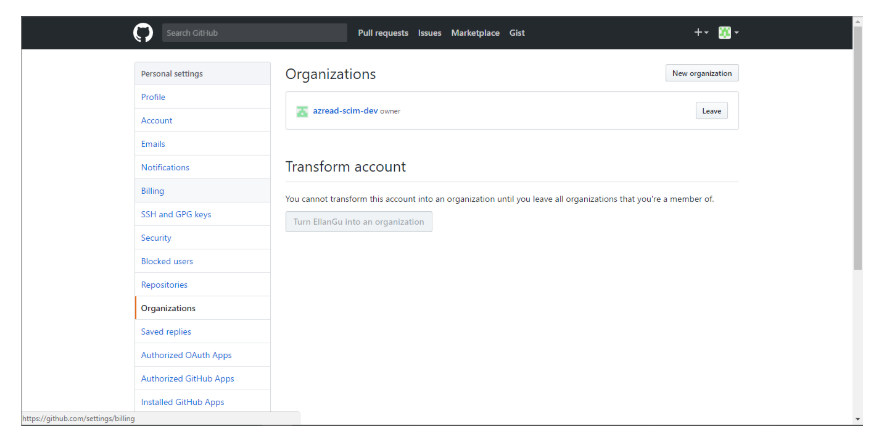
GitHub Membership Considerations
| Type | Consideration |
|---|---|
| GitHub Instance Membership | - Access to public repositories - Create personal projects - Public profile visibility |
| Organization Membership | - Role-based internal access - Profile visible to org admins - Might affect billing |
| Multiple Organization Memberships | - Different roles across orgs - Broader resource access - Complex permission and billing - Requires strict governance |