Explore the Power Query user interface
To get started using Power Query, you must first know where to find it. Depending on what app you're using, there are different places to find Power Query. For information on where to find Power Query in a particular app, see Where to get data.
For this training, you use Power Query in Excel.
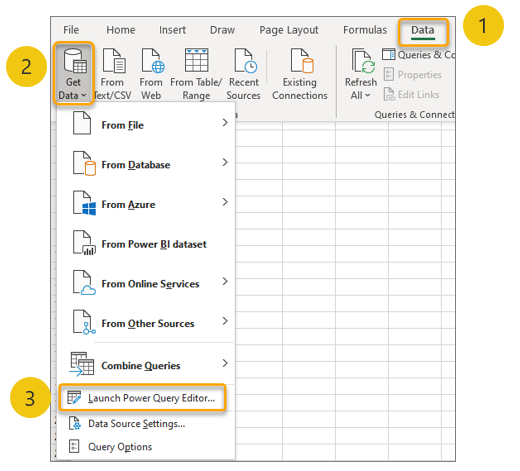
You can find Power Query in Excel (also known as the Power Query editor) by following these steps:
Go to the Data ribbon in Excel.
Select the Get Data dropdown list.
Select the Launch Power Query editor option.
After you launch the Power Query editor, two windows display for the Excel application: the Excel workbook and the Power Query editor. We recommend that you maximize the Power Query editor window to full size, because the Excel window is unresponsive with an active Power Query editor window.

The preceding screenshot shows the five key UI areas of the Power Query editor window:
Ribbon menu (1): The Power Query editor has a ribbon that's similar to other Office applications, including tabs and buttons that are organized across context-sensitive groupings for taking various actions.
Queries pane (2): Shows the query names included with the file. You can create multiple queries in one workbook. You can group queries into folders for organization and management.
Formula bar (3): Area for the M language code to be shown. This area is disabled by default, and you can (and should) enable it on the View tab of the ribbon.
Preview (4): Displays a preview of the results generated by the selected query in the Queries pane, evaluated up through the selected step within the Query Settings pane.
Query Settings (5): Contains the query's name and the list of the applied steps. Each action the author performs adds or updates a step in this list. You can navigate to the results of each step, rename them for documentation purposes, and reorder them by using this pane.