Exercise - Azure Cloud Services for HoloLens 2
With each consecutive chapter, you'll add new Azure Cloud services to expand the application features and user experience, while teaching you the fundamentals of each Azure Cloud service.
Note
This module series will focus on the HoloLens 2, but due the cross-platform nature of Unity, most of these lessons will also apply for desktop and mobile applications.
Application goals
In this module series, you'll build a HoloLens 2 application that can detect objects from images and find its spatial location. We'll refer to these objects as Tracked Objects.
The user can create a Tracked Object to associate a set of images via computer vision, a spatial location, or both. All data must be persisted into the cloud.
Features
- Basic managing of data and images
- Image training and detection
- Storing a spatial location and guidance to it
Azure Cloud Services
You'll use the following Azure Cloud services to implement the above features:
Azure Storage
You'll use Azure Storage to persist data. Azure Storage allows you to store data in a table and upload large binaries like images.
Azure Custom Vision
With Azure AI Custom Vision (part of the Azure AI services) you can associate a set of images to Tracked Objects, train a machine learning model on the set you created, and detect the Tracked Objects.
Azure Spatial Anchors
To store a Tracked Object location and give guided directions to find it, you'll use Azure Spatial Anchors.
Create and prepare the Unity project
In this section, you'll create a new Unity project and get it ready for MRTK development.
First, follow the steps in the HoloLens 2 learning path, excluding the Build your application to your device instructions, which includes the following steps:
- Creating the Unity project and giving it a suitable name, for example, Azure Cloud Tutorials
- Switching the build platform
- Importing the TextMeshPro Essential Resources
- Importing the Mixed Reality Toolkit
- Configuring the Unity project
- Creating and configuring the scene and give the scene a suitable name, for example, AzureCloudServices
Import the tutorial assets
Add the
AzurespatialAnchorsSDK to your project. To add the package, follow this tutorial.Download and import the following Unity custom packages in the order they're listed:
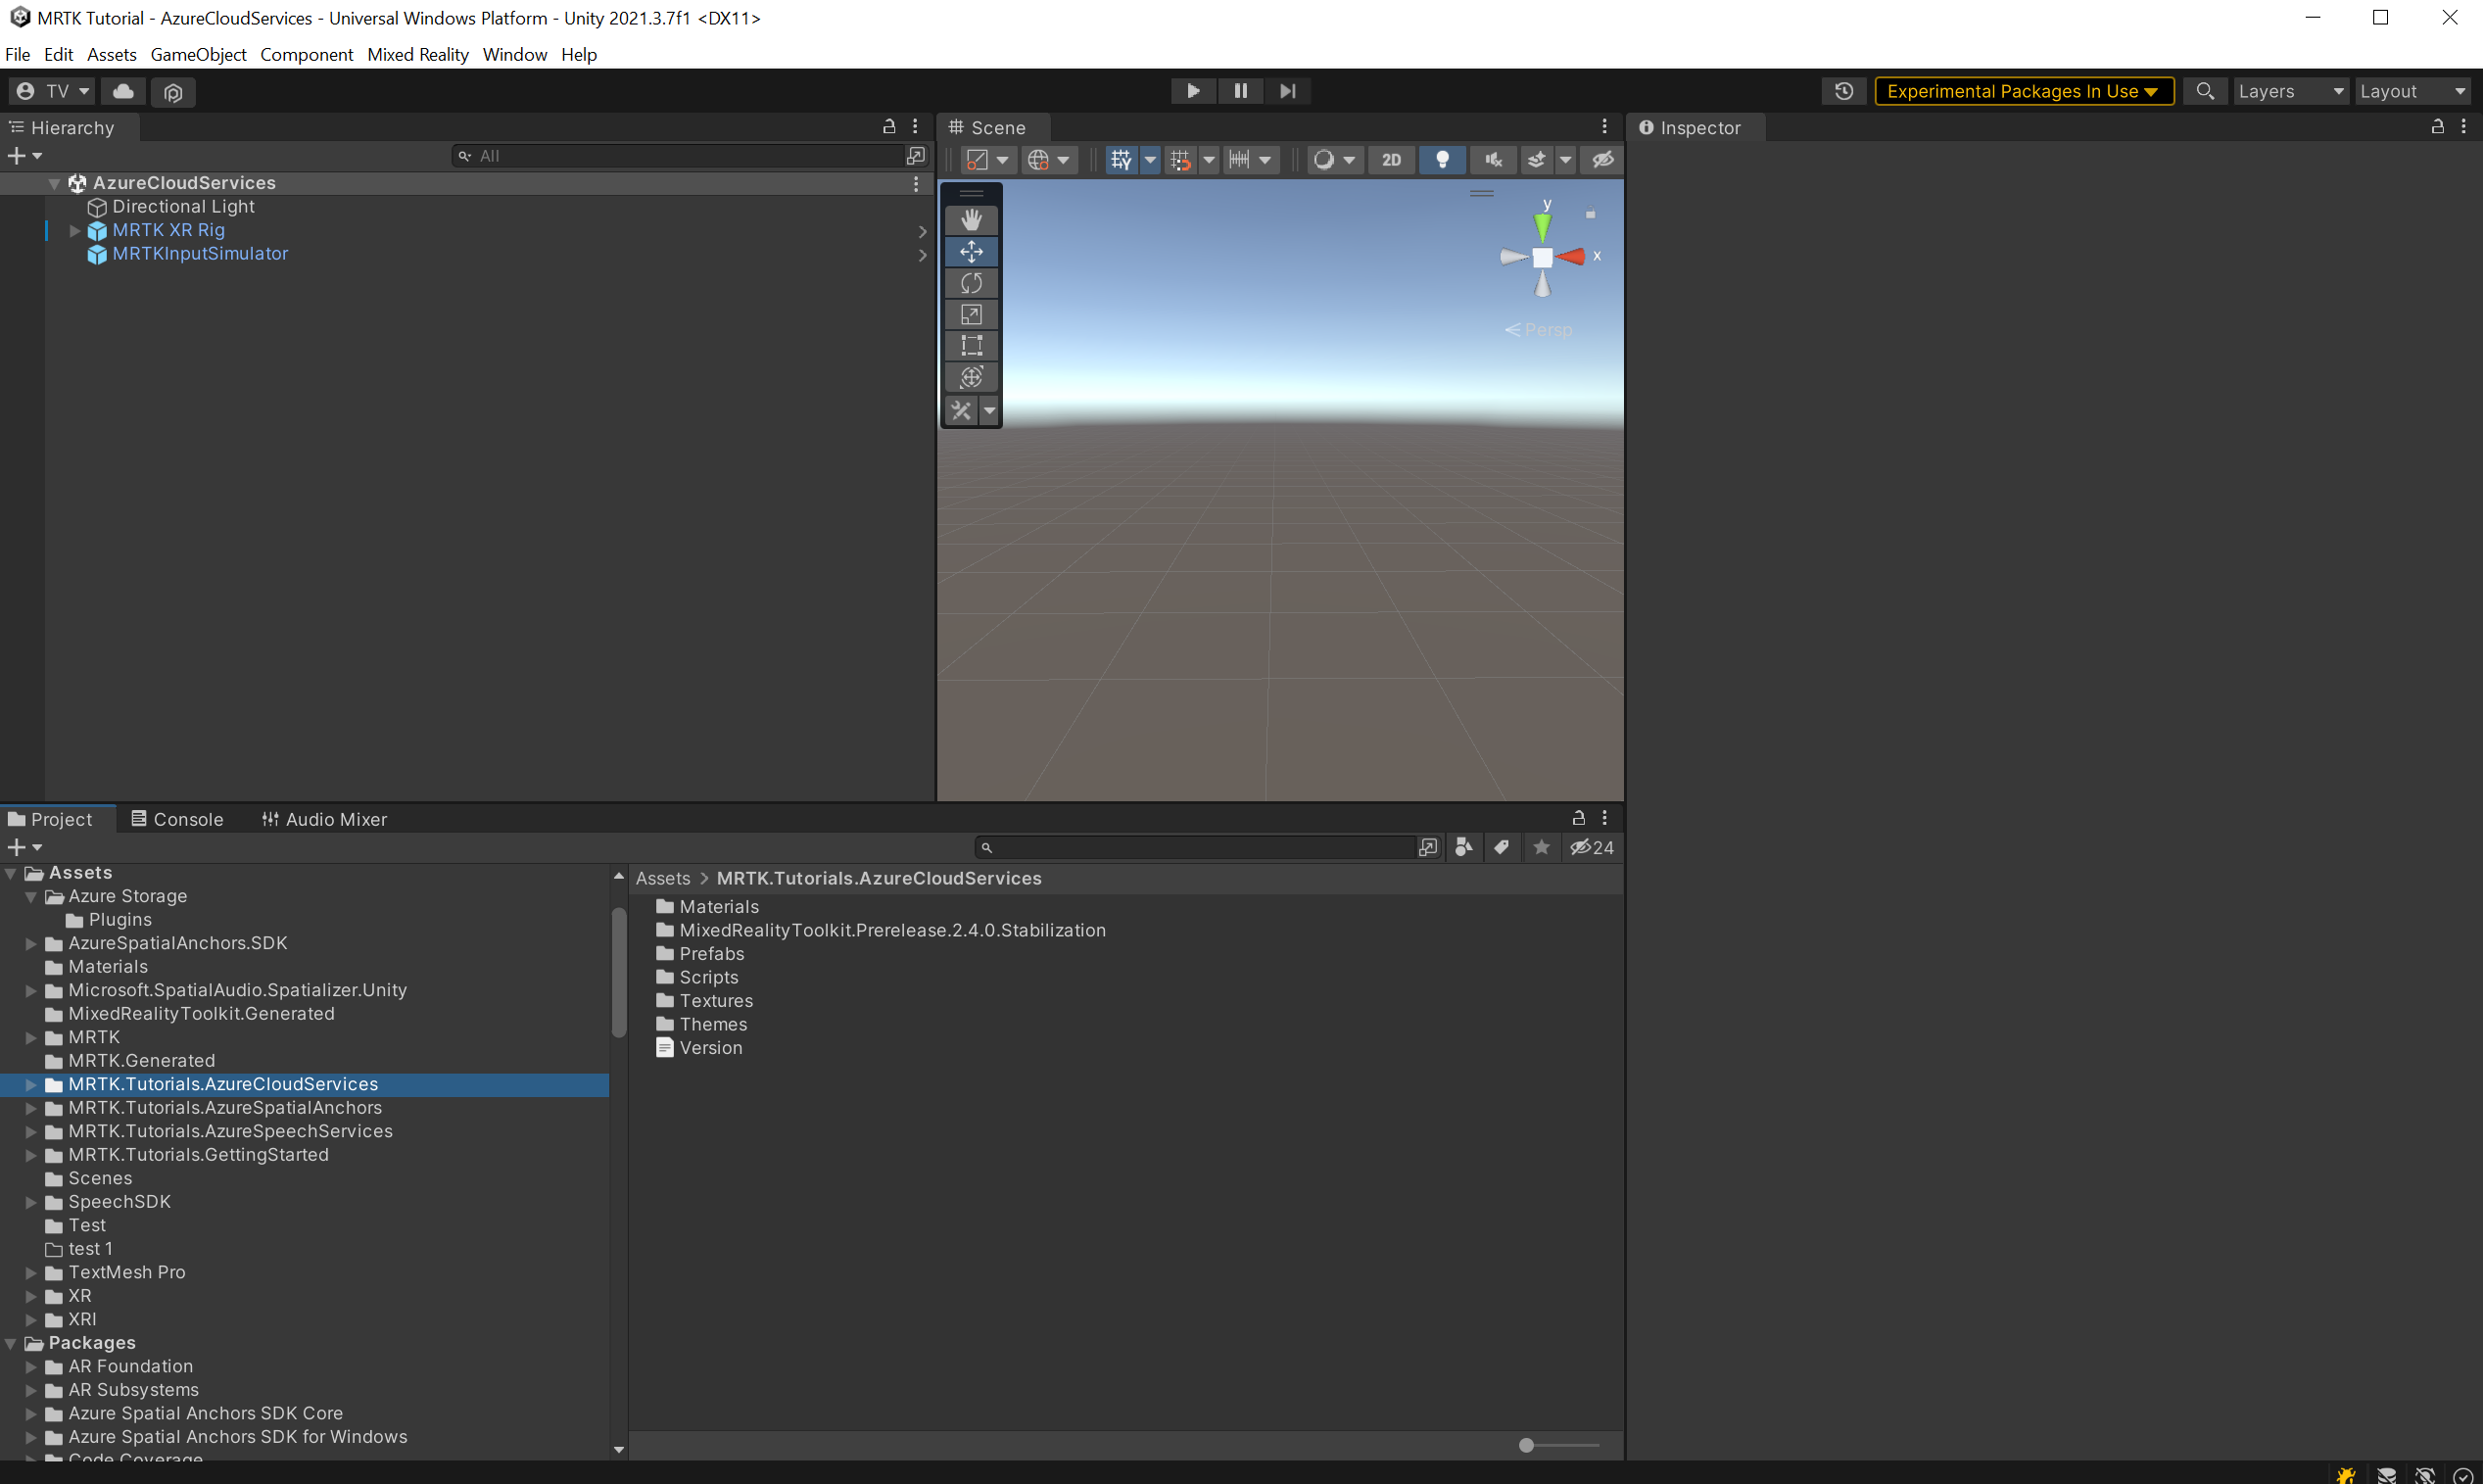
After you've imported the tutorial assets, your Project window should look similar to this:

Prepare the scene
In this section, you'll prepare the scene by adding some of the tutorial prefabs.
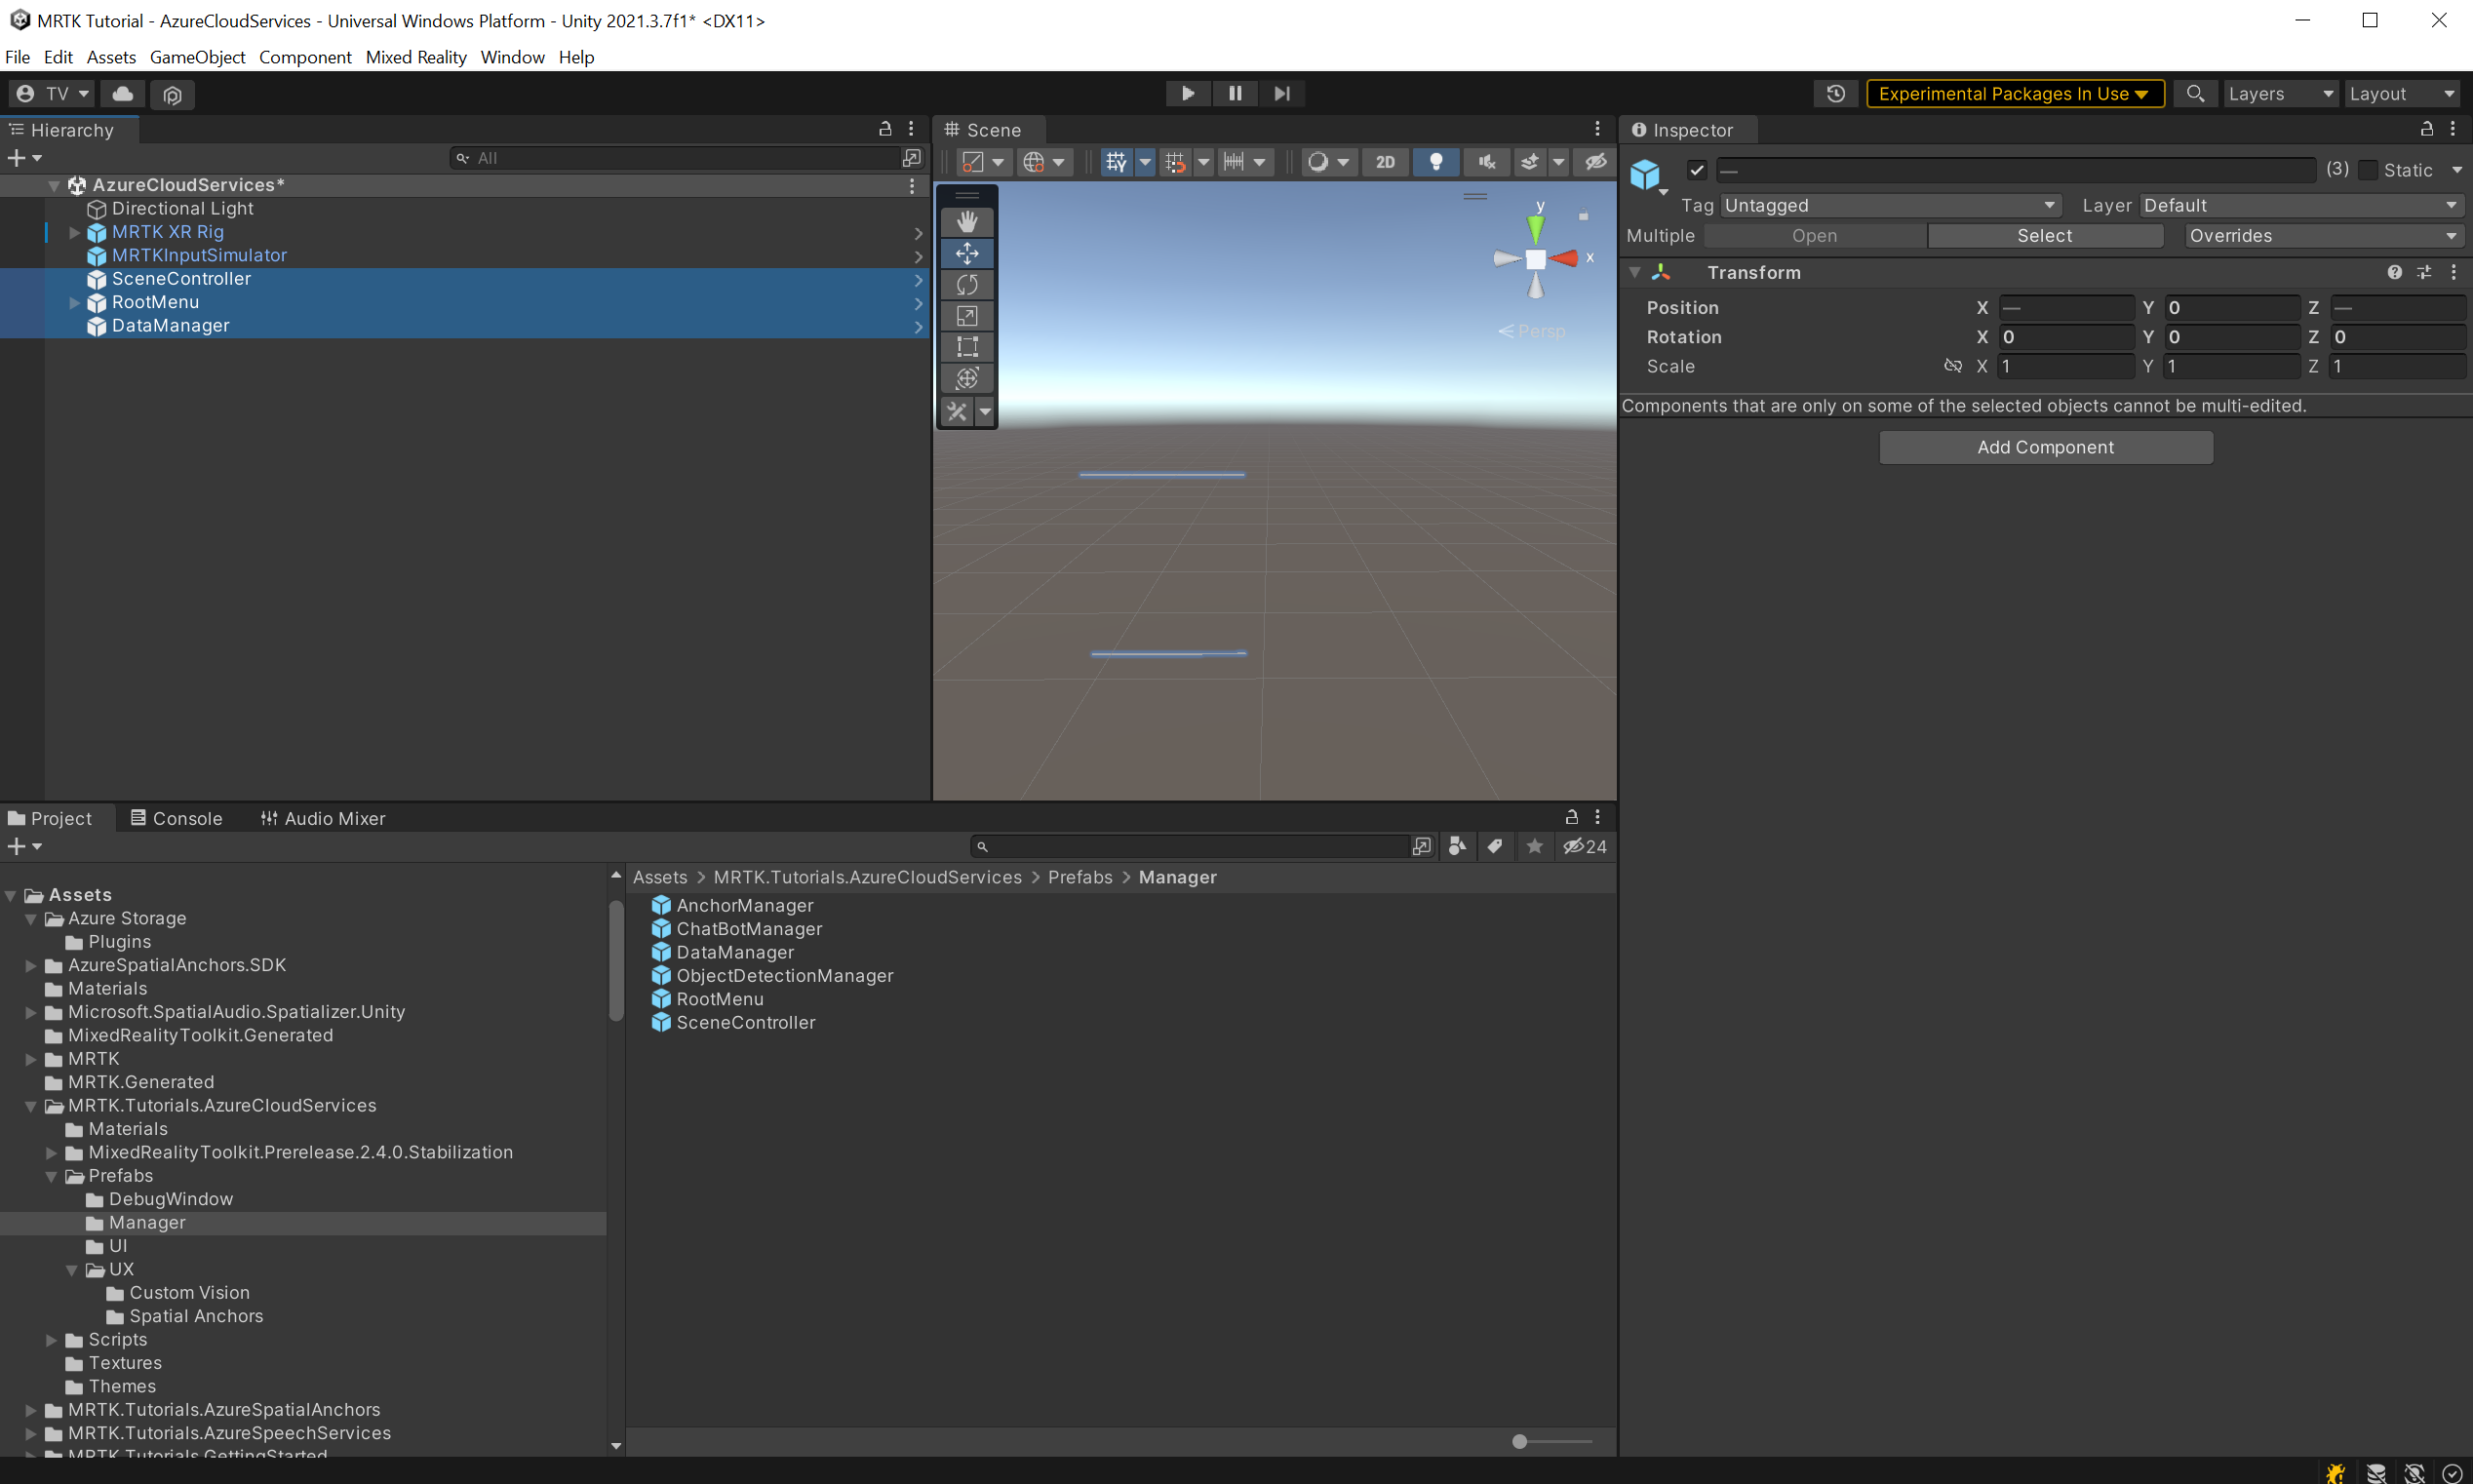
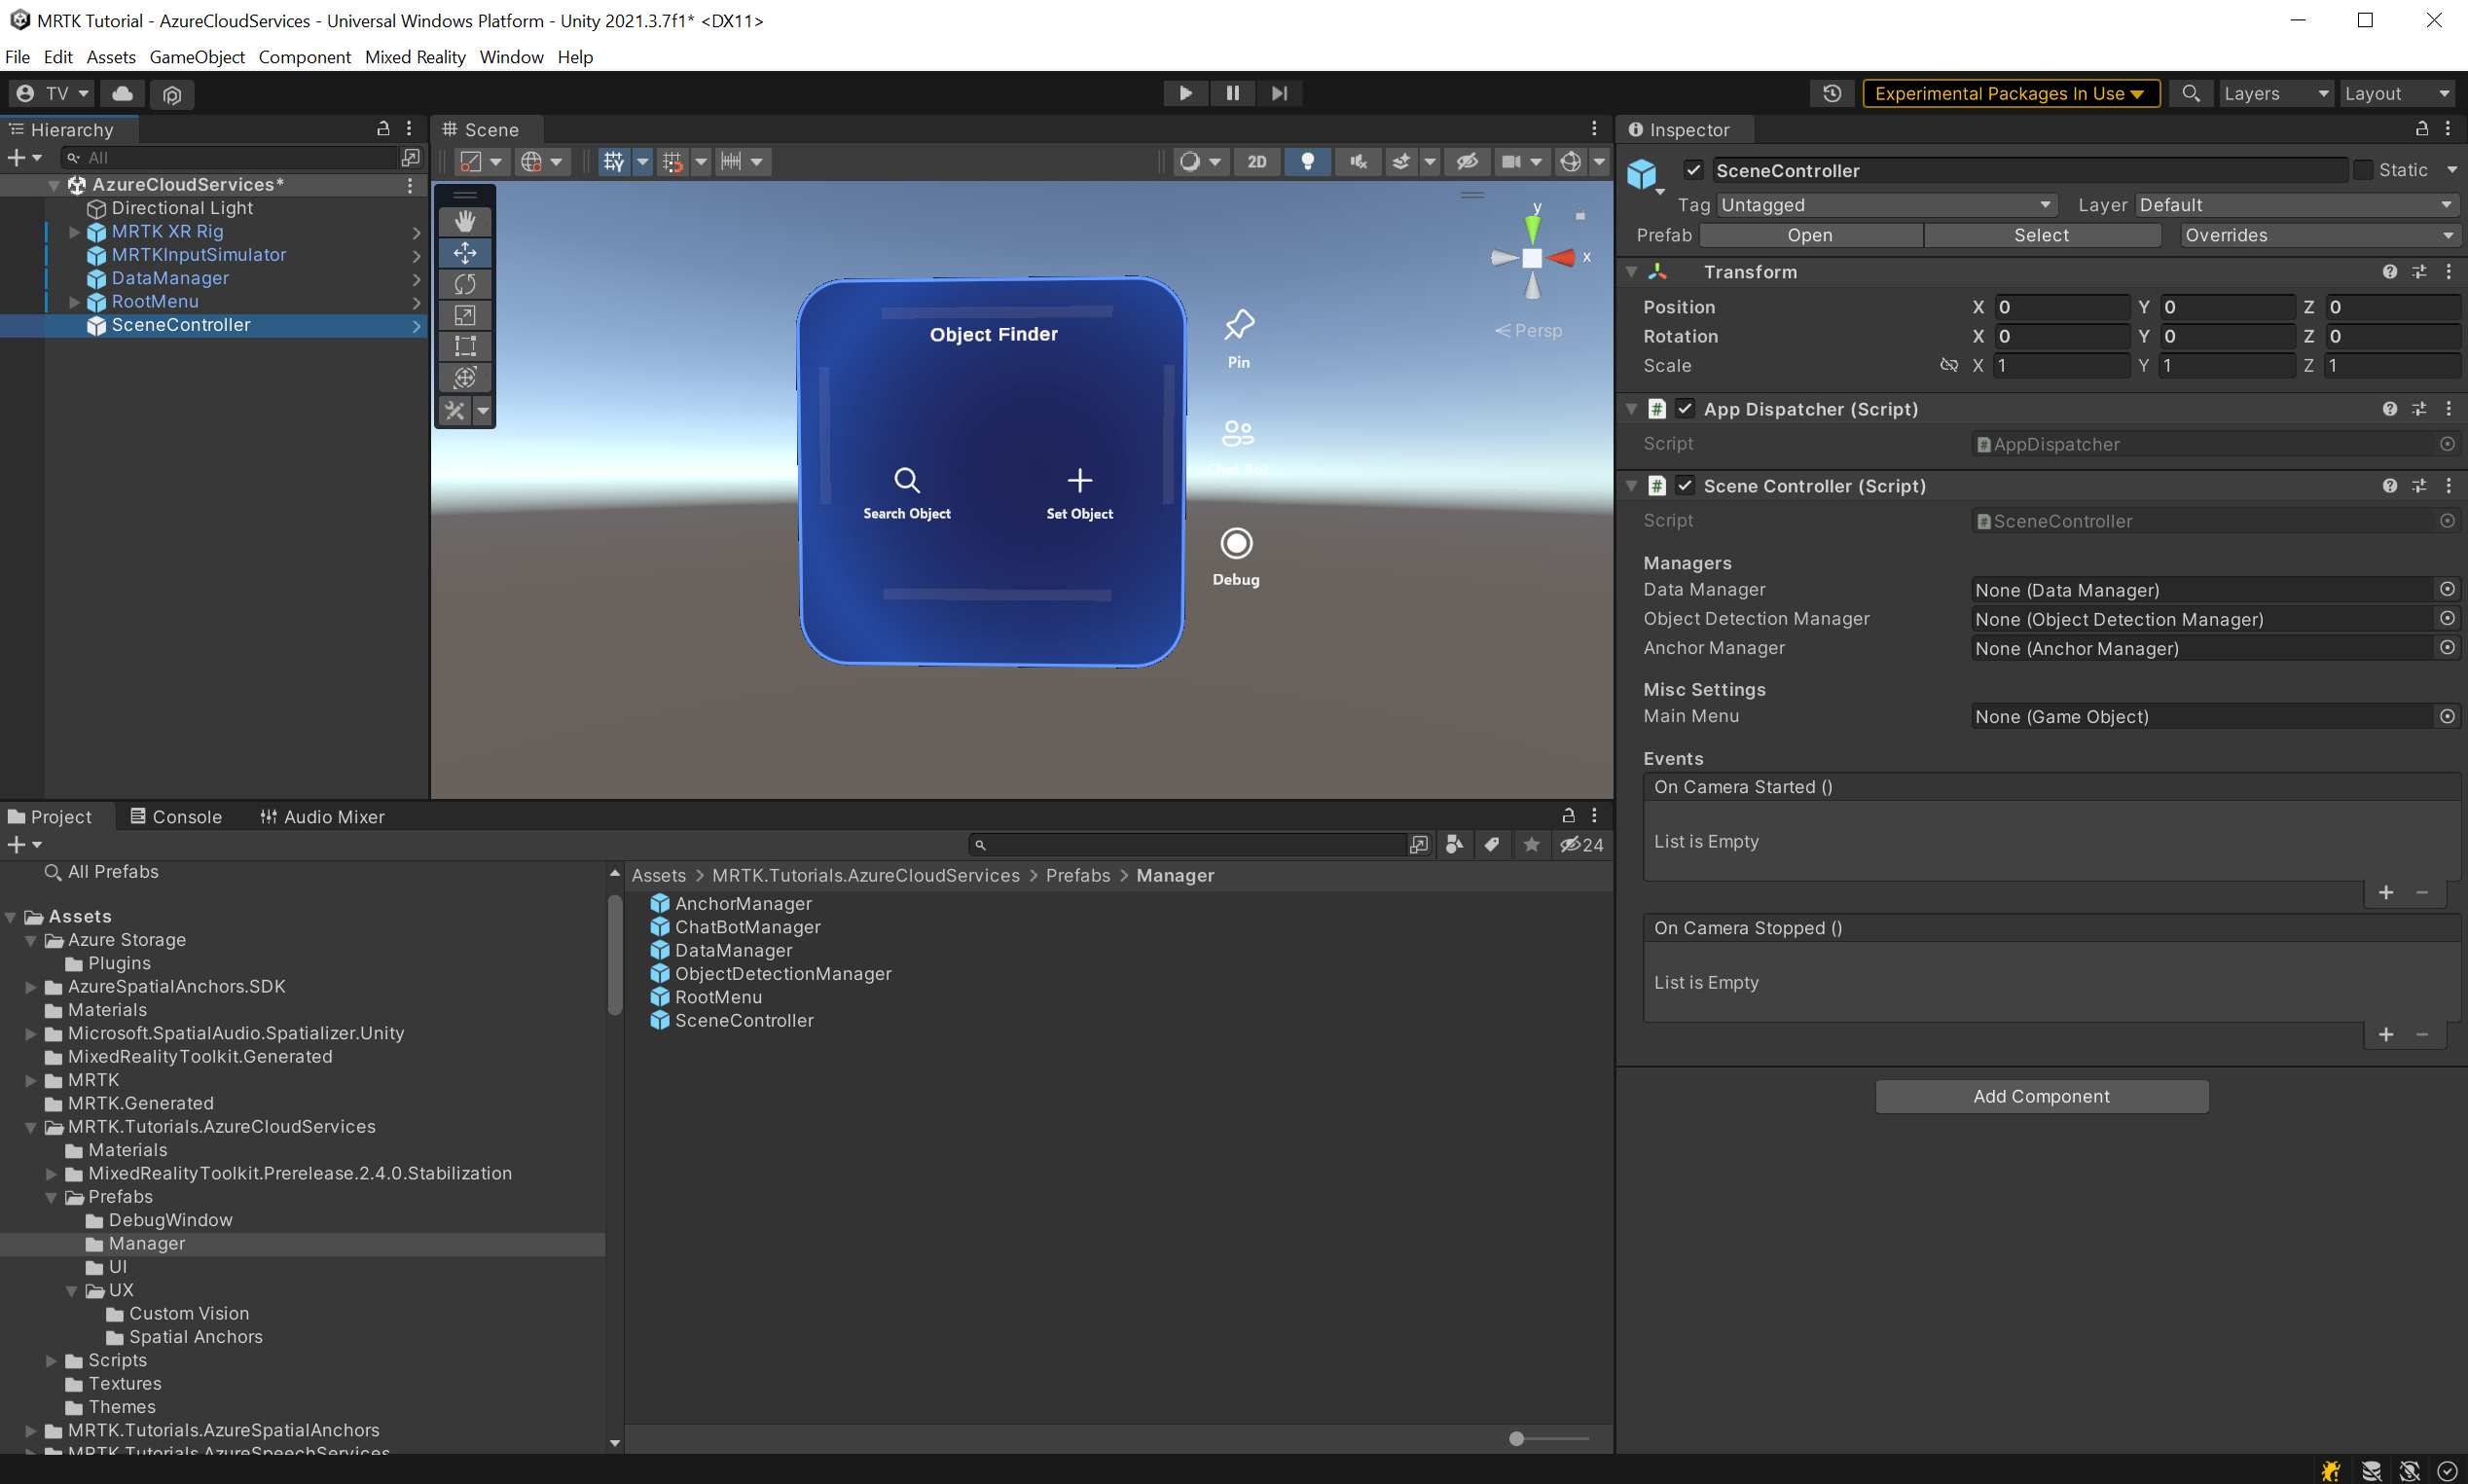
In the Project window, navigate to the Assets > MRTK.Tutorials.AzureCloudServices > Prefabs > Manager folder. While holding down the CTRL button, select SceneController, RootMenu and DataManager to select the three prefabs:

The SceneController (prefab) contains two scripts, SceneController (script) and UnityDispatcher (script). The SceneController script component contains several UX functions and facilitates the photo-capture functionality, while UnityDispatcher is a helper class to allow execute actions on the Unity main thread.
The RootMenu (prefab) is the primary UI prefab that holds all UI windows connected to each other through various small script components and control the general UX flow of the application.
The DataManager (prefab) is responsible for talking to Azure storage, and will be explained further in the next tutorial.
Now, with the three prefabs still selected, drag them into the Hierarchy window to add them to the scene:
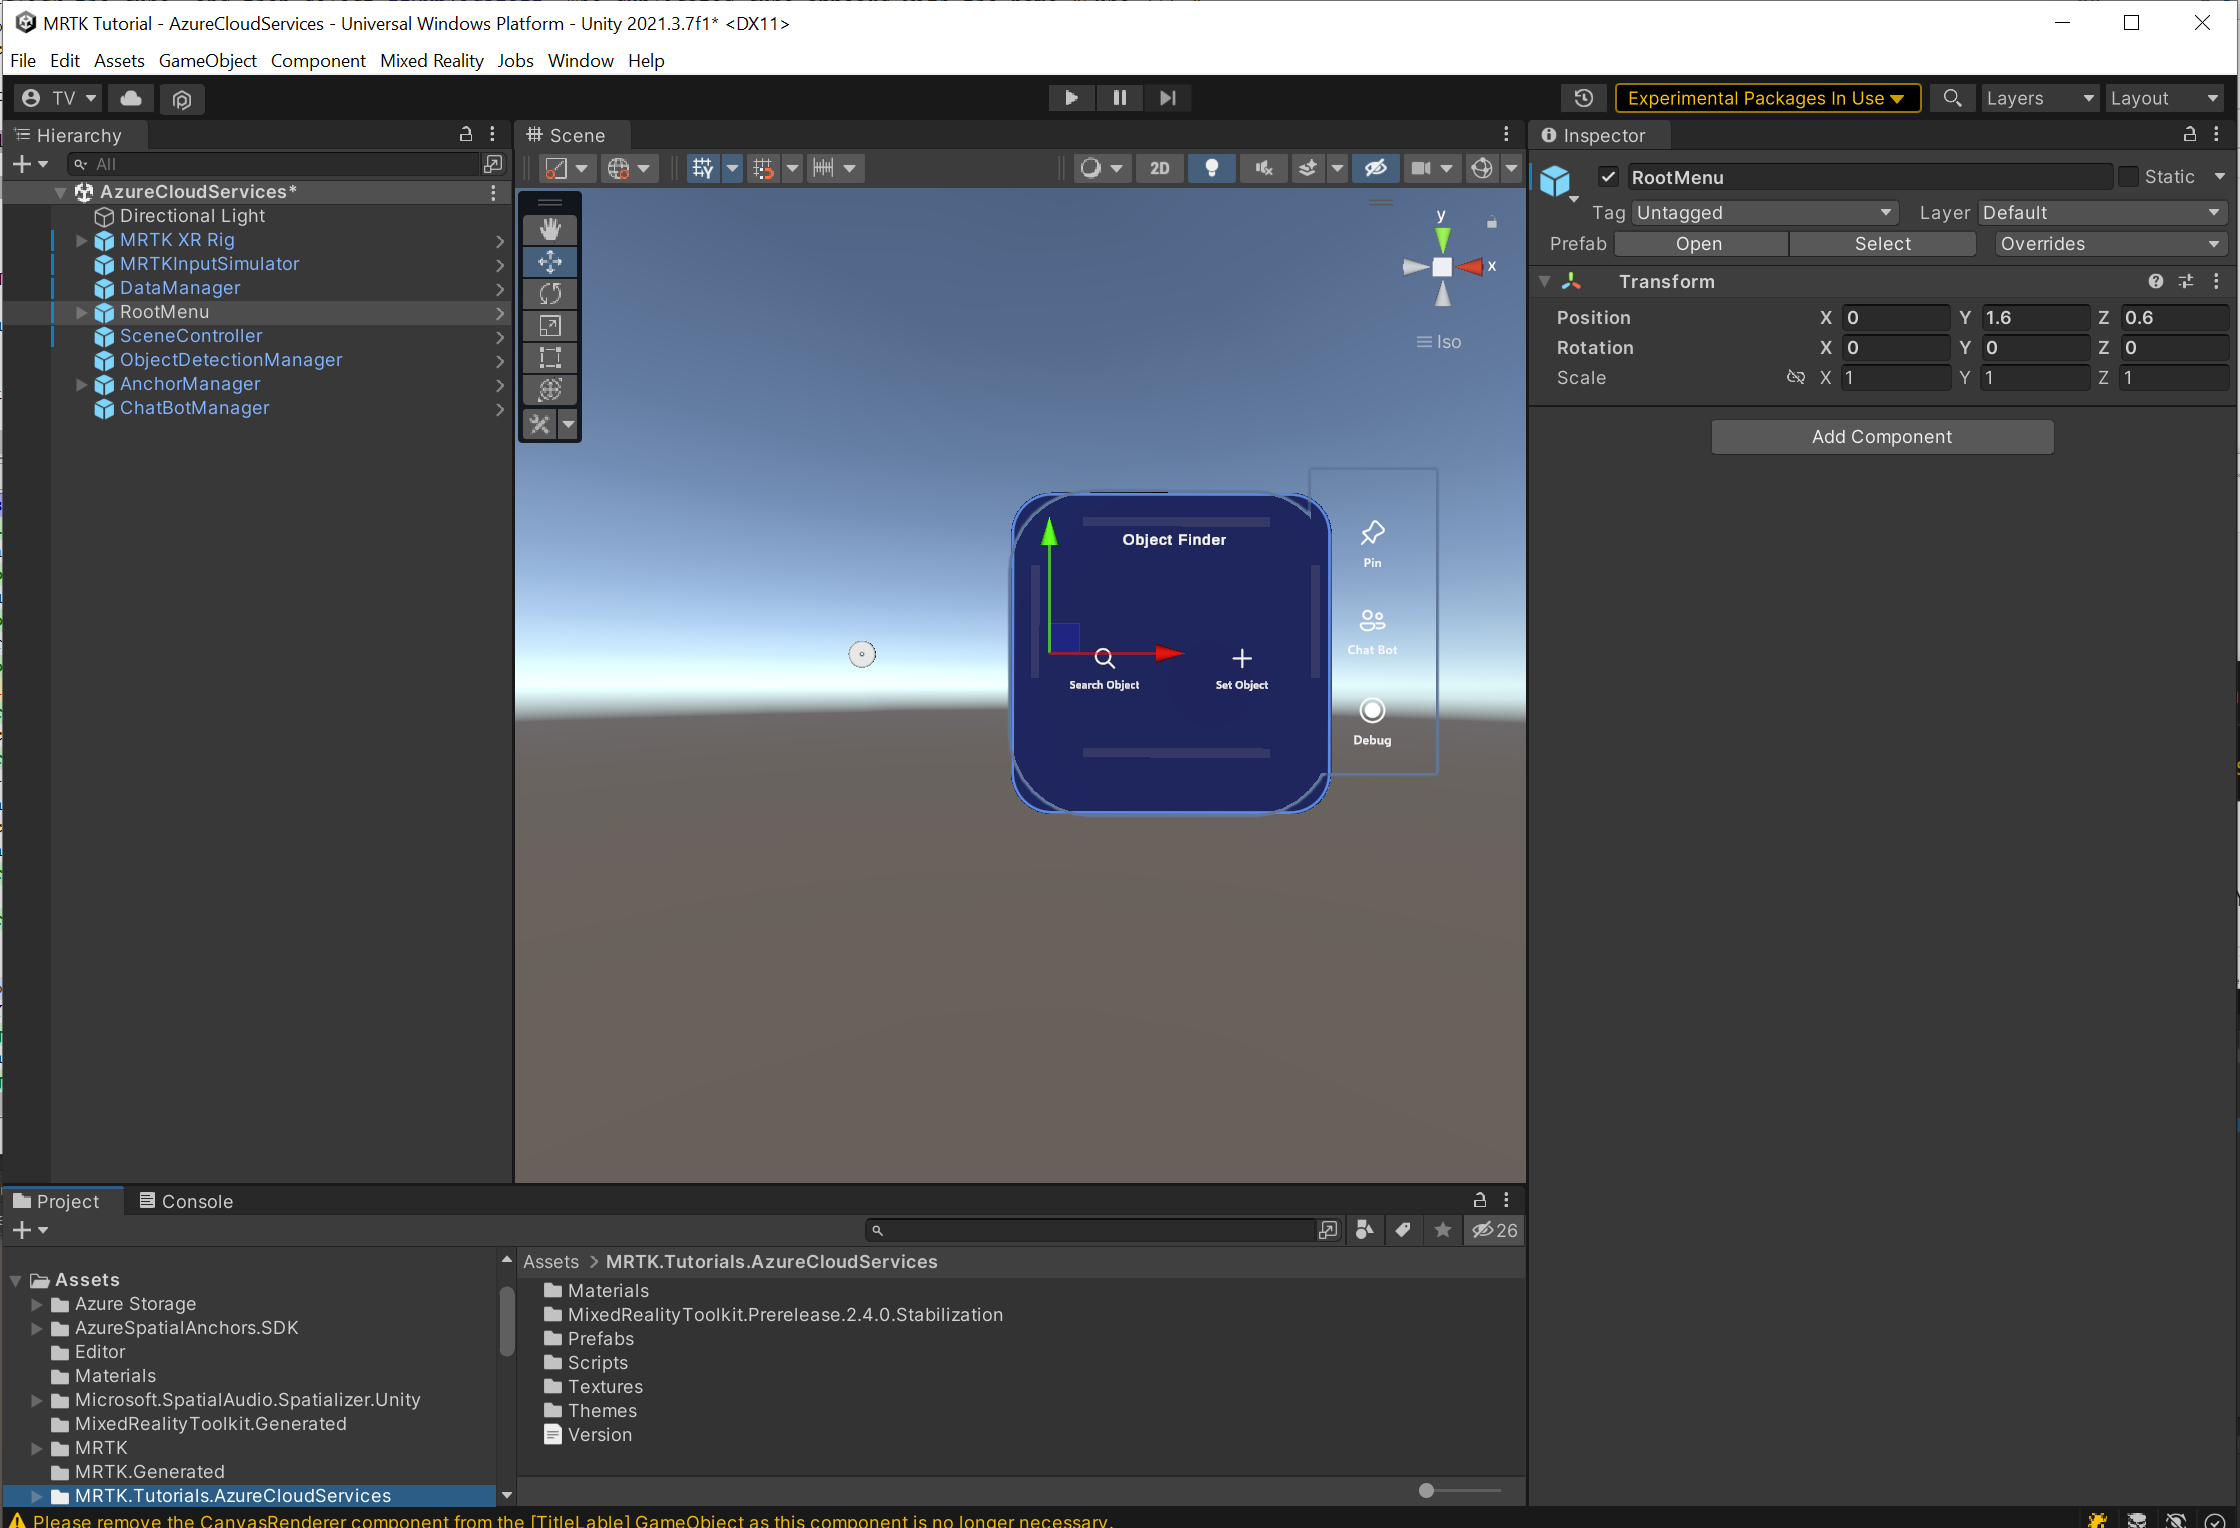
To focus in on the objects in the scene, you can double-click the RootMenu object, then zoom slightly out again. With the RootMenu object still selected, change its values in its Transform component to the following:
Position: X = 0.0, Y = 1.6, Z = 0.6
Tip
If you find the large icons in your scene distracting (for example, the large framed 'T' icons), you can hide them by toggling the Gizmos to the off position.


Configuring the scene
In this section, you'll connect SceneManager, DataManager, and RootMenu together to have a working scene for the next Integrating Azure storage tutorial.
Connect the objects
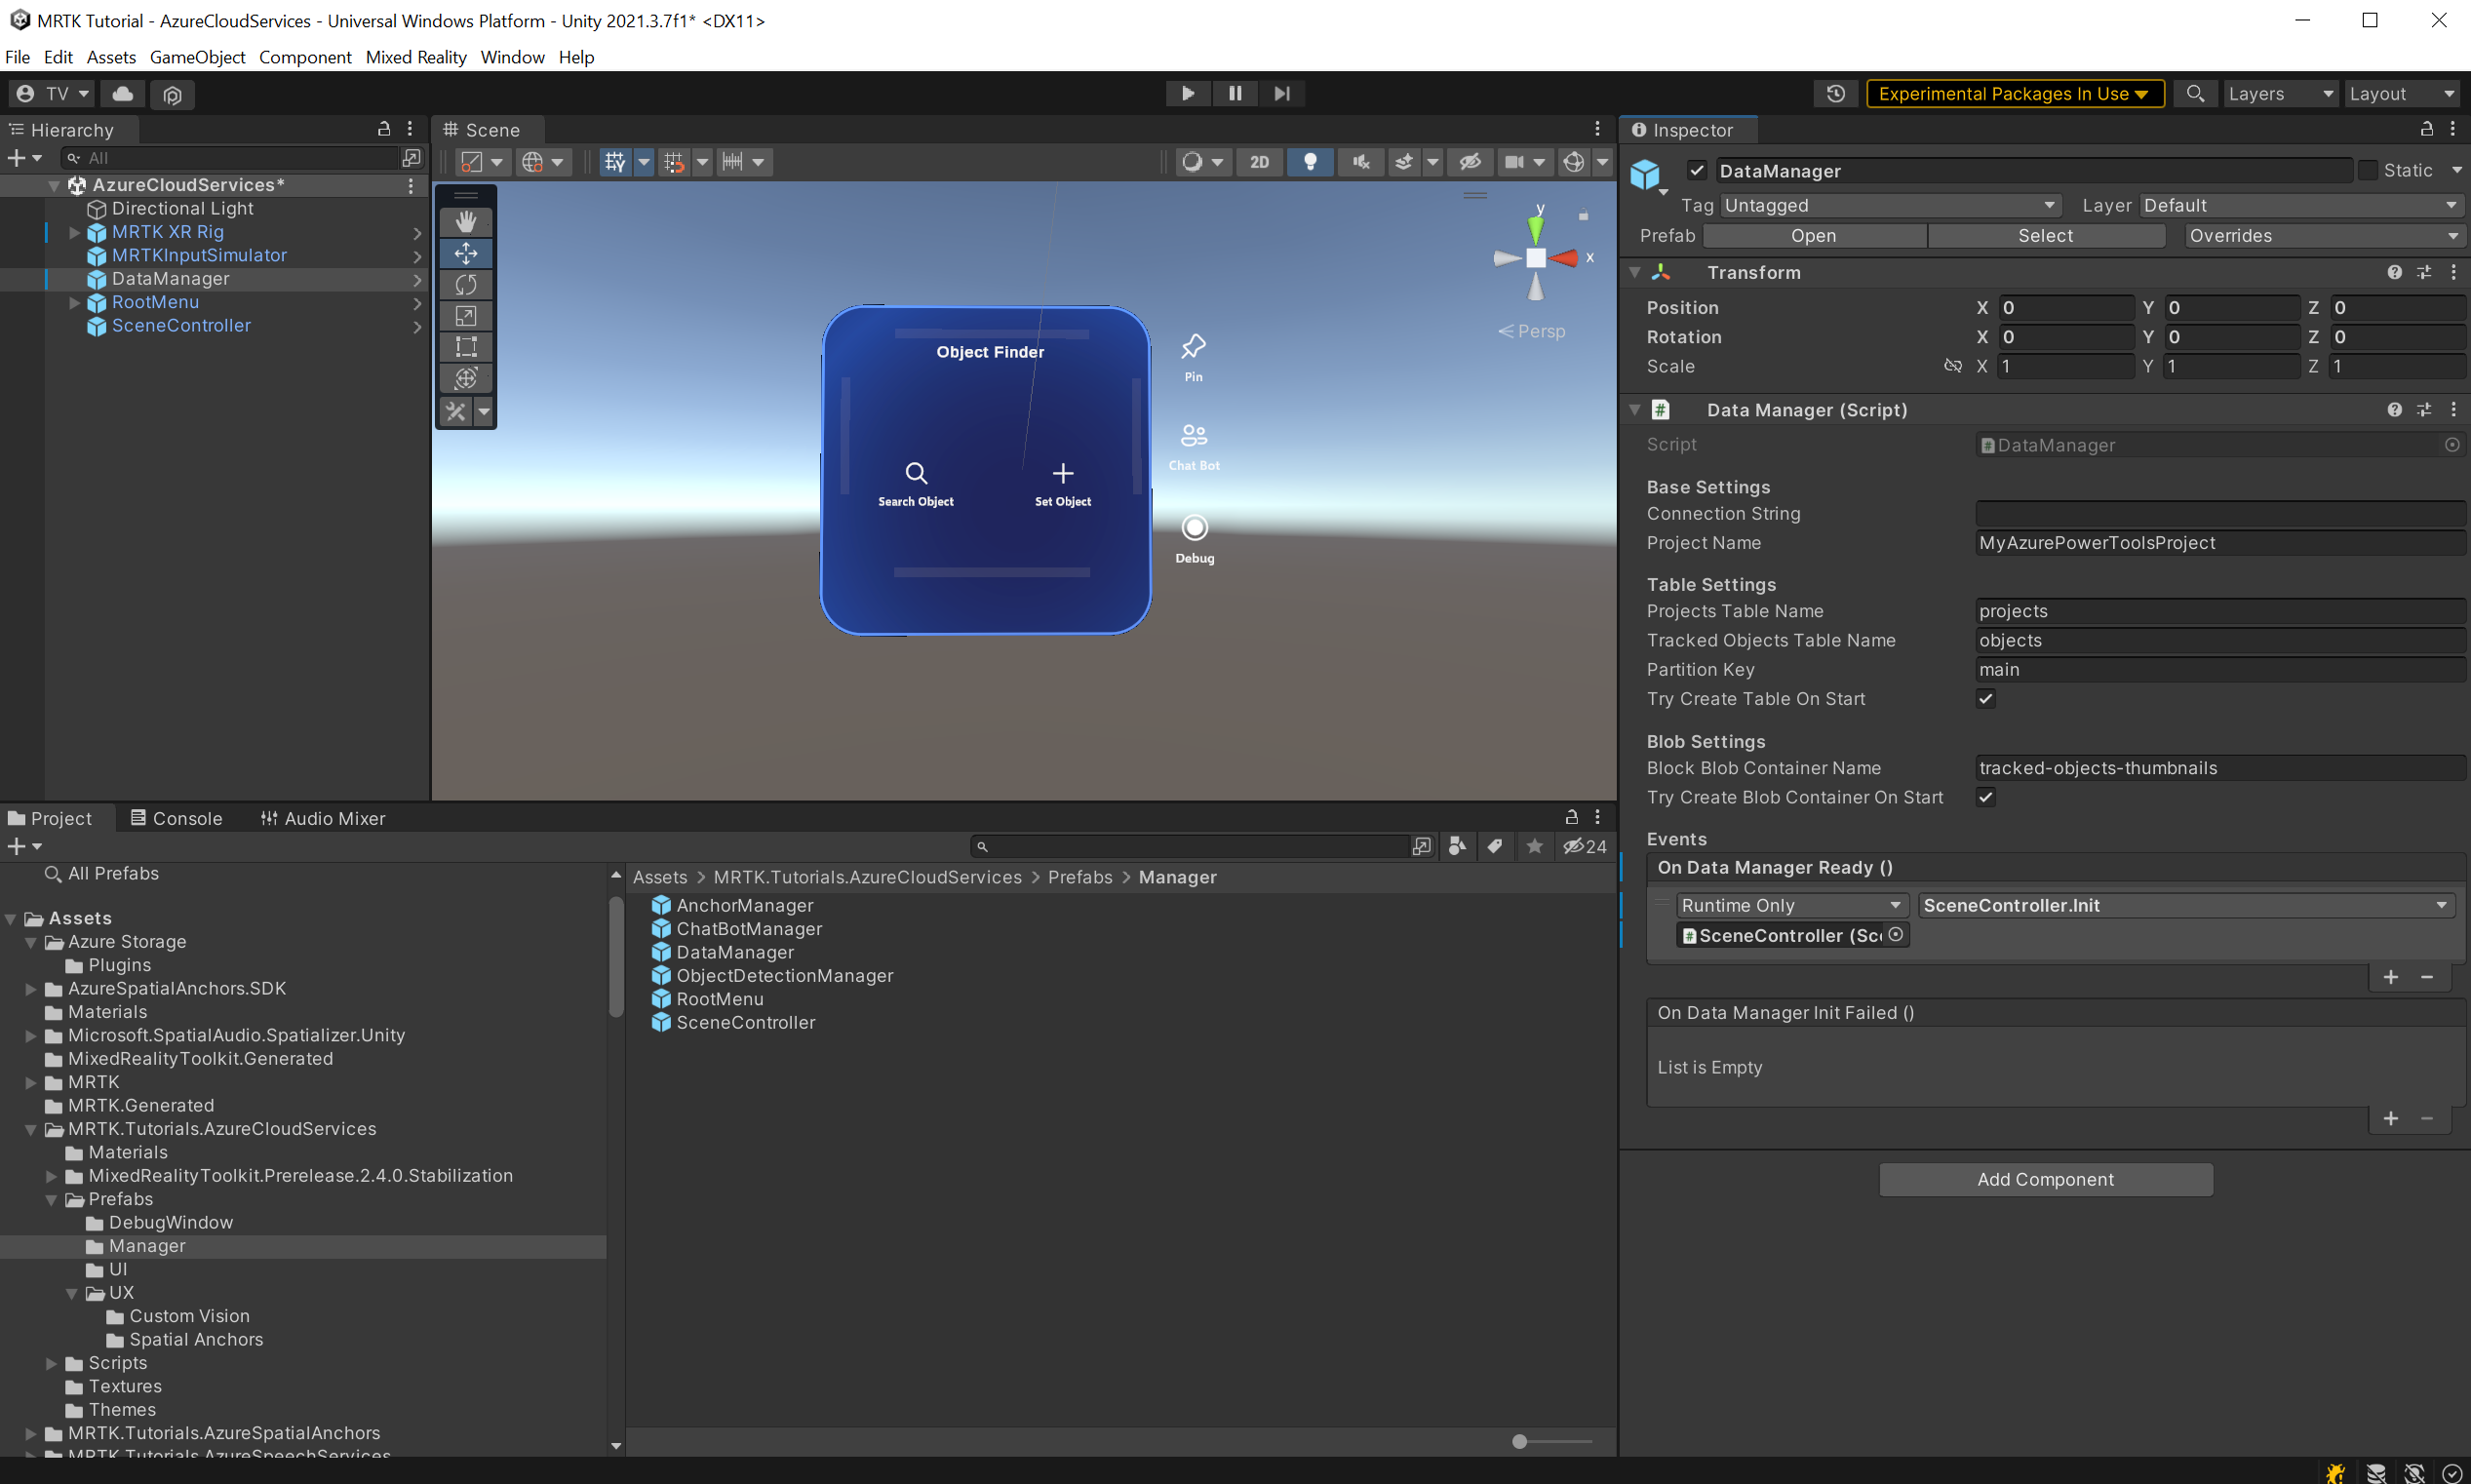
In the Hierarchy window, select the DataManager object:

In the Inspector window, locate the DataManager (Script) component. You'll see an empty slot on the On Data Manager Ready () event. Drag the SceneController object from the Hierarchy window to the On Data Manager Ready () event.

The event's drop-down menu is now active. Select the drop-down menu, navigate to SceneController, and select the Init () option in the submenu.
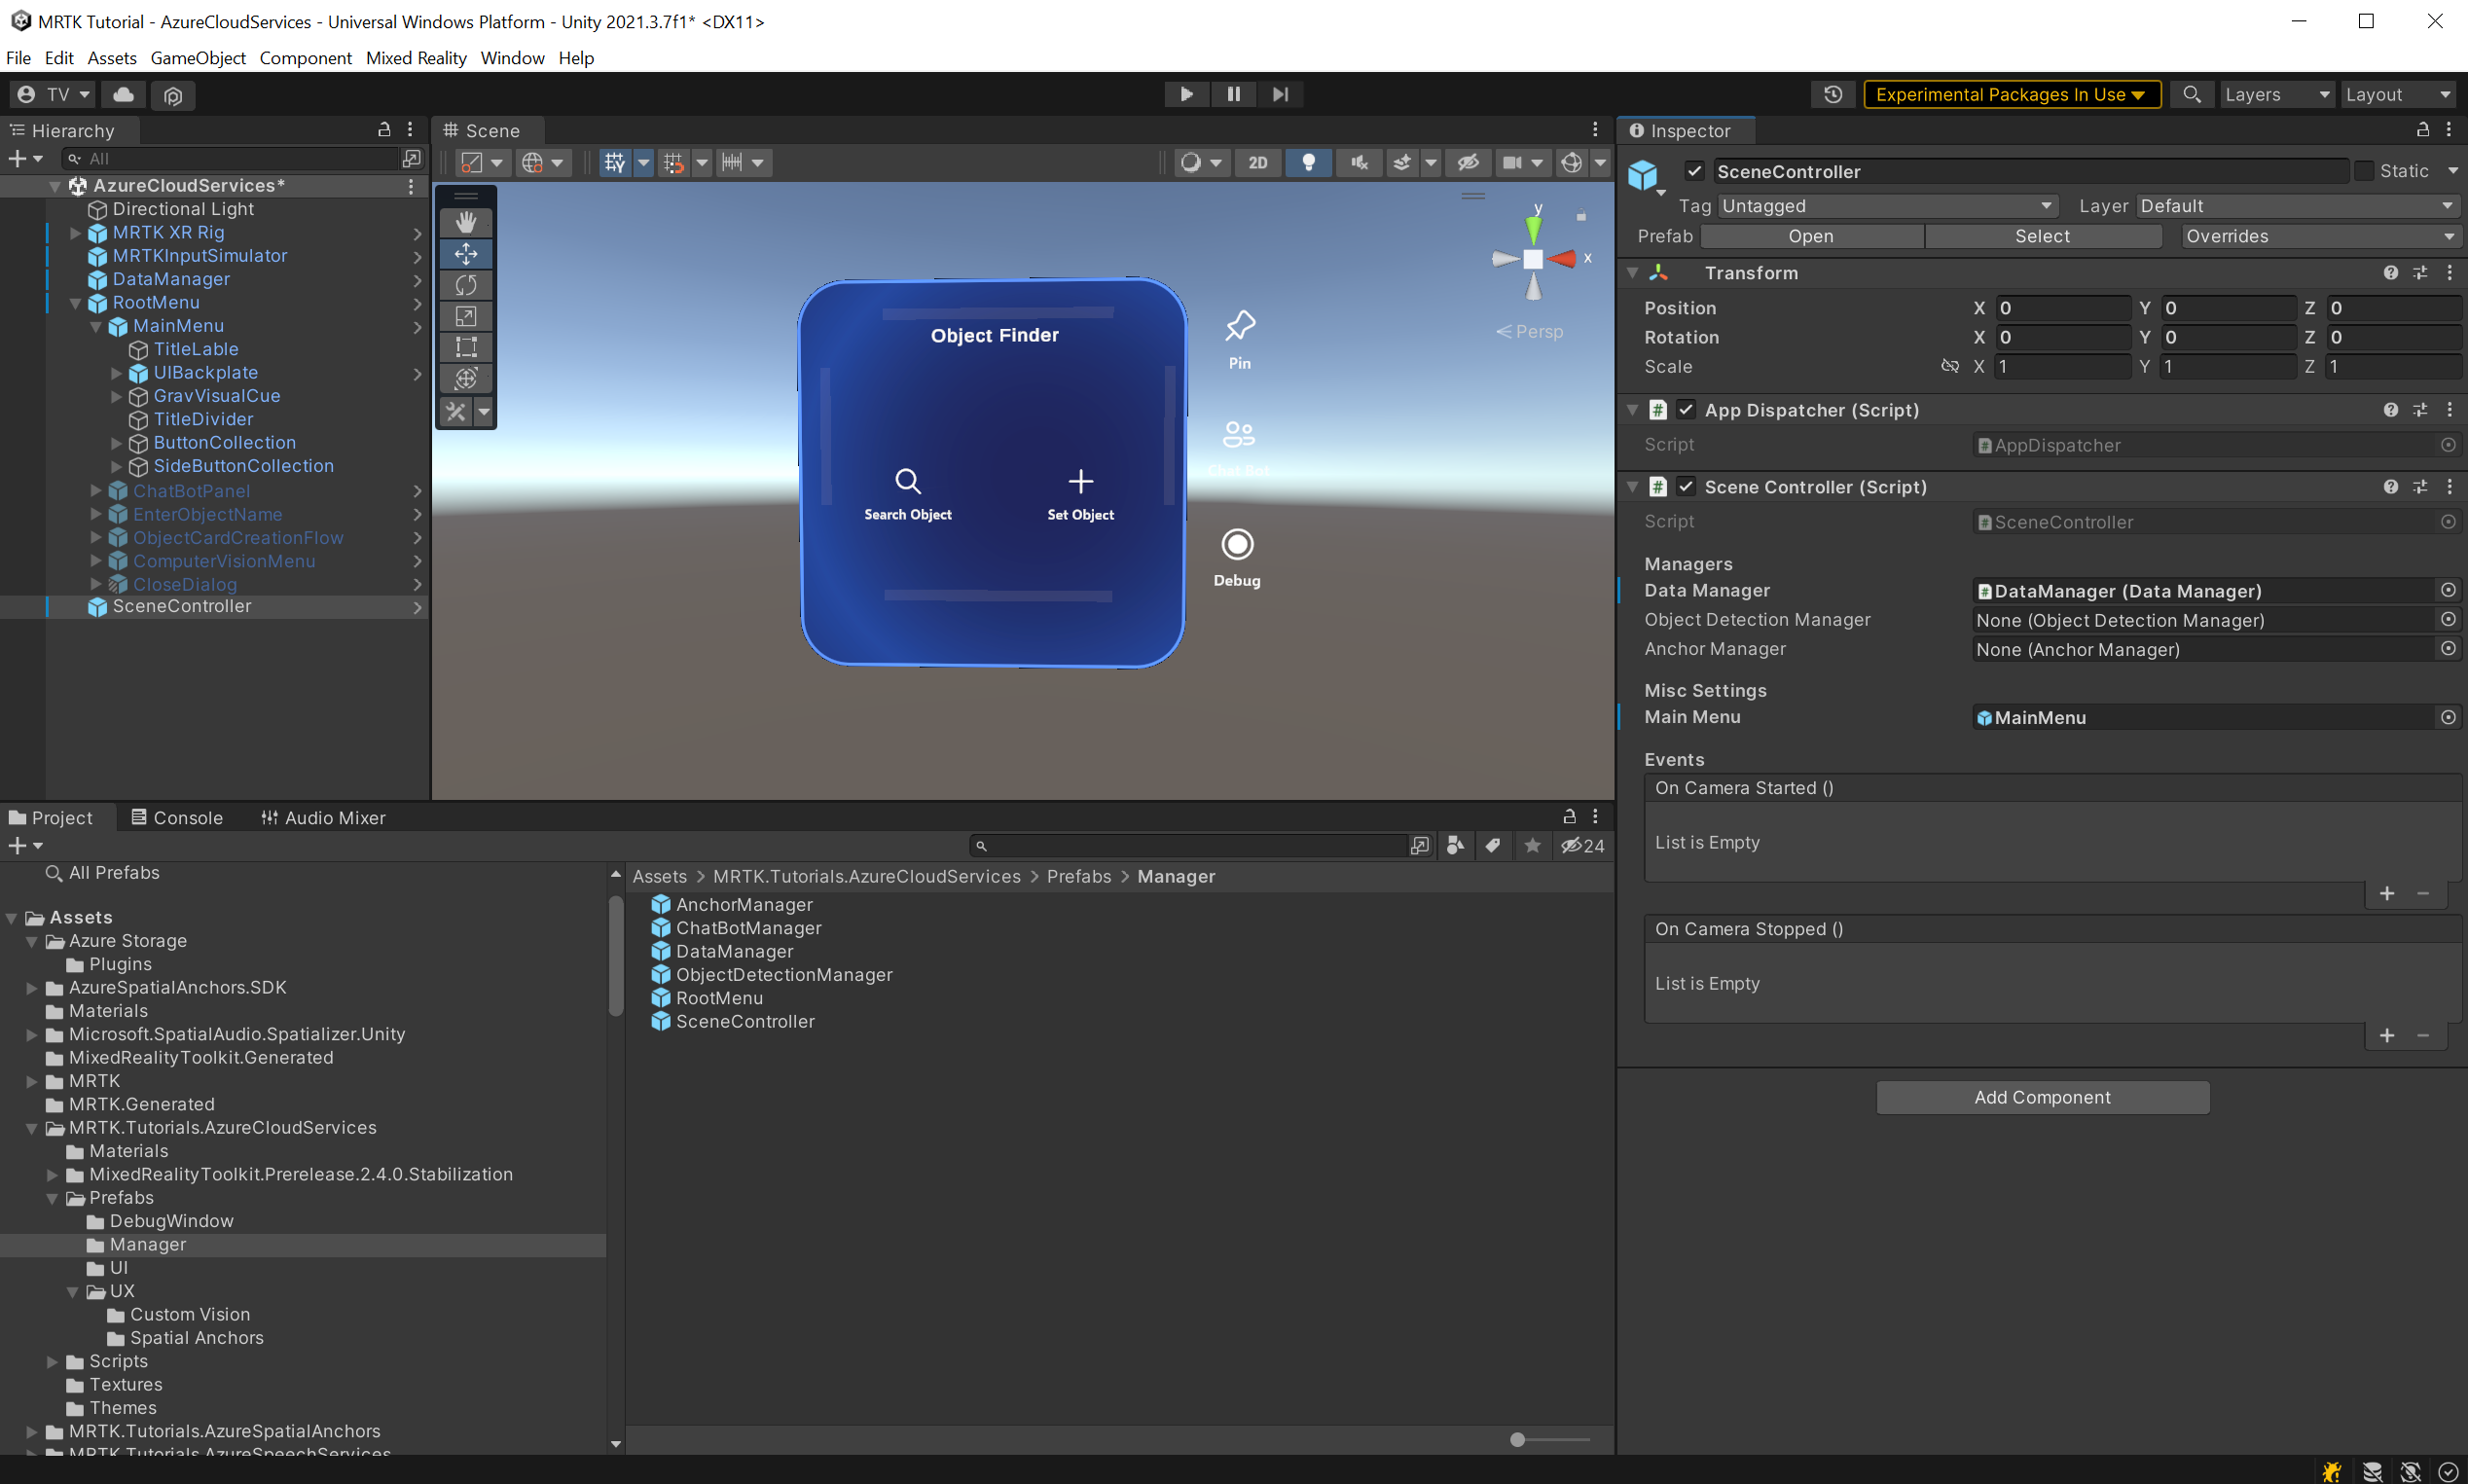
From the Hierarchy window, select the SceneController object. You'll find the SceneController (script) component in the Inspector.
There are now several unpopulated fields; let's change that. Move the DataManager object from the Hierarchy into the Data Manager field, then move the RootMenu>MainMenu GameObject from the Hierarchy into the Main Menu field.
In the Hierarchy window, select the MRTK XR Rig object. Ensure that the MRTK Speech child object is enabled. This allows you to open the menu by saying "Open menu."
Now your scene is ready for the upcoming tutorials. Don't forget to save it to your project.


Prepare project build pipeline
Note
Building and testing on HoloLens 2 isn't mandatory. You can test on the HoloLens 2 Emulator if you don't have a HoloLens device. You can purchase devices at HoloLens.com.
Before we finish the scene, let's prepare the project to build for HoloLens 2.
1. Add other required capabilities
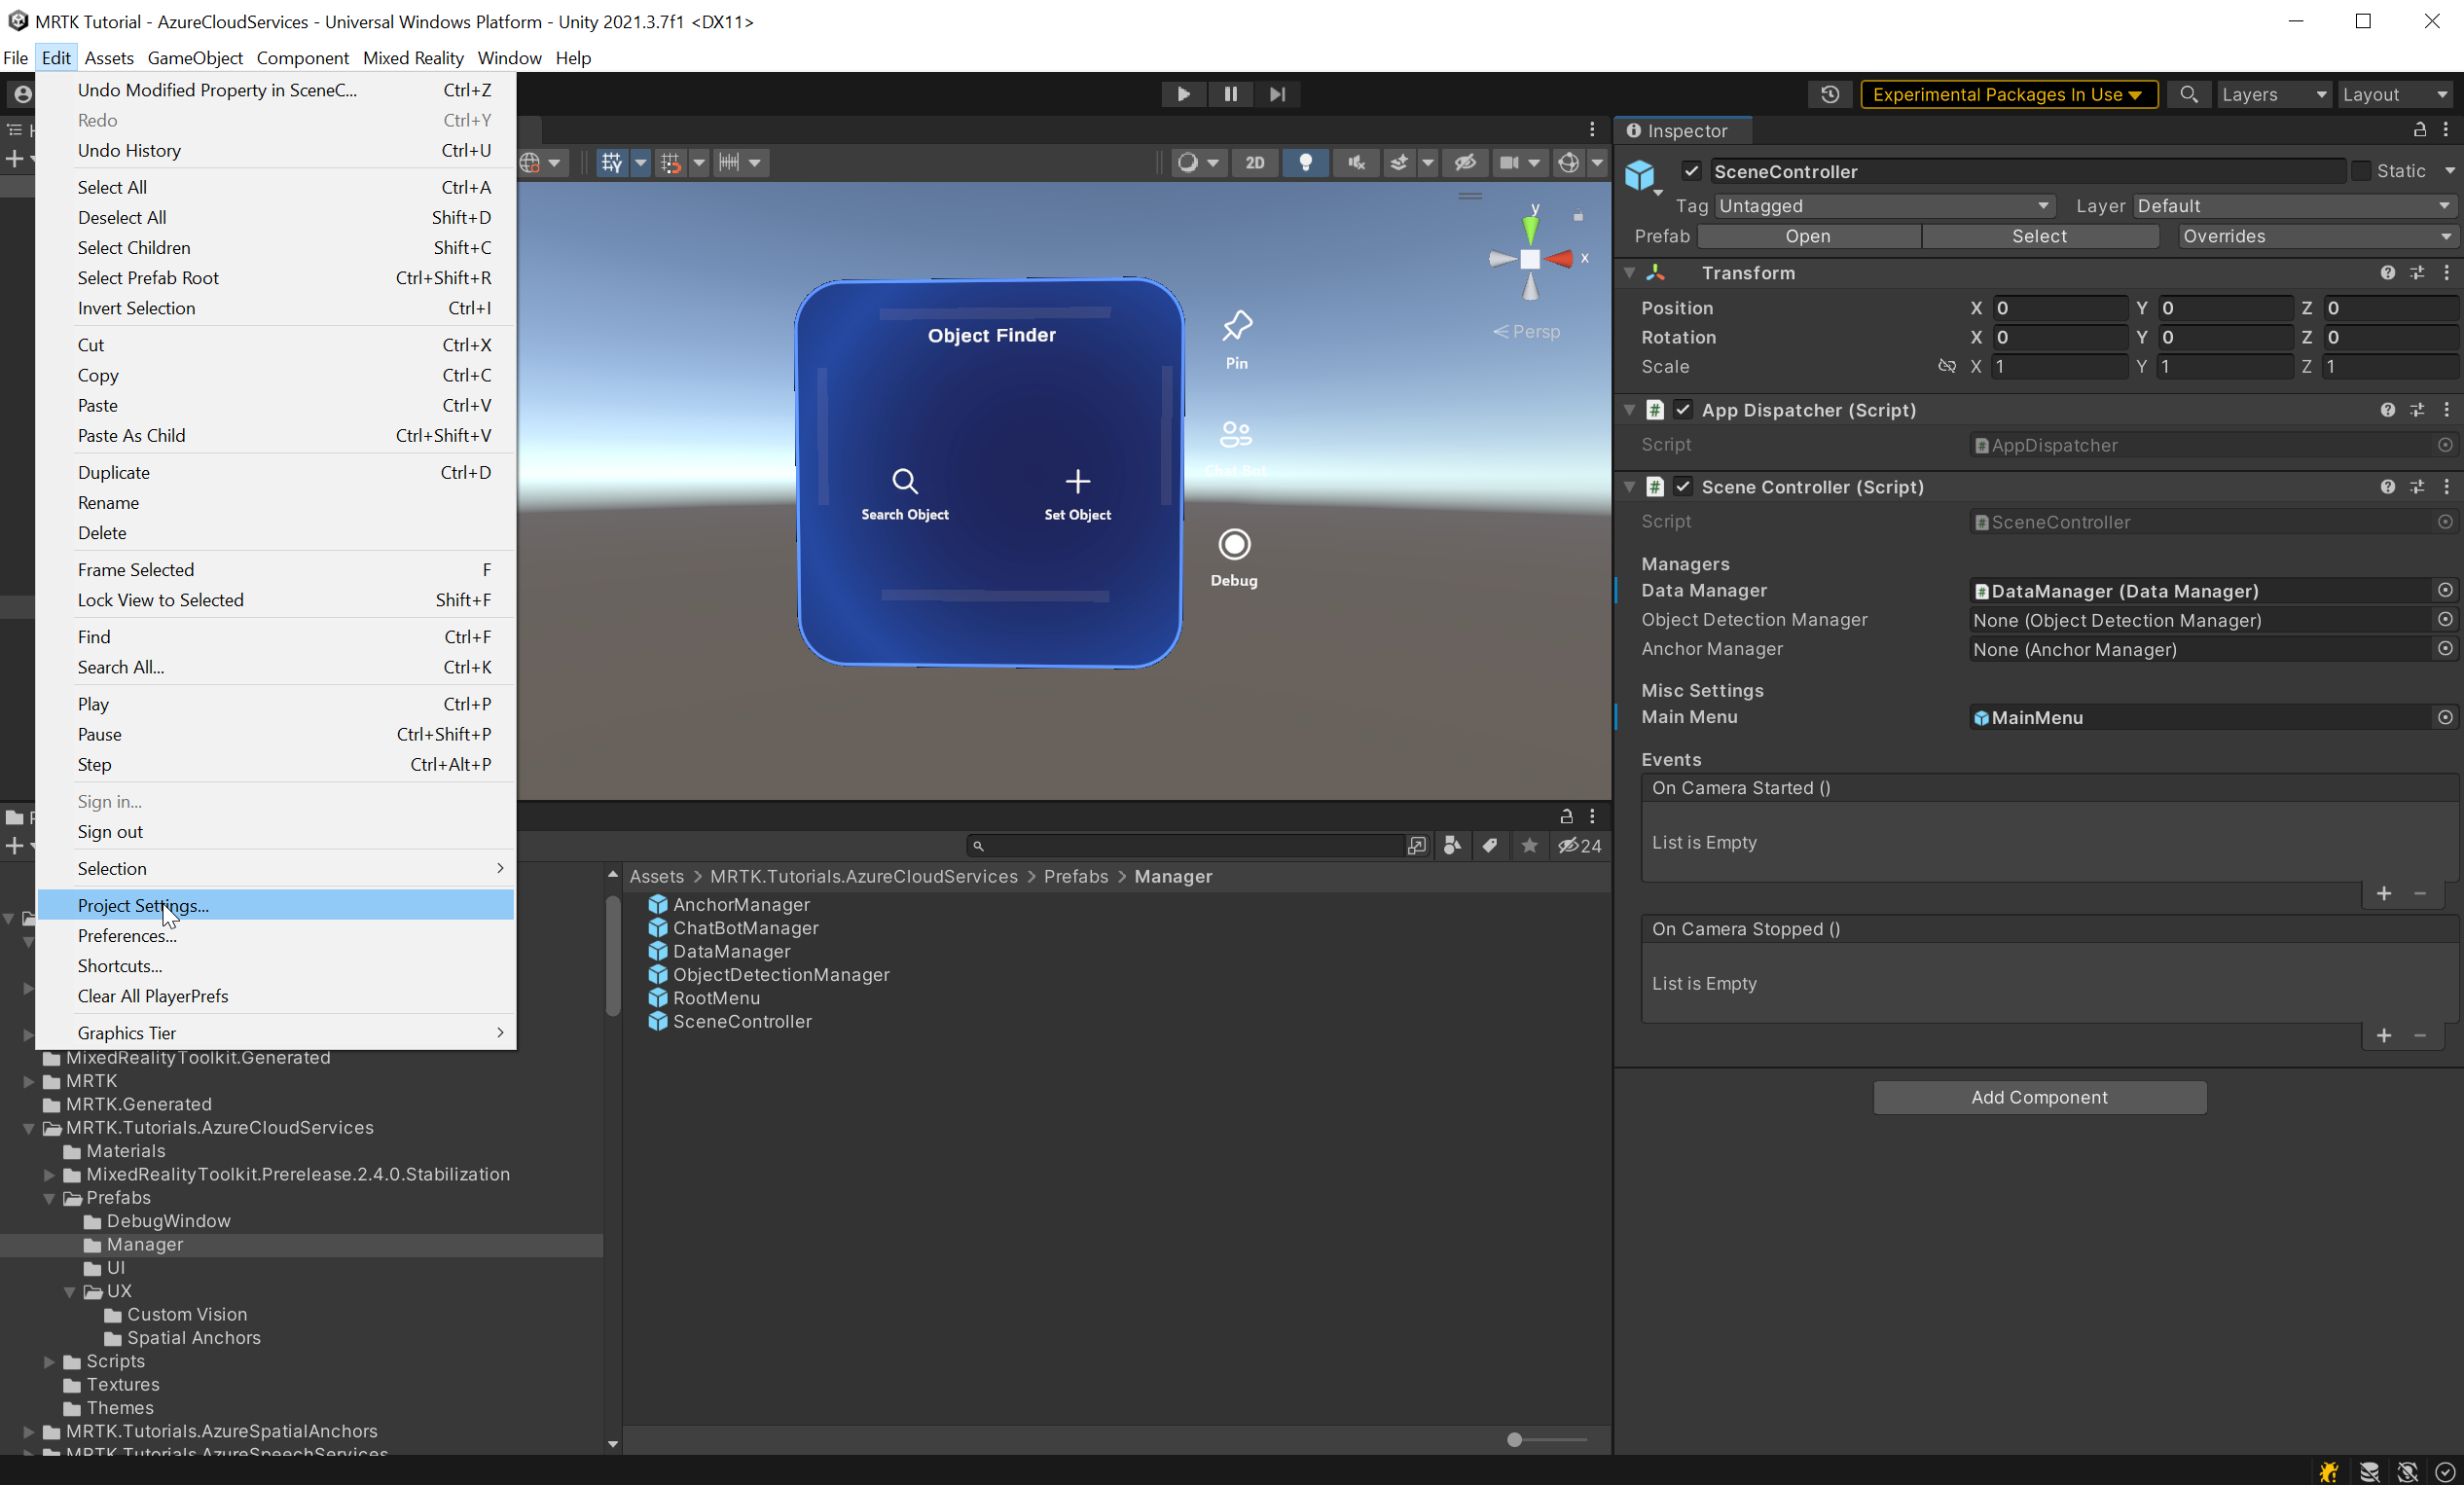
In the Unity menu, select Edit > Project Settings... to open the Project Settings window.
In the Project Settings window, select Player, then Publishing Settings:

In Publishing Settings, scroll down to the Capabilities section and double-check that the InternetClient, Microphone, and SpatialPerception capabilities (which you enabled when you created the project at the beginning of the tutorial) are enabled. Then, enable the InternetClientServer, PrivateNetworkClientServer, and Webcam capabilities:


2. Deploy the app to your HoloLens 2
You won't be able to run all the features that you'll use in this tutorial series inside the Unity editor. Therefore, you need to be familiar with deploying the application to your HoloLens 2 device or emulator.
Tip
For a reminder on how to build and deploy your Unity project to HoloLens 2, you can refer to the Getting started tutorials - Build and deploy your application instructions.
3. Run the app on your HoloLens 2 and follow the in-app instructions
Caution
All Azure Services uses the internet, so make sure your device is connected to the internet.
When the application is running on your device, grant access to the following requested capabilities:
- Microphone
- Camera
These capabilities are required for services like Custom Vision to function properly.