Exercise - Create an HPC cluster from built-in templates
You can create new clusters directly from the graphical interface of the Azure CycleCloud web application. CycleCloud offers many predefined, scheduler-specific templates, which simplify cluster provisioning for the corresponding schedulers.
Now that you provisioned an Azure virtual machine that hosts the CycleCloud web applications, you're ready to evaluate its use for deployment of a Slurm-based HPC cluster into Azure. You first need to ensure that your Azure subscription accommodates the cluster's resource requirements. You also want to consider whether your management team wants to keep the cluster's cost within the project's budget. So, you plan to set up CycleCloud budget alerts and deprovision the lab environment after you complete the evaluation.
In this exercise, you step through deployment of a Slurm-based HPC cluster into Azure by using Azure CycleCloud. The exercise consists of the following tasks:
- Task 1: Prepare for the deployment of an HPC cluster
- Task 2: Create an HPC cluster by using Azure CycleCloud
- Task 3: Configure and start an HPC cluster by using Azure CycleCloud
- Task 4: Clean up the lab environment
Task 1: Prepare for the deployment of an HPC cluster
Before you deploy an HPC cluster, you should first ensure that you have sufficient network and compute resources to accommodate its usage.
Note
To complete this exercise, you don't need to satisfy quota requirements to accommodate provisioning of the compute nodes because you won't run any jobs on the cluster you create. However, if that's the case, you might notice a mismatch between the screenshots in this exercise and your CycleCloud web interface, since CycleCloud won't pre-create placeholder compute nodes if you don't have the sufficient number of available cores.
On your computer, switch to the web browser window displaying the Azure portal.
In the Azure portal, use the search box at the top of the portal interface to search for the cyclecloud-rg resource group.
In the Azure portal, on the cyclecloud-rg page, in the list of resources, select the cyclecloud-rg-vnet entry, representing the virtual network you provisioned in the previous exercise of this module.
On the cyclecloud-rg-vnet page, in the vertical menu on the left side, select Subnets.
On the cyclecloud-rg-vnet | Subnets pane, select + Subnet.
On the Add subnet pane, in the Name text box, enter contoso-slurm-lab-cluster-subnet, accept the default subnet range, and select Save.
Note
We recommend separating the subnet hosting the CycleCloud Azure VM from the subnets hosting cluster compute resources. For larger clusters, you should allocate sufficiently-sized IP address ranges.
In the Azure portal, use the search box to search for Subscriptions.
On the Subscriptions page, select the Azure subscription that you're using for exercises in this module.
On the page displaying the Azure subscription, in the vertical menu on the left side, in the Settings section, select Usage + quotas.
On the Usage + quotas pane, configure the following filtering settings (leave others with their default values):
Setting Value Select a service Select Standard Dv3 Family vCPUs, Standard FSv2 Family vCPUs, and Total Regional vCPUs entries. Select a provider Select the Microsoft.Compute entry. Select a location Select the name of the Azure region where you intend to deploy the cluster in this exercise. Review the output and identify the number of available vCPUs in each group.

Task 2: Create an HPC cluster by using Azure CycleCloud
Now you have the CycleCloud web application installed in an Azure VM, enough vCPU cores available in your Azure subscription, and a designated network subnet capable of accommodating autoscaling of cluster nodes. You're ready to proceed with deployment of a Slurm-based cluster.
On your computer, in the web browser window displaying the Subscriptions page of the Azure CycleCloud web application, in the upper left corner, select the Back to clusters link.
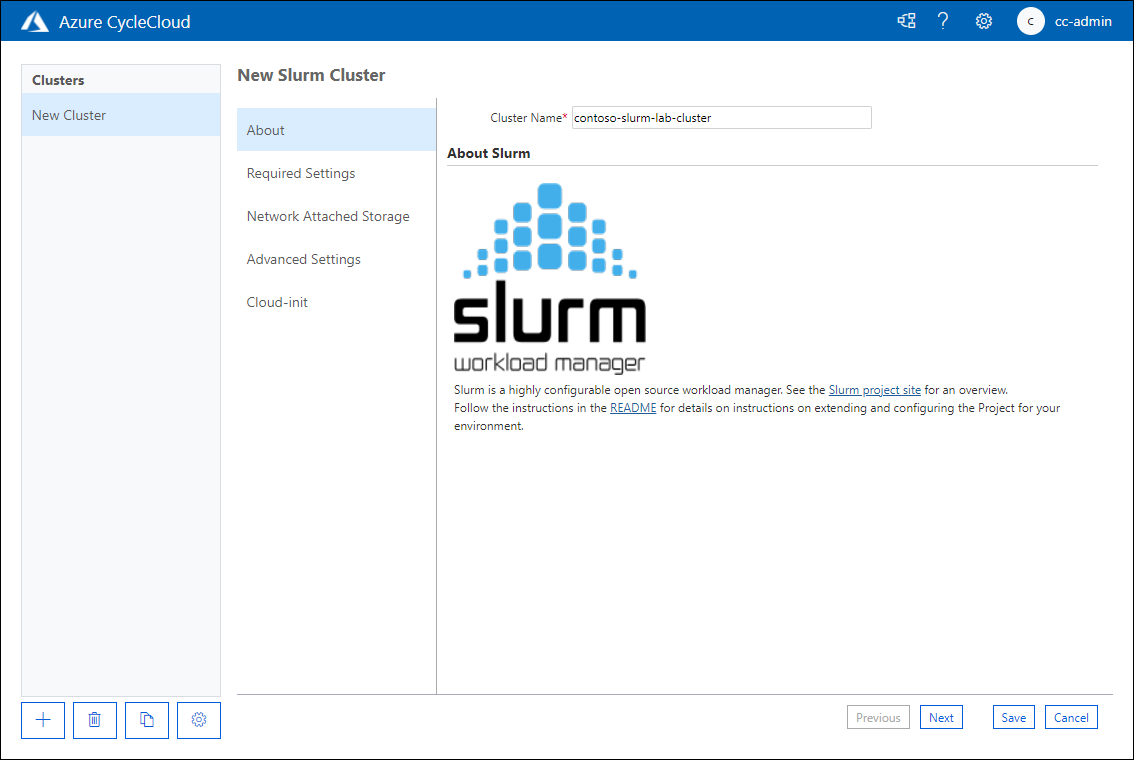
On the Create a New Cluster page, review the available options, and in the Schedulers section, select Slurm.

On the About tab of the New Slurm Cluster page, in the Cluster Name text box, enter contoso-slurm-lab-cluster.
On the Required Settings tab of the New Slurm Cluster page, in the Cluster Name text box, configure the following settings (leave others with their default values):
Setting Value Region Select the name of the Azure region where you intend to deploy the cluster in this exercise. Scheduler VM Type Select Choose, and then in the Select a machine type pop-up window, in the SKU Search text box, enter "D2ds_v5". In the list of results, select the checkbox next to the D2ds_v5 entry, and then select Apply. 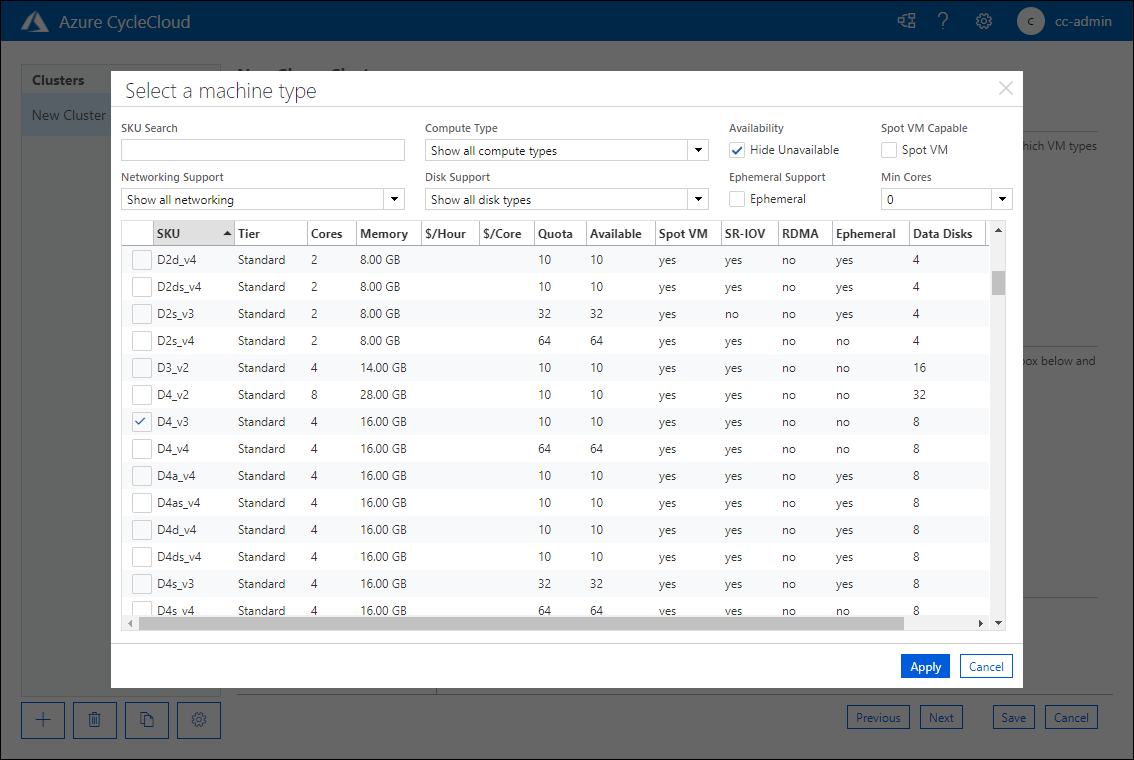
Setting Value Max HPC Cores Enter 100 Max HTC Cores Enter 100 Max VMs per Scaleset Enter 40 Subnet ID Select cyclecloud-rg: cyclecloud-rg-vnet-contoso-slurm-lab-cluster-subnet 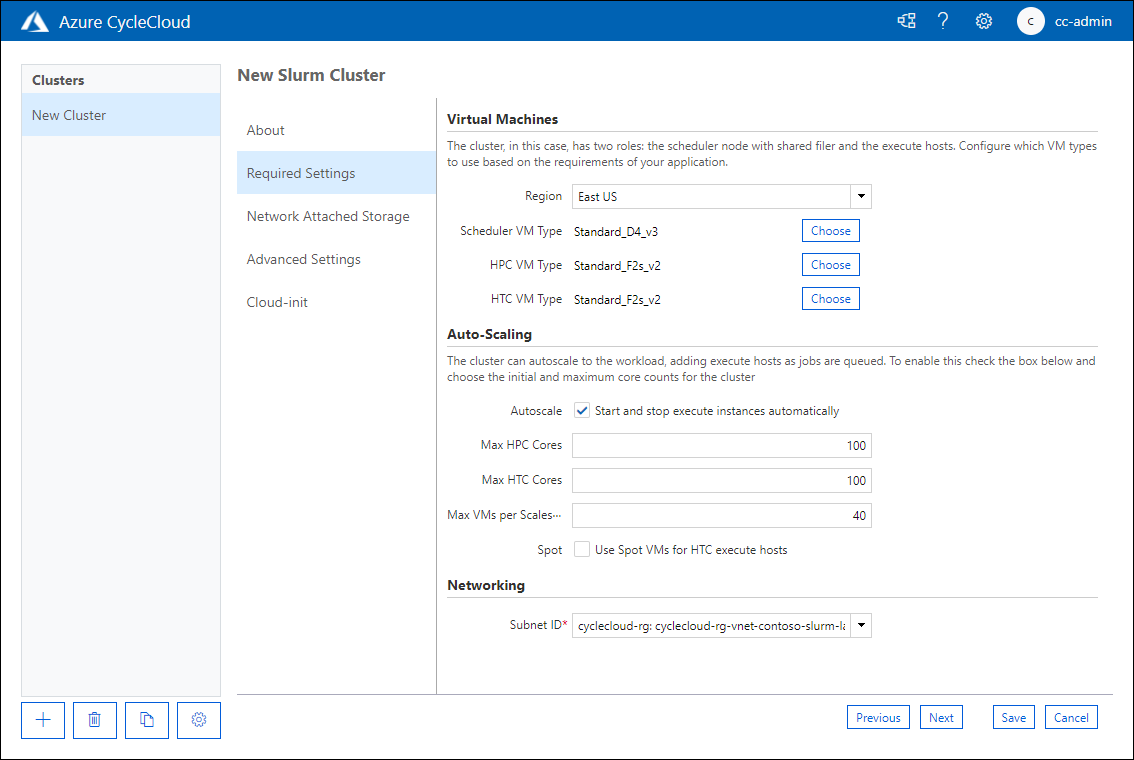
Note
The Max VMs per Scaleset setting limits the maximum size of a Message Passing Interface job that can run on the cluster, since the scaleset is currently the InfiniBand fabric boundary.
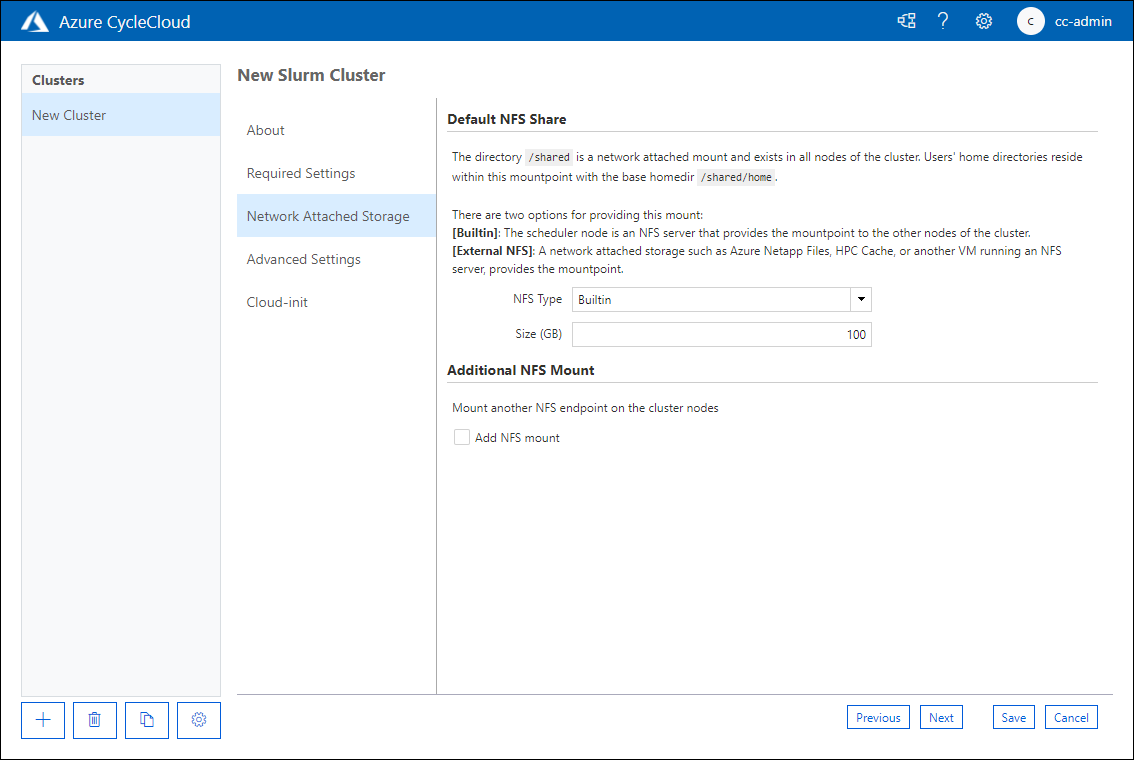
On the Network Attached Storage tab of the New Slurm Cluster page, verify that the NFS Type is set to Builtin. Accept the default value of Size (GB) set to 100, and select Next.
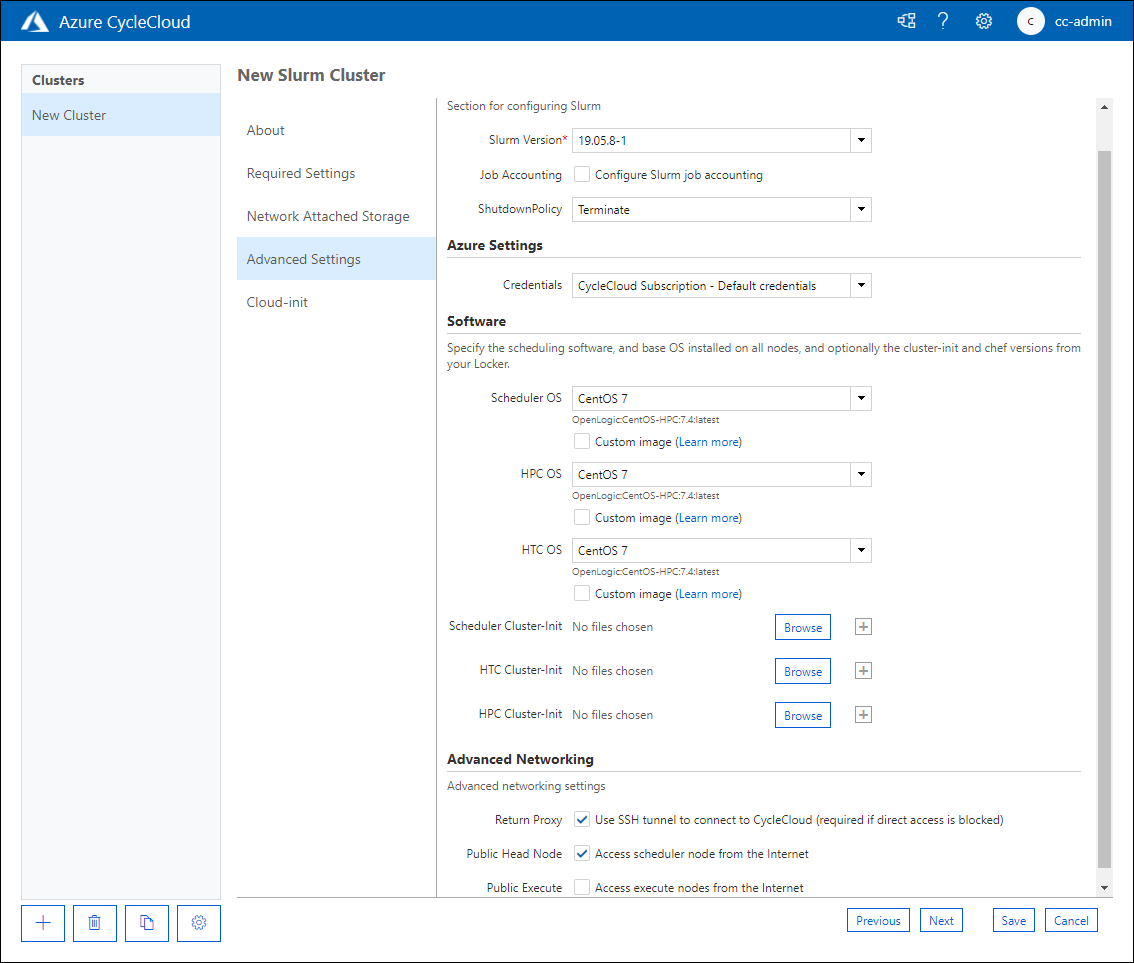
On the Advanced Settings tab of the New Slurm Cluster page, review the available options without making any changes, and then select Next.
On the Cloud-init tab of the New Slurm Cluster page, review the available options without making any changes, and then select Save.
Task 3: Configure and start an HPC cluster by using Azure CycleCloud
To prepare for operationalizing your cluster, set alerts to notify you when cluster usage costs reach the budget allocated towards the cost of Azure resources. You also validate your deployment by starting the cluster with the graphical interface of the CycleCloud web application.
On your computer, in the web browser displaying the graphical interface of the Azure CycleCloud web application, review the properties of the newly deployed cluster.
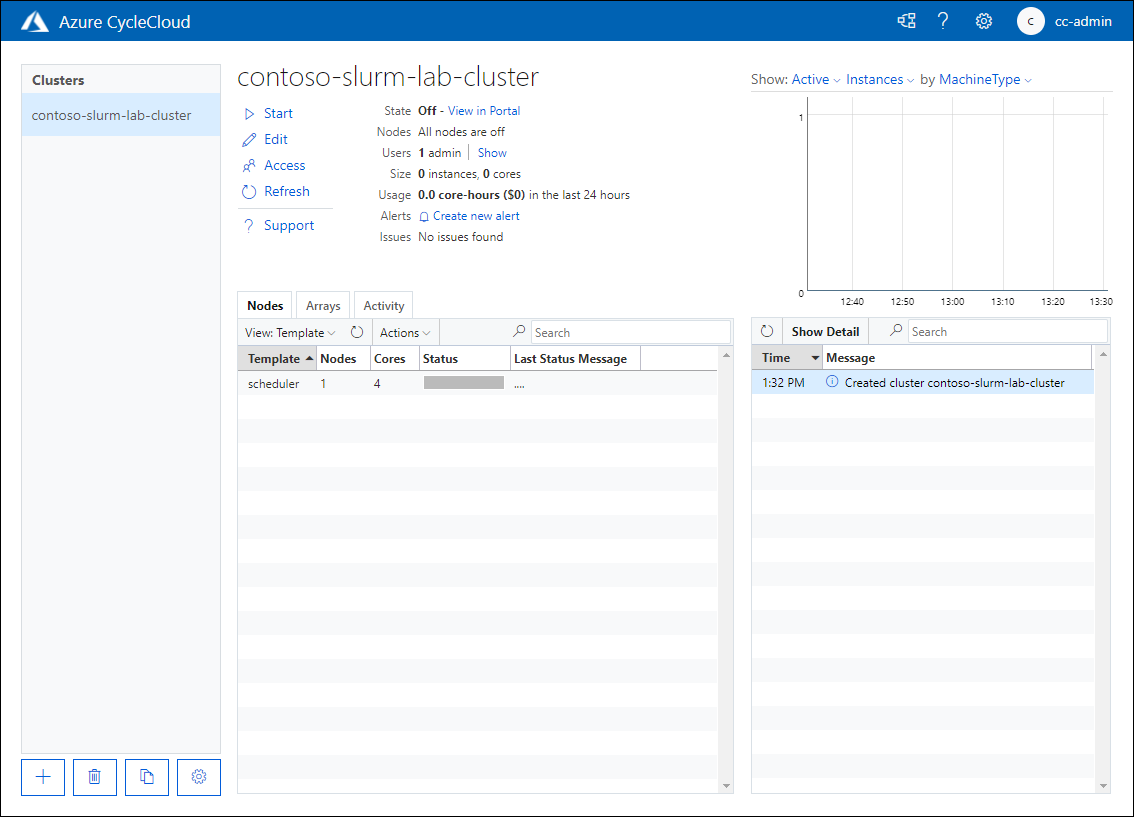
On the contoso-slurm-lab-cluster page, select the Create new alert link.
In the Cluster usage alert for contoso-slurm-lab-cluster pop-up window, specify the following settings, and then select Save:
Setting Value Budget $100.00 Per Month Send notification Enabled Recipients cc-admin@contoso.com 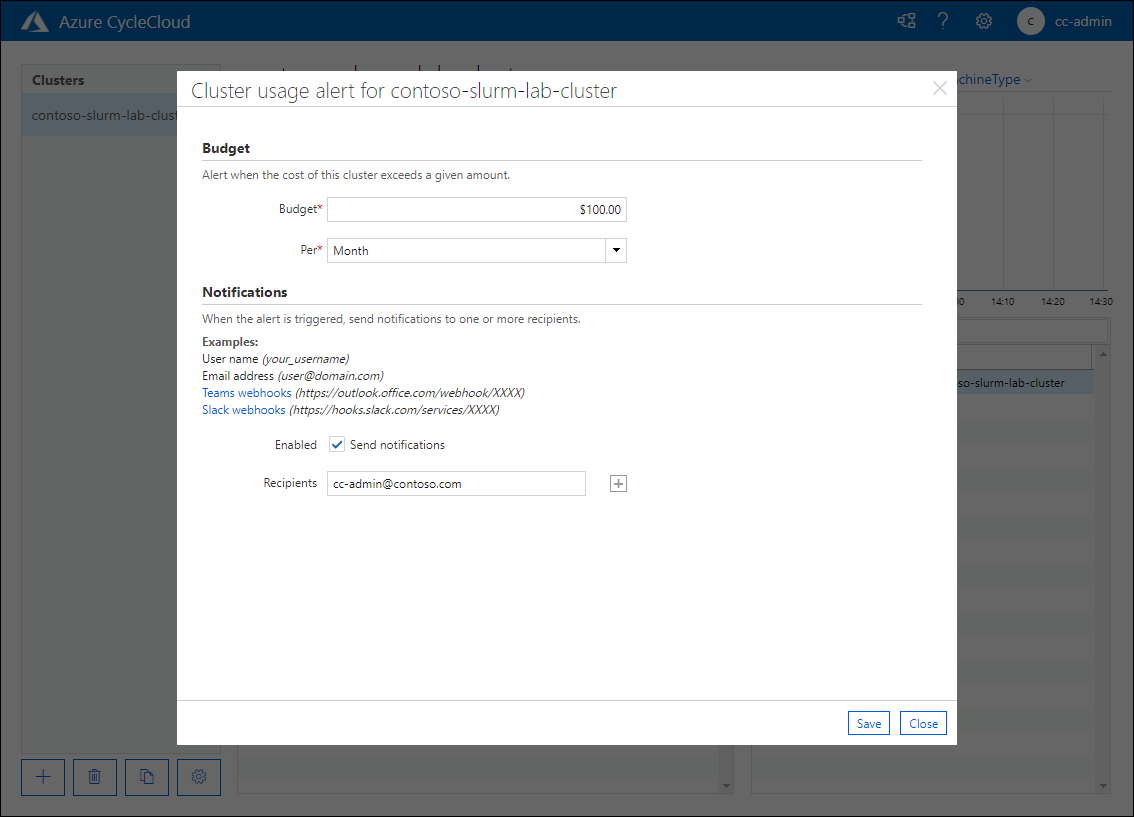
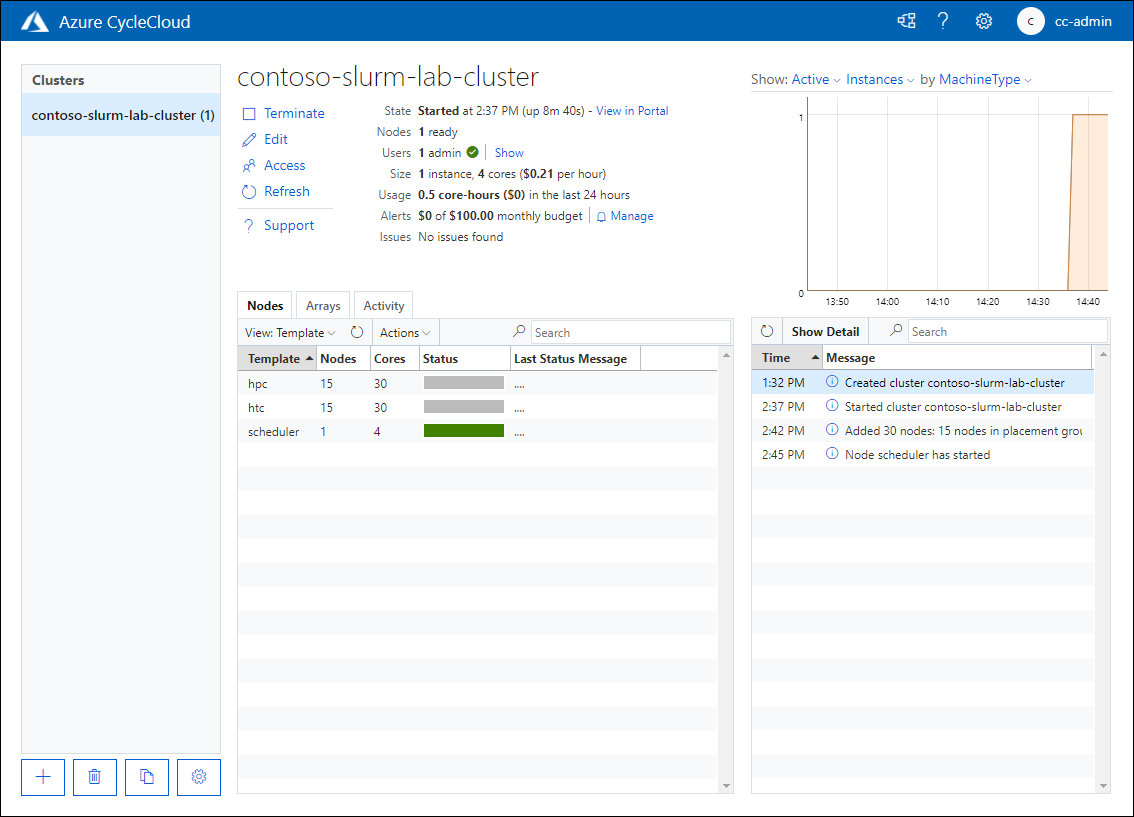
Back on the contoso-slurm-lab-cluster page, select the Start link, and when prompted to confirm, select OK.
Monitor the startup process.
Note
The process involves provisioning of the Azure VM serving the role of the cluster's head node, and installation and configuration of the Slurm scheduler. This might take about five minutes.
Task 4: Clean up the lab environment
You completed testing of the cluster deployment process by using the Azure CycleCloud application. To avoid unnecessary costs associated with the use of Azure resources, terminate the cluster and remove all of the resources you provisioned throughout the exercises of this course.
On your computer, in the web browser displaying the graphical interface of the Azure CycleCloud web application, on the contoso-slurm-lab-cluster page, select the Terminate link, and when prompted to confirm, select OK.
Monitor the termination process.
Note
The process involves deprovisioning of the Azure VM serving the role of the cluster's head node. This might take about five minutes.
Note
You should delete the resources that you deployed as part of this exercise, as outlined in this task. If you don't delete the resources, you might incur additional charges to your subscription.
Note
To delete all other resources you provisioned in this lab, delete the cyclecloud-rg resource group.
On your computer, switch to the browser window displaying the Azure portal.
In the Azure portal, navigate to the cyclecloud-rg blade. Select the Delete resource group entry in the toolbar, and in the TYPE THE RESOURCE GROUP NAME textbox, enter cyclecloud-rg, and then select Delete.
Repeat the previous step to delete the resource group with the name starting with contoso-slurm-lab-cluster- that contains the disk resource used by the cluster.
Congratulations! You successfully completed the second exercise of this module. You ensured the availability of compute and network resources that are required to accommodate deployment of a new cluster. Then, you deployed the cluster by using Azure CycleCloud, configured its budget alerts, and started it to validate its functionality. Finally, you terminated the cluster and deleted all resources you provisioned in this module to avoid any unnecessary costs.