Exercise - Deploy Azure SQL Database
In this activity, you deploy Azure SQL Database by using the Azure portal. Throughout this exercise, you explore the options that are available to you.
Deploy Azure SQL Database by using the Azure portal
Sign in to the Azure portal.
In the top search bar, enter Azure SQL and wait for results so you can review what appears.
There are many items and categories here, but this menu gives you filters to search. Let's break them down:
- Services: With this filter, you can see your existing resources all together. For example, if you selected Azure SQL, you'd see all of your SQL virtual machines, databases, logical servers, managed instances, and pools.
- Resources: This search is based on existing resource names. For example, if you searched for adventureworks, any resources with "adventureworks" in the name would be returned.
- Marketplace: This filter allows you to deploy new resources from Azure Marketplace.
- Documentation: This searches
learn.microsoft.comfor relevant documentation. - Resource groups: This filter allows you to search based on resource group name.
Under Marketplace, select Azure SQL. This step brings you to the Azure SQL create experience.
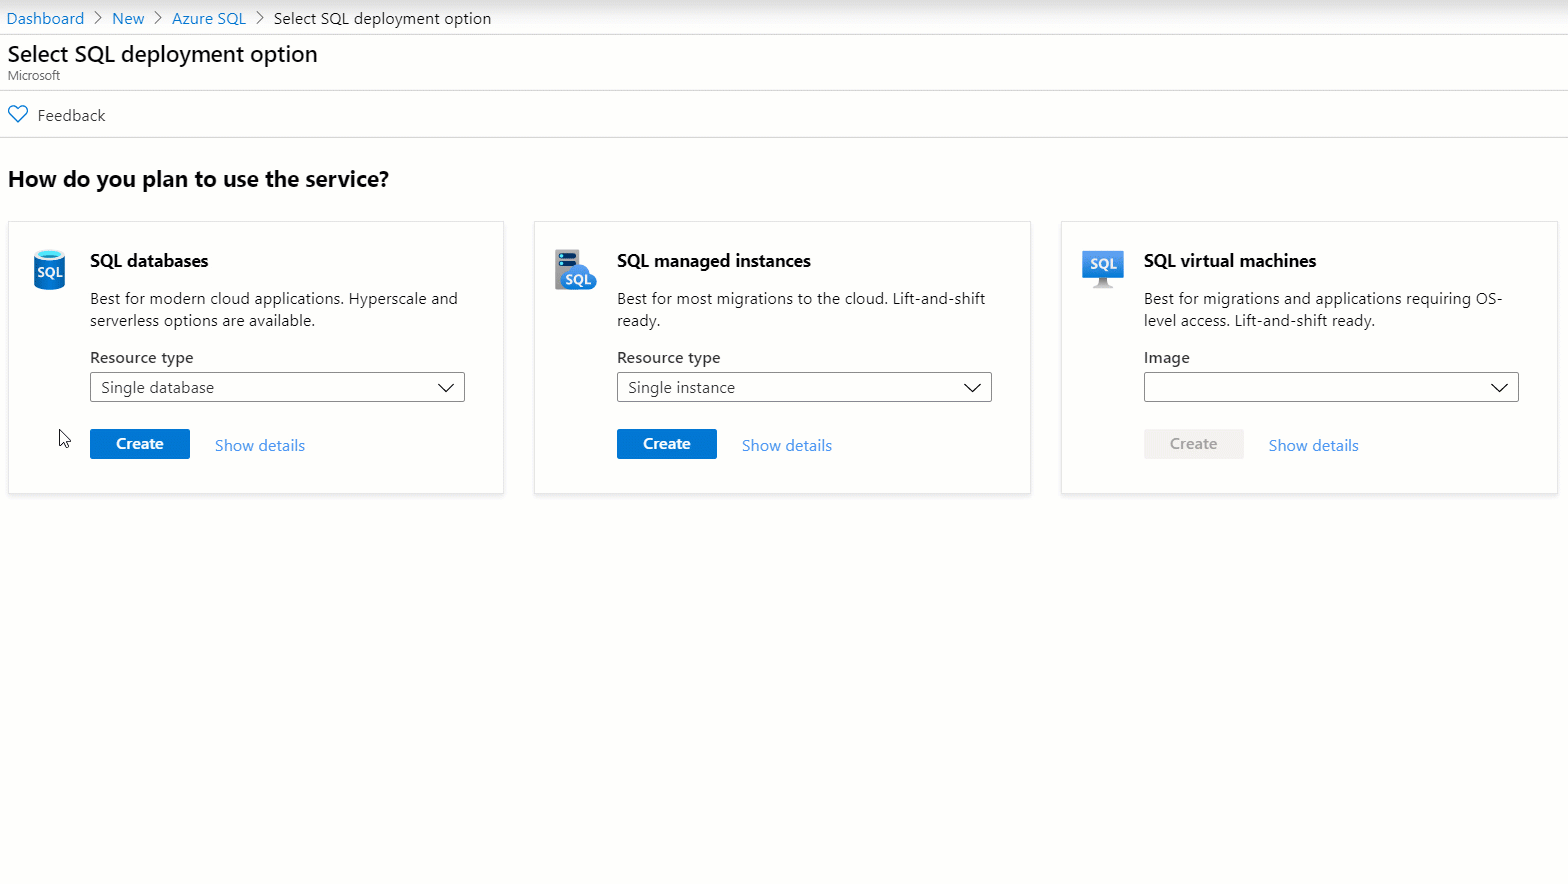
In SQL databases, select Single database > Create.
On the Basics tab, enter the following information:
Parameter Value Subscription Select your Azure subscription. Resource group Select a resource group to use, or select Create new. Database name AdventureWorks Server Select Create new, fill out the Server details pane as follows, and select OK: Server name: Enter a unique name for the server, for example, aw-server0406. Location: Use a region that's close to you. Authentication method: Use SQL authentication. Server admin login: cloudadmin Password/Confirm Password: Use a complex password that meets strong password requirements. Note this password for later use. Want to use SQL elastic pool? No Workload environment Leave the default of Production. Compute + storage Leave the default of General Purpose, Gen5, 2 vCores, 32 GB storage. Backup storage redundancy Leave the default of Geo-redundant backup storage. Caution
This training module uses the less-secure SQL password authentication to simplify the demo. For improved security, Microsoft Entra authentication is the recommended authentication method for Azure SQL products.
Select Next: Networking.
For Connectivity method, select Public endpoint. Select Yes for both Allow Azure services and resources to access this server and Add current client IP address.
For Connection policy, select Default.
Select Next: Security.
When you deploy Azure SQL Database in the Azure portal, you're prompted about whether you want to Enable Microsoft Defender for SQL in a free trial. Select Start free trial.
After the free trial, you're billed according to the Microsoft Defender for Cloud Standard Tier pricing. After you enable it, you get functionality related to identifying and mitigating potential database vulnerabilities and threat detection.
Leave remaining defaults and select Next: Additional settings.
On the Additional settings tab for Azure SQL Database, you can select the
AdventureWorksLTdatabase as the sample in the Azure portal. For this exercise, for Use existing data, select Sample. Select OK when prompted.Select Review + create. Review your deployment selections and the Azure Marketplace terms. Review all the options to ensure that all of your selections match the exercise instructions, then select Create to deploy the service.
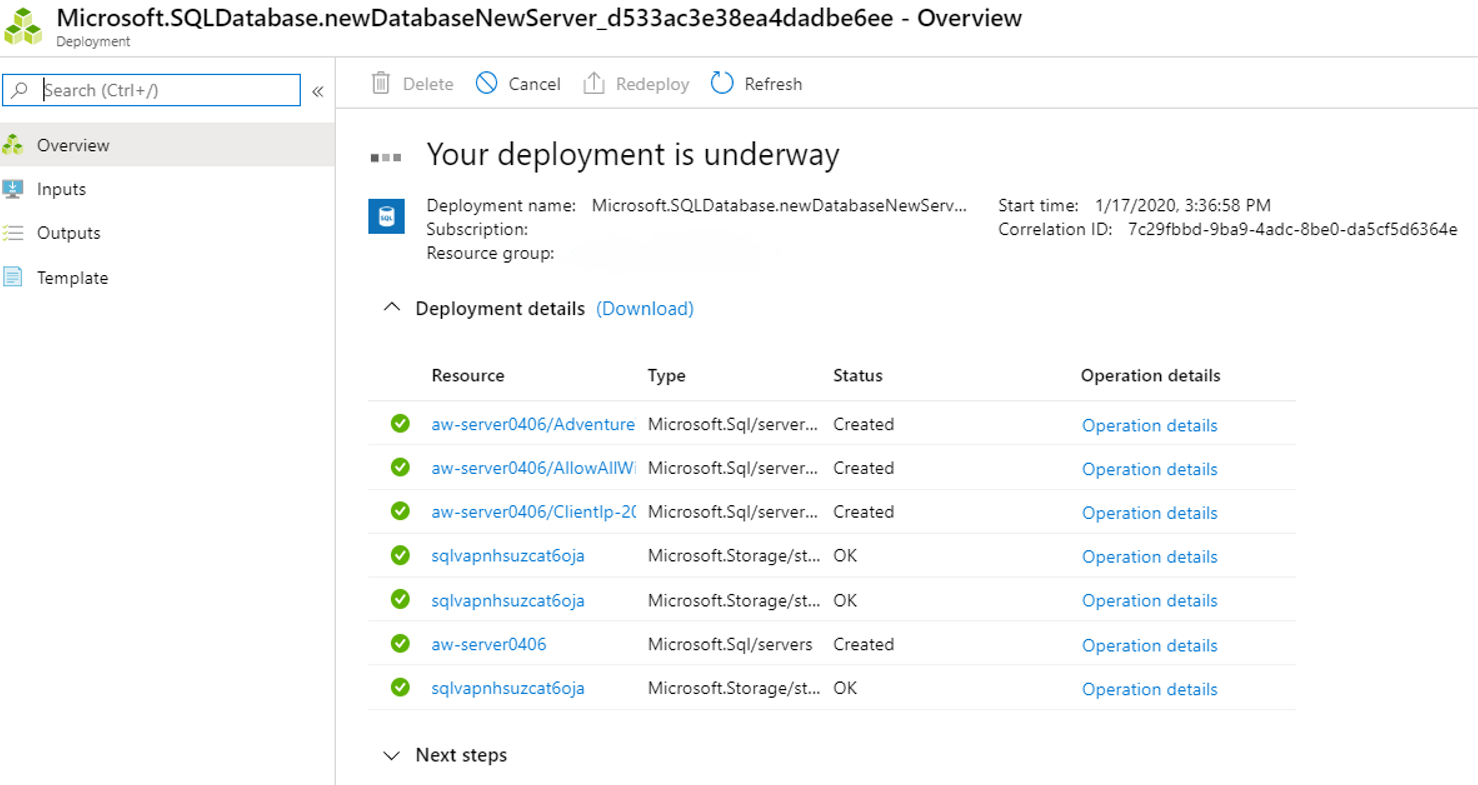
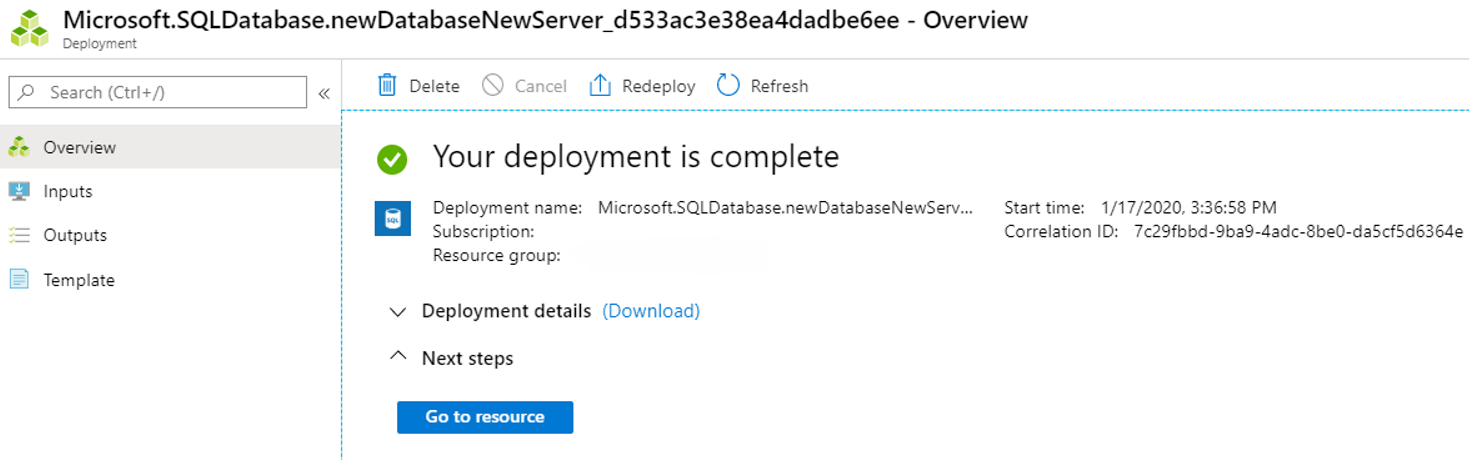
You're redirected to a pane where you can monitor the status of your deployment. You can also go to your resource group and select Deployments to open this same pane. It gives you the various deployments, their status, and more information. This deployment typically takes less than five minutes.
When your deployment is complete, select Go to resource.
Review the Overview pane for the SQL database in the Azure portal and confirm that the status is Online.
Connect to Azure SQL Database
Next, we look at the basics of connecting to your deployed SQL database and compare that experience to connecting to SQL Server.
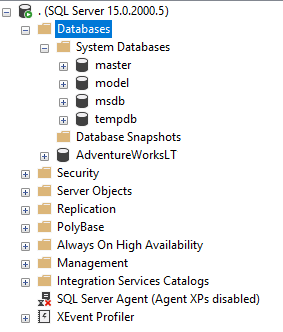
What does connecting to SQL Server 2019 look like?
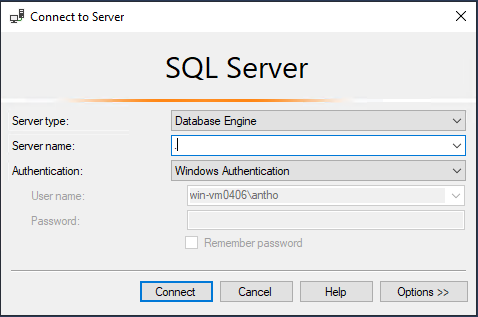
Before you look at the SQL database that you deployed, review what connecting to an instance of SQL Server 2019 might look like. Typically, you'd open SQL Server Management Studio (SSMS) and connect to the local instance of SQL Server 2019. You might use Windows Authentication for the connection. The selections would be similar to the following image:
You then see a view that looks similar to the following example:
Keep that in mind as a reference for comparison as you complete the following steps.
Connect to your SQL Database by using SSMS
Get the logical server name. On the Overview pane for your database, locate the Server name information. The name is the fully qualified domain name (FQDN) of your logical server, for example, aw-server0406.database.windows.net. Hover your mouse at the end of the name and select Copy to clipboard.
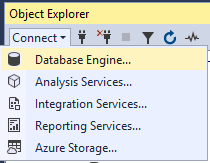
Connect to your Azure SQL Database logical server. On your local device, open SSMS if it's not open already and create a new connection. Select Connect > Database Engine.
For Server name, paste the name of your Azure SQL Database logical server.
Change the authentication to SQL Server Authentication, then enter the corresponding Server admin login and Password. These values are the ones you entered in the previous exercise.
Select Remember password, and then select Connect.
Note
Depending on your local configuration (for example, VPN), your client IP address might differ from the IP address that the Azure portal used during deployment. If it does, you get a message that says: Your client IP address does not have access to the server. Sign in to an Azure account and create a new firewall rule to enable access.
If you get this message, sign in with the account you use for Azure and add a firewall rule for your client IP address. You can complete all of these steps by using the pop-up wizard in SSMS.
Expand the databases and system databases. The view should be similar to the following example:
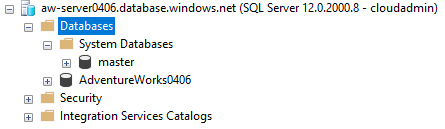
Spend a few minutes exploring the differences between the Azure SQL Database logical server and SQL Server.
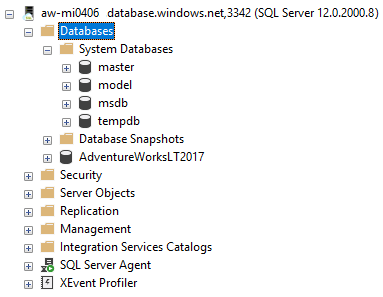
You don't deploy an Azure SQL Managed Instance as part of this exercise, but the following image shows how a SQL managed instance would appear in SSMS:
In this exercise, you saw how to deploy and connect to Azure SQL Database, and how it compares to SQL Server and Azure SQL Managed Instance. In the next exercise, you continue this comparison and go deeper by exploring various methods to verify your deployment and installation.