Exercise - Install the Truffle for VS Code extension
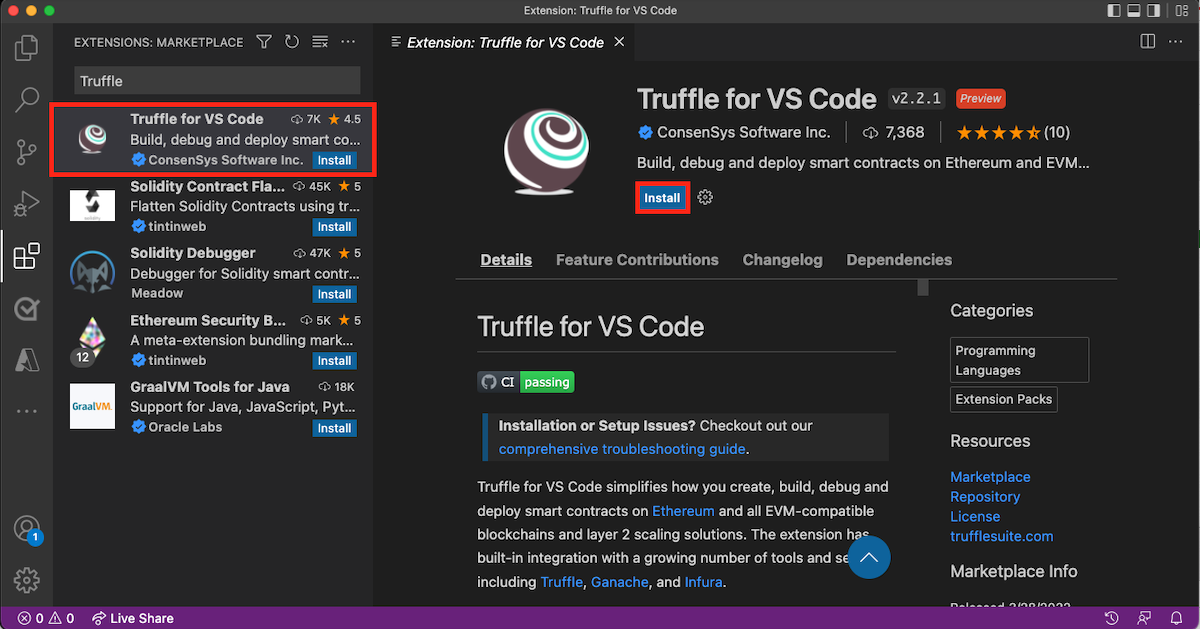
The Truffle for VS Code extension: This extension can simplify how you create, build, and deploy smart contracts on Ethereum ledgers. This extension has built-in integration with Truffle, Ganache, and more tools and services. In this module, we'll use this extension to write and test smart contracts.
Install the extension
In Visual Studio Code, on the left sidebar, select Extensions. Search for Truffle for VS Code, and select it to install it.
Before you use the Truffle extension, make sure you've installed:
- Node.js and npm: To confirm Node.js is installed, open your terminal and type
node. If Node.js is installed, the terminal returns your computer's version of Node.js. You can also confirm that the node package manager (npm) is installed by typingnpmin the terminal. - Git: To confirm Git is installed, open your terminal and type
git. If Git is installed, the terminal returns a list of available git commands. - Truffle Suite: The extension provides a link to install the Truffle Suite of developer tools (required while the extension is in public preview).
- Ganache: The extension provides a link to install Ganache (required while the extension is in public preview).
If you don't have this software installed, or don't have the minimum versions, the extension provides tips for how to install the tools.
Get started
When you have all of the dependencies installed, use the Truffle extension to create your first project:
On your computer, add an empty directory for the project. To create a directory from Visual Studio Code, go to Terminal > New Terminal and then type
mkdir newSolidityProject. Make a note of this new directory's location. You'll need it later.In Visual Studio Code, go to View > Command Palette. In the search box, type
Truffle: New Solidity Project. As you type, a list of suggestions appears.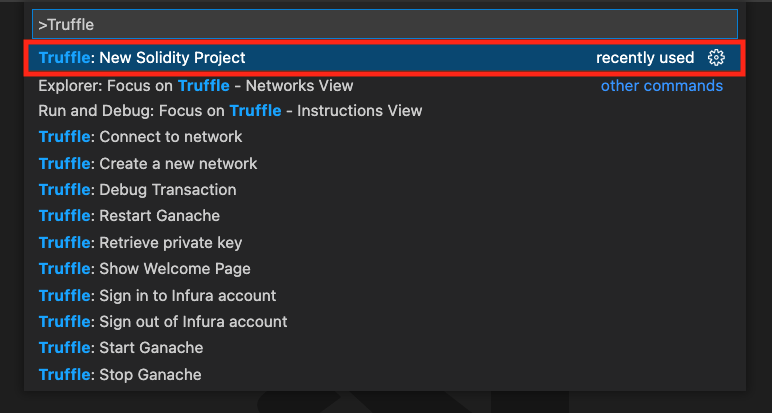
For the type of Solidity project, select Create basic project.

Use the Explorer pane to find the folder you created in step 1. Select the folder. In the lower-right corner of the window, you see Creating new project.
After your Solidity project is created, open the Explorer pane to see the project's files.
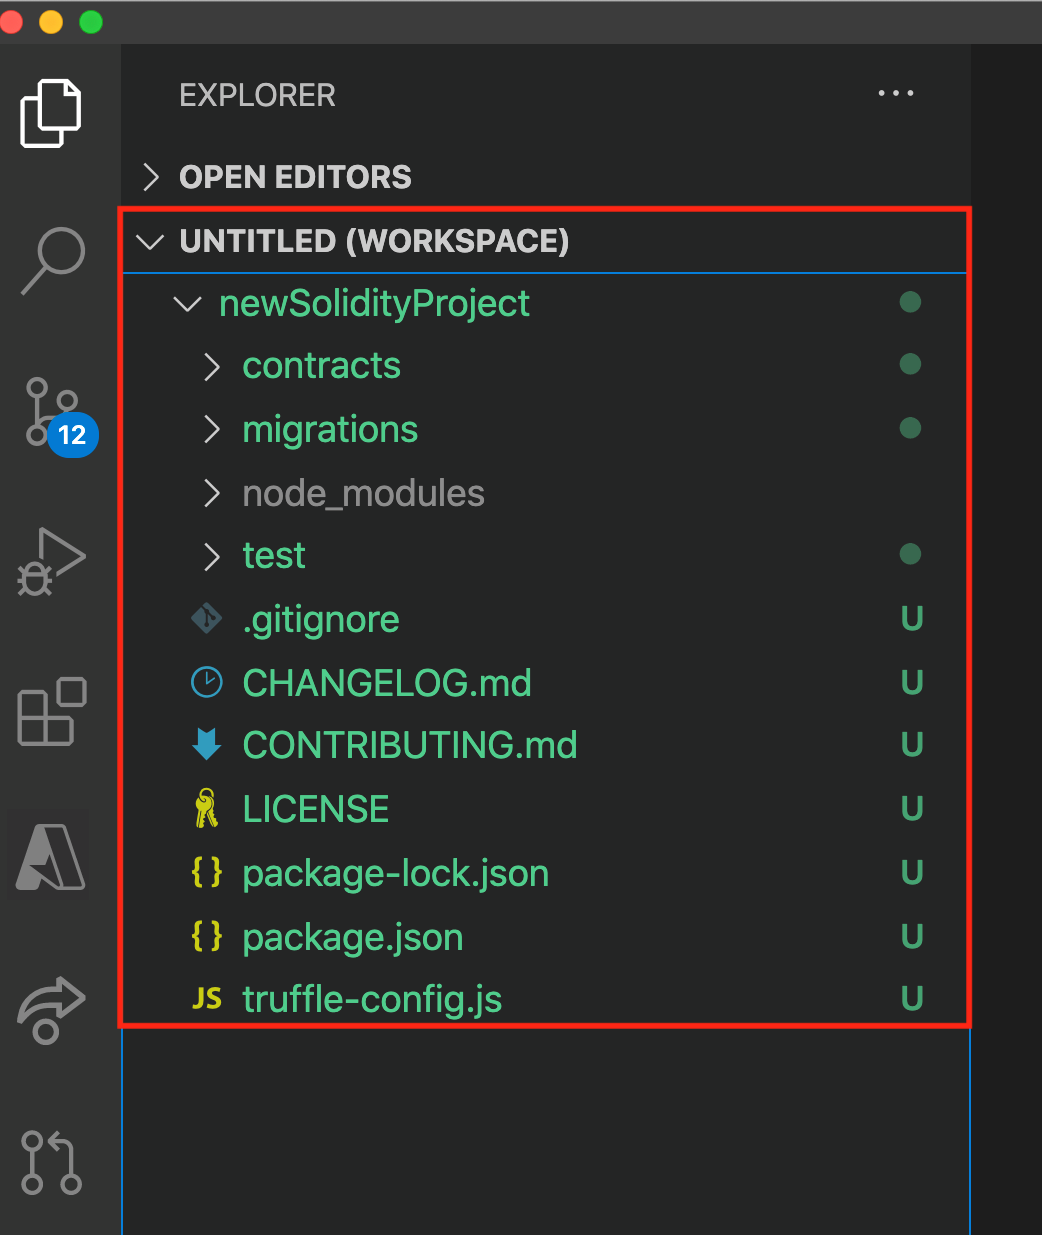
The project includes boilerplate for Solidity code. Notice the following directories:
- contracts: Contains the HelloBlockchain.sol contract
- migrations: Contains a migration for the HelloBlockchain contract that's written in JavaScript
- test: Contains a test for the HelloBlockchain contract that's written in JavaScript
You also see some configuration files:
- package.json: Defines project details and dependencies
- truffle-config.json: Defines dependencies and configuration for Truffle
To save the workspace, go to File > Save Workspace As. Name it newSolidityProject.
Now let's get back to the project itself. First we'll focus on the contracts directory.
Compile the contracts
We'll start with the HelloBlockchain.sol smart contract inside the contracts folder.
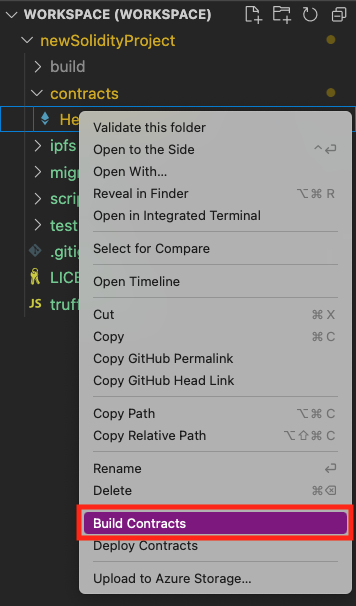
In the Explorer pane, in the contracts folder, right-click the contract name, HelloBlockchain.sol.
Select Build Contracts to compile the smart contract. A window in the lower-right corner indicates that contracts are building.
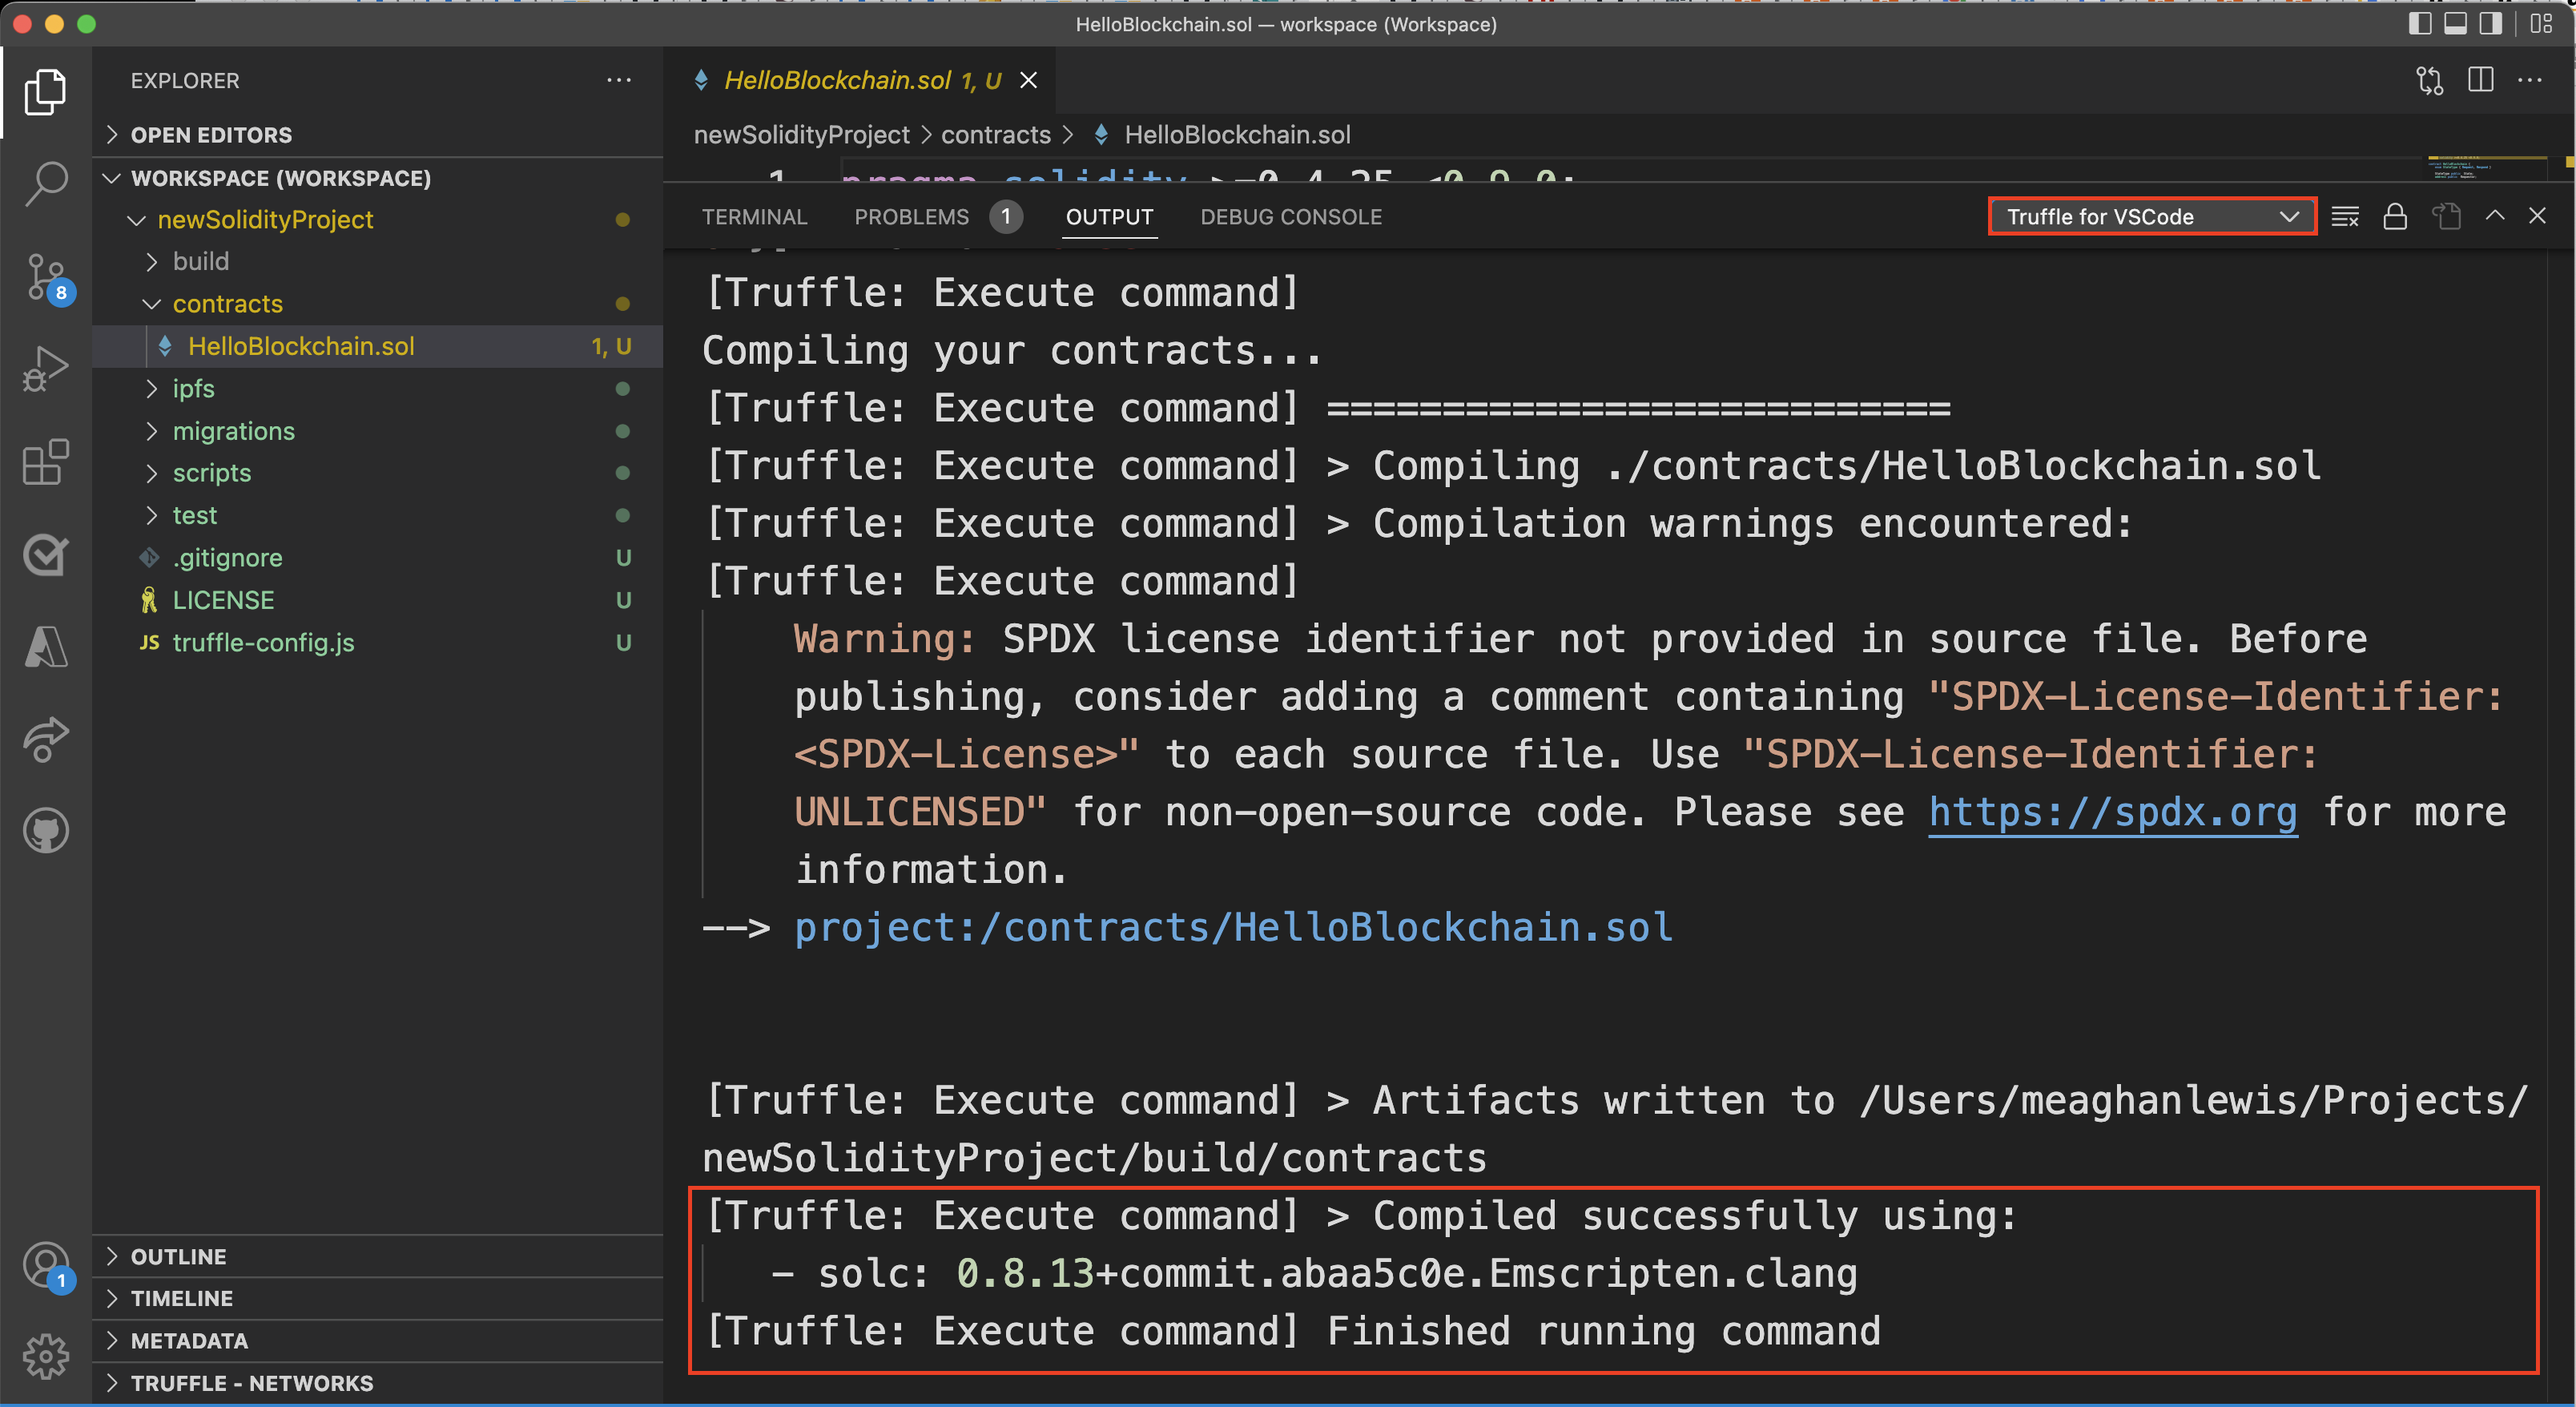
Select View -> Output to see information about the compiled contract. In the window, you might need to select Truffle for VS Code to see the output from the extension.
Deploy contracts
After the contract has been compiled successfully, you can deploy it locally
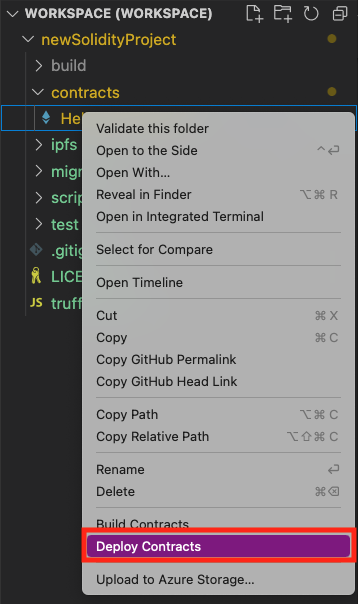
In the Explorer pane, go to the contracts folder and then right-click the contract name, HelloBlockchain.sol.
Select Deploy Contracts.
In the output window (View -> Output), you see information about the deployed migrations and contracts.
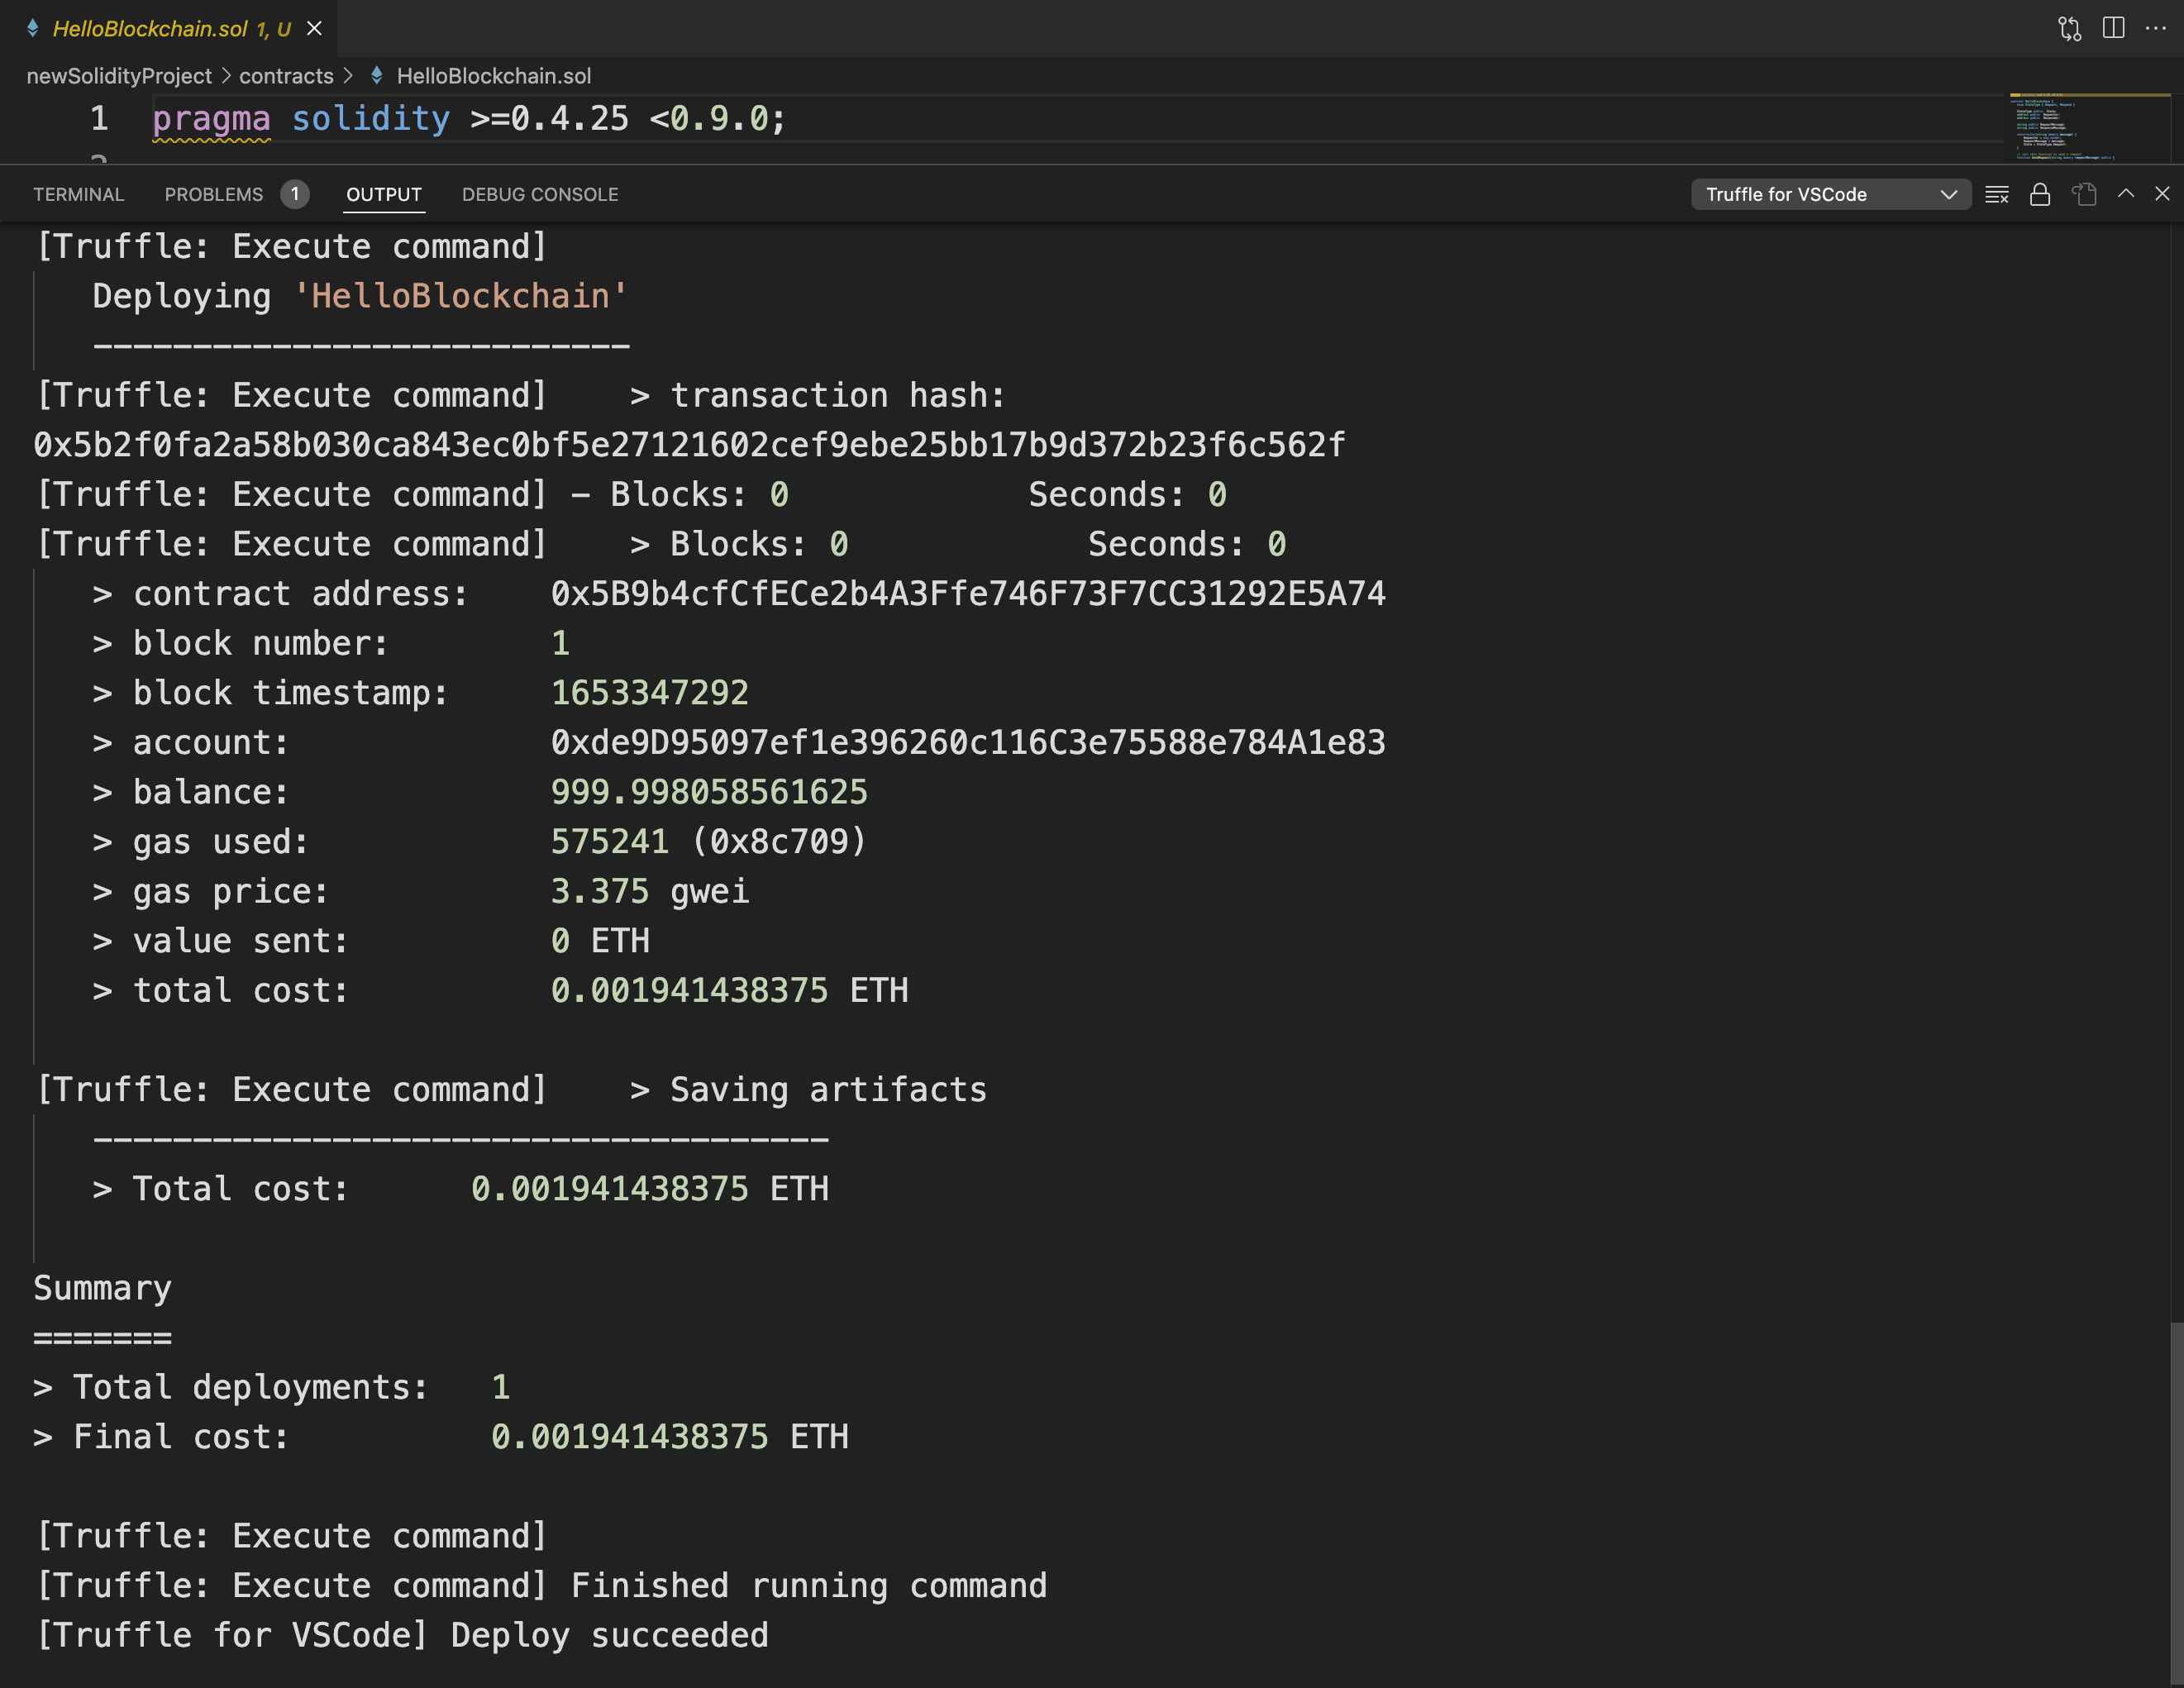
Here you see some key information or metadata for your deployed contract:
- The address of the contract.
- The time stamp of the block that the contract creation transaction was part of.
- The address of the account that deployed the contract.
- The account's balance (in ether) after the transaction. The balance is 100 ETH (the starting default value) minus the total cost.
- The amount of gas used and the gas price. Gas refers to the fee required to conduct a transaction or to execute a contract on the Ethereum blockchain platform. You can think of it like the gas you need for your car. Total cost = gas price * gas use.
Note
Gas prices are shown in gwei. One gwei is worth 0.000000001 ETH.