Exercise – Create a canvas app with data from an Excel file
In this exercise, you'll create a mobile application using data from an Excel table. Start by downloading the RealEstateProperties.xlsx for use in this exercise.
Note
Microsoft Power Apps requires a Microsoft 365 license or a free trial. Learn more about your licensing options.
Step 1: Create a solution
Go to make.powerapps.com and sign in.
Note
On the top of the Power Apps Home page, you may see a Try the new Power Apps experience toggle - make sure this is toggled off.
On the left navigation bar, select Solutions.
On the Solutions page, under Current preferred solution, select Manage.
On the Set your preferred solution dialog box, select + New solution.
In the New solution dialog box, enter the following:
- Display Name:
Real Estate Solution - Name:
RealEstateSolution - Publisher: Select a publisher from the dropdown list or create a new one.
- Version:
1.0.0.0
- Display Name:
Select Create.
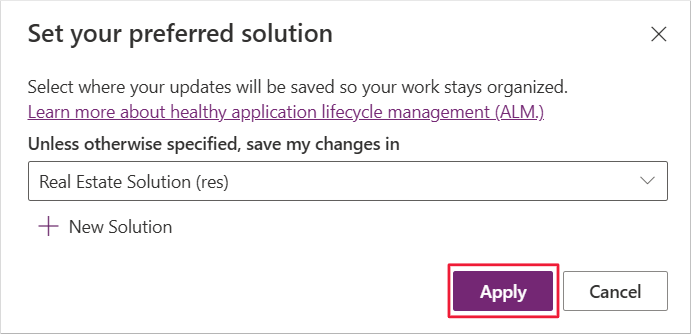
Select the newly created Real Estate Solution from the preferred solution dropdown list, then select Apply.
Note
A solution is a container that helps you manage and package apps, flows, and other components in the Power Platform.
Setting a preferred solution is helpful because it allows you to select where your future updates will be saved so your work stays organized.
On the left navigation bar, select Home to return to the Power Apps home page.

Step 2: Create a canvas app from an Excel file
On the Power Apps home page, select Start with data.
Select Create new tables, then choose Import an Excel file or .CSV.
Browse to and select the RealEstateProperties.xlsx file and then select Open. (The maximum file size limit is 5 GB.)
Copilot generates a Microsoft Dataverse table based on the Excel file, defining seven data columns.
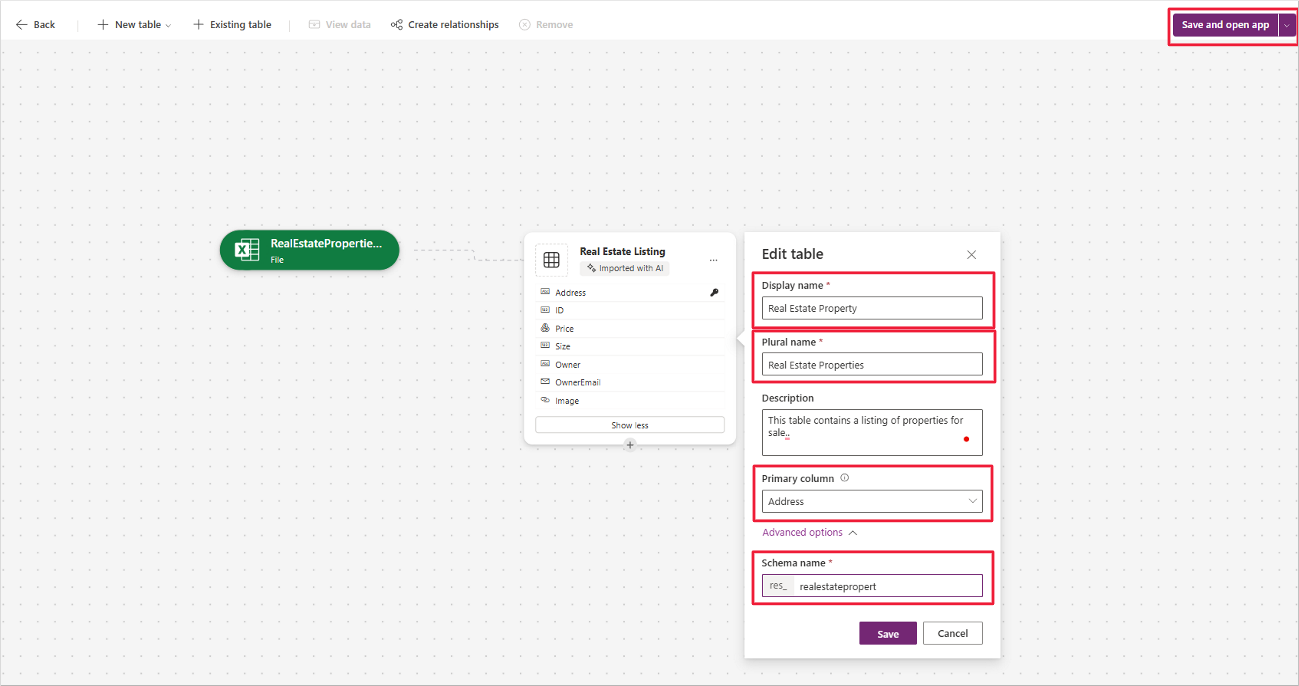
Next to the table name, select the View options ellipsis (...), then choose Properties.
Update the table properties:
- Display name: Real Estate Property
- Plural name: Real Estate Properties
- Description: This table contains a listing of properties for sale.
- Primary column: Address
- Under Advanced settings, set the schema name to realestateproperty.
Select Save, then choose Save and open app. From the pop-up, select Save and open app again.

Step 3: Customize the app layout
If prompted with Welcome to Power Apps Studio, select Skip.
The app opens in Edit mode.
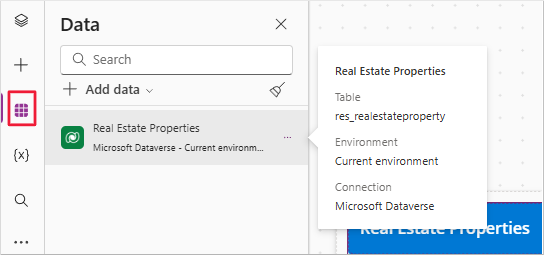
Select the Data icon from the left navigation bar. A Dataverse table has been created from the RealEstateProperties.xlsx Excel file.
Select the Tree view icon to return to the Tree view layout.
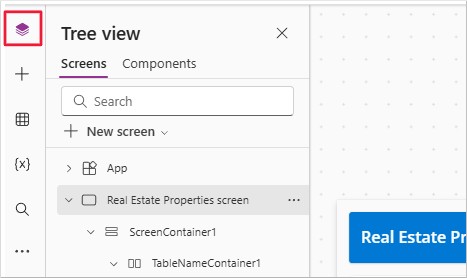
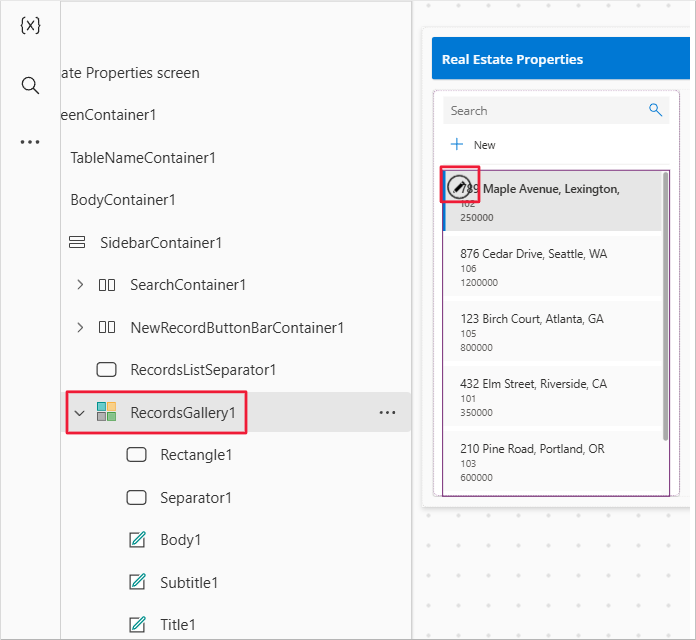
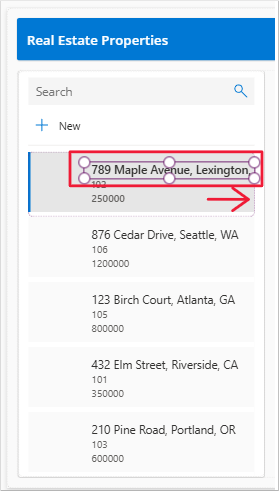
In the main screen, locate the gallery (RecordsGallery1) showing property details.

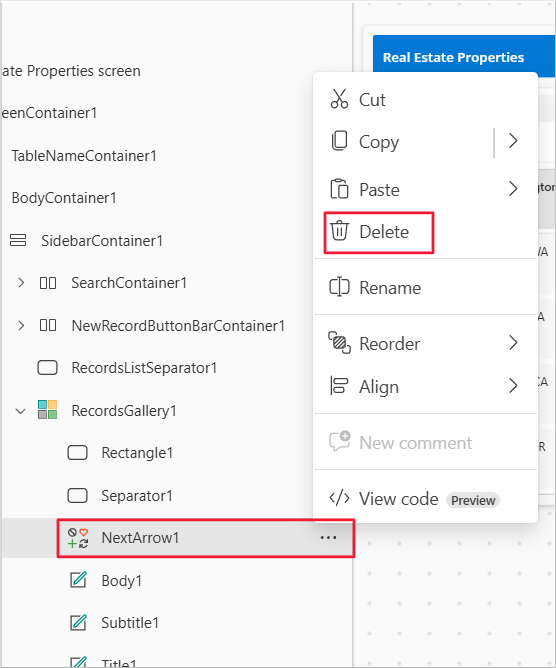
Expand RecordsGallery1 in the Tree view. Select the ellipsis (...) next to NextArrow and delete it.
With RecordsGallery1 selected, select on the edit icon to enter edit mode.
Select the Title component. Resize and reposition it to the right side of the template cell.
Other components should reposition alongside the Title component. If not, move them until they match the new layout.
Make sure that the gallery is still in edit mode. Select the Title1.
With Title1 selected, verify that the Text property is:
ThisItem.Address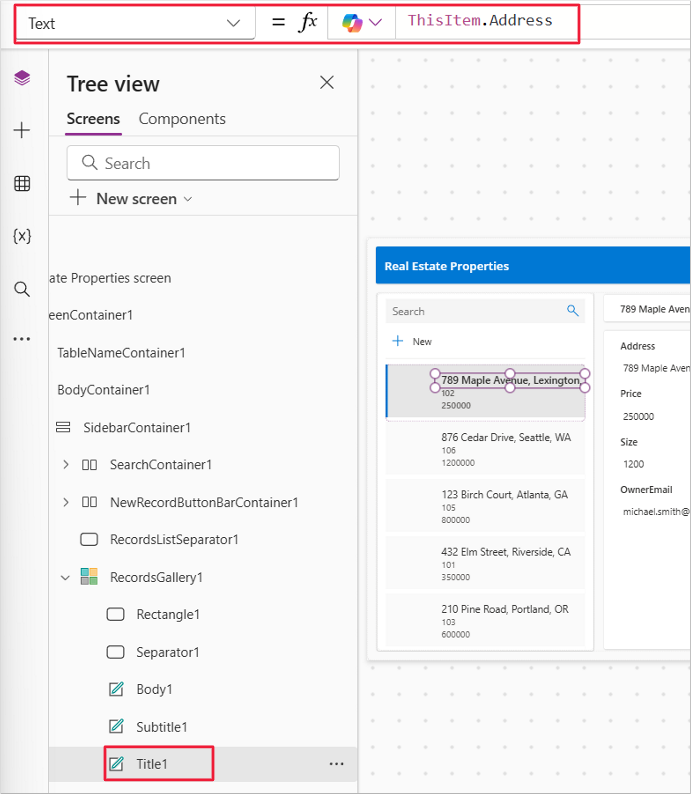
Select the Subtitle1 component in the gallery, and set its Text value to:
ThisItem.SizeIn the toolbar, change the Size to 13.

Select the Body1 component, and set the Text property to:
ThisItem.Price
With the first item in RecordsGallery1 selected, select Insert, search for Image, and then select the Image component to add it to the gallery.
Reposition and resize the image to center it in the gallery cell.


Step 4: Use Copilot to generate Power Fx formulas
To generate Power Fx formulas with Copilot in Power Apps, make sure that the gallery is still in edit mode. Select the price control (Body1) and then select Copilot > Conditional formatting.
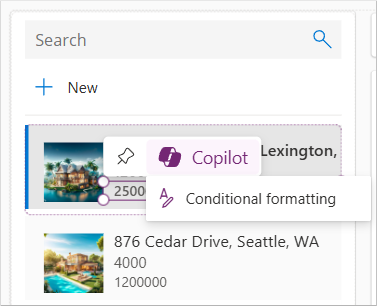
In the input box, type:
"format the text like this $250,000".
Select the generated formula and choose Apply.

With Copilot's help, the example ($250,000) value that you entered generated the following formula, which is now in the formula bar for the Text property in the price's control (Body1):
Text(ThisItem.Price, "$#,###")
Note
If Copilot updates the wrong property, manually correct it. Replace "CurrentItem" with "ThisItem" if needed.
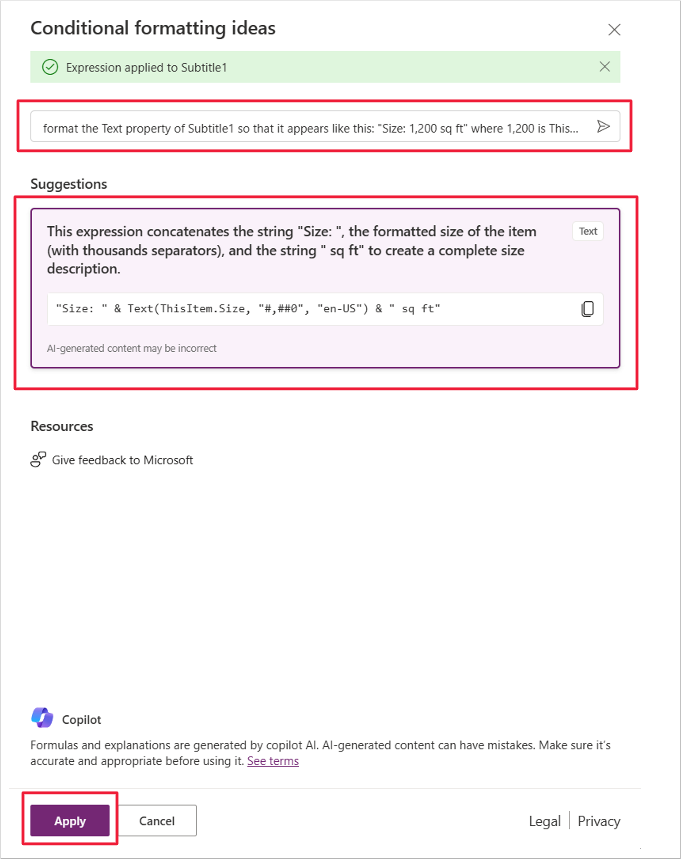
Repeat the same steps for Subtitle1. With Subtitle1 selected, choose Copilot > Conditional formatting.
In the input box, enter:
"format the Text property of Subtitle1 so that it appears like this: "Size: 1,200 sq ft" where 1,200 is ThisItem.Size"Make any necessary edits and select Apply.


Step 5: Save and test your app
Close the Copilot Conditional Formatting pop up box.
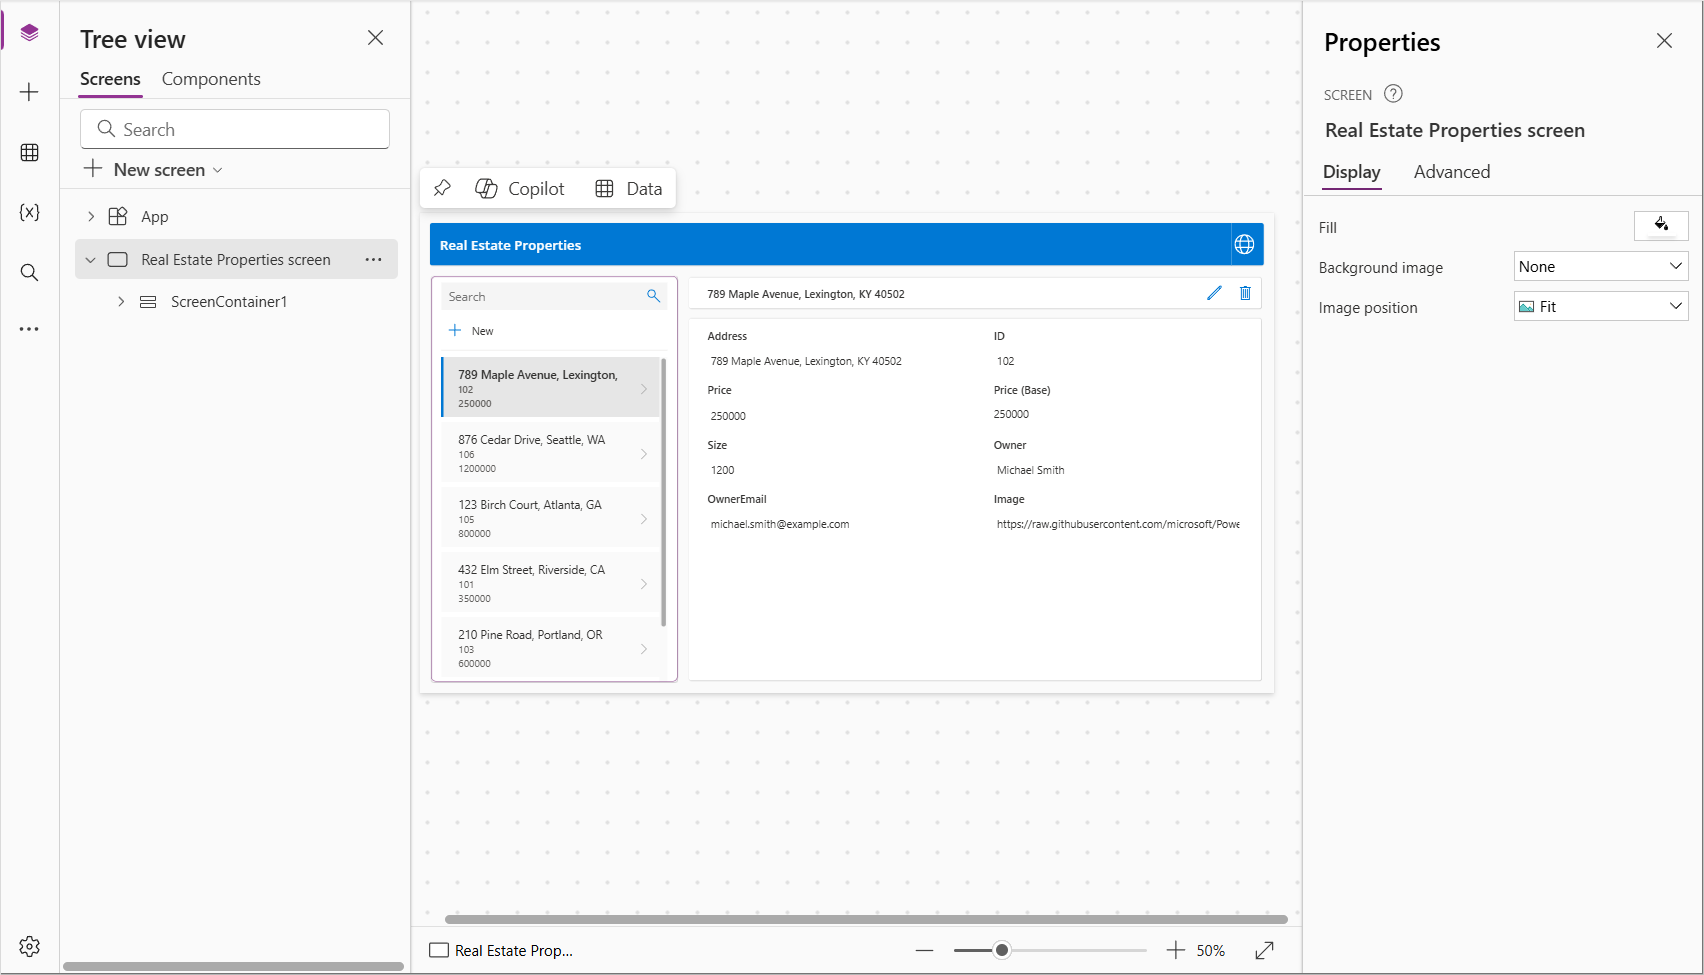
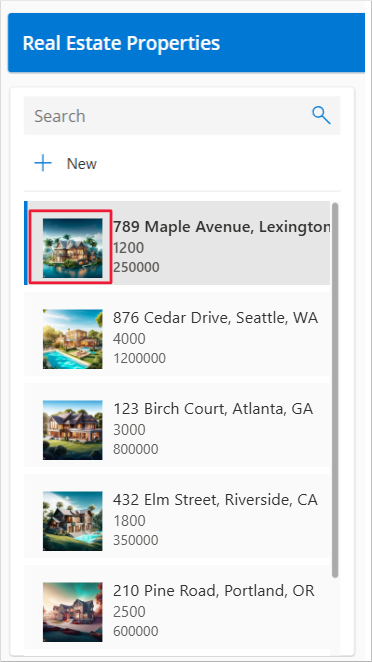
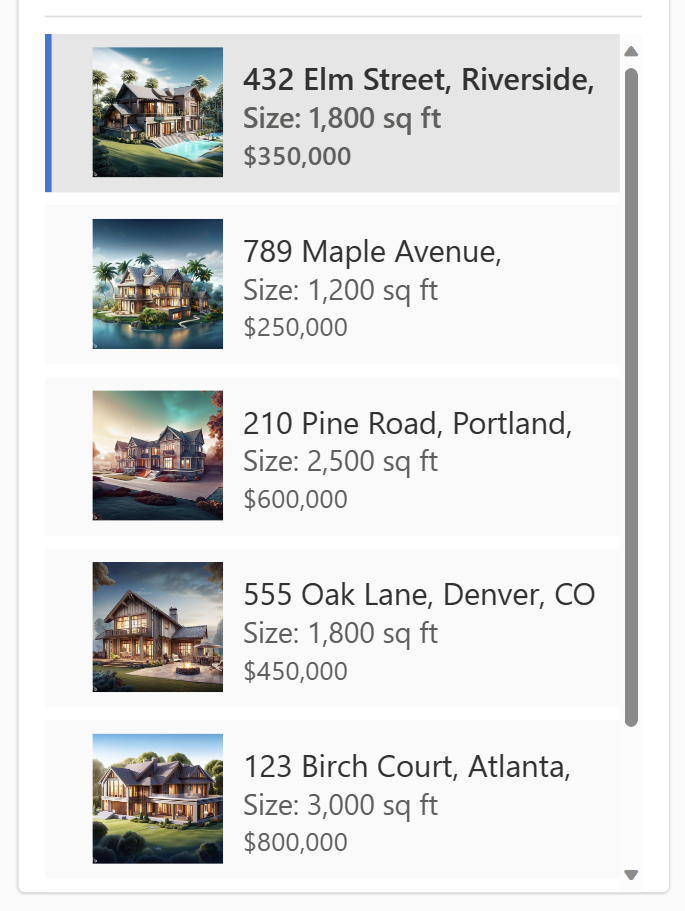
Your gallery should resemble the following image.
Save the app as RealEstateProperties.
Play your app to select different properties and view their data in the app form.
Selecting Back to return to the Power Apps home page.