Exercise – Create a canvas app with Copilot in Power Apps
In this exercise, you’ll create a mobile application by using Copilot in Power Apps. Field agents will use this app to browse real estate inventory and manage appointments for showings, and the data will be stored in Dataverse.
Note
Power Apps requires a Microsoft 365 license or a free trial. Learn more about your licensing options. Microsoft products include Power Apps and Power Automate.
Note
In this lab, your results for data might vary from those shown in the screenshots and images. The reason is because Power Apps uses OpenAI to generate data for the lab and the data changes daily.
Note
On the top of the Power Apps Home page, you may see a Try the new data experience toggle - make sure this is toggled off.
Create a canvas app with natural language
On the Home page in Power Apps, in the center text field, enter the following prompt to search for an AI-generated table:
build an app to manage real estate showingsSelect the Send button.

After Copilot AI generates a table based on your prompt, look through the table to view the columns that are created for the start of your table.
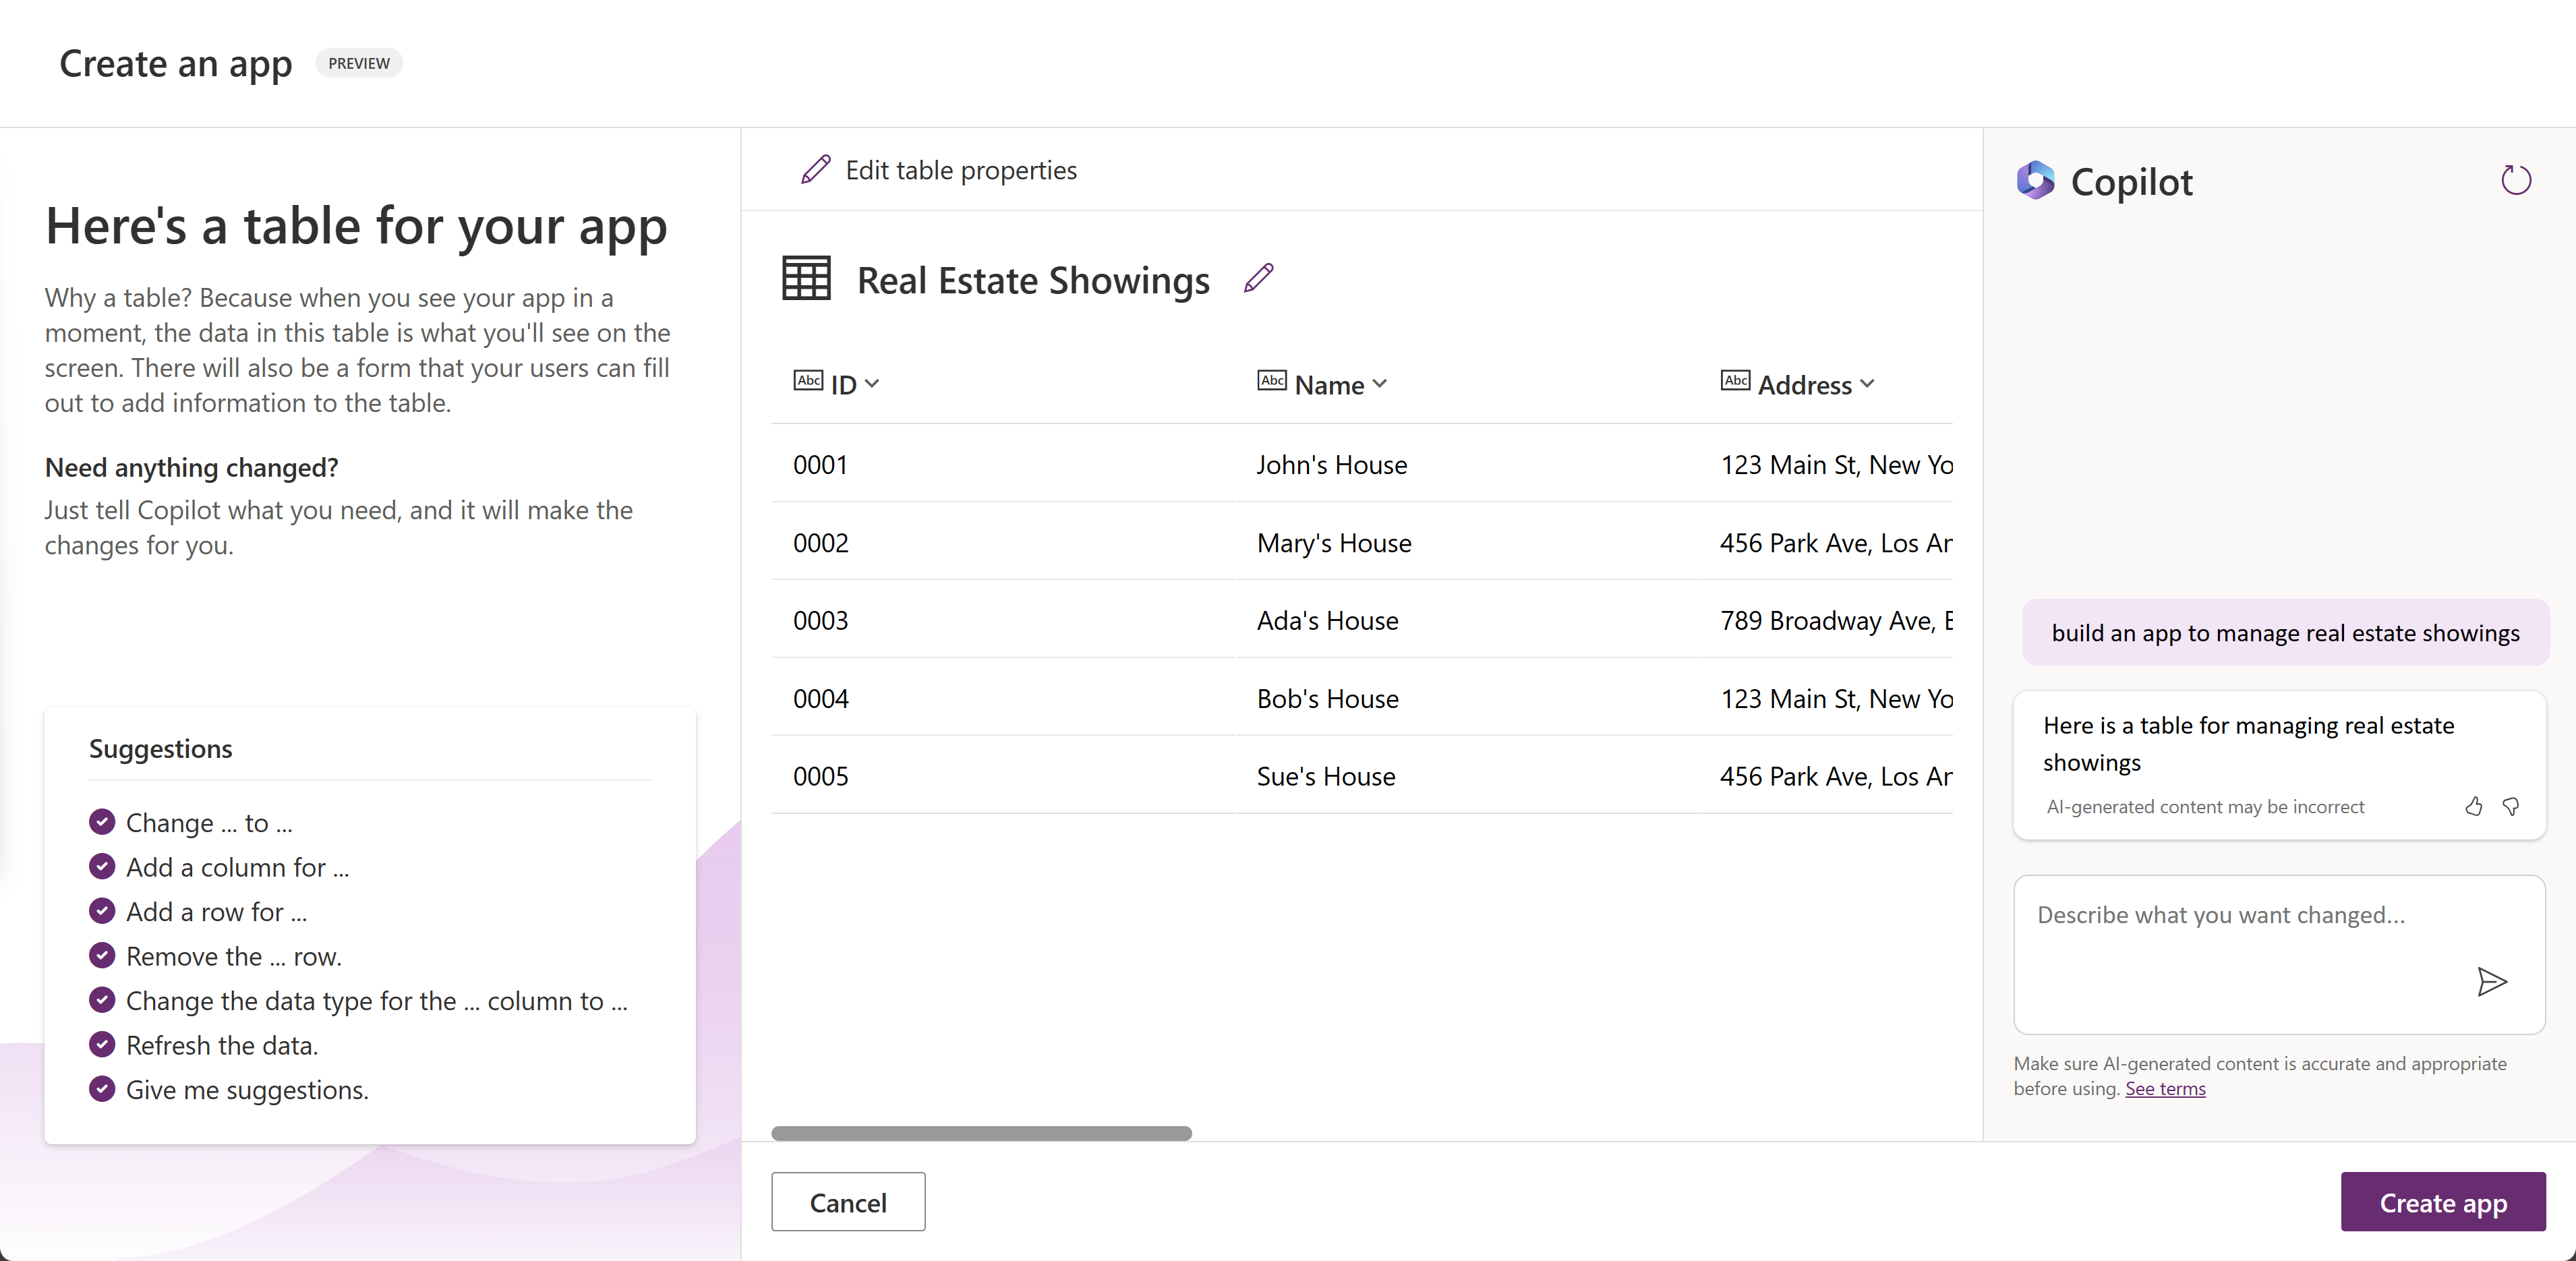
Your next steps are to modify and add to the already generated table.
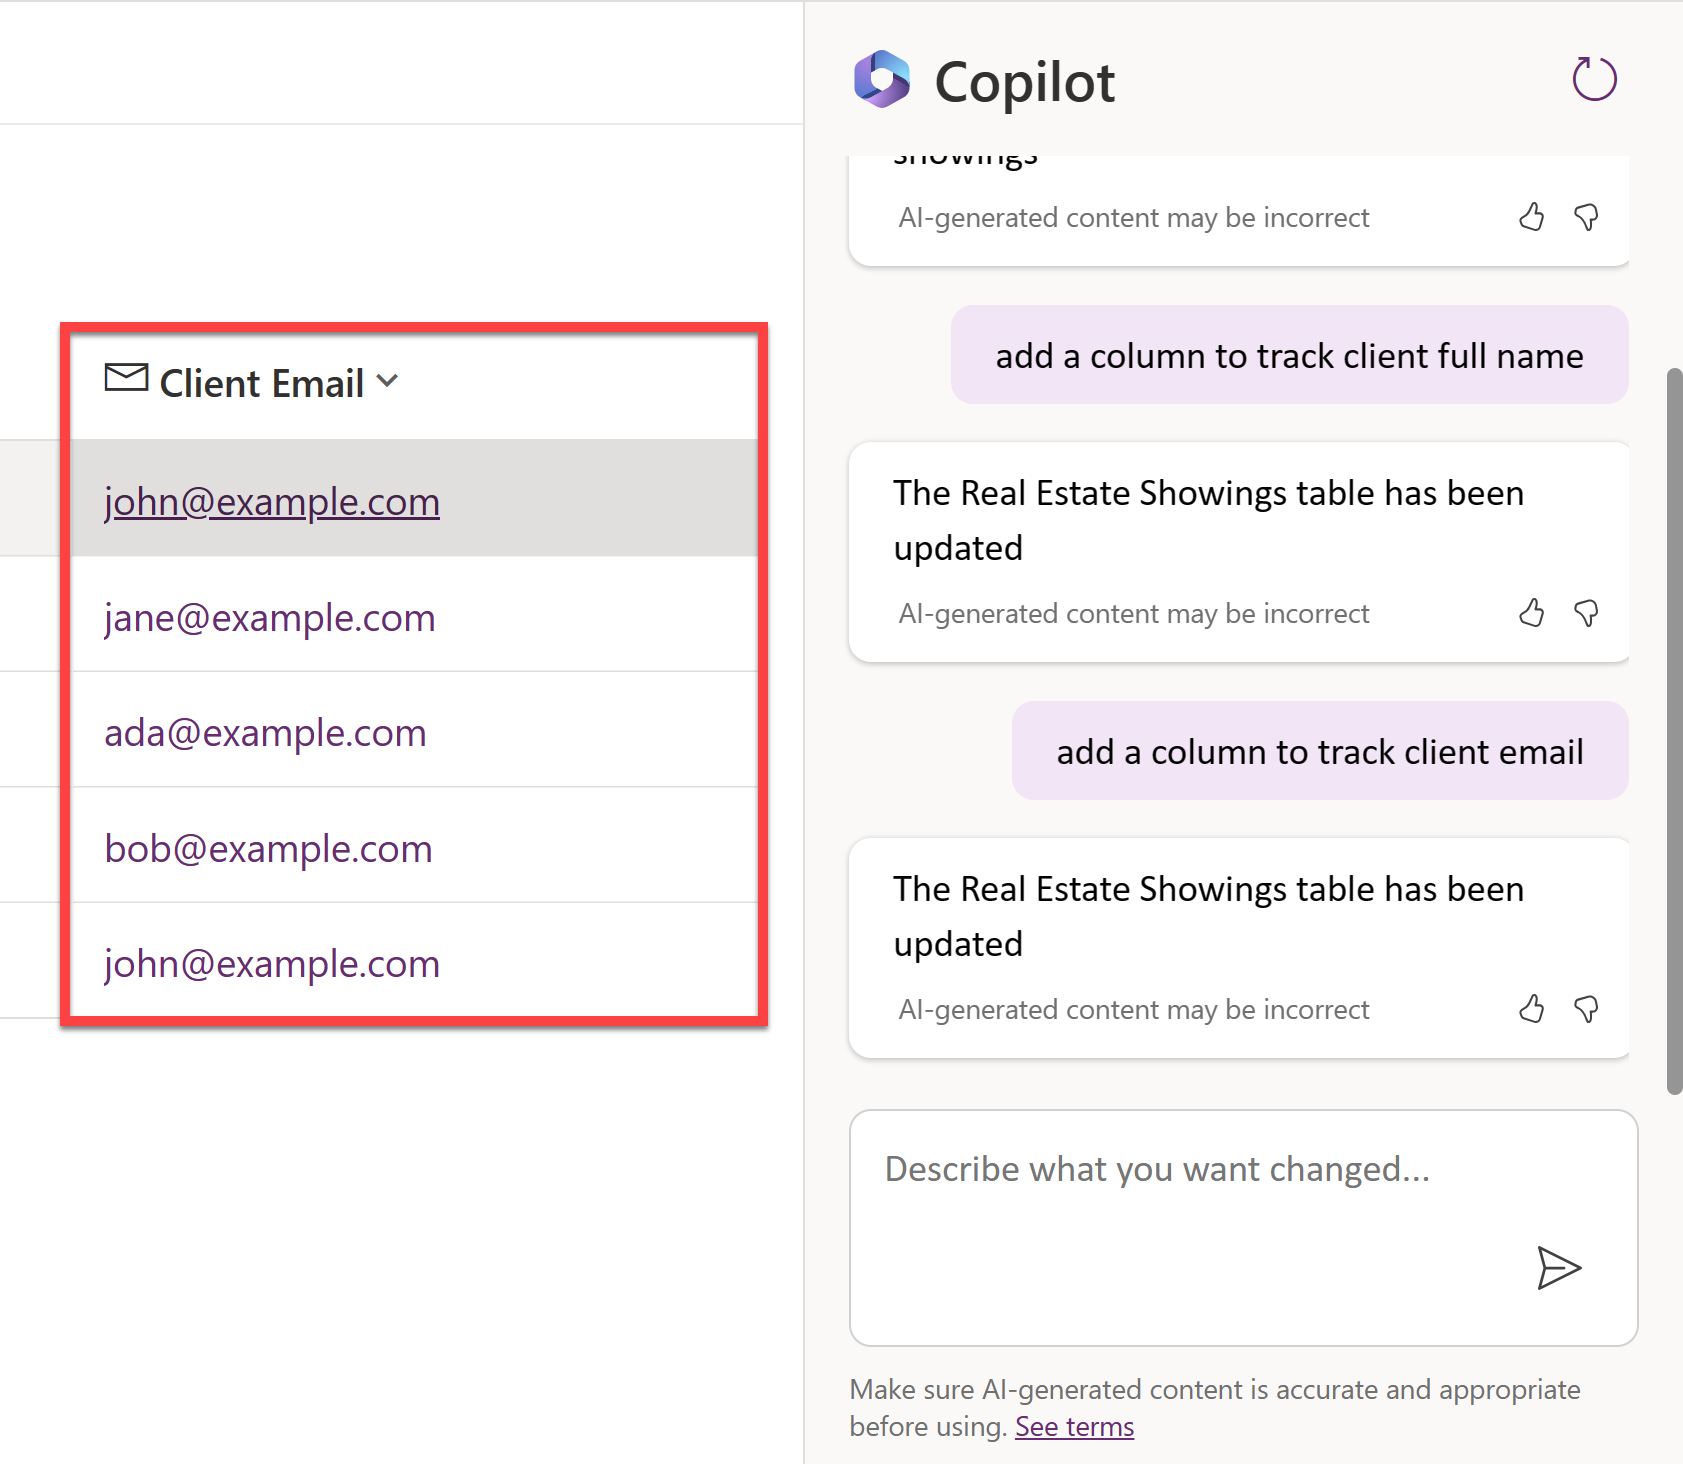
In the text box, in the lower part of the Copilot pane to the right of the screen, enter the following text:
add a column to track client full nameSelect the Send button.
Copilot notifies you that the table is updated, and the new column should show as being added to the table.

Enter the following text into the chat:
add a column to track client emailSelect the Send button.
A new column is added to the table and displays the client’s email.
Note
The data that's generated in your table might vary from the data that's shown in the table in the screenshots for this lab.
Note
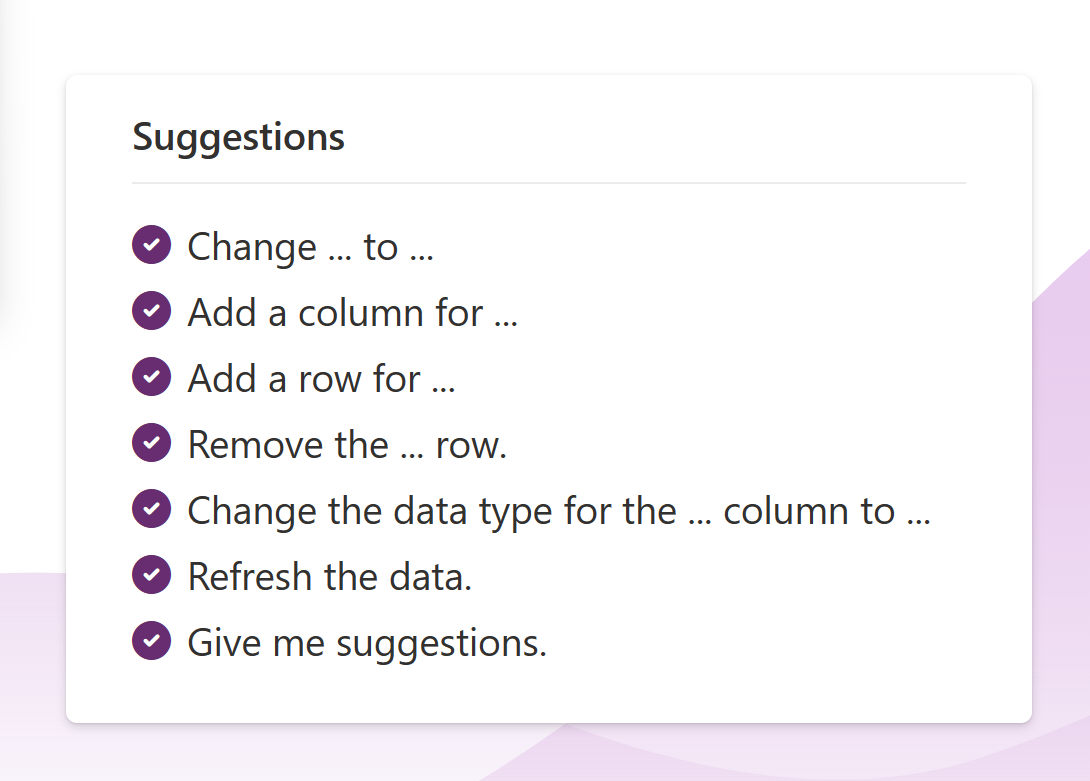
The Suggestions section in the lower-left corner of the screen provides you with different suggestions on how you can add to and modify your table.
On the right of the screen, it appears as if you're having a conversation with a Copilot while adding to and modifying your table. This area is where you can scroll through and view the changes or additions that you've made to your table.

Edit the Status column within the table.
Note
If you don't have a status column, you may need to add one via the Copilot chat first using statements such as:
add a status column to track the status of the showingstatus should have options for Pending, Confirmed, and Cancelledset the default choice of Status to Pending
In the text box within the Copilot pane, enter the following text and then send it:
add an option for “Completed” to the Status columnThe system might take a minute to load. When it does, the Status column shows as updated and includes the option for Completed.
Select the Status column name dropdown menu and then select View column where you can view the columns’ properties and the current status details and data.

Note
If your column choices aren't the same as the ones that are shown in the screenshot, enter the following command into the Copilot pane text box and then send it:
the status choices should be Pending, Confirmed, Cancelled, and CompletedSelect the X in the upper-right corner of the pane to close it.
Next, you'll add more data to your table and the existing columns.
In the Copilot pane text box, enter and send the following text:
add 5 more rows of dataFive more rows of data are added for each existing column in the table.

Your table should have several columns. However, to continue following the modules in this learning path, try to remove some columns that you won't use.
The list of columns that you need are:
- ID
- Address
- Date
- Time
- Status
- Agent Name
- Client Full Name
- Client Email
Use what you've learned with the Copilot Chat window to adjust your table to match the preceding list. Make sure that you refer to the Suggestions section if you need to remove a column, change a column name, or add a column.
To create the app, select the Create app button in the lower-right corner of the screen.

When the app first loads, a dialog might appear stating Welcome to Power Apps Studio. If so, select the Skip button.
The app that has been built for you should show in Edit mode.


Modify the Real Estate Showings table
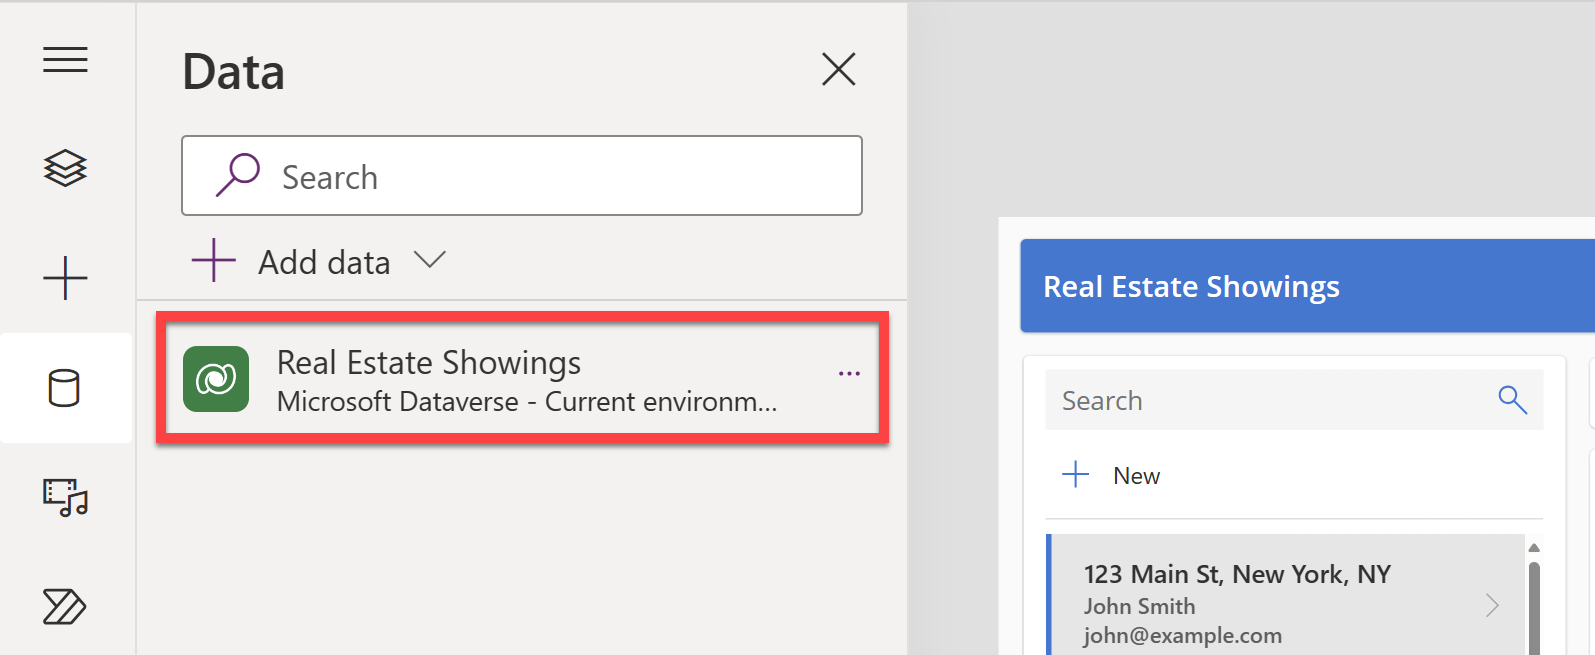
Select the Data icon from the left navigation bar. Copilot has created a Dataverse table that's now displaying in the Environments section.
Note
Currently, Copilot is only supported for Dataverse. You can't use any other data access point at this time.
Next, you'll edit the table now that the app has been created.
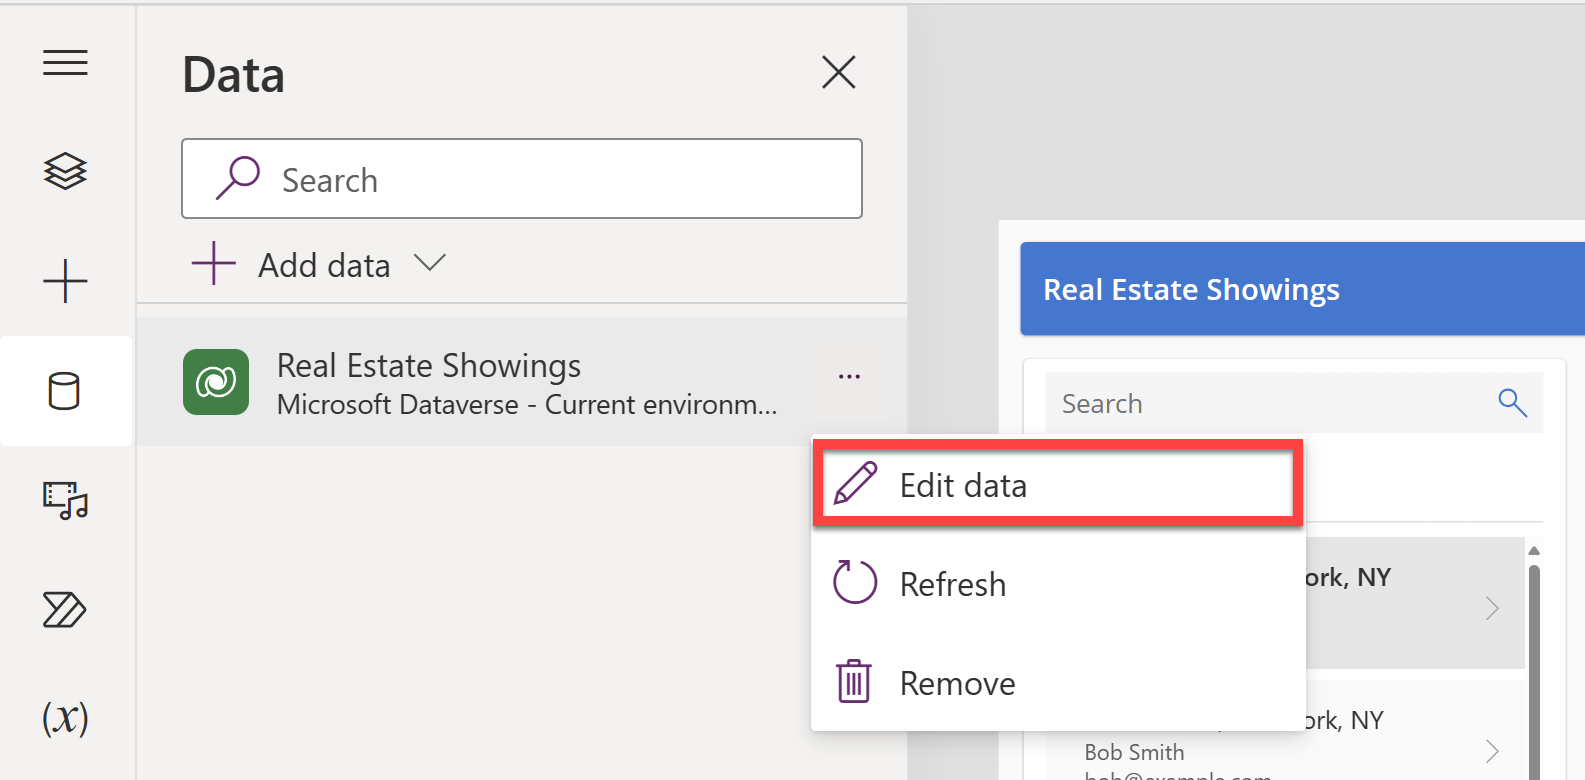
Within the Data pane, hover your mouse cursor over the table. To the right of the table, select the ellipsis (...).
From the menu, select Edit data.
In the Edit table dialog, you can add your own columns to the table or modify existing columns.
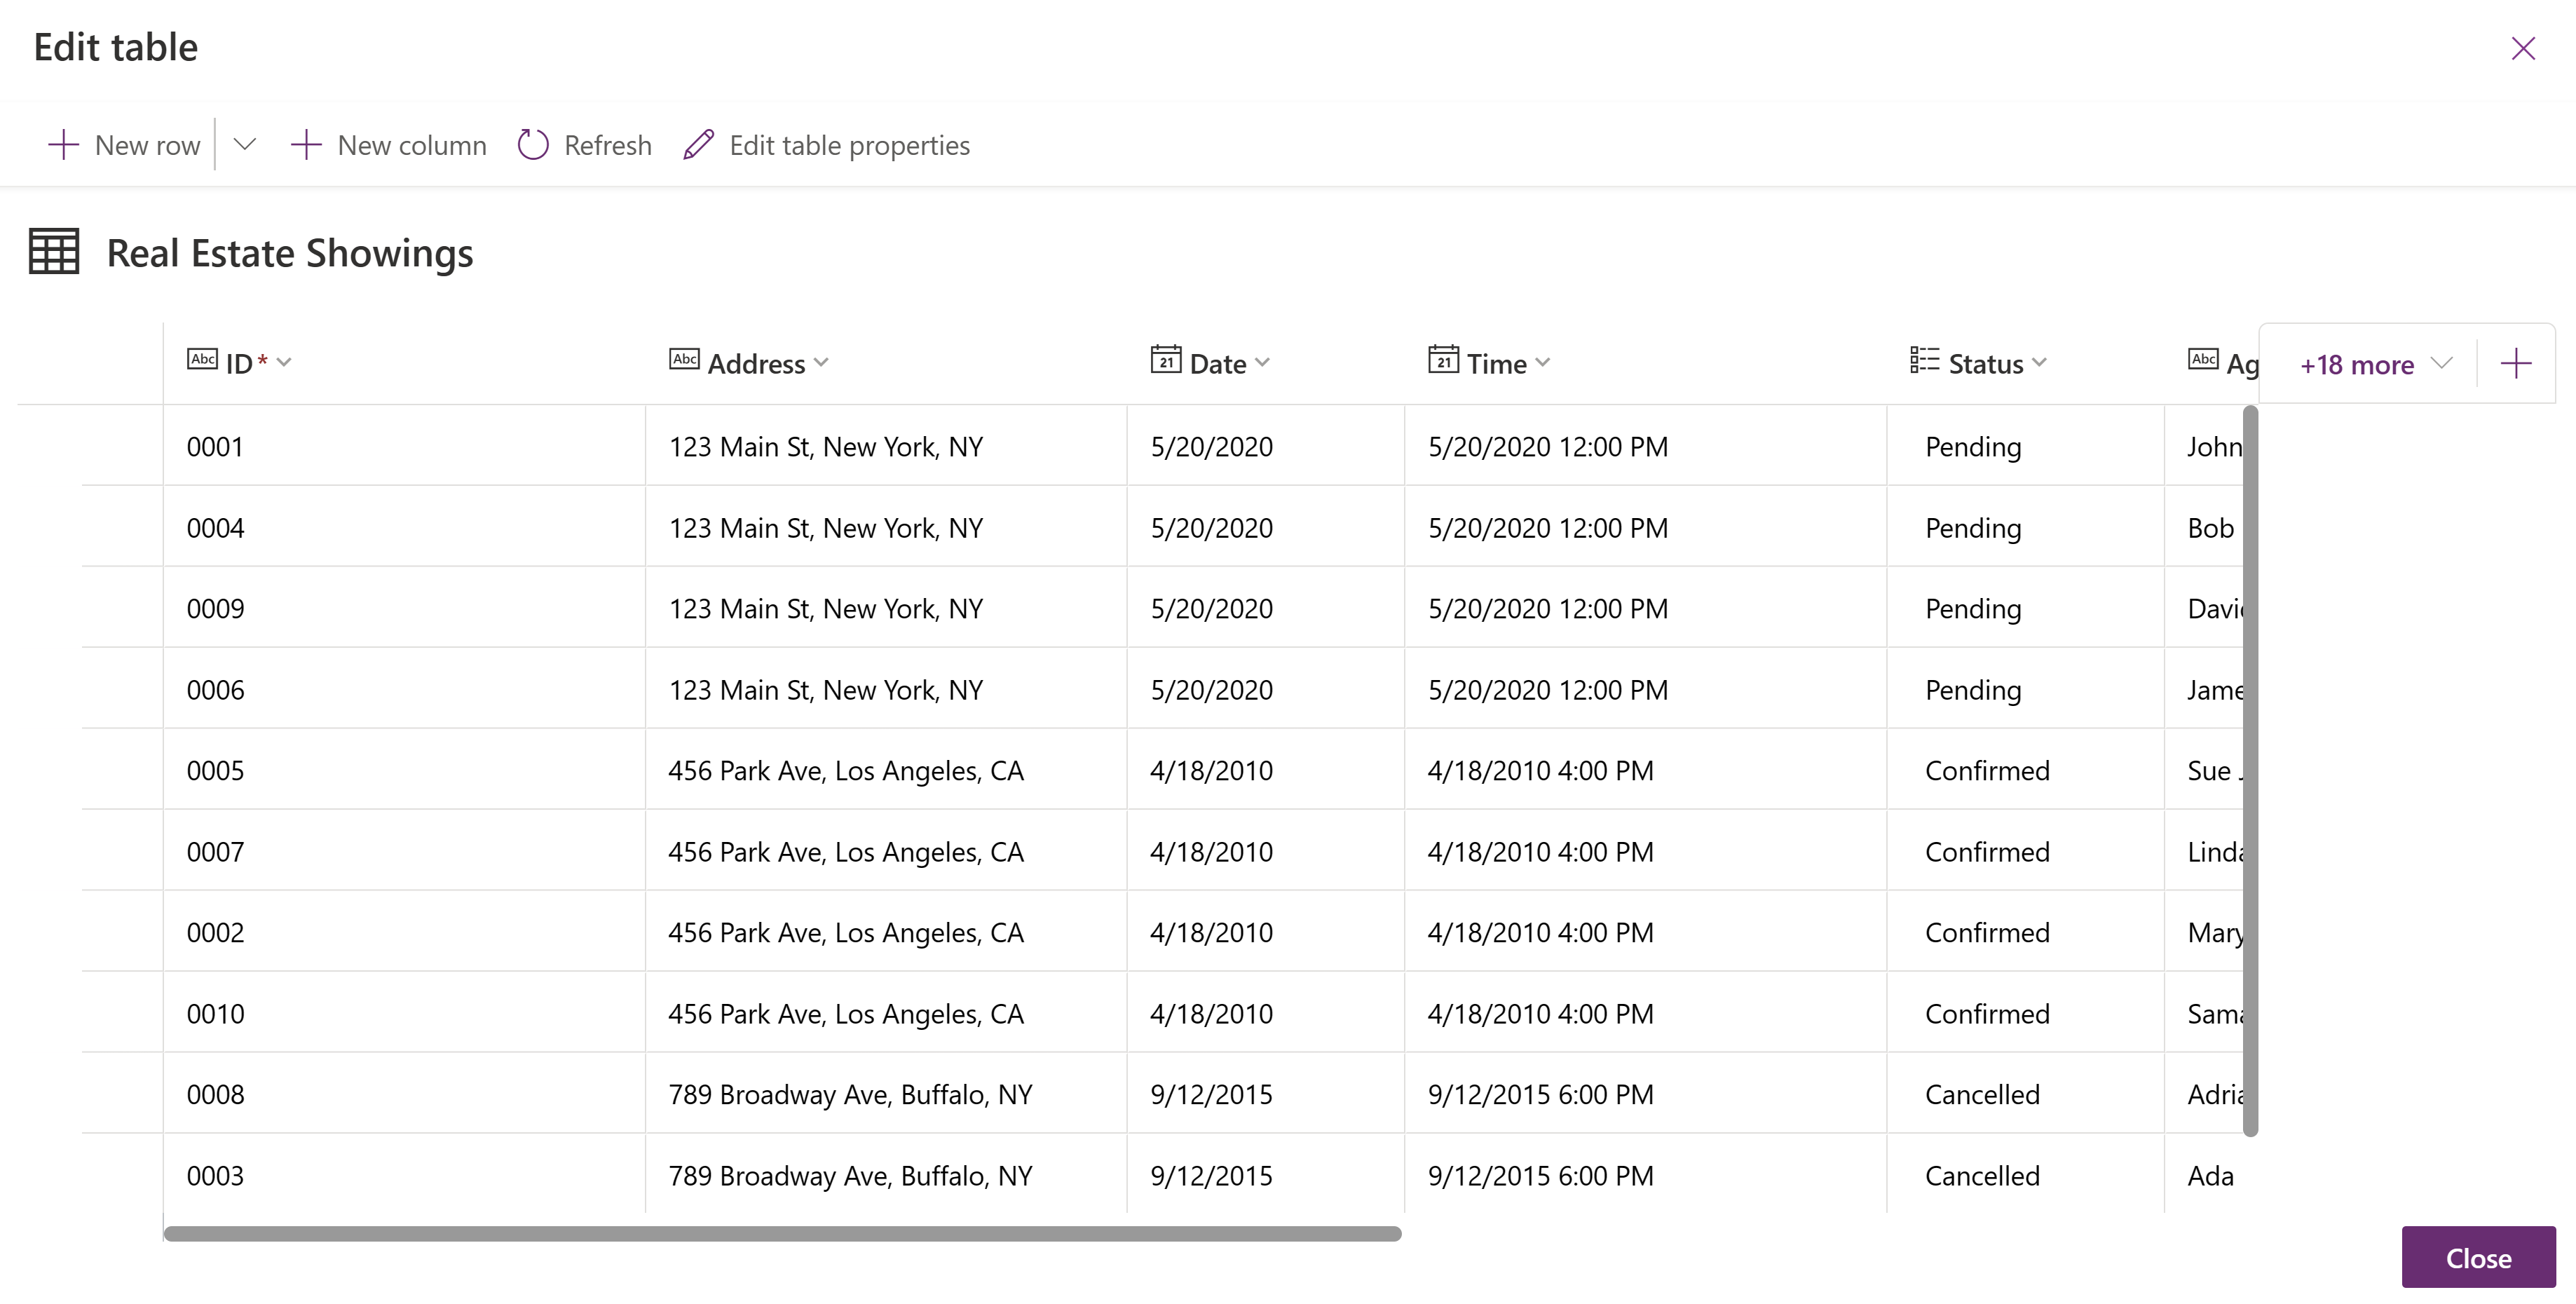
Select the ID column header from the table.
From the dropdown menu, select the Edit column option.

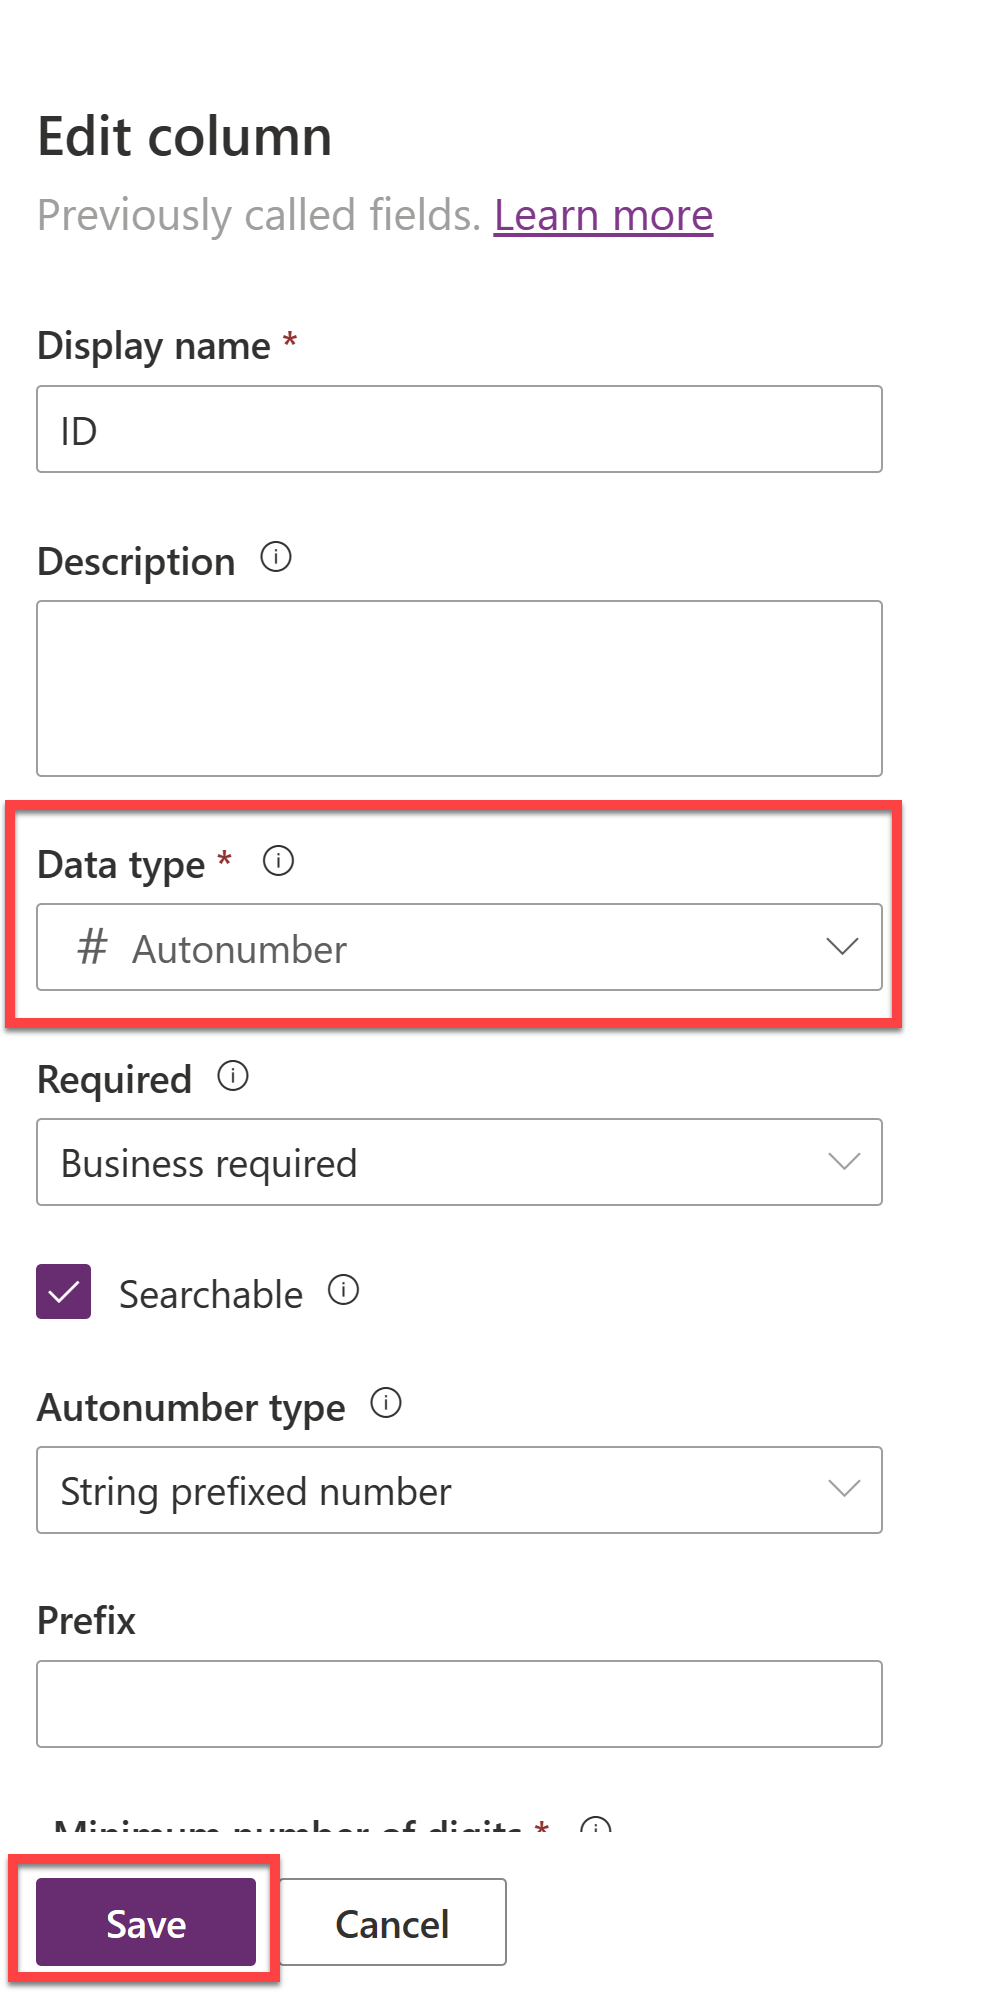
In this example, you don't want the Data type to be a Single line of text. To change that value, go to the Edit column pane, and then from the Data type dropdown menu, select # Autonumber.
Select Save.
Select the Close button in the lower-right corner of the Edit table dialog.
The table should now show as Refreshed in the Data pane.


Modify the canvas app user interface
Modify the gallery in the application so that it displays the relevant data. Select the Tree view icon to return to the Tree view.
On the app's main screen, select RecordsGallery1 to display Real Estate Showings and then select the edit button to put the gallery in edit mode.
Select the Title and then set the Text value to the following formula:
ThisItem.AddressSelect the Subtitle and then set the Text value to the following formula:
ThisItem.'Client Email'Select the Body and then set the Text value to the following formula:
ThisItem.StatusA single record in the gallery should now resemble the following image.

On the app's main screen, select the Form control.

On the Properties pane on the right, under the Fields property, select Edit fields.

In the Fields pane, expand the ID field.
From the Control type dropdown menu, change the type to View text.
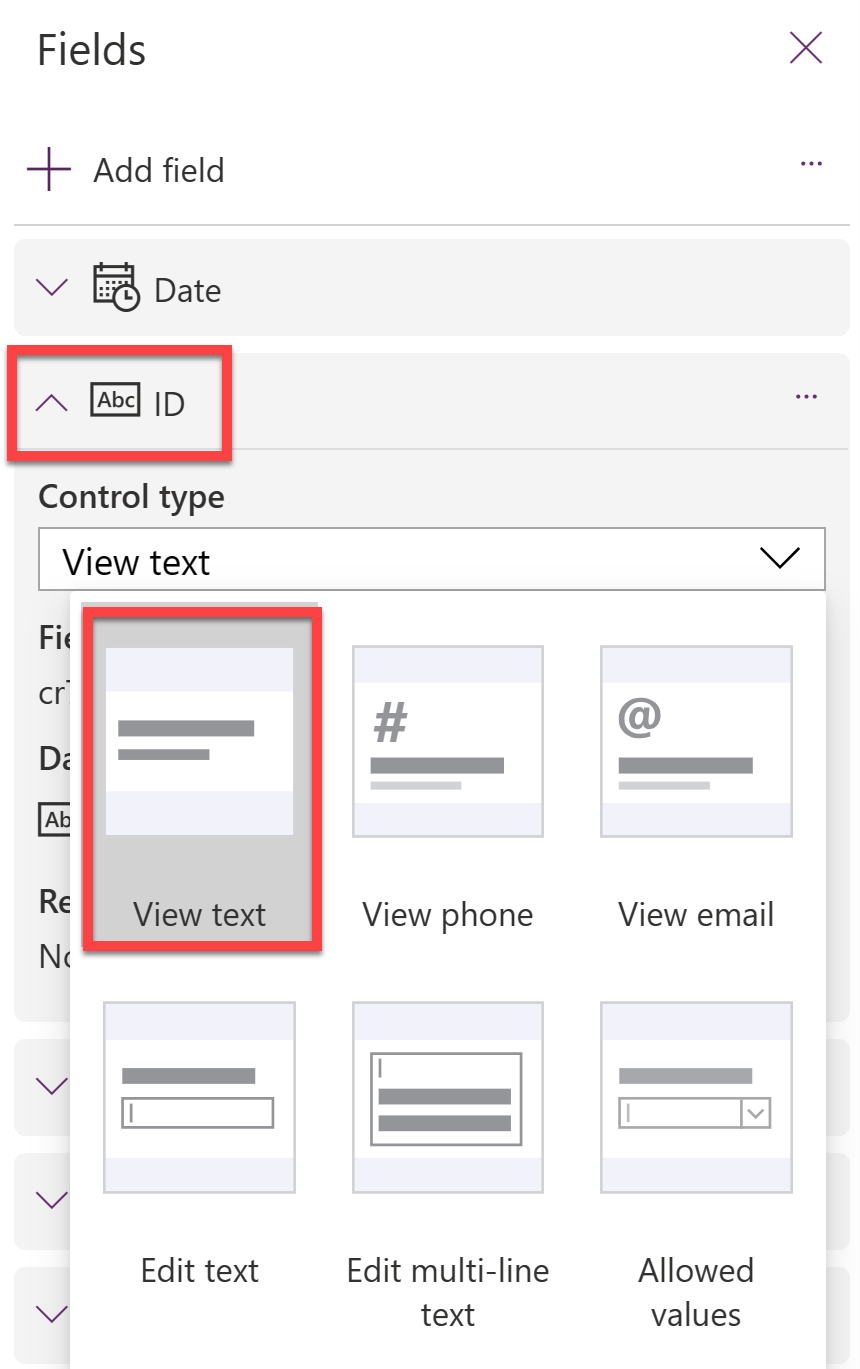
Because you previously changed the ID field to Autonumber, you don’t want users entering their own number; Dataverse automatically enters the numbers for you.
In the Fields pane, select the X in the upper-right corner to close the pane.
Make a new request for a property that shows in the app by selecting the Play button from the upper part of the screen.

In the left pane, select the +New button.

Though you could modify the form to automatically fill in the fields for you, for this lab, you'll complete this step manually to observe how the app works.
Fill in the fields with the following information:
- Agent Name - < Your name >
- Client Full Name - < Your name >
- Client Email - < Your email >
- Date - < Any future date >
- Time - < Any future time >
- Status -
Pending - Address -
210 Pine Road, Portland, OR 97204
Note
This address is one of the addresses from the Microsoft Excel file in Module 1, and it's the same file that you uploaded and turned into the Real Estate Properties table.
Though you'd usually have a lookup field to the Real Estate Properties table, this lab doesn't provide one to keep it simple.
Select the check mark in the upper-right corner of the screen.

Select the X in the upper-right corner to close out of the app.
If a dialog appears saying Did you know?, select OK.
The new request is added to the left of the list of requests.
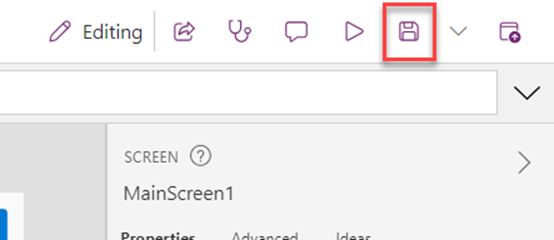
From the upper part of your screen, select the Save button to save the new app that you created.
If the system prompts you, save the app name as Real Estate Showings.
Exit the app to return to the Power Apps home page.


