Exercise - Create the location and TypeofAccident custom tables
In this exercise, you create two more custom tables to store more data for your employee accident tracking application.
Note
If you haven't completed the previous modules within this learning path, download the packaging files. These files contain the completed work on the Accident Tracking app thus far.
Create a custom LocationTable
Follow these steps to create a custom LocationTable:
From the home screen, select Tables from the left-side menu.
Select the Start with a blank table option.
In the Create new tables screen, enter this for the Display name:
LocationTable.Open Properties and note the name of the Primary column, currently called New column. Select this column name, and then select Edit column and enter this for the Display name:
LocationID. Then select Update.Select the + (New column) button from the data table at the bottom of the screen.
In the New column pane, enter the following information:
Display name -
LocationNameData type - Single line of text (default)
Required - toggle it on (you want to prevent users from entering a location record without a name)
Select Save.
Select + New column and create a LocationCountry column.
Enter these values for the new column:
Display name -
LocationCountryData type - Choice
Under Choices let's add a few choices to represent some countries.
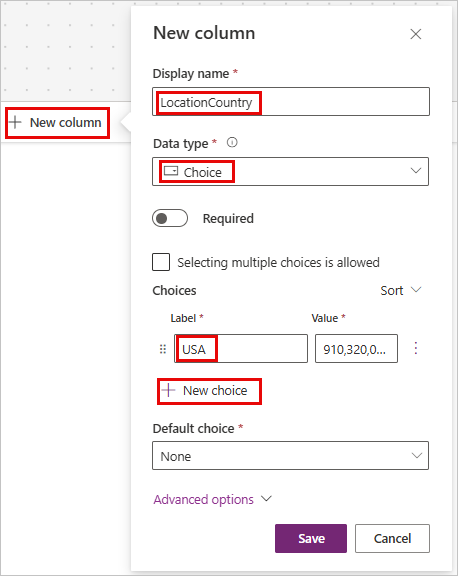
Under Choices in the first Label entry field, input
USA. Notice that the Value field has a numeric entry in it. This is an autonumber field, assigned by Dataverse, but you can change it to whatever value you wish. In this case, we don't need to change it so we'll leave it alone.Select New choice and enter
Spain.Note
You can add more choices for countries/regions, but for this example we will only need USA and SPAIN.
Select Save, then Save and exit to create this table.
We need to change our LocationID field to type Autonumber. From your list of tables, find/select your LocationTable.
Look at the LocationTable columns and data in the lower half of your screen. Select the LocationId field and select Edit column.
In the Edit column panel on the right side of the screen, change the Data type dropdown menu from Single line of text to Autonumber. Leave the defaults for the other values as they are.
Select Save.
Another table is complete. Let's move on to the TypeofAccident table.

Create a custom TypeofAccident table
To create the TypeofAccident table, follow these steps:
Return to the Tables screen (select Tables from the left-hand navigation panel).
Select the Start with a blank table button.
Select Create from blank and enter the following for the Display name:
TypeofAccidentTable.Select New column from the data table and change the DisplayName to:
TypeofAccidentId.Select Update.
Once the table is created, we'll come back to change this one to autonumber. For now let's add some more columns before we create the table.
Select + New column to create a new column with the following settings:
Display name -
AccidentNameData type - Single line of text (default)
Required - toggle on
Save the column.
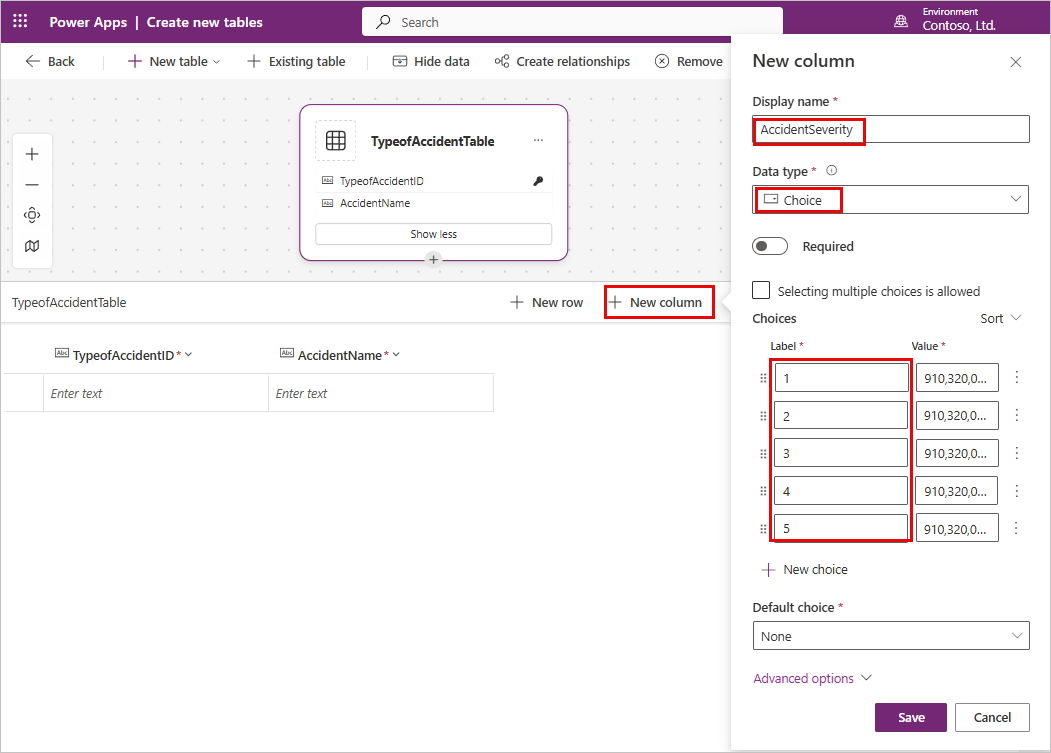
In the same manner, add the new column AccidentSeverity with these inputs:
Display name -
AccidentSeverityData type - Choice
Enter 1, 2, 3, 4, and 5, respectively, in the Label field (representing choices 1-5).
Ensure that the Default choice is None
Save the column.
Select Save and exit to create the table.
Once Dataverse is done creating your new table, find/select your TypeofAccidentTable.
Select the TypeofAccidentID column header and Edit column.
Change the Data type to Autonumber and leave the other items as the defaults.
Save the column.

We have now added supporting tables, including LocationTable and TypeofAccidentTable, to go along with your EmployeeTable to Dataverse. To view all of the tables you have created from Tables you can select the Custom filter tab under the Tables screen. You can also search for your new tables by using the search field at the top right corner of the screen.
