Exercise - Update your pipeline's trigger
A colleague asks you to turn on the App Service Always On feature on the company website so the website app is always running.
In this exercise, you'll update the pipeline you created to run automatically whenever a file changes on your main branch. You'll use the updated pipeline to deploy the requested configuration change to the website.
During the process, you'll:
- Update your pipeline, so it triggers automatically whenever a file changes in the deploy folder on the main branch.
- Make a change to your Bicep file.
- Verify that the pipeline runs automatically.
Update the trigger to be branch-based
In Visual Studio Code, open the deploy/azure-pipelines.yml file.
Remove the manual trigger on the first line.
Add the following trigger definition on the first line:
trigger:
  batch: true
  branches:
    include:
    - main
Notice that you also enable concurrency control, to avoid your pipeline running multiple times simultaneously.
Save your changes to the file.
Commit your changes, but don't push the changes yet. You'll push them soon.
git add .
git commit -m 'Add branch trigger'
Update your Bicep file
In Visual Studio Code, open the main.bicep file.
In the
appServiceAppresource definition'ssiteConfigproperty, add thealwaysOnproperty, with a value oftrue:resource appServiceApp 'Microsoft.Web/sites@2022-03-01' = { name: appServiceAppName location: location properties: { serverFarmId: appServicePlan.id httpsOnly: true siteConfig: { alwaysOn: true appSettings: [ { name: 'ToyManualsStorageAccountConnectionString' value: toyManualsStorageAccountConnectionString } ] } } }Save your changes to the file.
In the Visual Studio Code terminal, run the following code to commit your changes and push both your commits:
git add .
git commit -m 'Configure app Always On setting'
git push
Verify that the pipeline fails
In your browser, select Pipelines, and then select your pipeline.
Select the most recent run to see that the pipeline ran automatically. The pipeline ran because you pushed your changes to a branch that the branch trigger monitors. If the pipeline is still running, wait a minute, and then refresh the page.
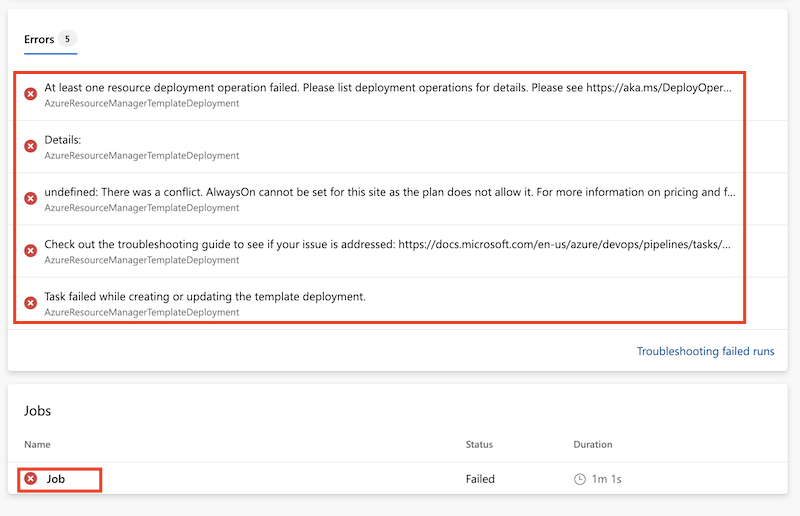
The pipeline shows a failed deployment.
To diagnose the failure, in Jobs, select the job, and then select the failed AzureResourceManagerTemplateDeployment task. Scroll to see the full error message. The error message includes the following text:
There was a conflict. AlwaysOn cannot be set for this site as the plan does not allow it. For more information on pricing and features, please see: https://aka.ms/appservicepricingdetailsThis error message indicates that the deployment failed because the App Service app was deployed by using the F1 free tier, which doesn't support the Always On feature.
Important
This example illustrates how it's important to test your Bicep files, including all the parameter values you use. It's easy for subtle errors to be added to your resource configuration or other code. You might not discover an issue until your pipeline deploys the code and it fails. In a future module, you'll learn some strategies you can use to verify and test your Bicep code.
Fix the Bicep file and see the pipeline triggered again
You speak to your colleague about the failed deployment. Together, you decide that the Always On setting needs to be applied only for your production environment. Here, you fix the issue that caused your deployment failure by applying the new rule you decide to use.
In Visual Studio Code, add new properties for each environment type to the
environmentConfigurationMapvariable:var environmentConfigurationMap = { nonprod: { appServiceApp: { alwaysOn: false } appServicePlan: { sku: { name: 'F1' capacity: 1 } } toyManualsStorageAccount: { sku: { name: 'Standard_LRS' } } } prod: { appServiceApp: { alwaysOn: true } appServicePlan: { sku: { name: 'S1' capacity: 2 } } toyManualsStorageAccount: { sku: { name: 'Standard_ZRS' } } } }Change the application's
alwaysOnsetting to use the appropriate configuration map value for the environment type:resource appServiceApp 'Microsoft.Web/sites@2022-03-01' = { name: appServiceAppName location: location properties: { serverFarmId: appServicePlan.id httpsOnly: true siteConfig: { alwaysOn: environmentConfigurationMap[environmentType].appServiceApp.alwaysOn appSettings: [ { name: 'ToyManualsStorageAccountConnectionString' value: toyManualsStorageAccountConnectionString } ] } } }Save your changes to the file.
In the Visual Studio Code terminal, commit your changes and push them:
git add .
git commit -m 'Enable App Service Always On for production environments only'
git push
Verify that the pipeline succeeds
In Azure DevOps, return to the Pipelines list and select your pipeline.
Select the most recent run. If the pipeline is still running, wait a minute, and then refresh the page.
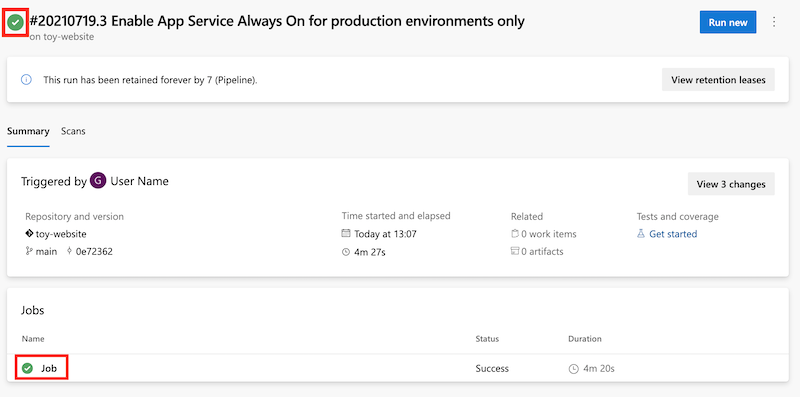
The pipeline shows a successful deployment. It succeeded this time because you used a valid Bicep file.
Clean up the resources
Now that you've completed the exercise, you can remove the resources so you aren't billed for them.
In the Visual Studio Code Terminal, run the following command:
az group delete --resource-group ToyWebsite --yes --no-wait
The resource group is deleted in the background.
Remove-AzResourceGroup -Name ToyWebsite -Force