Exercise - Add a flow to your Power Apps app
Flows can be used to automate a sequence of actions from within your Power Apps application. For example, when a new customer record is created, you could start an approval process, add a new SharePoint list item, or email a forms survey to your customer. This feature allows for more consistent business processes and less manual work.
The key feature that makes this ability so powerful is that needed information is passed from the app to a flow when it's triggered. The following steps demonstrate how to connect a flow to Power Apps with a simple app to send a message to Teams. The goal is when Button1 is pressed, the contents of TextBox1 will be passed to the flow to become a message in Teams.
Step 1 - Create the Power Apps application
To create the Power Apps application, follow these steps:
Open the Power Apps app in Teams from the Home tab select + New App.
Select a team to store the app and then select Create. Note that this can take some time if this is the first time an App has been created through Teams. Be patient and it completes. Also note that based on environment, app settings and, other items the screenshots below might not identically represent your Power App interface.
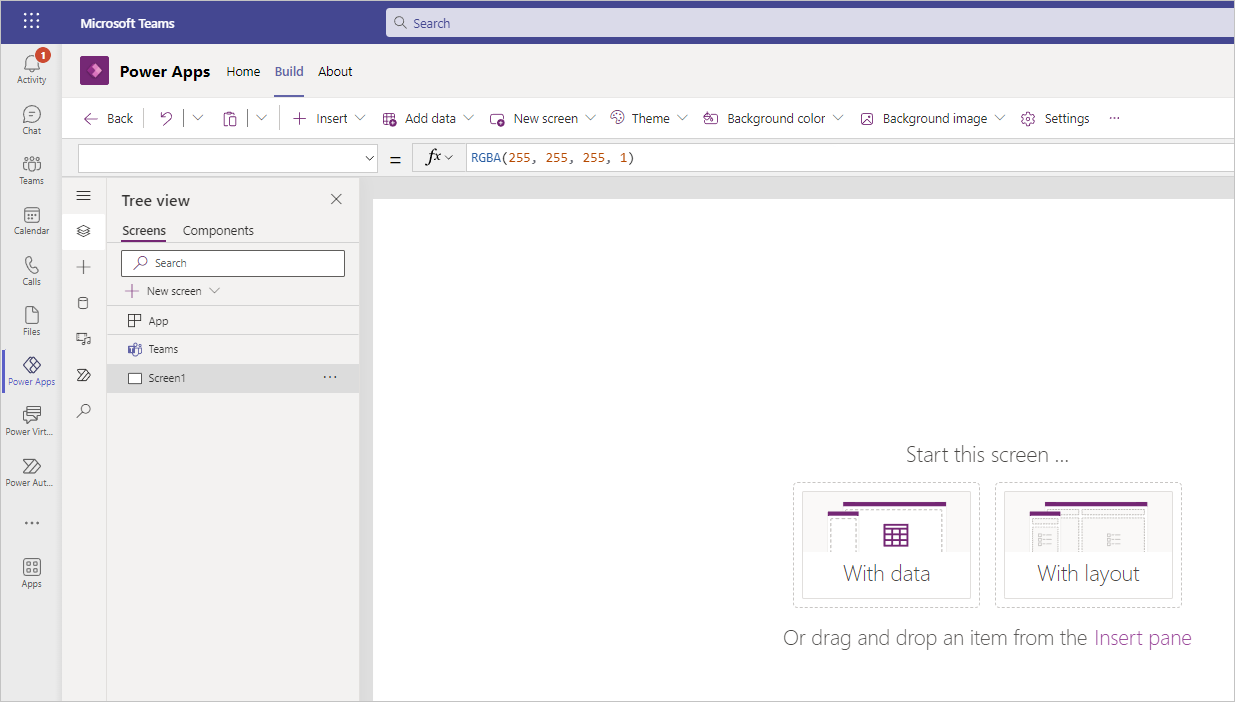
Name the app Trigger Flow From App and then select Save. Your created app shows a blank screen with a center screen menu displaying the options to start the screen With data, With layout, Or drag and drop an item from the Insert pane.
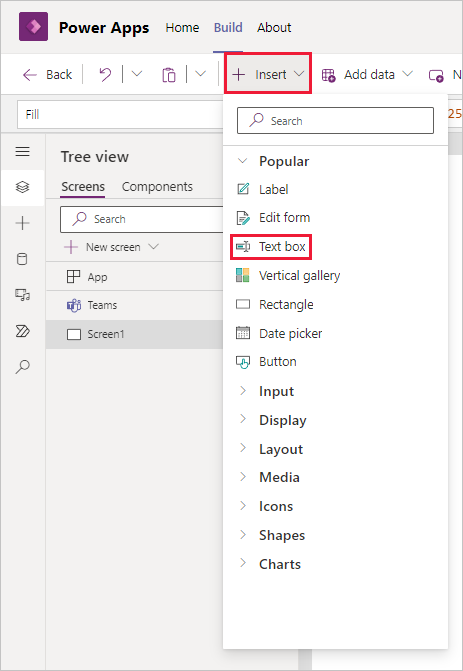
From the command ribbon at, the top select the + Insert button and you'll see a selection menu popup appear (alternatively you can select the + in the left side rail, and you'll have a similar menu); then select a Text box.
Tip
You can enter a control name in the search field in the Insert pane if you don't see the control you're looking for right away.
Next, using the exact same step, insert a Button.
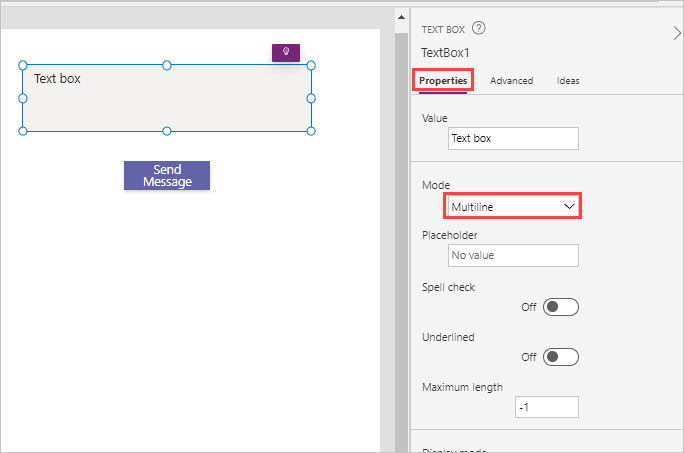
Position the controls on the screen to resemble the image below. You can select and drag them around. Resize the text box to make it a little taller by clicking and holding while dragging one of the dots on the upper or lower edge.
Change the following properties of TextBox1 and Button1 first by selecting them and using the Properties tab.
TextBox1 Mode - Multiline
Button1 Text - Send Message


Step 2 - Create and connect a flow
To create and connect a flow, follow these steps:
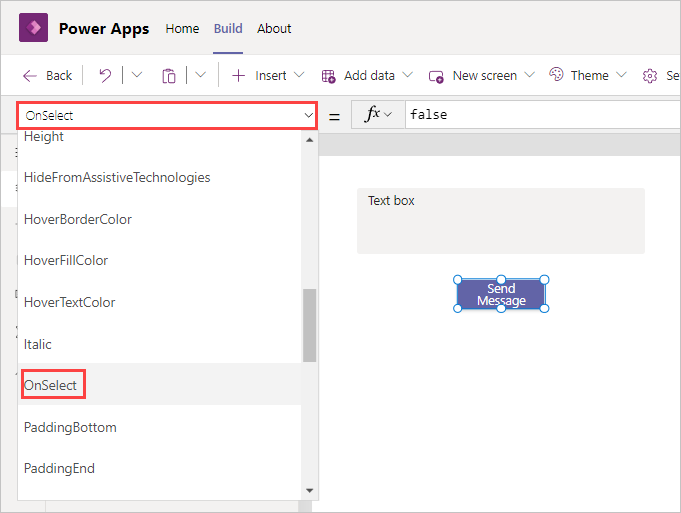
To connect a flow, select the item and event that will start the flow. Because you want the flow to trigger when Button1 is pressed, select the button and then select OnSelect from the drop-down menu.
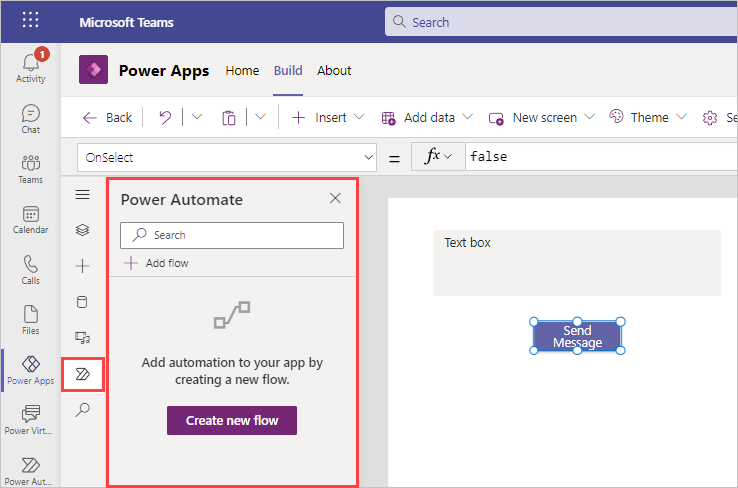
To create a flow and link it to the app, select the Power Automate button from the Power Apps side rail. A Power Automate add/create flow menu appears immediately on the right once you select the rail button.
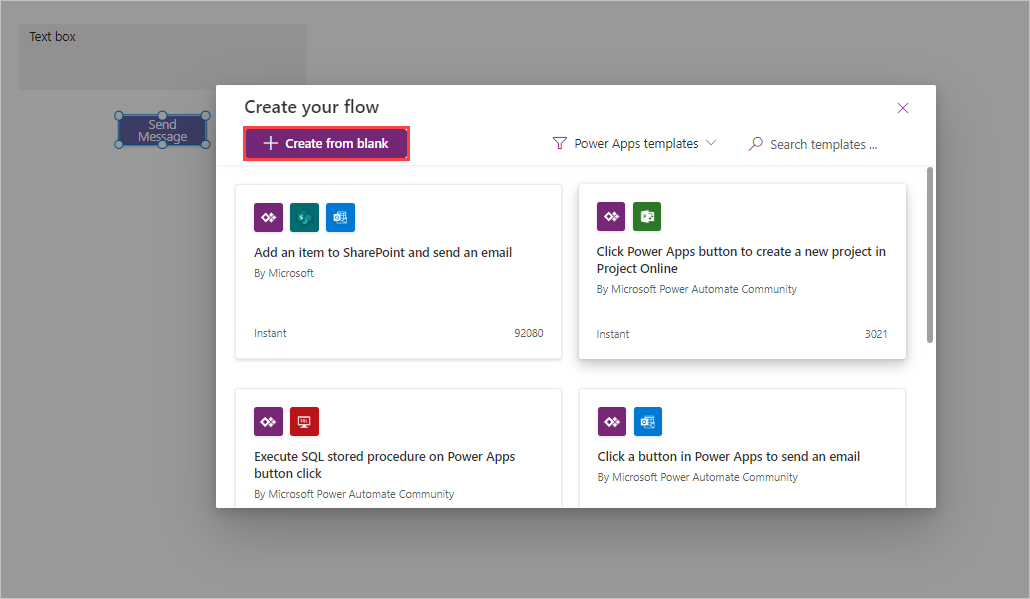
Select Create a new flow. A Create your flow popup appears, allowing you to select a preexisting template or + Create from blank. Select + Create from blank.
Give your flow a new name by selecting Untitled and then entering Power Apps to Teams Message.
Notice that your new flow already has the PowerApps trigger.

To add an action, select + New Step just below your trigger.
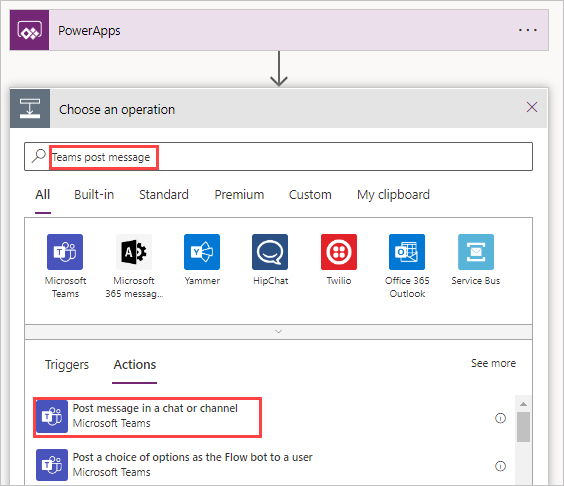
Enter Teams post message in the search box and select Post message in a chat or channel (it should be at the top of the list, but if not, you can scroll down to find it).
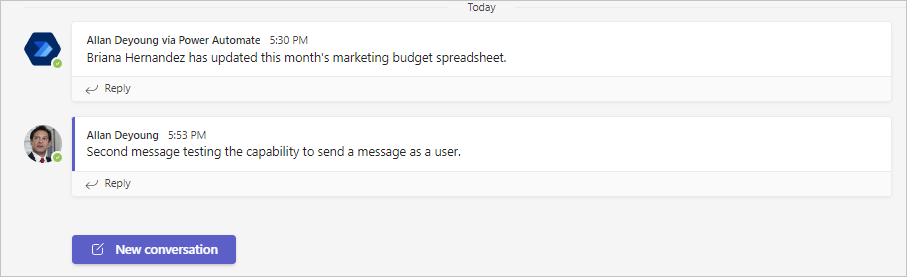
In the Post as section, select Flow bot (this should be the default selection). This sends your messages as the Flow bot instead of a specific user. So essentially, the messages are sent as a generic user.
For the Post in section, select Channel.
Now, select the Team and Channel that you want the message to be sent to.
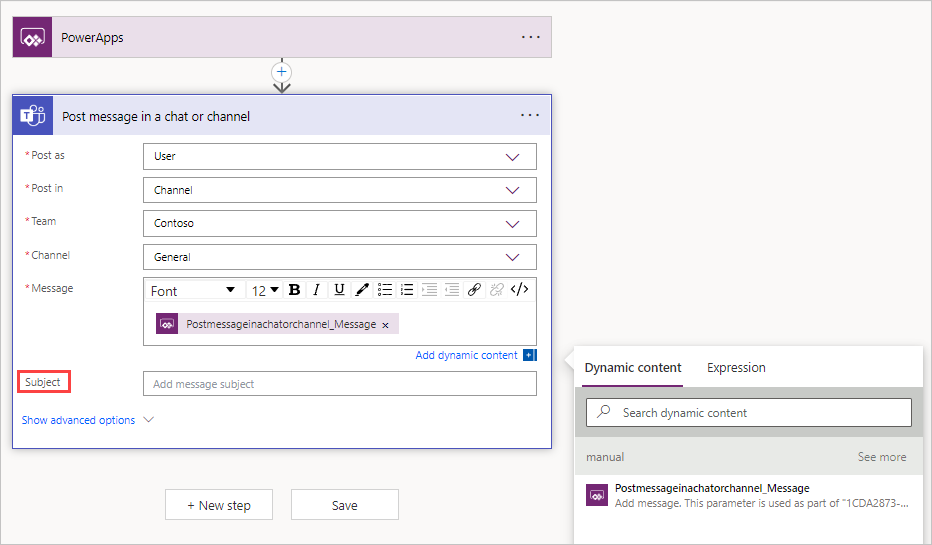
The message will be provided by the Power Apps application when it's triggered. Select in the Message text box to bring up Dynamic content and then select Ask in PowerApps.
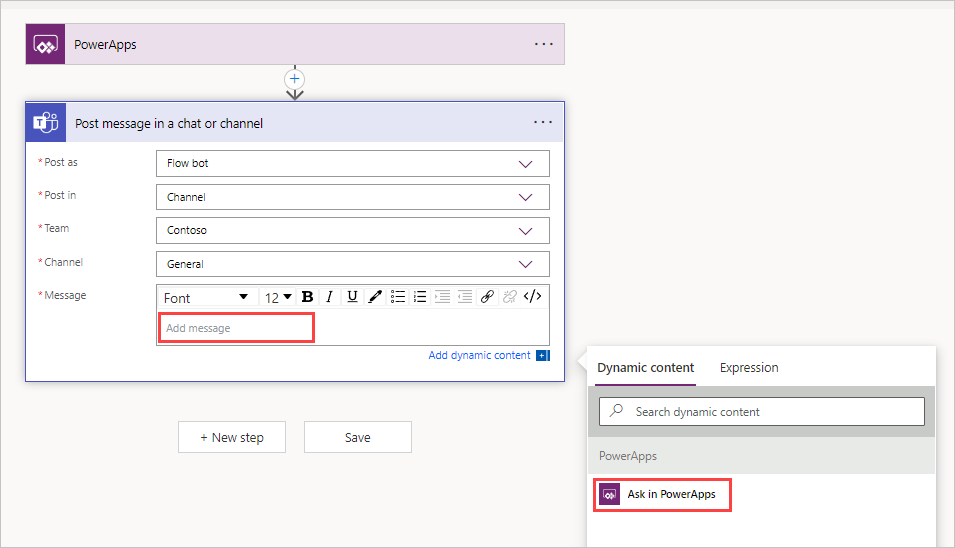
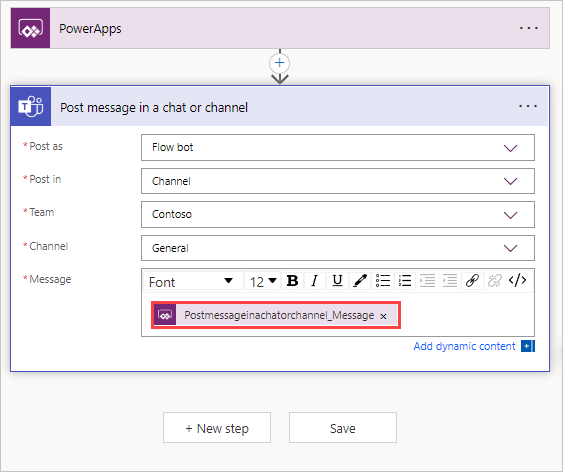
Notice that the dynamic content inside of the message field has something that looks like the title of this flow step with the spaces removed and _message at the end. Select the Save button under this step.
Once the flow saves, the Power Automate editor closes. In the Power Automate pane on the left side of your editing canvas, select the + Add flow, then look for your new flow titled Power Apps to Teams Message and select it.
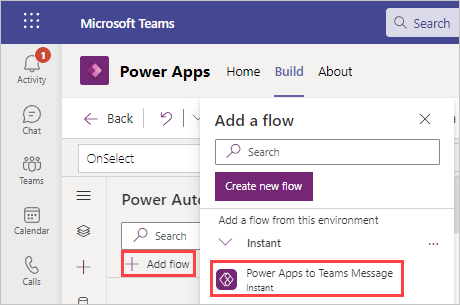
After a few moments, the Add flow popup closes and your new flow appears in the Power Automate pane under In your app
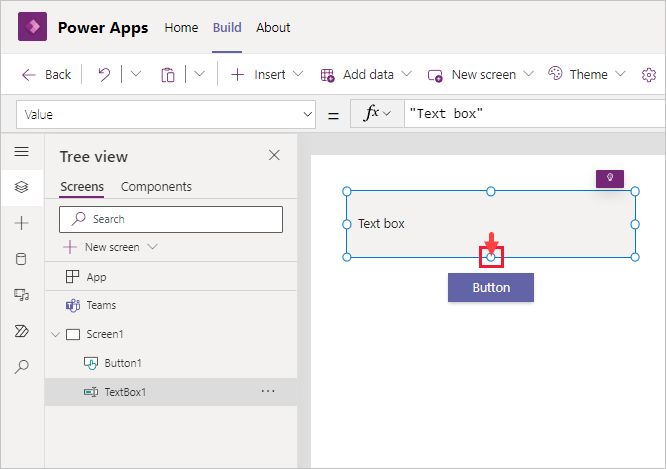
With Button1 selected and your OnSelect property displayed in the fx field (which is currently false), enter 'PowerApps' in the formula field and select PowerAppstoTeamsMessage.Run from the suggested input just below the fx entry field.
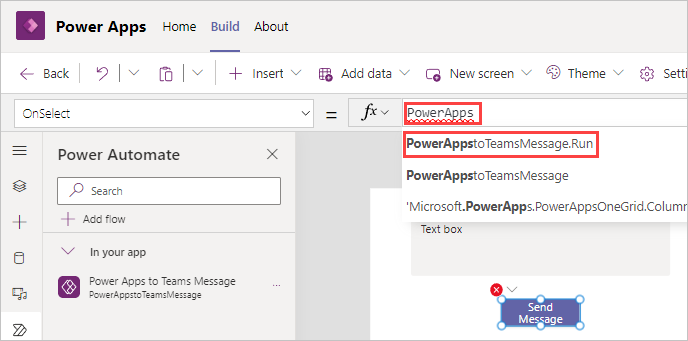
The command to run the flow appears in the formula bar. Notice how you still have error indicators in your app; that's because you need to pass a parameter from Power Apps into the flow. Complete the formula by entering (Textbox1.Value) so that your formula looks like the image below:

Notice how the error indicators disappear as you complete the formula. Now when you enter text in the text box, and select your Send Message button, that text is posted inside of the Teams room that you designated in your Power Automate flow.
Make sure to Save your app before continuing (note if your Save icon is disabled, Power Apps has already saved it for you).


Step 3 - Test the app and flow
Before publishing any application to Teams, you can test it by selecting Preview from the toolbar.
From the toolbar, select Preview (alternatively select F5).
Delete the existing text and enter a message into the text box; then select Send Message.

Switch to the Teams channel to see the message in Teams.

In the Power Apps editor, close preview mode by selecting the X icon or by pressing the Esc key.


Now let's edit the flow and change the Post as from Flow bot to User. To edit a flow you've connected to Power Apps, follow the steps below:
Select your Power Apps icon in the side rail.
From Recent apps select your app.
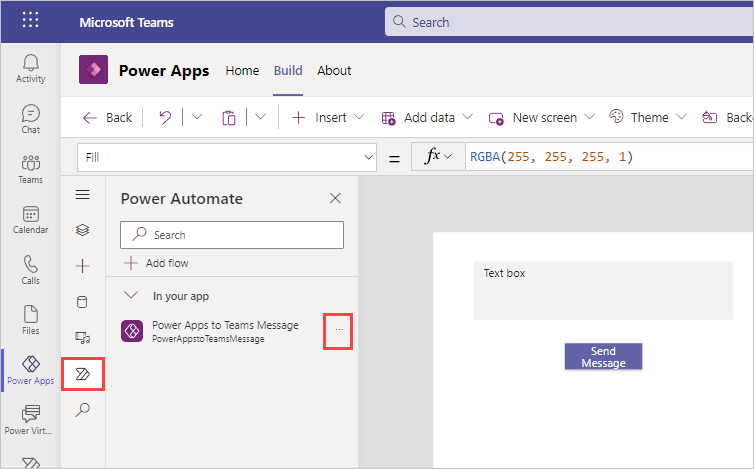
Select the Power Automate tab from the Power Apps editor side rail, then select the ellipsis just to the right of your flow from the Power Automate pane.
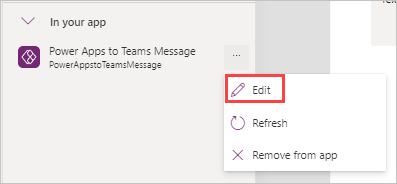
Select Edit and the Power Automate editor will popup on your screen.
Select your step Post message in a chat or channel action and it expands. In the Post as field, change this to User.
In the Message section, clear out the dynamic content and then readd it back to the field. When you update the Post as section, it's not uncommon for dynamic content to also need updated.
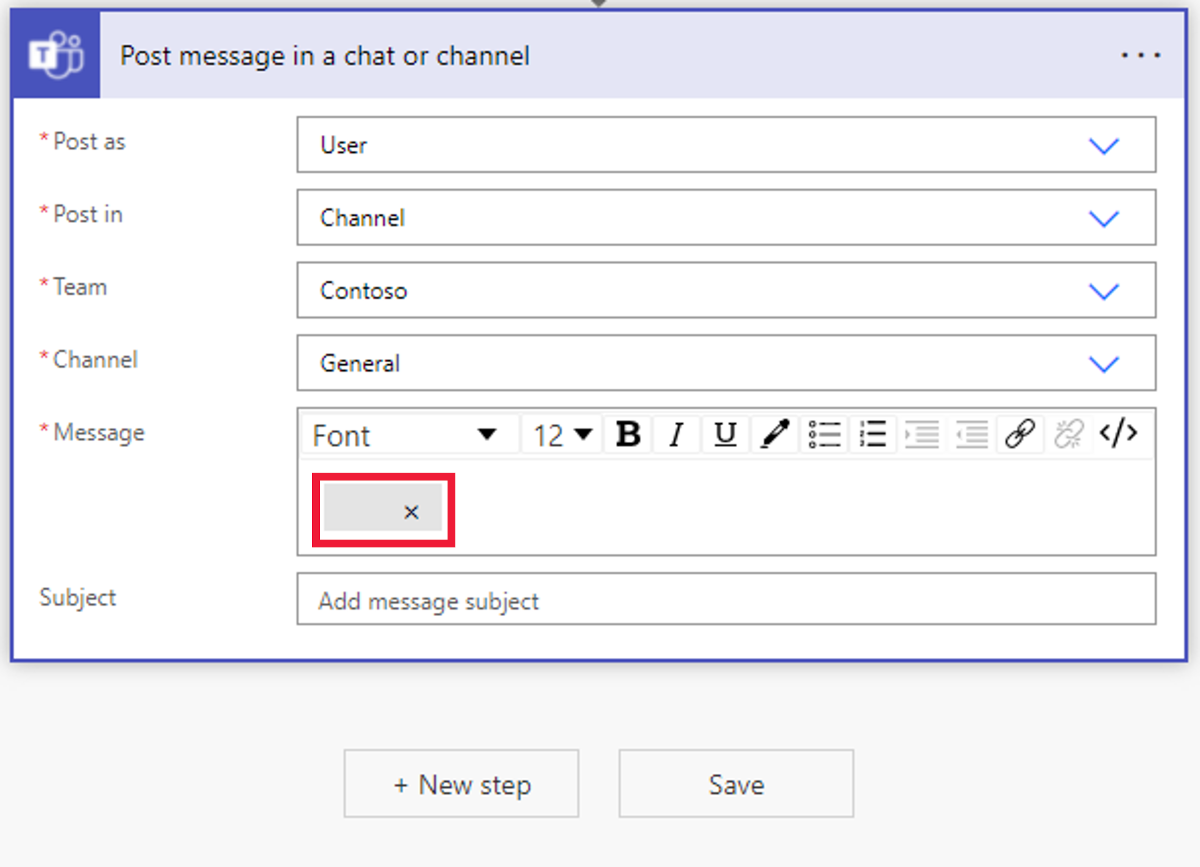
Also make note that there's an extra field for Subject now after the Message field. The subject isn't required, so you don't need to fill that in. You can if you want to see how it looks when you send your next message.
Select Save and then the X in the upper right corner of the flow editor to return to the app. You might notice that your app refreshes with the new changes in this flow.
Once again, put your app in preview mode, enter text in your text box and press Send Message.
Return to your Team message board and you should see the new post. It now posts as the user.