Exercise - Deploy resources conditionally
Note
The first time you activate a sandbox and accept the terms, your Microsoft account is associated with a new Azure directory named Microsoft Learn Sandbox. You're also added to a special subscription named Concierge Subscription.
You need to deploy your toy company's resources to a variety of environments, and you want to use parameters and conditions to control what gets deployed to each environment.
In this exercise, you'll create an Azure SQL logical server and a database. You'll then add auditing settings to ensure that auditing is enabled, but you want it enabled only when you're deploying to a production environment. For auditing purposes, you need to have a storage account, which you'll also deploy only when you're deploying resources to a production environment.
During the process, you'll:
- Create a Bicep file that defines a logical server with a database.
- Add a storage account and SQL auditing settings, each of which is deployed with a condition.
- Set up an infrastructure for your development environment, and then verify the result.
- Redeploy your infrastructure against your production environment, and then look at the changes.
This exercise uses the Bicep extension for Visual Studio Code. Be sure to install this extension in Visual Studio Code.
Create a Bicep template with a logical server and database
Open Visual Studio Code.
Create a new file called main.bicep.
Save the empty file so that Visual Studio Code loads the Bicep tooling.
You can either select File > Save As or select Ctrl+S in Windows (⌘+S on macOS). Be sure to remember where you've saved the file. For example, you might want to create a templates folder in which to save it.
To define a logical server and database, add the following content to the file, along with the parameters and variables that these resources need. Enter the content yourself instead of copying and pasting so that you can see how the tooling helps you to write your Bicep files.
@description('The Azure region into which the resources should be deployed.')
param location string

@secure()
@description('The administrator login username for the SQL server.')
param sqlServerAdministratorLogin string

@secure()
@description('The administrator login password for the SQL server.')
param sqlServerAdministratorLoginPassword string

@description('The name and tier of the SQL database SKU.')
param sqlDatabaseSku object = {
  name: 'Standard'
  tier: 'Standard'
}

var sqlServerName = 'teddy${location}${uniqueString(resourceGroup().id)}'
var sqlDatabaseName = 'TeddyBear'

resource sqlServer 'Microsoft.Sql/servers@2024-05-01-preview' = {
  name: sqlServerName
  location: location
  properties: {
    administratorLogin: sqlServerAdministratorLogin
    administratorLoginPassword: sqlServerAdministratorLoginPassword
  }
}

resource sqlDatabase 'Microsoft.Sql/servers/databases@2024-05-01-preview' = {
  parent: sqlServer
  name: sqlDatabaseName
  location: location
  sku: sqlDatabaseSku
}
Notice that all of the parameters include
@descriptiondecorators, which help to make them easier to work with. Also notice that thesqlServerAdministratorLoginandsqlServerAdministratorLoginPasswordparameters have the@securedecorator applied to them. This tells Bicep that these parameter values are sensitive. Azure doesn't print sensitive values to logs.
Add a storage account
In the auditing settings for the logical servers, you need to specify a storage account to contain the auditing data. You'll update your Bicep file to create this storage account, but only when auditing is going to be enabled.
Below the parameter declarations, add the following parameters:
@description('The name of the environment. This must be Development or Production.')
@allowed([
  'Development'
  'Production'
])
param environmentName string = 'Development'

@description('The name of the audit storage account SKU.')
param auditStorageAccountSkuName string = 'Standard_LRS'
Below the variable declarations, add the following variables:
var auditingEnabled = environmentName == 'Production'
var auditStorageAccountName = take('bearaudit${location}${uniqueString(resourceGroup().id)}', 24)
Notice that you're creating a variable called
auditingEnabled, which you'll use as the condition for deploying the auditing resources. When you create a variable like this, you make your Bicep code clearer and easier to read. Anyone who looks at the conditions on your resources will understand what's happening.Also notice that the
auditStorageAccountNamevariable uses a function calledtake(). Storage account names have a maximum length of 24 characters, so this function trims the end off the string to ensure that the name is valid.At the bottom of the file, below the resources, add the following resource definition for the storage account:
resource auditStorageAccount 'Microsoft.Storage/storageAccounts@2023-05-01' = if (auditingEnabled) {
  name: auditStorageAccountName
  location: location
  sku: {
    name: auditStorageAccountSkuName
  }
  kind: 'StorageV2'
}
Notice that the definitions for the storage account include the
ifkeyword, which specifies a deployment condition.
Add auditing settings
Below the storage account resource you just added, add the following:
resource sqlServerAudit 'Microsoft.Sql/servers/auditingSettings@2024-05-01-preview' = if (auditingEnabled) {
  parent: sqlServer
  name: 'default'
  properties: {
    state: 'Enabled'
    storageEndpoint: environmentName == 'Production' ? auditStorageAccount.properties.primaryEndpoints.blob : ''
    storageAccountAccessKey: environmentName == 'Production' ? auditStorageAccount.listKeys().keys[0].value : ''
  }
}
Notice that the definition includes the same
ifcondition as the storage account. Also, thestorageEndpointandstorageAccountAccessKeyproperties use the question mark (?) ternary operator to ensure that their values are always valid. If you don't do this, Azure Resource Manager evaluates the expression values before it evaluates the resource deployment condition and returns an error, because the storage account can't be found.Save the changes to the file.
Verify your Bicep file
After you've completed all of the preceding changes, your Bicep file should look like this example:
@description('The Azure region into which the resources should be deployed.')
param location string

@secure()
@description('The administrator login username for the SQL server.')
param sqlServerAdministratorLogin string

@secure()
@description('The administrator login password for the SQL server.')
param sqlServerAdministratorLoginPassword string

@description('The name and tier of the SQL database SKU.')
param sqlDatabaseSku object = {
  name: 'Standard'
  tier: 'Standard'
}

@description('The name of the environment. This must be Development or Production.')
@allowed([
  'Development'
  'Production'
])
param environmentName string = 'Development'

@description('The name of the audit storage account SKU.')
param auditStorageAccountSkuName string = 'Standard_LRS'

var sqlServerName = 'teddy${location}${uniqueString(resourceGroup().id)}'
var sqlDatabaseName = 'TeddyBear'
var auditingEnabled = environmentName == 'Production'
var auditStorageAccountName = take('bearaudit${location}${uniqueString(resourceGroup().id)}', 24)

resource sqlServer 'Microsoft.Sql/servers@2024-05-01-preview' = {
  name: sqlServerName
  location: location
  properties: {
    administratorLogin: sqlServerAdministratorLogin
    administratorLoginPassword: sqlServerAdministratorLoginPassword
  }
}

resource sqlDatabase 'Microsoft.Sql/servers/databases@2024-05-01-preview' = {
  parent: sqlServer
  name: sqlDatabaseName
  location: location
  sku: sqlDatabaseSku
}

resource auditStorageAccount 'Microsoft.Storage/storageAccounts@2023-05-01' = if (auditingEnabled) {
  name: auditStorageAccountName
  location: location
  sku: {
    name: auditStorageAccountSkuName
  }
  kind: 'StorageV2'
}

resource sqlServerAudit 'Microsoft.Sql/servers/auditingSettings@2024-05-01-preview' = if (auditingEnabled) {
  parent: sqlServer
  name: 'default'
  properties: {
    state: 'Enabled'
    storageEndpoint: environmentName == 'Production' ? auditStorageAccount.properties.primaryEndpoints.blob : ''
    storageAccountAccessKey: environmentName == 'Production' ? auditStorageAccount.listKeys().keys[0].value : ''
  }
}
If it doesn't, either copy the example or adjust your template to match the example.
Deploy the Bicep template to Azure
To deploy this template to Azure, you need to sign in to your Azure account from the Visual Studio Code terminal. Be sure you've installed the Azure CLI, and remember to sign in with the same account that you used to activate the sandbox.
On the Terminal menu, select New Terminal. The terminal window usually opens in the lower half of your screen.
If the terminal window displays bash on the right side, it means the correct shell is already open. Alternatively, if you see a bash shell icon on the right, you can select it to launch the shell.

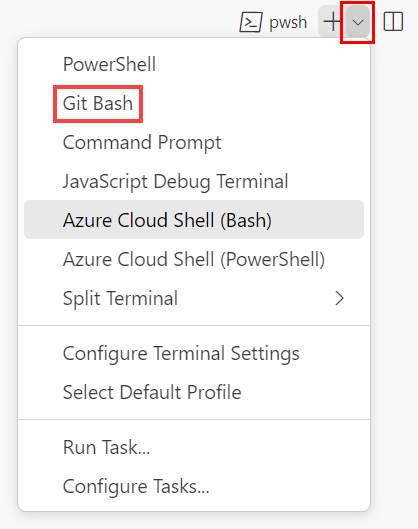
If a shell other than bash appears, select the shell dropdown arrow, and then select Git Bash.
In the terminal, go to the directory where you saved your template. For example, if you saved your template to the templates folder, you can use this command:
cd templates
Install Bicep
Run the following command to ensure you have the latest version of Bicep:
az bicep install && az bicep upgrade
Sign in to Azure
In the Visual Studio Code terminal, sign in to Azure by running the following command:
az loginIn the browser that opens, sign in to your Azure account. The Visual Studio Code terminal displays a list of the subscriptions associated with this account. Select the subscription called Concierge Subscription.
If you've used more than one sandbox recently, the terminal might display more than one instance of Concierge Subscription. In this case, use the next two steps to set one as the default subscription.
Get the Concierge Subscription IDs.
  az account list \
   --refresh \
   --query "[?contains(name, 'Concierge Subscription')].id" \
   --output table
Set the default subscription by using the subscription ID. Replace {your subscription ID} with the latest Concierge Subscription ID.
az account set --subscription {your subscription ID}
Set the default resource group
When you use the Azure CLI, you can set the default resource group and omit the parameter from the rest of the Azure CLI commands in this exercise. Set the default to the resource group that's created for you in the sandbox environment.
az configure --defaults group="<rgn>[sandbox resource group name]</rgn>"
Deploy the template to Azure by using the Azure CLI
In the Visual Studio Code terminal, deploy the Bicep template to Azure by running the following code. Notice that you're explicitly setting the location parameter to westus3.
az deployment group create --name main --template-file main.bicep --parameters location=westus3
To deploy this template to Azure, sign in to your Azure account from the Visual Studio Code terminal. Be sure you've installed Azure PowerShell, and sign in to the same account that activated the sandbox.
On the Terminal menu, select New Terminal. The terminal window usually opens in the lower half of your screen.
If the terminal window displays pwsh or powershell on the right side, it means the correct shell is already open. Alternatively, if you see a PowerShell shell icon on the right, you can select it to launch the shell.

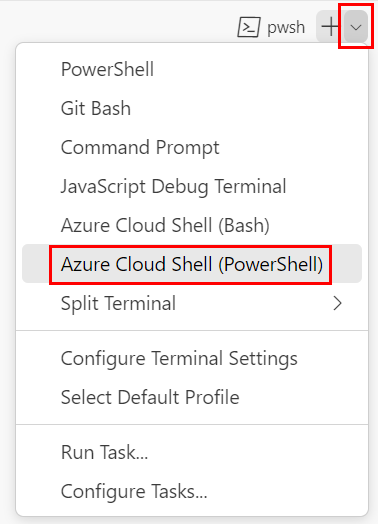
If a shell other than pwsh or powershell appears, select the shell dropdown arrow, and then select PowerShell.
In the terminal, go to the directory where you saved your template. For example, if you saved your template in the templates folder, you can use this command:
Set-Location -Path templates
Install the Bicep CLI
To use Bicep from Azure PowerShell, install the Bicep CLI.
Sign in to Azure by using Azure PowerShell
In the Visual Studio Code terminal, run the following command:
Connect-AzAccountA browser opens so that you can sign in to your Azure account. The browser might open in the background.
After you sign in to Azure, the terminal displays a list of the subscriptions associated with this account. If you activated the sandbox, a subscription named Concierge Subscription is displayed. Select it for the rest of the exercise.
If you've used more than one sandbox recently, the terminal might display more than one instance of Concierge Subscription. In this case, use the next two steps to set one as the default subscription.
Get the subscription ID. Running the following command lists your subscriptions and their IDs. Look for
Concierge Subscription, and then copy the ID from the second column. It looks something likeaaaa0a0a-bb1b-cc2c-dd3d-eeeeee4e4e4e.Get-AzSubscriptionChange your active subscription to Concierge Subscription. Be sure to replace {Your subscription ID} with the one that you copied.
$context = Get-AzSubscription -SubscriptionId {Your subscription ID}
Set-AzContext $context
Set the default resource group
You can set the default resource group and omit the parameter from the rest of the Azure PowerShell commands in this exercise. Set this default to the resource group created for you in the sandbox environment.
Set-AzDefault -ResourceGroupName <rgn>[sandbox resource group name]</rgn>
Deploy the template to Azure by using Azure PowerShell
In the Visual Studio Code terminal, deploy the template to Azure by running the following Azure PowerShell command. This process can take a couple of minutes to complete, and then you'll have a successful deployment.
New-AzResourceGroupDeployment -Name main -TemplateFile main.bicep -location westus3
You're prompted to enter the values for sqlServerAdministratorLogin and sqlServerAdministratorLoginPassword parameters when you execute the deployment.
Tip
When you enter the secure parameters, the values you choose must follow certain rules:
sqlServerAdministratorLoginmust not be an easily guessable login name such asadminorroot. It can contain only alphanumeric characters and must start with a letter.sqlServerAdministratorLoginPasswordmust be at least eight characters long and include lowercase letters, uppercase letters, numbers, and symbols. For more information about password complexity, see the SQL Azure password policy.
If the parameter values don't meet the requirements, Azure SQL won't deploy your logical server.
Also, be sure to note the login and password that you enter. You'll use them again shortly.
Because you haven't specified a value for the environmentName parameter, the deployment uses the default value of Development.
Wait for deployment to finish. If your deployment fails with a message that a location isn't accepting creation of new Windows Azure SQL Database servers, select a different region like eastus or eastus2.
Verify the deployment
Use the Azure portal to inspect the resources that you deploy and to inspect the results of each deployment.
Go to the Azure portal, and make sure you're in the sandbox subscription by doing the following:
a. Select your avatar at the upper right.
b. Select Switch directory. In the list, select the Microsoft Learn Sandbox directory.On the left pane, select Resource groups.
Select
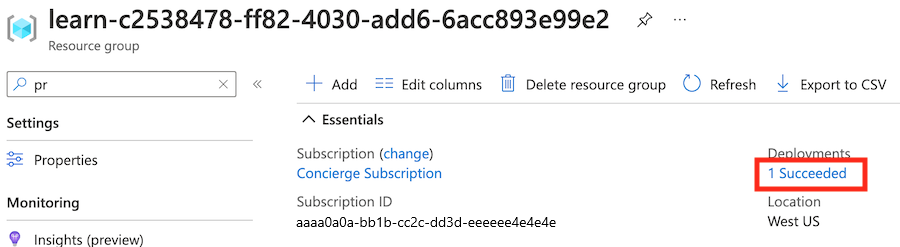
[sandbox resource group name] .In the Overview section, you can see that one deployment has succeeded. You can also see that a logical server and a SQL database are deployed, but the storage account for auditing isn't deployed.
Note
The storage account with a name beginning with
cloudshellis unrelated to your deployment and was created by the Learn sandbox.
Next to Deployments, select 1 Succeeded to see deployment details.
Select the deployment called main to see which resources were deployed, and then select Deployment details to expand it.
In this case, one logical server and one SQL database are deployed. Notice that the storage account and auditing settings aren't on the list of resources.

Leave the page open in your browser. You'll check on deployments again later.
Redeploy for the production environment
In the previous deployment, the default value for the environmentName parameter was used, which meant that it was set to Development.
Now you'll explicitly set the parameter value to Production. You expect that, by making this change, the storage account for auditing purposes will be deployed, and auditing will be enabled on the logical server.
Deploy the template for the production environment
In the Visual Studio Code terminal, deploy the Bicep template to Azure by running the following code:
az deployment group create --name main --template-file main.bicep --parameters environmentName=Production location=westus3
In the Visual Studio Code terminal, deploy the template to Azure by running the following Azure PowerShell command:
New-AzResourceGroupDeployment -Name main -TemplateFile main.bicep -environmentName Production -location westus3
Caution
Be sure to use the same login and password that you used previously, or the deployment won't finish successfully.
After minute or two, the deployment should finish successfully.
Verify the redeployment
To complete this exercise, verify that the redeployment has finished successfully and that auditing has been enabled.
Return to the Azure portal and go to your resource group. If you already have the resource group open, select Refresh.
You should see that an additional storage account has been deployed for auditing purposes.
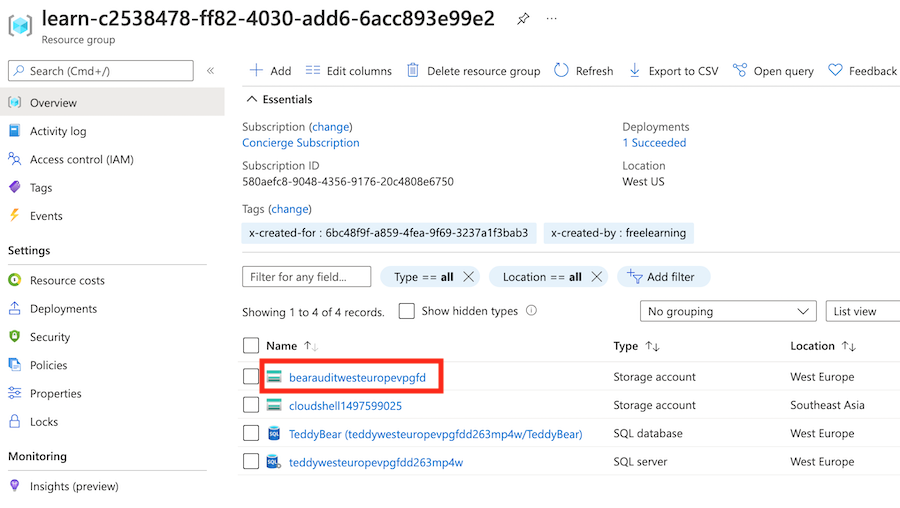
Select your logical server (look for the resource with type SQL server).
In the search field, enter Auditing. Under Security, select Auditing.
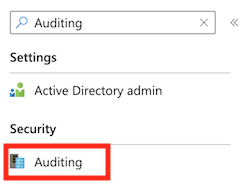
Verify that auditing is enabled for this logical server.
