Create an agent in Copilot Chat - Part 2
If you used the Describe tab in Copilot Studio to create the initial draft version of your agent, you can then switch over to the Configure tab to customize and edit the remaining details of the agent. However, if you choose not to use the Describe tab, or if it isn't available in your region or preferred language, then you must create the entire agent using the Configure tab.
Note
The Describe tab and the Configure tab are synchronized. As such, any changes made in the Describe tab are reflected in the Configure tab, and vice-versa, allowing you to switch between the two tabs for a seamless authoring experience. This ability to switch between tabs enables you to use the experience that you find most comfortable to author the agent.
Configure tab in Copilot Studio
The Configure tab enables you to view and edit detailed information about the agent, giving you more control and precision over its performance. The remaining sections in this training unit examine each of the features of the Configure tab. For detailed information on each of these features, review the earlier training unit that explored the components of an agent in SharePoint and Microsoft 365 Copilot Chat.
Template
- When you open the Configure tab, you can optionally select a template that provides the foundation for your agent.
- If you're using the Configure tab because you didn't have access to the Describe tab due to your region or preferred language, the template provides a starting point with preconfigured settings and structures. This process is the same as selecting a template on the Describe tab, where it provides a name, detailed description of the agent's purpose, and instructions on how it should behave.
- If you select a template on the Describe tab, you can override your choice by selecting a different template on the Configure tab. However, if you do this, Copilot Studio resets the agent's configuration to match the settings and structure of the new template you select on the Configure tab. Any specific changes or customizations you made in the Describe tab are replaced by the new template's predefined settings. As such, you must re-enter any custom instructions or details that you want to retain.
Warning
You should carefully consider whether you want to switch templates after making customizations, as this action resets the agent's configuration to the new template's defaults.
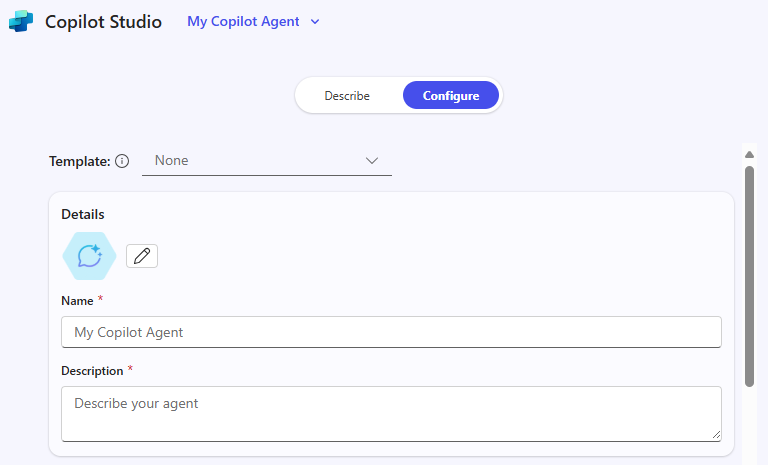
Agent icon
Every agent is assigned the system's default icon for agents, as seen in the Details section in the earlier Copilot Studio screenshot. You can select the Edit (pencil) icon to change the default icon to a customized icon. Keep in mind that an agent's icon must be a .png file, and it can't exceed 1 MB in size.
Agent name, description, and instructions
At this point, you can enter or edit the agent's name, description, and instructions. If you entered this information on the Describe tab, then review it here to ensure it meets your needs. Keep in mind that if you entered instructions on the Describe tab along with any follow-up responses to questions posed by Copilot Studio, the instructions that appear on the Configure tab are the builder's interpretation of that conversation. Each task or instruction that you provided are listed in a bulleted fashion.
On the other hand, if you don't have access to the Describe tab, or you chose to skip the Describe tab and go straight to the Configure tab, you can still enter your instructions in the Configure tab using natural language. If you do so, Copilot Studio interprets your natural language instructions (just like on the Describe tab) and replaces them with the interpreted instructions. Doing so enables you to verify the agent's behavior is accurately defined based on your input.
Unlike the Describe tab, the Configure tab doesn't ask you questions to clarify your instructions. The Describe tab is designed to provide a more conversational and guided experience, where Copilot Studio might ask follow-up questions to refine the agent's behavior. So while you can use natural language in the Configure tab, the experience doesn't include the interactive, question-based refinement process found in the Describe tab.
Tip
You should review the instructions to ensure Copilot Studio correctly interpreted the instructions that you provided. Edit any bullet points that you feel need refinement.
Keep in mind that if you select a template on the Configure tab, the system inserts predefined instructions related to the selected template. You can customize these instructions if you wish, or replace them with your own, customized instructions.
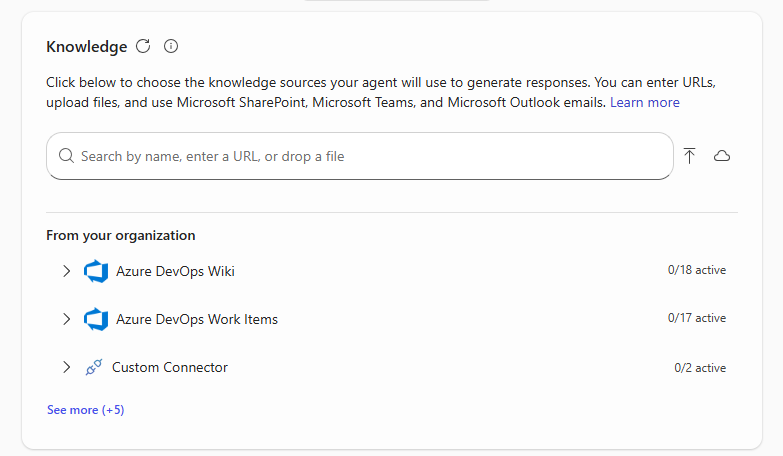
Knowledge sources
After verifying or updating the agent's name, description, and instructions, you're now ready to customize the remaining details of your agent. Doing so begins with updating the knowledge sources, where you can select various data sources to enhance the agent.
In the Knowledge section, you can:
Select folders and file types (for example, .docx, .doc, .pptx, .ppt, and .html) or add a SharePoint site.
Enable or disable the agent from accessing the Web.
Enter a URL for a SharePoint site or folder, such as contoso.sharepoint.com/sites/policies.
Select files or folders from the SharePoint file picker.
Select Microsoft Graph connectors, which allow agents to include knowledge from external repositories or systems such as customer accounts, incident tickets, and knowledge articles.
Note
You can add up to 20 knowledge sources per agent. These sources can be sites, document libraries, folders, or files.
It's important that you keep in mind the following considerations related to knowledge sources:
- Web content access. The ability to enable or disable web content access depends on your organization's settings. If an IT admin disables the "Allow web search in Copilot" policy, the web content toggle becomes unavailable to users.
- SharePoint access. If Restricted SharePoint Search is enabled, you can't use SharePoint as a knowledge source.
- File size limitations. The maximum file size supported can vary based on your organization's licensing and configuration. For instance, with a Microsoft 365 Copilot license, files up to 200 MB may be supported.
- File readiness. Newly uploaded files to SharePoint may take several minutes to be ready for the agent to include in its responses. You can check the file readiness by looking in the Knowledge section in the Configure tab; the file has the word "Preparing" next to it.
Capabilities
In the Capabilities section, you can optionally enable the Code interpreter and Image generator features. Both features are turned off by default.
As you learned in the prior training unit, the Code interpreter enables the agent to solve complex tasks using Python code. However, you don't write the Python code that's used by the agent - that's the job of the Code interpreter. You enter a natural language prompt in the agent, and the Code interpreter interprets the meaning of your prompt and generates Python code behind the scenes to satisfy your request.
The Image generator generates images based on user prompts. It's based on Microsoft's existing Designer functionality and uses DALL-E technology to create visually appealing and contextually relevant graphics. The Image generator can produce multiple images for each prompt, and users can interact with these images by viewing them in full size, downloading, or modifying them with subsequent prompts.

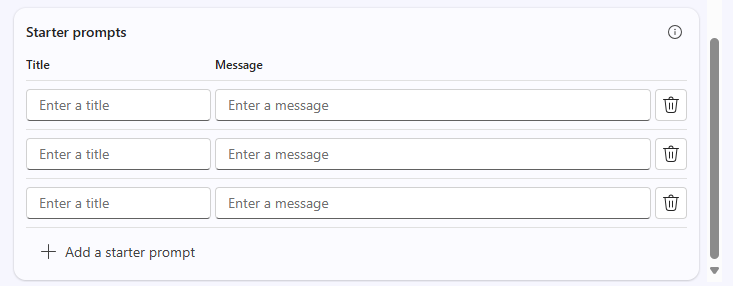
Starter prompts
In the Starter prompts section, you can add, remove, and edit starter prompts that you want the agent to display to the user when they open the agent. Starter prompts are predefined suggestions or questions designed to help users initiate a task or conversation related to your agent. These prompts serve as a starting point to guide users in the right direction, especially when they're unsure of how to begin.
If you select a template, the system inserts predefined starter prompts related to the selected template. If you didn't select a template, Copilot Studio automatically creates several suggested prompts based on the agent's description. You can use these suggested prompts as is, or you can edit or remove them, or add your own custom prompts.
Note
When you create an agent in Microsoft 365 Copilot Chat, you can assign an unlimited number of starter prompts to each agent.
Test the agent
Once you finish configuring your agent in the Configure tab, you can test the draft version of the agent on the same page. Testing an agent helps ensure that it's well-designed, functional, and ready to meet the needs of your users. It allows you to make necessary adjustments and improvements, leading to a more effective and reliable agent.
Testing an agent is covered in greater detail in a later training unit in this module.
Create the agent
Once you finish testing the agent and make any final adjustments to its draft version, select the Create button to create the live agent. When you select the Create button, Copilot Studio does more than just convert the draft version of the agent to a live version. Here are some other actions that occur:
- Activation. The agent becomes active and ready for use. It can now start interacting with users and performing its designated tasks.
- Deployment. The agent is deployed to the specified environment, making it accessible to the intended users. This process includes integrating with any configured knowledge sources and capabilities.
- Configuration synchronization. Any configurations made in the Describe and Configure tabs are synchronized and finalized. This process ensures that all settings, instructions, and knowledge sources are properly set up.
- Availability. The agent becomes available for sharing and collaboration. You can share the agent with other users or teams, allowing them to access and utilize it.
- Monitoring and analytics. The agent is set up for monitoring and analytics. These features allow you to track the agent's performance, usage, and any issues that might arise, providing valuable insights for further optimization.
When the agent is successfully created, the system returns the following dialog box.
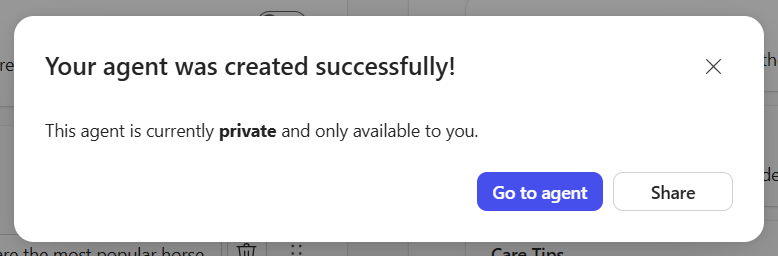
This window allows you to either share the agent by selecting the Change sharing settings option or open the agent to start using it by selecting the Go to agent button. Sharing an agent is covered in the next module in this course.