Exercise: Getting Started with Playwright
Let’s begin by installing Playwright, then let's explore the tool and validate that we can run the example tests that come when installing Playwright.
Install Playwright
Start by opening the terminal and creating a new directory for your project. You can also install Playwright in an existing project, but for this exercise, let's create a new one and call it learn-playwright.
mkdir learn-playwright
Navigate into the new directory:
cd learn-playwright
In this new empty directory, install Playwright and explore what got installed.
npm init playwright@latest
When you run this command, you're asked a few questions to configure the Playwright project:
- Select the language you want to use for your tests. We recommend TypeScript.
- Select the name of the test directory. We recommend tests.
- Add a GitHub Action for automating tests. We recommend Yes.
- Install Playwright browsers. We recommend selecting the default of True.
You should now see the following output in the terminal:
Initializing NPM project (npm init -y)…

Wrote to /learn-playwright/package.json:

{

  "name": "learn-playwright",
  "version": "1.0.0",*
  "description": "",*
  "main": "index.js",*
  "scripts": {*
    "test": "echo \"Error: no test specified\" && exit 1"*
  },
  "keywords": [],
  "author": "",
  "license": "ISC"
}

Installing Playwright Test (npm install --save-dev @playwright/test)…

added 4 packages, and audited 5 packages in 2s

found 0 vulnerabilities
Installing Types (npm install --save-dev @types/node)…

added 2 packages, and audited 7 packages in 580ms

found 0 vulnerabilities
Writing playwright.config.ts.
Writing .github/workflows/playwright.yml.
Writing tests/example.spec.ts.
Writing tests-examples/demo-todo-app.spec.ts.
Writing package.json.
Downloading browsers (npx playwright install)…
✔ Success! Created a Playwright Test project at /learn-playwright

Inside that directory, you can run several commands:

  npx playwright test
    Runs the end-to-end tests.

  npx playwright test --ui
    Starts the interactive UI mode.

  npx playwright test --project=chromium
    Runs the tests only on Desktop Chrome.

  npx playwright test example
    Runs the tests in a specific file.

  npx playwright test --debug
    Runs the tests in debug mode.

  npx playwright codegen
    Auto generate tests with Codegen.

We suggest that you begin by typing:

    npx playwright test

And check out the following files:
  - ./tests/example.spec.ts - Example end-to-end test
  - ./tests-examples/demo-todo-app.spec.ts - Demo Todo App end-to-end tests
  - ./playwright.config.ts - Playwright Test configuration

Visit https://playwright.dev/docs/intro for more information. ✨

Happy hacking! 🎭
The output tells us that a new npm project was created with a package.json file, and that Playwright Test was installed. It also tells us the files that were created:
playwright.config.ts: The Playwright Test Configuration file..github/workflows/playwright.yml: GitHub Action for automating teststests/: Top-level folder that Playwright searches recursively for tests with an example test script.tests-examples/: Staging folder with a demo todo app test script to try out.package.json: The npm project file.
Next, it tells us that Playwright has downloaded browsers. Playwright downloads the latest version of the browsers on which we can run our tests. It uses browser binaries that are installed locally, so you don't need to have the browsers installed on your machine.
When finished, we get a success message and a list of commands we can run to interact with the Playwright Test project.
Validate Playwright test runner
To run tests in Playwright, use the npx playwright test command. The command runs all the tests in the tests/ folder, which is the folder name we defined in step 2 when installing.
npx playwright test
When you run the command, you see the following output:
Running 6 tests using 5 workers
      6 passed (4.0s)

To open last HTML report run:

  npx playwright show-report
The output tells us that six tests were run using five workers. By default, Playwright runs tests in parallel by using workers. The number of CPU cores available determines the number of workers. Playwright uses half of the available CPU cores.
Let's open the HTML report to see more details about the test run.
npx playwright show-report
The following message tells us the report is being served locally, and a browser window opens with the report.
Serving HTML report at http://localhost:9323. Press Ctrl+C to quit.
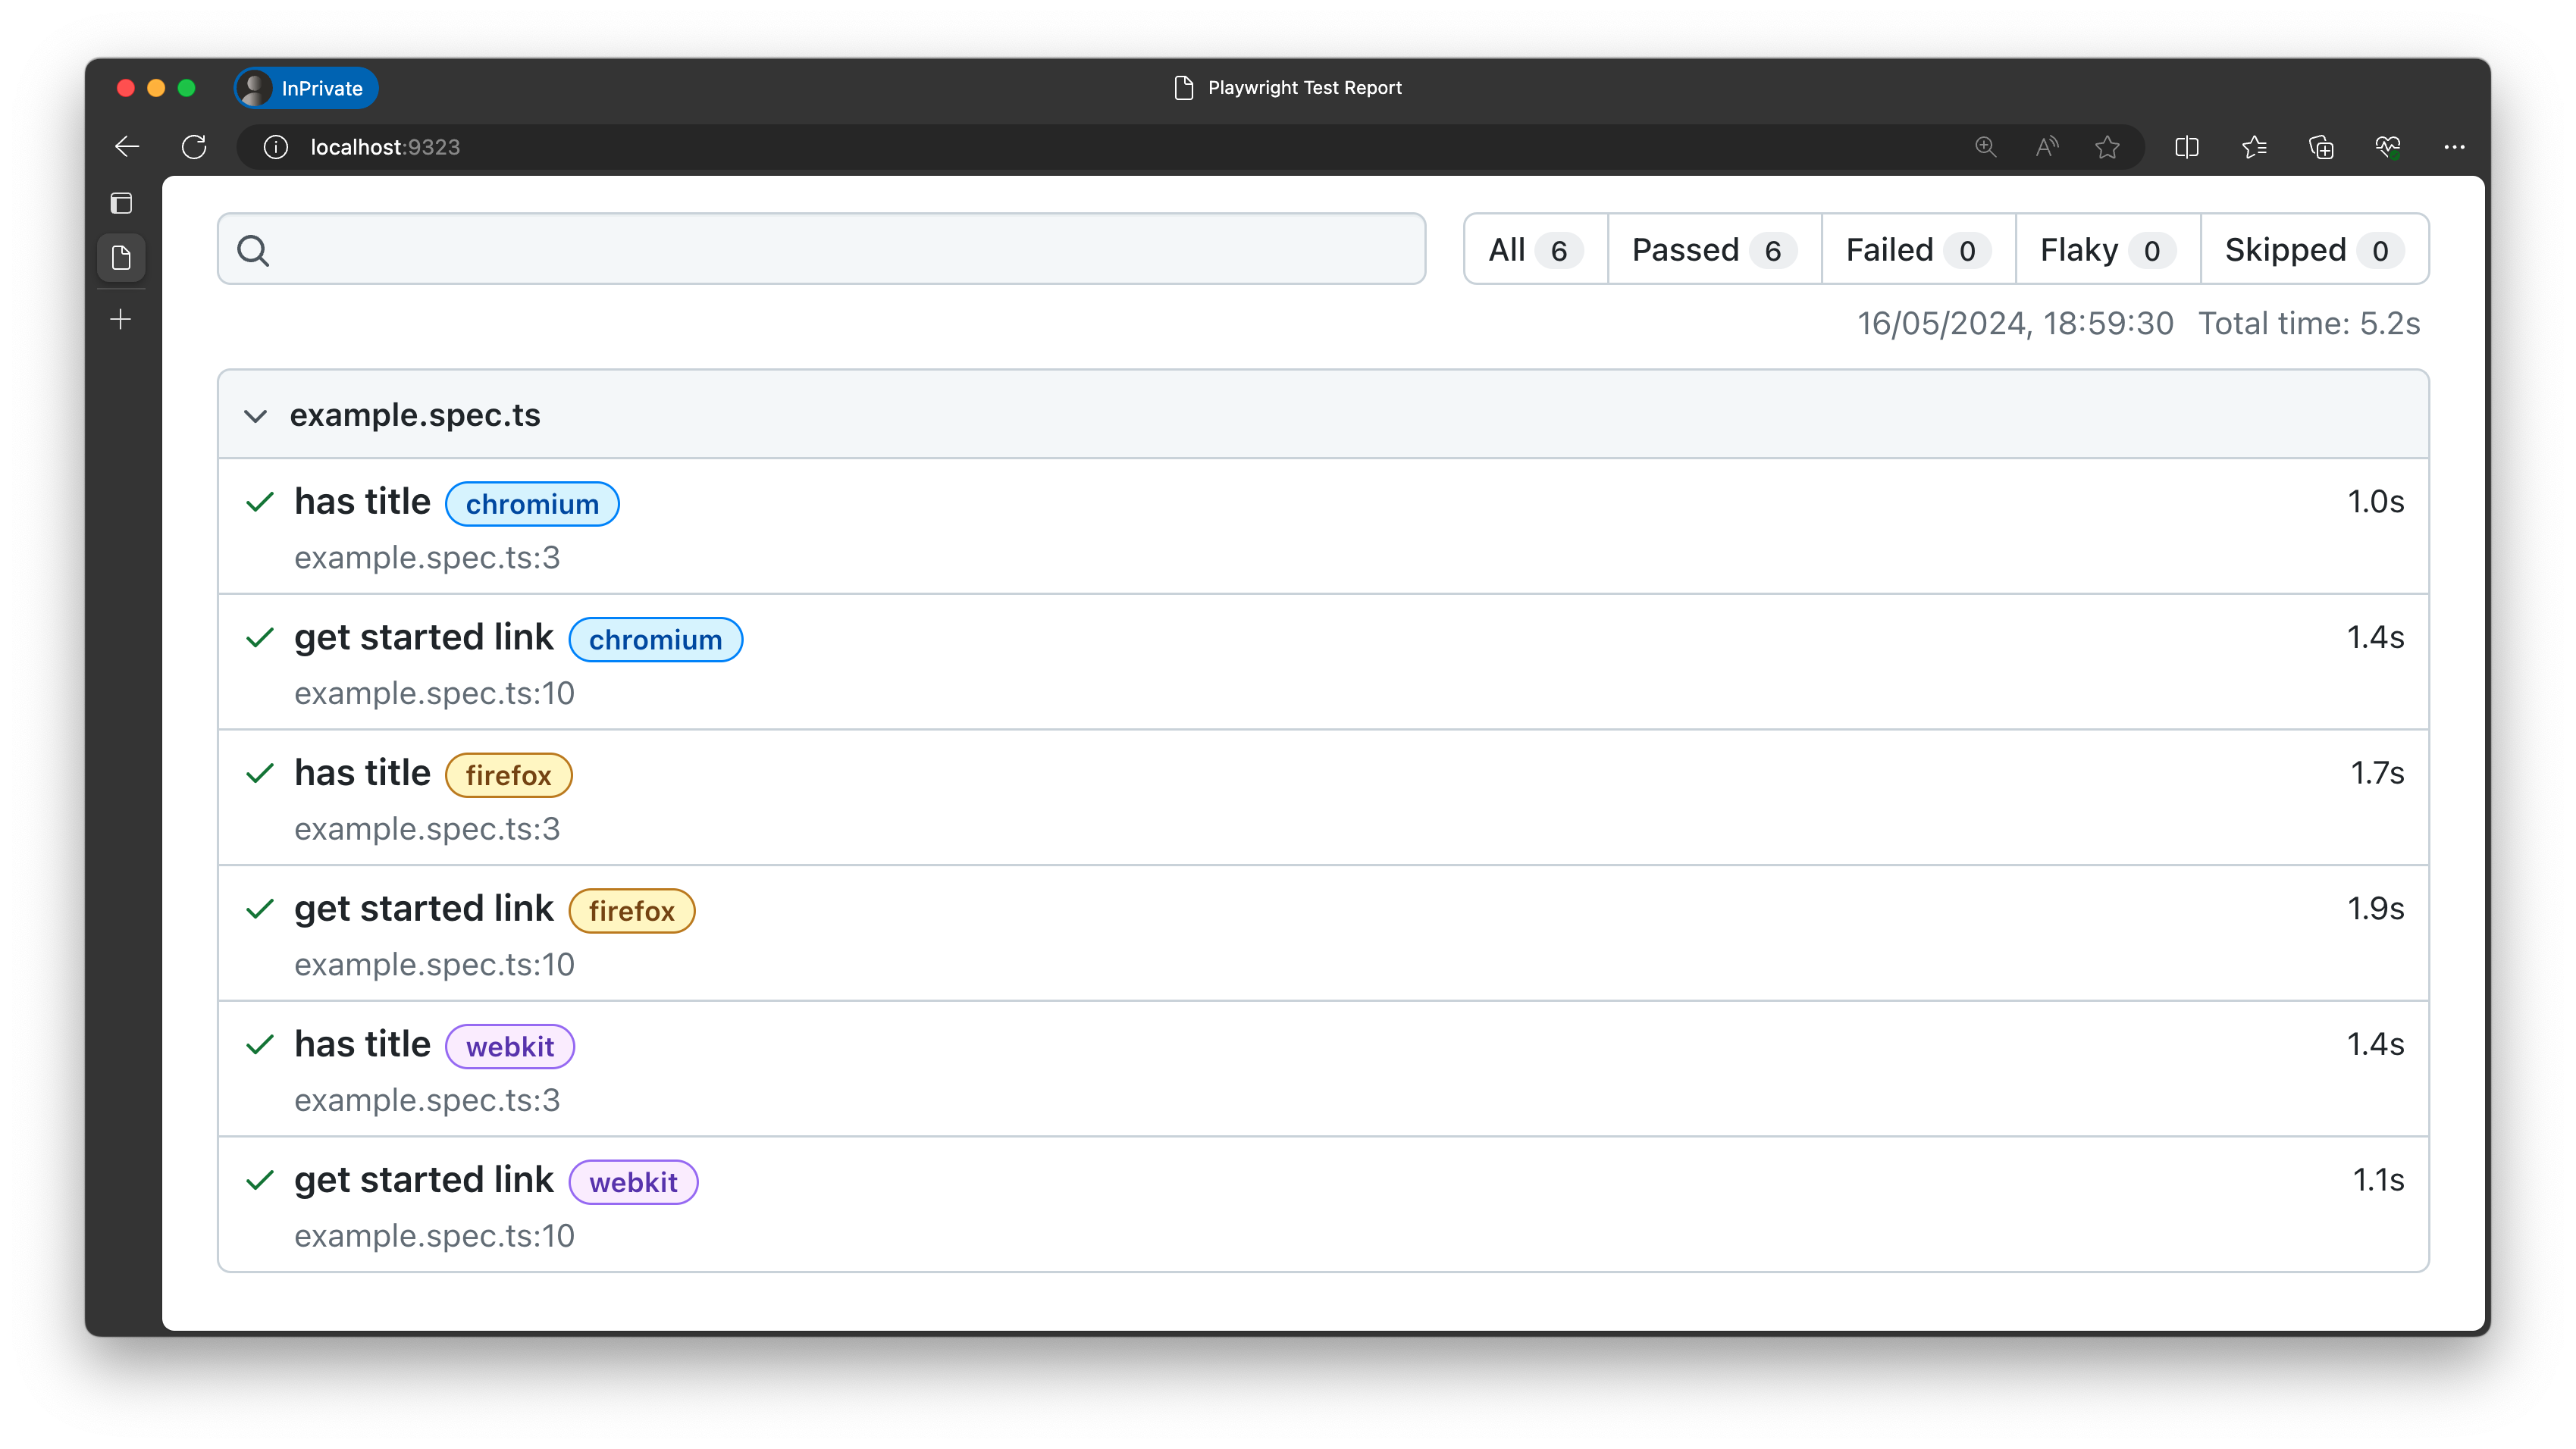
The report gives us the following insights:
- We have two test cases (has title and get started link)
- We ran each across three browser engines (chromium, Firefox, webkit)
- The test cases were defined in the
example.spec.tsfile - The test run took 5.2s with all six tests passing (none skipped)
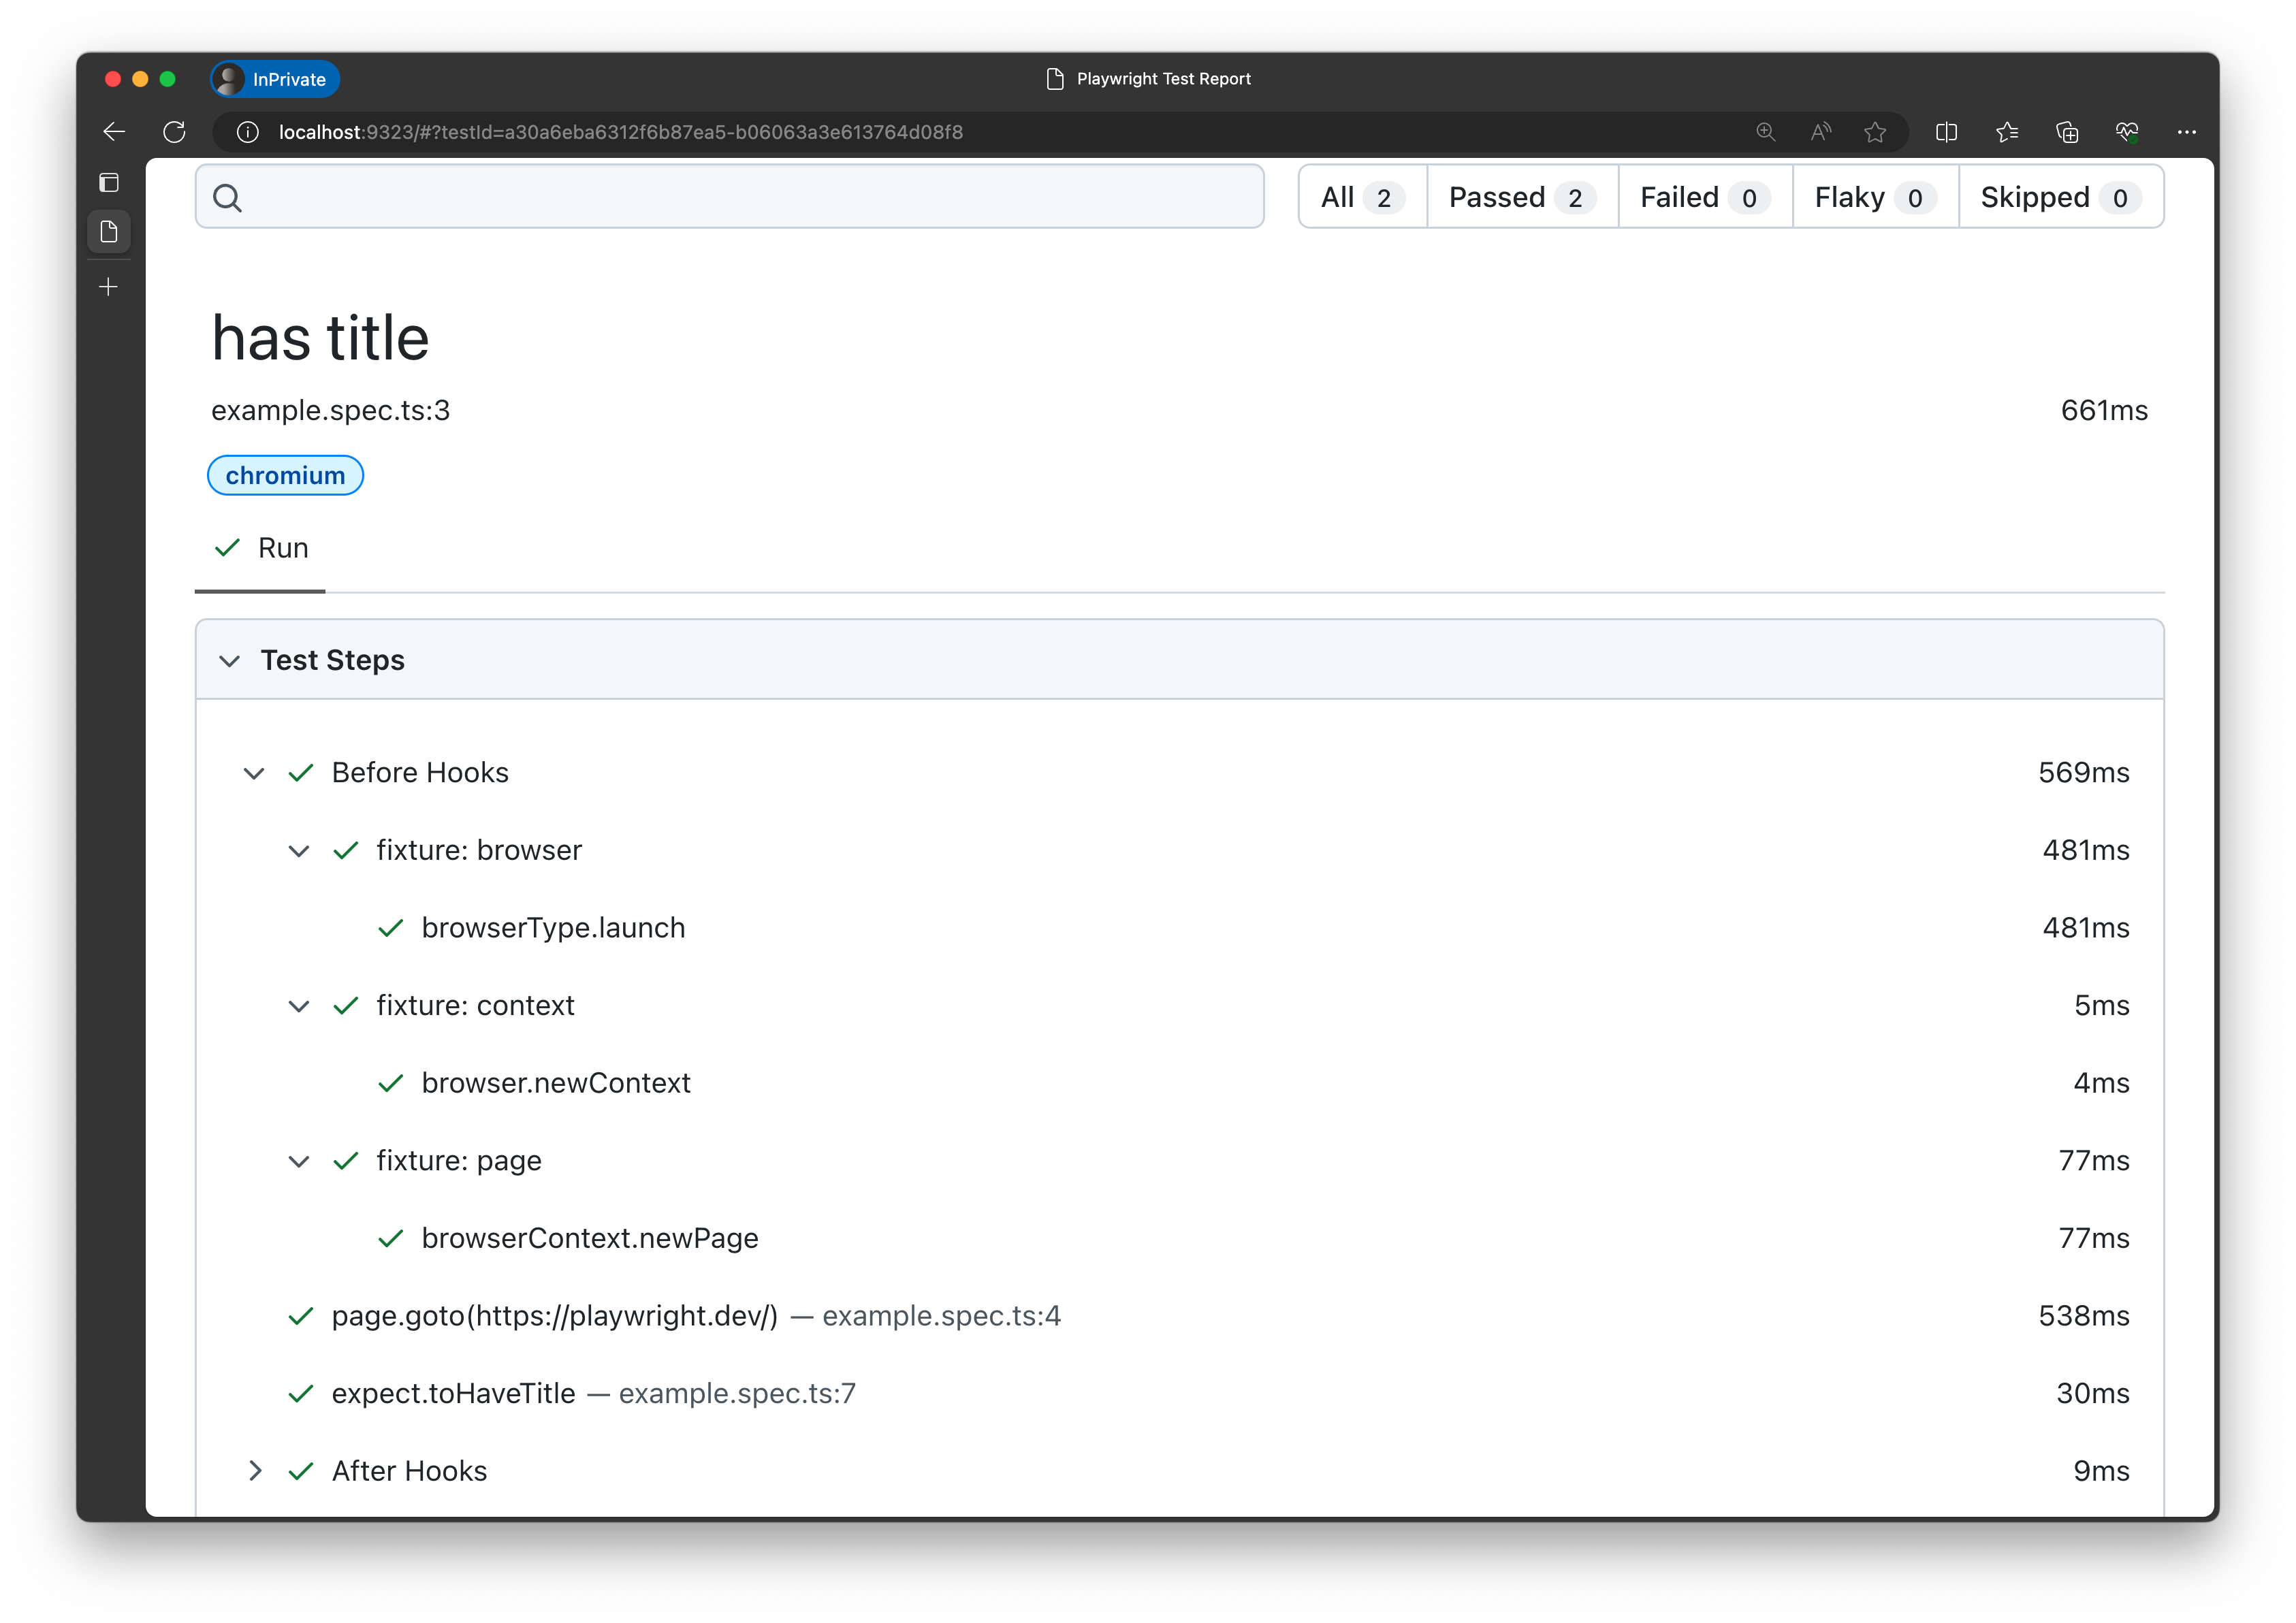
Selecting a particular row gives you the detailed run of that test case. For example, if we select the first row, we get the following details:
- The test is called has title.
- The file name is
example.spec.tsand the line number is3. - The test case was run on Chromium
- The Before Hooks test ran first. It launched the browser and set the browser and page context (fixtures) for test isolation.
- The Action test on line
4ran next. It resulted in navigation to a specific page. - Then, the Assertion test on line
7executed. It validated that the page has a specific title. - The After Hooks test ran last. It took any context cleanup actions needed.
- The test case took 661ms to complete.
To run our test only on the Chromium browser, we can use the --project option.
npx playwright test --project chromium
Go ahead and run the command. Notice that two tests were run using two workers. When you open the report, you see that the tests were only run on the Chromium browser.
Congratulations! You successfully installed Playwright and ran the example test. In the next section, we'll look at the test in more detail, as well as the Playwright configuration file.