Introduction to the design process of a button flow
Building a Button flow is the same as building any other flow. You have a start and an end. A flow always starts with a trigger action and in this module, we're focusing on Manually triggering a flow using buttons without any input.
After the trigger, you add steps.
Each step can be an action or a condition or a combination of actions and conditions.
The flow always ends with an action.
There are two ways to design the process for a Button Flow. One is to use an existing template with a button trigger, and the other is to build one from blank.
Existing template
Using an existing template is a great way to understand the basic principles to design a successful flow.
To build a flow using an existing template, follow these steps:
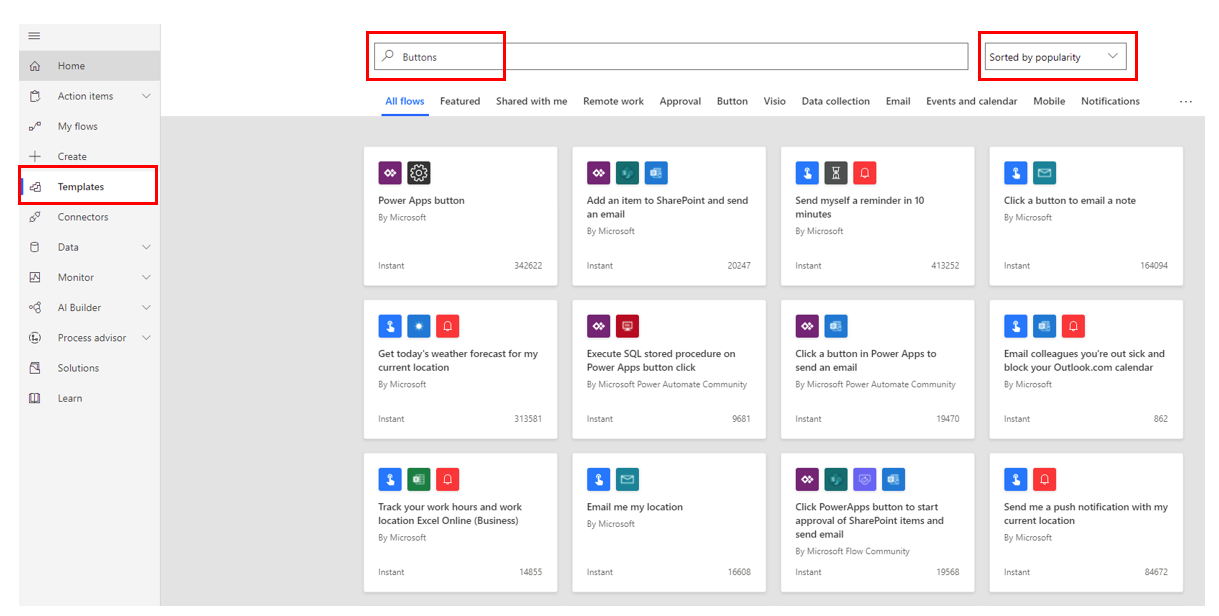
On the left navigation pane, select Templates.
In the search bar on the top, in Search templates, enter Buttons.
Select a template that matches your requirements, add your connectors, and then fill in the required parameters.
The following screenshot shows an example of the button templates.
Build a flow from blank
Building a flow from blank allows you the flexibility to design a workflow that matches your requirements through customized logic.
To build a flow from blank, follow these steps:
On the left navigation pane, select + Create.
The page shows different ways for you to make a flow. Select Instant flow.
Give your flow a name. In the Choose how to trigger this flow section, select Manually trigger a flow.
Select Create to start building the flow.
