Exercise - Write data with output bindings
In the previous exercise, we implemented a scenario to look up bookmarks in an Azure Cosmos DB database. We configured an input binding to read data from our bookmarks collection. But, we can do more. Let's expand the scenario to include writing. Consider the following flowchart:
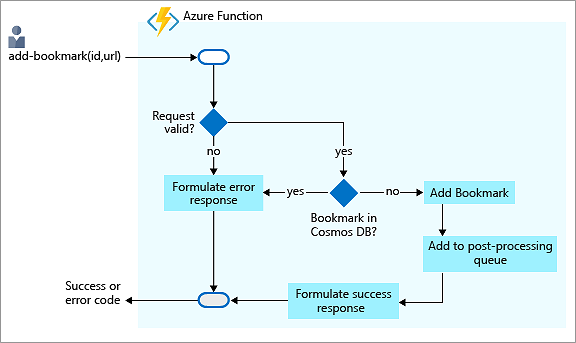
In this scenario, we receive requests to add bookmarks to our collection. The requests pass in the desired key, or ID, along with the bookmark URL. As you can see in the flowchart, we respond with an error if the key already exists in our back end.
If the key that was passed to us isn't found, we add the new bookmark to our database. We could stop there, but let's do a little more.
Notice another step in the flowchart? So far, we didn't do much with the data that we received in terms of processing. We move what we receive into a database. However, in a real solution, we'd probably process the data in some fashion. We can do all the processing in the same function. However, in this exercise we show a pattern that offloads further processing to another component or piece of business logic.
What might be a good example of offloading of work in our bookmarks scenario? Well, what if we send the new bookmark to a QR code generation service? That service would generate a QR code for the URL, store the image in Blob Storage, and add the address of the QR image into the entry in our bookmarks collection. Calling a service to generate a QR image is time consuming. So rather than wait for the result, we hand the task off to a function, and let it complete this task asynchronously.
Just as Azure Functions supports input bindings for various integration sources, it also has a set of templates for output bindings to make it easy for you to write data to data sources. Output bindings are also configured in the function.json file. As you see in this exercise, we can configure our function to work with multiple data sources and services.
Important
This exercise builds on the sandbox resources and resources that you created in previous units; specifically, the Azure Cosmos DB database, bookmarks, and input bindings. If you haven't completed the exercises in previous units, you'll not be able to complete this exercise.
Create an HTTP-triggered function
In the Azure portal, go to the function app that you created by selecting the name of the function app in the breadcrumb path at the top of the HttpTrigger2 function page.
In the Functions tab on the Overview page, you should have the HTTP trigger functions that you created.
Select Create on the Functions tab. The Create function pane appears.
Under the Select a template section, select HTTP trigger, and then select Next. Accept the defaults on the Template details tab and select Create. The Overview pane for the HttpTrigger3 function appears.
Add an Azure Cosmos DB input binding
Let's add another Azure Cosmos DB input binding.
In the HttpTrigger3 Function menu, select Integration. The Integration pane appears.
In the Trigger and inputs box, select Add input. The Create Input pane appears.
In the Binding Type dropdown list, select Azure Cosmos DB.
The Cosmos DB account connection setting should be prepopulated with the connection you created in the previous exercise.
If you don't see your connection listed, follow these steps to create a new connection.
In the Azure Cosmos DB details section, under the Cosmos DB account connection setting, select the New link.
When the New Cosmos DB connection dialog box appears, select OK to create the connection. A new Cosmos DB account connection is created.
Enter the following values for the other settings in this pane. At any time, to learn more about the purpose of a setting, you can select the information icon to its right.
Setting Value Description Document parameter name bookmarkThe name used to identify this binding in your code. Database name func-io-learn-dbThe database to work with. This value is the database name we set earlier in this lesson. Collection Name BookmarksThe name of the collection from which data is read. We defined this setting earlier in the lesson. Document ID {id}Add {id}to use the correct binding expression and accept the parameter that is passed in the query string.Partition key {id}Again, add {id}to use the correct binding expression and accept the parameter that is passed in the query string.SQL Query (optional) Leave blank We're only retrieving one item at a time based on the ID. So, filtering with the Document setting is better than using a SQL Query in this instance. We could craft a SQL Query to return one entry ( SELECT * from b where b.ID = /id). That query would indeed return an item, but it would return it in an items collection. Our code would have to manipulate a collection unnecessarily. Use the SQL Query approach when you want to get multiple documents.Like the input binding that we created in the previous exercise, we want to look up a bookmark with a specific ID. So we tied the Document ID that our function receives in the query string to the binding, which is known as the binding expression. The function trigger is an HTTP request that uses a query string to specify the ID to look up. The binding returns either 0 (not found) or 1 (found) documents.
Select Add to save the input binding configuration.
We now have an Azure Cosmos DB input binding. Let's add an output binding so we can write new entries to our collection.
Add an Azure Cosmos DB output binding
In the Integration pane for HttpTrigger3, in the Outputs box, select Add output. The Create Output pane appears.
Under Binding Type, from the dropdown list, select Azure Cosmos DB.
The Cosmos DB account connection setting should be prepopulated with the connection you created earlier. If not, expand the dropdown list, and select the connection you defined for HttpTrigger3 input binding.
Enter the following values for the remaining settings for the output binding.
Setting Value Description Document parameter name newbookmarkThe name used to identify this binding in your code. This parameter is used to write a new bookmark entry. Database name func-io-learn-dbThe database to work with. This value is the database name we set earlier in this lesson. Collection Name BookmarksThe name of the collection from which data is read. This value is the container name that we defined earlier in the lesson. Partition key /idAdd the partition key that we defined when we created the Bookmarks Azure Cosmos DB container earlier. The key entered here (specified in input binding configuration <key>) must match the one in the container.Select Add to save this output binding configuration.
Now we have a binding to read from our collection, and a binding to write to it.
Add an Azure Queue Storage output binding
Azure Queue storage is a service for storing messages that can be accessed from anywhere in the world. The size of a single message can be as much as 64 KB, and a queue can contain millions of messages--up to the total capacity of the storage account that the queue is defined in. The following diagram shows, at a high level, how a queue is used in our scenario.
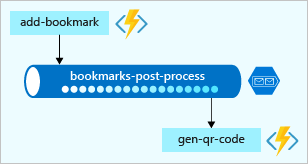
In this example, you see that a function named add-bookmark adds messages to a queue, and another named gen-qr-code pops messages from the same queue and processes the request. Because we write, or push, messages to the queue from add-bookmark, we add a new output binding to your solution.
Let's create the binding through the portal.
On the Integration pane for your function, in the Outputs box, select Add output. The Create Output pane appears.
In Binding Type dropdown list, select Azure Queue Storage.
If a message appears prompting you to install the
Microsoft.Azure.WebJobs.Extensions.Storageextension, select install and wait for it to finish.
Next, we set up a storage account connection, where our queue is hosted.
Under Storage account connection, select New. The New Storage Account connection dialog box appears.
At the beginning of this module, when you created your function app, a storage account was also created for you. Select it from the dropdown list, and then select OK.
The Storage account connection setting is populated with the name of a connection.
Although we could keep the default values, let's change some settings to lend more meaning to the remaining properties.
Complete the settings in the Create Output pane, by replacing the following old values with the new values:
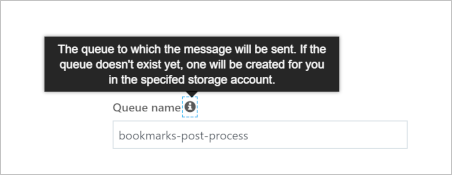
Setting Old value New value Description Message parameter name outputQueueItem newmessage The binding property we use in code. Queue name outqueue bookmarks-post-process The name of the queue where we're placing bookmarks so that another function can process them further. Select Add to save your output configuration for Azure Queue Storage.
Update function implementation
We now have all our bindings set up. It's time to use them in our function.
To open the index.js file in the code editor, select your function HttpTrigger3.
In the menu, select Code + Test. The Code + Test pane appears for your function.
Replace all the code in the index.js file with the code from the following snippet. Then in the command bar, select Save.
module.exports = function (context, req) {

    var bookmark = context.bindings.bookmark;
    if(bookmark){
            context.res = {
            status: 422,
            body : "Bookmark already exists.",
            headers: {
            'Content-Type': 'application/json'
            }
        };
    }
    else {

        // Create a JSON string of our bookmark.
        var bookmarkString = JSON.stringify({
            id: req.body.id,
            url: req.body.url
        });

        // Write this bookmark to our database.
        context.bindings.newbookmark = bookmarkString;

        // Push this bookmark onto our queue for further processing.
        context.bindings.newmessage = bookmarkString;

        // Tell the user all is well.
        context.res = {
            status: 200,
            body : "bookmark added!",
            headers: {
            'Content-Type': 'application/json'
            }
        };
    }
    context.done();
};
Let's break down what this code does:
- Because this function changes our data, we expect the HTTP request to be a POST and the bookmark data to be part of the request body.
- Our Azure Cosmos DB input binding attempts to retrieve a document, or bookmark, by using the
idthat we receive. If it finds an entry, thebookmarkobject is set. Theif(bookmark)condition checks to see whether an entry was found. - Adding to the database is as simple as setting the
context.bindings.newbookmarkbinding parameter to the new bookmark entry, which we created as a JSON string. - Posting a message to our queue is as simple as setting the
context.bindings.newmessageparameter.
Note
The only task you performed was to create a queue binding. You never created the queue explicitly. You're witnessing the power of bindings! As the following notification declares, the queue is automatically created for you if it doesn't exist.
 .
.
Select function.json from the dropdown list in your
<functionapp> \ HttpTrigger3 \path and make the following changes:- Change all instances of
"collectionName"to"containerName". - Change all instances of
"connectionStringSetting"to"connection". - Delete the references to
"methods": [].
- Change all instances of
Your final function.json file should resemble this code.
{
  "bindings": [
    {
      "authLevel": "function",
      "type": "httpTrigger",
      "direction": "in",
      "name": "req",
      "methods": [
        "get",
        "post"
      ]
    },
    {
      "type": "http",
      "direction": "out",
      "name": "res"
    },
    {
      "name": "bookmark",
      "direction": "in",
      "type": "cosmosDB",
      "partitionKey": "{id}",
      "databaseName": "func-io-learn-db",
      "containerName": "Bookmarks",
      "connection": "your-database_DOCUMENTDB",
      "id": "{id}"
    },
    {
      "name": "newbookmark",
      "direction": "out",
      "type": "cosmosDB",
      "partitionKey": "/id",
      "databaseName": "func-io-learn-db",
      "containerName": "Bookmarks",
      "connection": "your-database_DOCUMENTDB"
    },
    {
      "name": "newmessage",
      "direction": "out",
      "type": "queue",
      "queueName": "bookmarks-post-process",
      "connection": "your-storage-account_STORAGE"
    }
  ]
}
In the command bar, select Save.
So, that's it. Let's see our work in action in the next section.
To open the run.ps1 file in the code editor, select your HttpTrigger3 function from the breadcrumb at the top of the pane.
In the Function menu, select Code + Test. The Code + Test pane for your HttpTrigger3 function appears, displaying the default content of run.ps1.
Replace the content in the file with the following code.
using namespace System.Net

param($Request, $bookmark, $TriggerMetadata)

if ($bookmark) {
    $status = 422
    $body = "Bookmark already exists."
}
else {
    $newBookmark = @{ id = $Request.Body.id; url = $Request.Body.url }

    Push-OutputBinding -Name newbookmark -Value $newBookmark

    Push-OutputBinding -Name newmessage -Value $newBookmark

    $status = [HttpStatusCode]::OK
    $body = "bookmark added!"
}

Push-OutputBinding -Name Response -Value ([HttpResponseContext]@{
    StatusCode = $status
    Body = $body
    ContentType = "application/json"
})
Select Save in the command bar. A connection is made, and a log file session opens.
Let's break down what this code does:
- Because this function changes our data, we expect the HTTP request to be a POST and the bookmark data to be part of the request body.
- Our Azure Cosmos DB input binding attempts to retrieve a document, or bookmark, by using the
idin the request. If it finds an entry, thebookmarkobject is set. Theif ($bookmark)condition checks to see whether an entry was found. - Adding to the database is as simple as calling
Push-OutputBindingwith the name of the Cosmos DB output binding (newbookmark) and the value of the$newBookmarkobject. - Posting a message to our queue is as simple as calling
Push-OutputBindingwith the name of the queue output binding (newmessage) and the value of the$newBookmarkobject.
Note
The only task you performed was to create a queue binding. You never created the queue explicitly. You're witnessing the power of bindings! As the following notification declares, the queue is automatically created for you if it doesn't exist.
So, that's it. Let's see our work in action in the next section.
Try it out
Now that we have multiple output bindings, testing becomes a little trickier. In previous units, we were content to test by sending an HTTP request with a query string, but we want to perform an HTTP post this time. We also need to check to see whether messages are making it into a queue.
In the command bar of the Code + Test pane for your HttpTrigger3 function, select Test/Run. A new pane appears, with the Input tab open, as shown in this image:
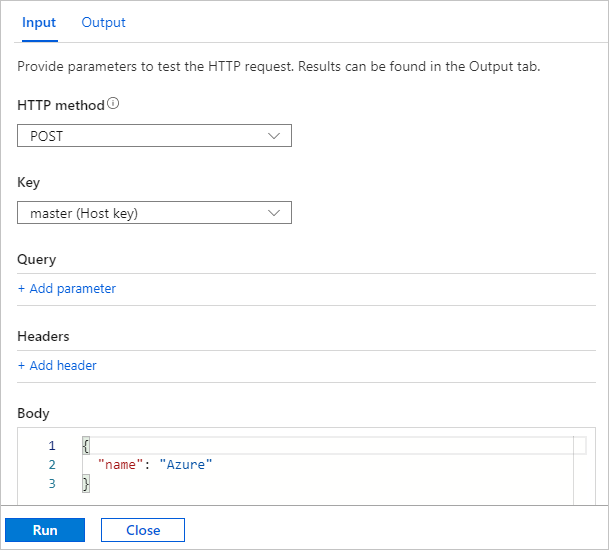
In the HTTP method dropdown list, verify that POST is selected.
Replace the contents of the request Body with the following JSON object:
{
    "id": "docs",
    "url": "https://learn.microsoft.com/azure"
}
Select Run.
The programmatic progress shows in the Logs pane. When completed, verify that the Output tab displays Bookmark already exists. in the HTTP response content setting.
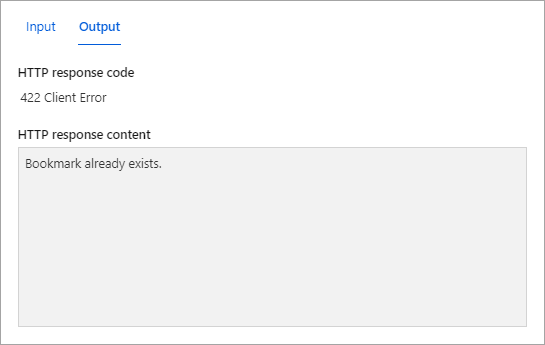
You added the bookmark item in Exercise - Read data with input bindings. The response confirms that your
var bookmark = context.bindings.bookmarkJavaScript is working correctly, and that your PowerShell code is making the same connection.Let's post a second bookmark to the database. Select the Input tab.
Replace the contents of the request Body with the following JSON object:
{
    "id": "github",
    "url": "https://www.github.com"
}
Select Run.
Verify that the Output tab displays bookmark added! in the HTTP response content, as shown in the following screenshot.
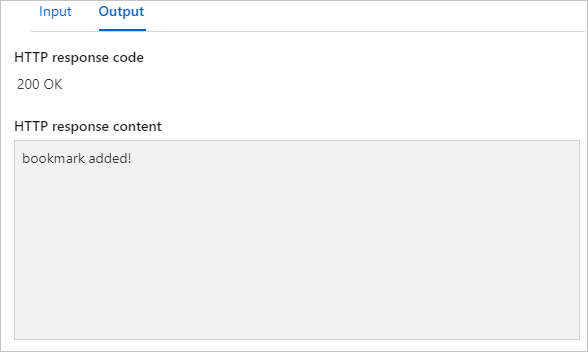
Congratulations, your function works as designed! But what about the queue operation we added to the code? Well, let's go see whether something was written to a queue.
Verify that a message is written to the queue
Azure Queue Storage queues are hosted in a storage account. You configured the storage account when you created the output binding.
In the Azure portal global search bar, enter storage accounts. Then in the results list, select Storage accounts. The Storage accounts pane appears.
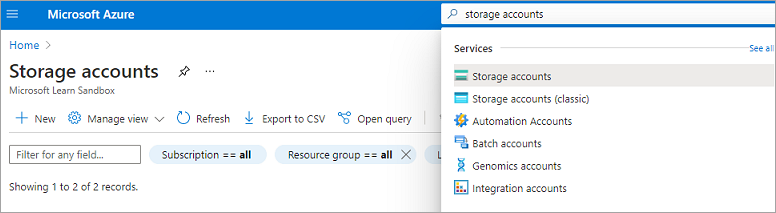
Select the storage account that you used to configure the newmessage output binding.
In the Storage account menu, under Data storage, select Queues to list the queues hosted by this storage account. Verify that the bookmarks-post-process queue is listed, as shown in the following screenshot.
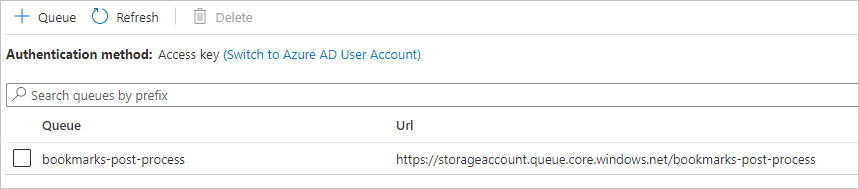
Select bookmarks-post-process to list the messages that are in the queue. If all went according to plan, the queue includes the message that you posted when you added a bookmark to the database. It should look like the following.

In this example, the message was given a unique ID, and the Message text column displays your bookmark in JSON format. There's no message for the Azure
docsbookmark that you tried to add because it already existed in the database.You can test the function further by changing the request body in the test pane with new id/url sets and running the function. Watch this queue to see more messages arrive. You can also look at the database to verify that new entries are added.

In this exercise, we expanded your knowledge of bindings to output bindings and writing data to your Azure Cosmos DB. We added an output binding to post messages to an Azure queue. This example demonstrates the true power of bindings to help you shape and move data from incoming sources to various destinations. We didn't have to write any database code or manage connection strings ourselves. Instead, we configured bindings declaratively and let the platform take care of securing connections, scaling our function, and scaling our connections.