Exercise - store secrets in Azure Key Vault
To get some quick experience with Azure Key Vault, let's create a new Key Vault and do the most basic operation available: store a secret. Creating a vault in the Azure portal requires no initial configuration. Your signed-in user identity is automatically granted the full set of secret management permissions, and you can start adding secrets immediately. Once you have a vault, adding and managing secrets can be done from any Azure administrative interface, including the Azure portal, the Azure CLI, and Azure PowerShell.
Create a new Azure Key Vault
Let's start by creating a new Key Vault in the Azure portal.
Sign in to the Azure portal using the same credentials you used to activate the Azure Sandbox.
Select Create a resource. The Create a resource pane appears.
In the Search services and marketplace, search for and select Key Vault to find the Azure Key Vault service. The Key Vault pane appears.
Select Create. The Create key vault pane appears.
On the Basics tab, enter the following values for each setting.
Setting Value Project details Subscription From the dropdown, select Concierge Subscription. Resource group From the dropdown, select [sandbox resource group name] .Instance details Key vault name Enter a globally unique name for the new vault. Vault names must be 3-24 characters long and contain only alphanumeric characters and dashes. The exercise uses the example name of VaultamortDiary for the new vault. Region Accept default. Pricing tier Accept default. Select Review + create.
After validation passes, select Create to create the Azure Key Vault.
After the deployment is complete, select Go to resource. Your Key vault pane appears.
Add a secret
Next, add a new secret to the vault.
In the left menu pane, under Objects, select Secrets. The Secrets pane appears for your key vault.
In the top menu bar, select Generate/Import. The Create a secret pane appears.
Enter a name, value, and (optional) content type. An example follows.
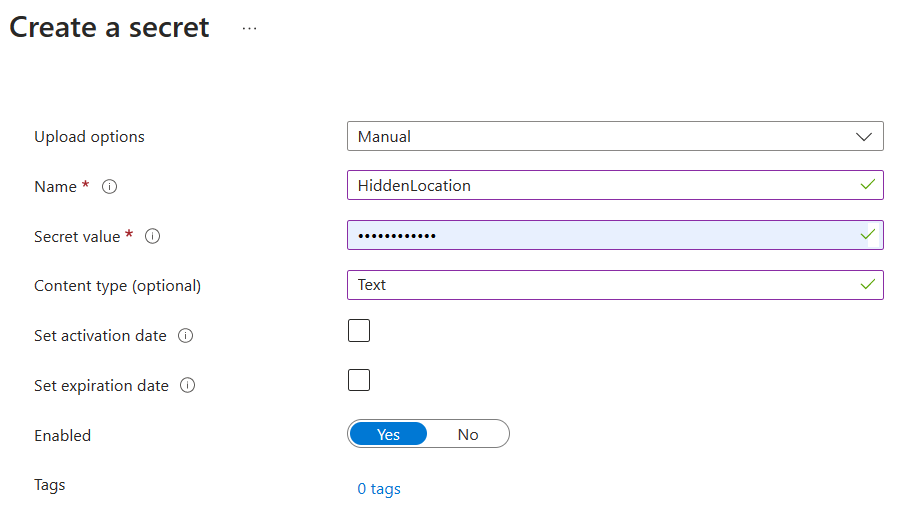
Select Create to add the secret. The Secrets pane reappears.
Show the secret
Finally, verify that the secret value has been set.
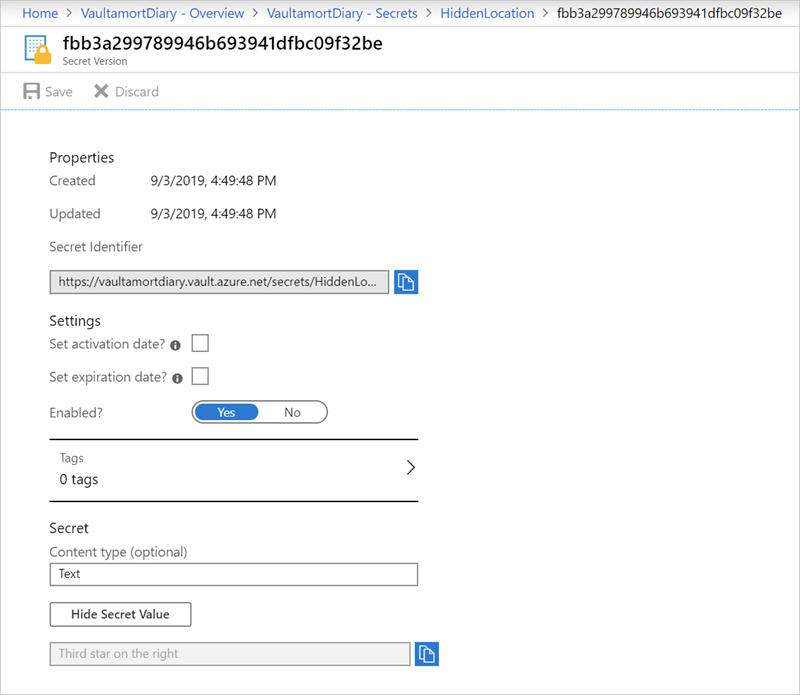
Select your secret from the list. The Versions pane appears for your secret.
Select the CURRENT VERSION of the secret. The Secret Version pane appears.
Select Show Secret Value to see the value assigned to the secret.
Other ways to consume the secret
You can create and retrieve secrets from the Azure Key Vault as long as you're authenticated with Microsoft Entra ID using the REST API, native SDKs, Azure CLI, or Azure PowerShell. For example, here's the same process using Azure PowerShell.
Get-AzKeyVault
This command returns the created vault with the name VaultamortDiary.
Vault Name          : VaultamortDiary
Resource Group Name : Learn-4f01665a-1272-46a8-9c16-83bbf146494e
Region              : northcentralus
Resource ID         : /subscriptions/xyz/providers/Microsoft.KeyVault/vaults/VaultamortDiary
With the name of the vault and the key, you can retrieve the secret value:
Get-AzKeyVaultSecret -VaultName 'VaultamortDiary' -Name 'HiddenLocation'
This command returns our set value:
Vault Name   : vaultamortdiary
Name         : VaultamortDiary
Version      : ff4b23af35bf4ba9a5c8792227d00ff6
Id           : https://vaultamortdiary1972.vault.azure.net:44
               3/secrets/VaultamortDiary/ff4b23af35bf4ba9
               a5c8792227d00ff6
Enabled      : True
Expires      :
Not Before   :
Created      : 12/17/2020 7:54:03 PM
Updated      : 12/17/2020 7:54:03 PM
Content Type : text
Tags         :
Note
The module Manage secrets in your server apps with Azure Key Vault shows how to use the Azure CLI and various programming languages to create Key Vaults, set, and retrieve secrets.