Back up and recover data from encrypted disks
It's important for the Contoso IT security team to be able to recover data from any disk. This is true for encrypted disks as well. The Azure Backup service enables the team to perform backup and restore operations for disks encrypted with Azure Disk Encryption.
Back up your Azure Disk Encryption–protected VMs
To back up your Azure Disk Encryption–protected VMs, create a Recovery Services vault if you don't already have one. Then perform the following steps:
- In the Azure portal, navigate to and select your Recovery Services vault.
- On the Recovery Services Vault blade, select Backup.
- On the Backup Goal blade, specify the location of your workload. For example, select Azure, select Virtual machine, and then select Backup.
- On the Backup blade, in the Policy section, select a backup policy (or create a new one).
- In the Virtual Machines section, select Add.
- In the Select virtual machine blade, select the encrypted VMs, and then select OK.
- On the Backup blade, select Enable Backup.
- On the Backup Goal blade, select Backup.
- You can force a manual backup of a protected VM by selecting that VM on the Virtual machines blade in the Azure portal. On the Backup blade, in the Operations section, select Backup, and then from the menu, select Backup now.

Restore your Azure Disk Encryption–protected VMs
After you've backed up your Azure Disk Encryption–protected VM, you can restore any encrypted disks using Azure Backup. Use the following procedure to restore the VM:
In the Azure portal, on the Virtual machines blade, select the VM you want to recover.
On the Backup blade, in the Operations section, select Backup, and then review the available Restore points.
In the Restore points section, select the appropriate restore point, and then select the ellipsis button.
Select Restore VM.
Note
You can only restore encrypted VMs by restoring the VM disk. Replace existing and Restore VM aren't supported.
Select a Staging location, and then select Restore.

Decrypting disks
If you need to, you can decrypt a disk by using either the Azure CLI, PowerShell, or the Azure portal.
Use Azure CLI to decrypt a disk
For the Azure CLI, use the az vm encryption disable command:
az vm encryption disable --resource-group ContosoResourceGroup --name ContosoVM6
Use PowerShell to decrypt a disk
You can decrypt a disk through PowerShell using Disable-AzVMDiskEncryption as in the following command:
Disable-AzVMDiskEncryption -ResourceGroupName ContosoResourceGroup -VMName ContosoVM6
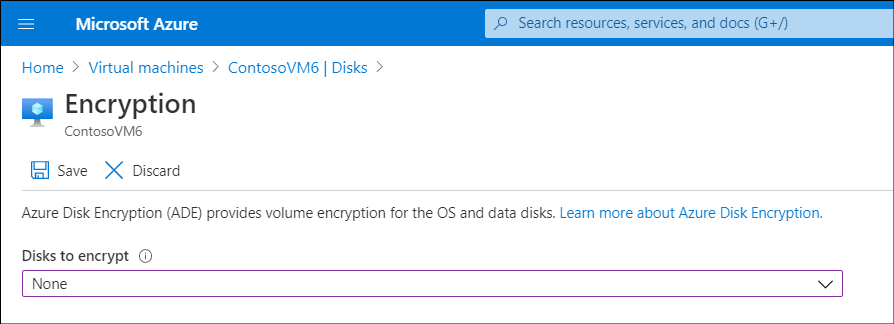
Use the Azure portal to decrypt a disk
Use the following procedure to decrypt disks using the Azure portal:
- In the Azure portal, navigate to your VMs, and then select the appropriate VM.
- On the Virtual machine blade, in the navigation pane, in the Settings section, select Disks.
- On the Disks blade, select Encryption.
- On the Encryption blade, from the Disks to encrypt list, select None, and then select Save.