Create blob containers
Azure Blob Storage uses a container resource to group a set of blobs. A blob can't exist by itself in Blob Storage. A blob must be stored in a container resource.
Things to know about containers and blobs
Let's look at the configuration characteristics of containers and blobs.
All blobs must be in a container.
Containers organize your blob storage.
A container can store an unlimited number of blobs.
An Azure storage account can contain an unlimited number of containers.
You must create a storage container before you can begin to upload data.
Configure a container
In the Azure portal, you configure settings to create a container for an Azure storage account. As you review these details, consider how you might organize containers in your storage account.
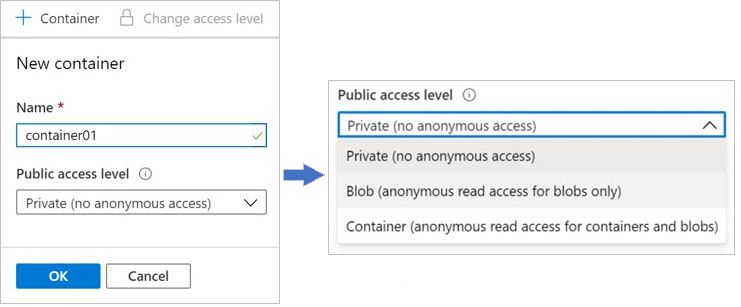
Name: Enter a name for your container. The name must be unique within the Azure storage account.
- The name can contain only lowercase letters, numbers, and hyphens.
- The name must begin with a letter or a number.
- The minimum length for the name is three characters.
- The maximum length for the name is 63 characters.
Public access level: The access level specifies whether the container and its blobs can be accessed publicly. By default, container data is private and visible only to the account owner. There are three access level choices:
- Private: (Default) Prohibit anonymous access to the container and blobs.
- Blob: Allow anonymous public read access for the blobs only.
- Container: Allow anonymous public read and list access to the entire container, including the blobs.