Exercise - Use graph API from a custom connector
In this exercise, you'll create a custom connector and learn how to configure it to access the Microsoft Graph API by using Microsoft Entra ID authentication. Because the focus is on authentication, this exercise only configures a single action called Last Used.
Important
Use a test environment with Microsoft Dataverse provisioned. If you don't have one, you can sign up for the community plan.
Task 1: Create a new solution
To create a new solution, follow these steps:
Go to Power Apps maker portal and make sure that you are in the correct environment.
Select Solutions > + New solution.
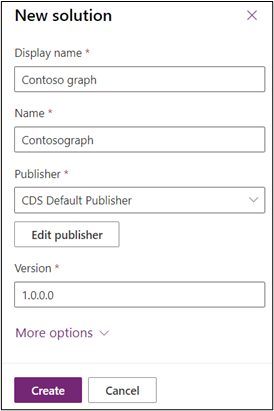
Enter Contoso graph for Display name, select CDS Default Publisher for Publisher, and then select Create. Note: When working with a real project, it's best to create your own custom publisher.
Don't navigate away from this page after selecting Create.

Task 2: Use Graph Explorer to test the API
In this task, you'll use Graph Explorer to perform an API action that you'll configure in the custom connector.
In another new browser tab, go to Graph Explorer.
Select Sign in.
Sign in with your user information.
Read the requested permissions and then continue if you agree.
Make sure that GET is selected for the verb, add /insights/used to the URL, and then select Run query.

You should get a 403 error indicating that Graph Explorer lacks your permission to perform this action.
Select the Modify permissions tab to grant Graph Explorer permission.
Select Consent for Sites.Read.All.
Read the requested permissions and then continue if you agree.
Select Run query again.
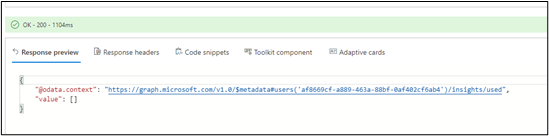
You should now get the OK - 200 status.
Start a new browser session tab.
Go to OneDrive Personal Cloud Storage and sign in.
Select + New and select Word document. You're creating this document so that you have some content in your Last Used list.
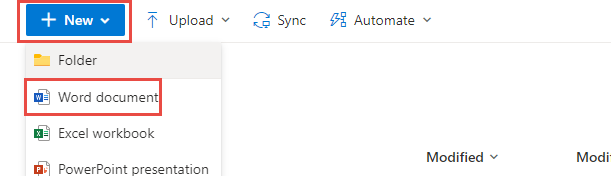
Enter some test text in the Word file. The document will be saved automatically for you.
Go back to the Graph Explorer.
Run the same query again.
You should now get a response with values. If you don't see a response, go back to the document you created in OneDrive and make changes, then come back and run the query again.
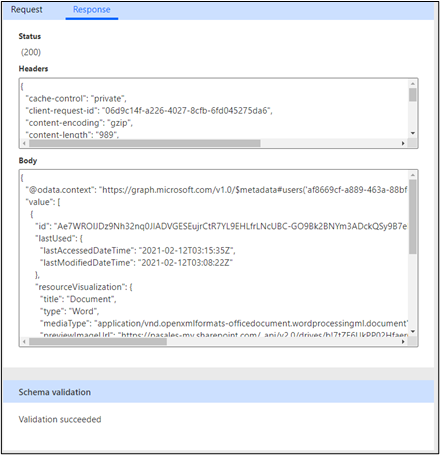
Select the response JSON, right-click, select Copy, and then save it.
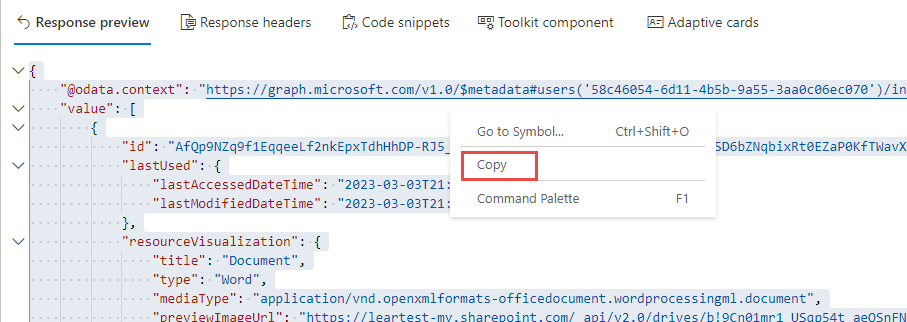
You'll need this response later in this exercise because you'll use it when you configure the response in the custom connector.


Task 3: Register a new application and add permissions
In this task, you'll configure a new application that will be used to access the Graph API from the custom connector. You'll also configure permissions for the specific graph API actions, similar to when you modified permissions in Graph Explorer.
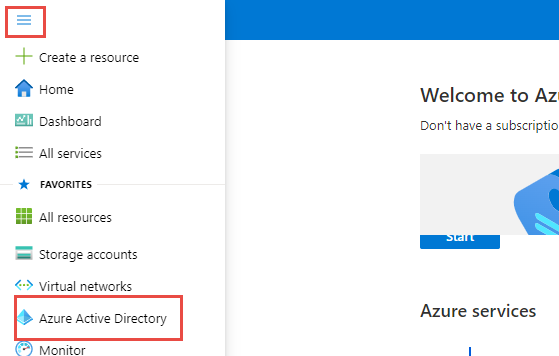
Go to Microsoft Azure and sign in with your admin user credentials.
Select Show portal menu and then select Microsoft Entra ID.
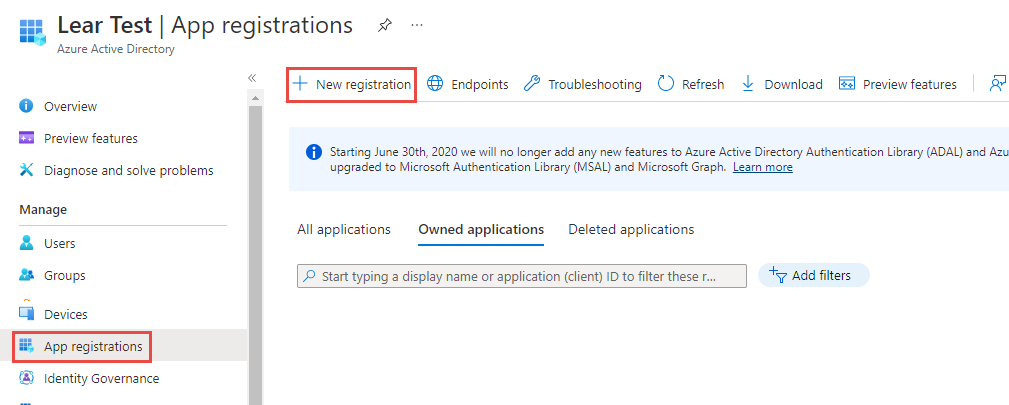
Select App registration > + New registration.
Enter Learn last used connector for Name, select Web enter
https://global.consent.azure-apim.net/redirectfor Redirect URI, and then select Register.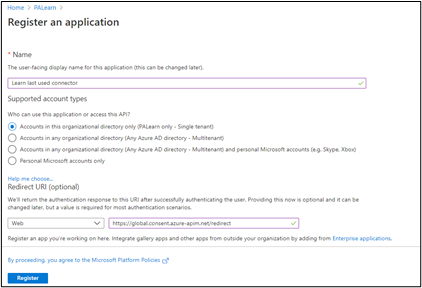
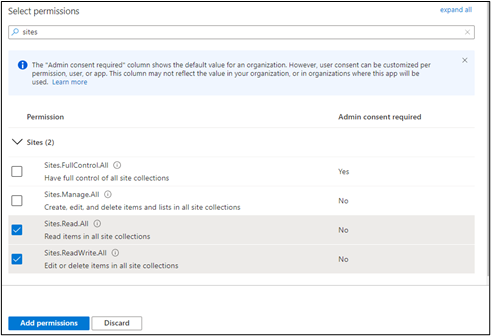
Select API permissions and then select + Add a permission.
Select Microsoft Graph.
Select Delegated permissions.
Search for sites and then expand Sites.
Select Sites.Read.All, Sites.ReadWrite.All, and then select Add permissions.
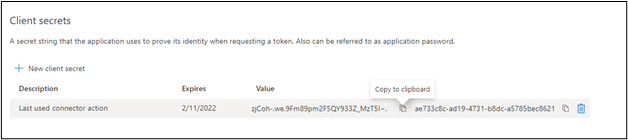
You should now have three API permissions. Select Certificates & secrets.
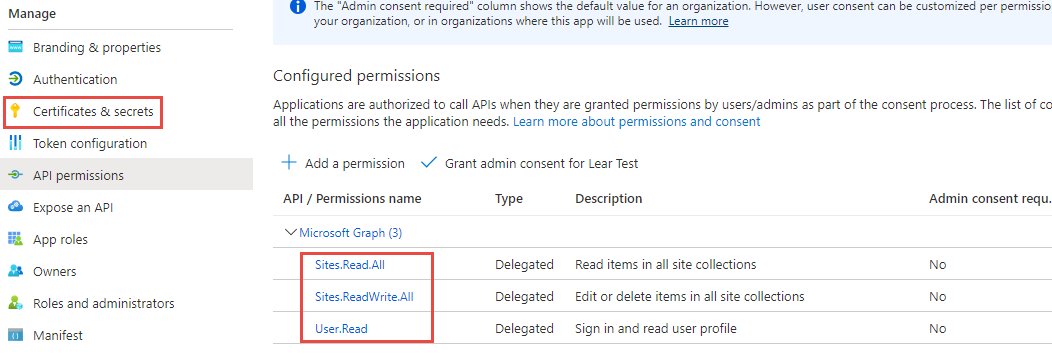
Select + New client secret.
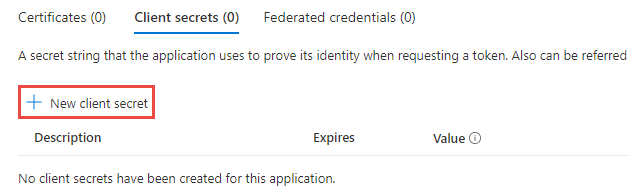
Enter Last used connector action for Description, select 90 days for Expires, and then select Add.
Copy the Value and save it for later because it won't be shown again. You'll use this user secret when creating the connector.
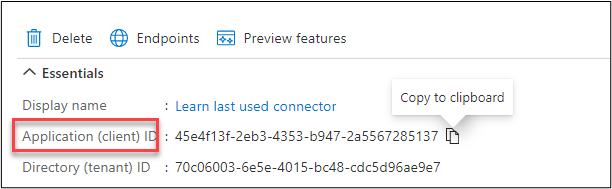
Select Overview.
Copy the Application (Client) ID and save it on a notepad. You'll use this client ID when creating the connector.


Task 4: Create a custom connector
Follow these steps to create a custom connector:
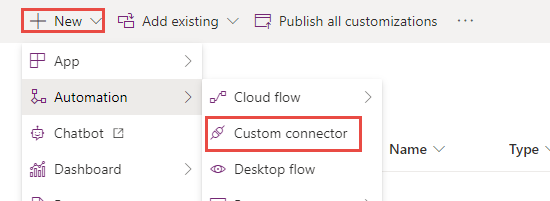
Go to Power Apps admin portal and make sure that you are in the correct environment.
Select Solutions and then select to open the Contoso graph solution that you created in Task 1: Create a new solution.
Select + New > Automation > Custom connector.
Enter Contoso graph for Connector name.
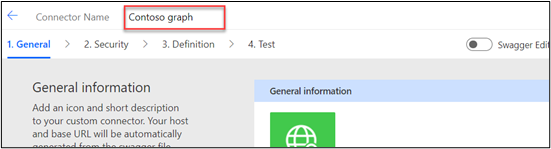
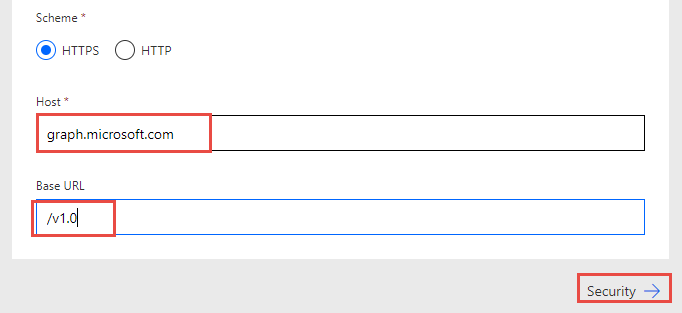
Scroll down, enter graph.microsoft.com for Host and /v1.0 for Base URL.
Select Security.
Select OAuth 2.0 for Authentication.
Select Microsoft Entra ID for Identity Provider.
Paste the ID that you copied from Azure in the Client id field and then paste the Value that you copied from Azure in the Client secret field.
Enter
https://graph.microsoft.comfor Resource URL and then select Create connector.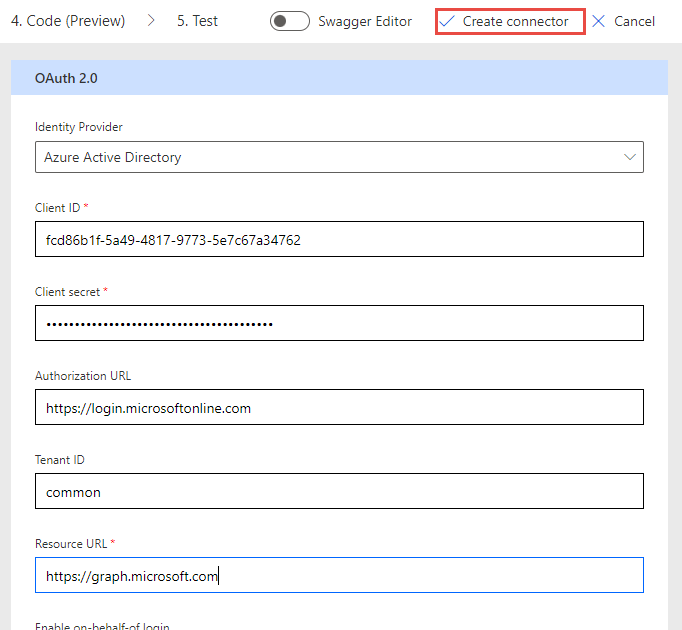
Don't navigate away from this page.


Task 5: Add the action
In this task, you'll configure the last used action tip called Graph API.
Select Definition > + New action.

Enter Last used for Summary and LastUsed for Operation ID.
Go to the Request section and select + Import from sample.
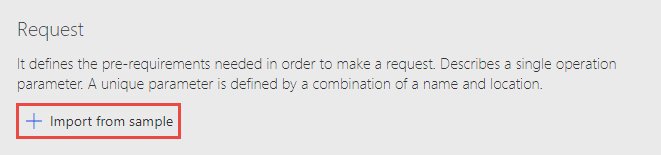
Select Get for the verb, enter /me/insights/used for URL, and then select Import.
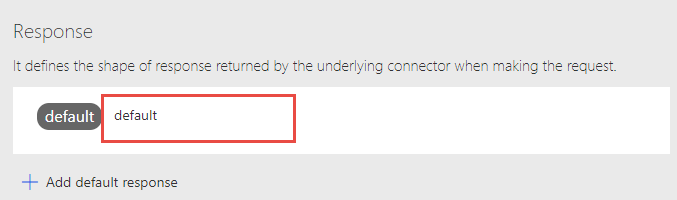
Scroll down and select the default response.
Select + Import from sample.
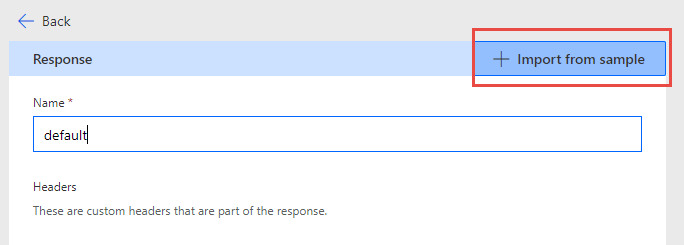
Paste the response that you copied from Graph Explorer in the Body field and then select Import.

Select Update connector.
Don't navigate away from this page.


Task 6: Test the connector
Follow these steps to test the connector:
Select the Test tab and then select + New connection.
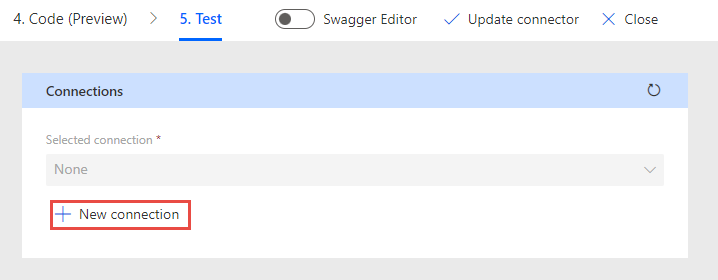
Provide your credentials.
Read the requested permissions and continue.
Select Refresh connections.
Select Test operation.
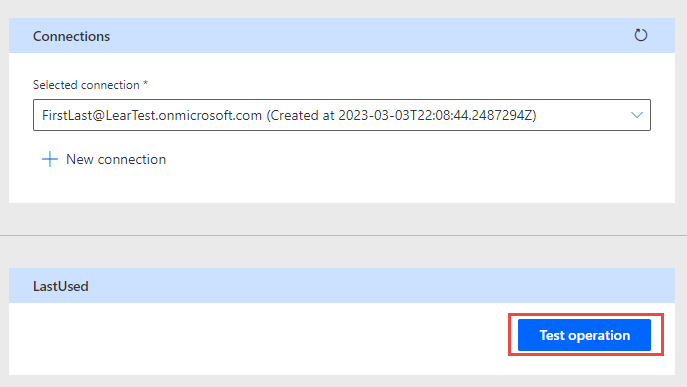
You should see a 200 status, and the response should look like the following image.