In the Azure portal, enter Arc in the Search resources, services, and docs search bar.
In Azure Arc, scroll down the left navigation menu to the Azure Arc resources section and select Machines.
On the Machines page, select + Add/Create and Add a machine.
On the Add servers with Azure Arc page, locate the Add a single server box, and select Generate script.
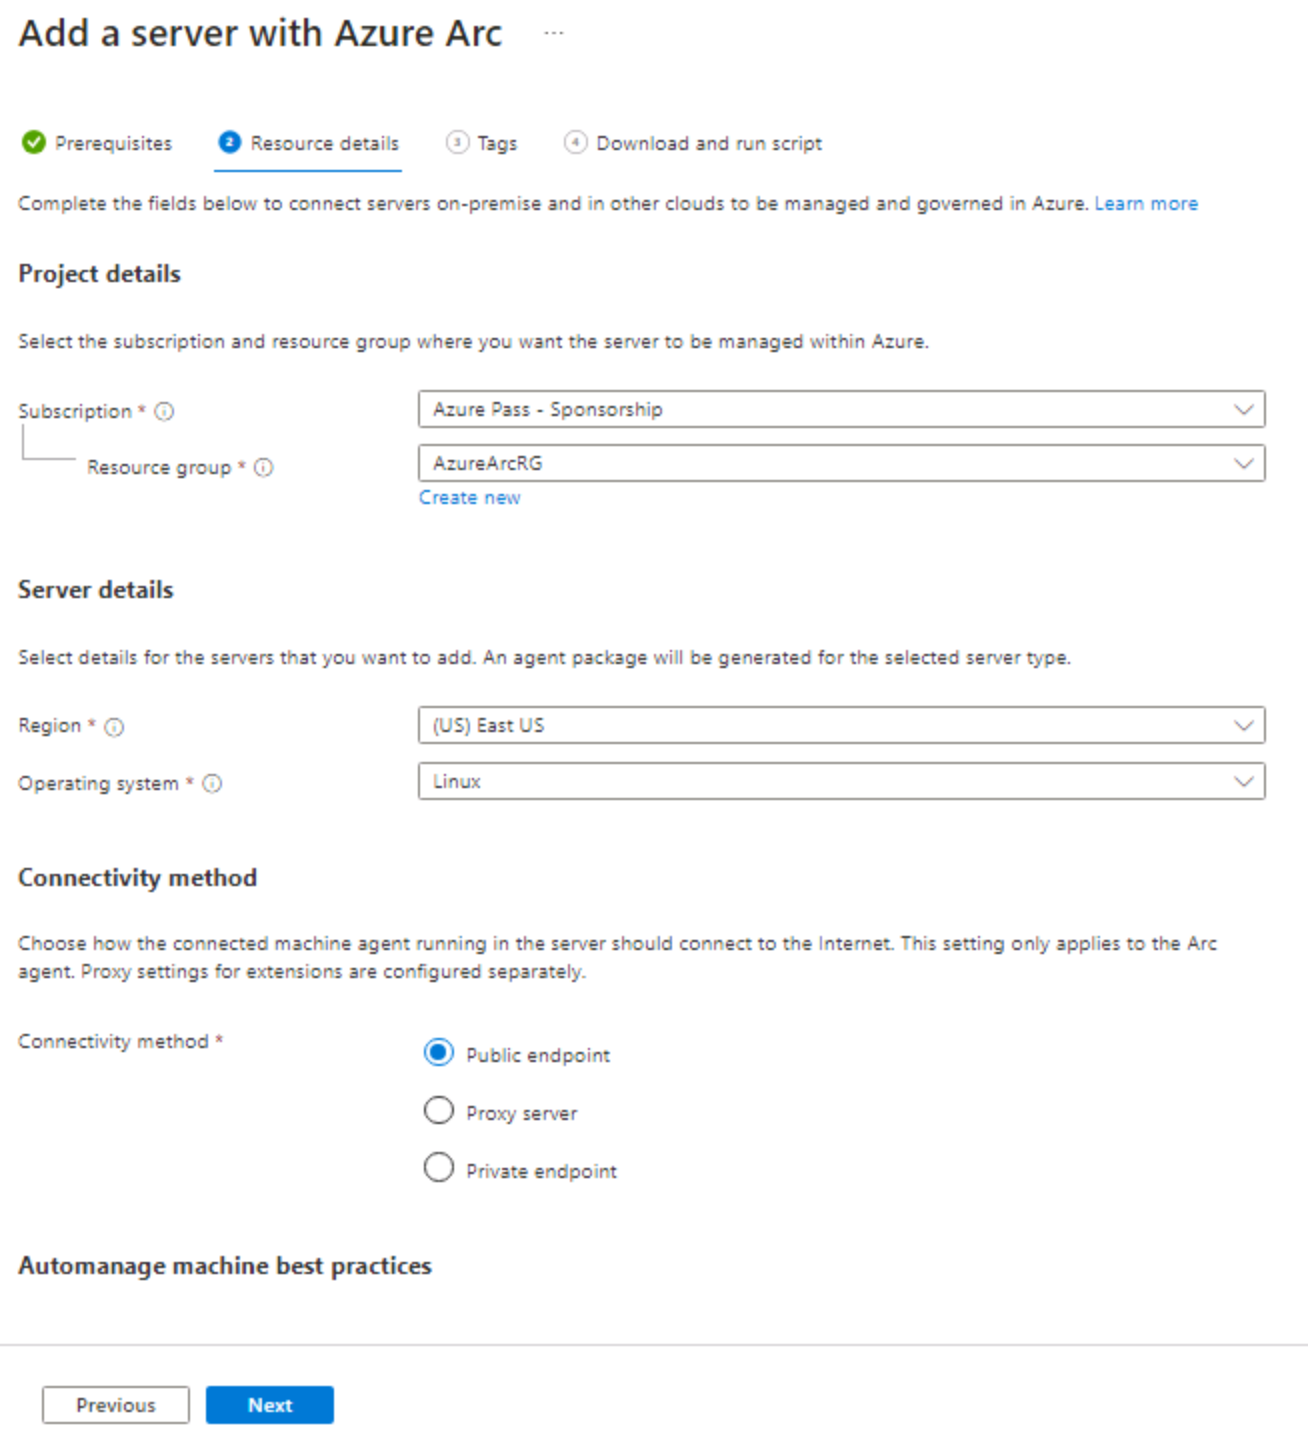
On the Add servers with Azure Arc page, Basics tab, select your Subscription and Resource group from the drop-down menus under Project details.
Tip
Select an Azure region in Server details before creating a new Resource groups.
In the Server details section, select your Region and then select Linux from the Operating system drop-down menu under.
Select the appropriate Connectivity method from the radio buttons under Connectivity method, and then select Next.
On the Add servers with Azure Arc page, Tags tab, enter Physical locations tags as needed and select Next.
On the Add servers with Azure Arc page, Download and run script tab, either download or copy the script to the clipboard.
Tip
If you're using a Microsoft Windows system with Microsoft Azure, it's easy to copy and paste the script into notepad, then ssh into your Linux machine with PowerShell to run the script in a Bash console.
Open a Bash console as an administrative (root) user on your non-Azure Linux machine and run the script.
This script does the following:
- Download an installation script from the Microsoft Download Center.
- Configure the package manager to use and trust the packages.microsoft.com repository.
- Download the agent from Microsoft's Linux Software Repository.
- Install the agent on the server.
- Create the Azure Arc-enabled server resource and associate it with the agent.
When the script successfully completes, you should see a message stating Latest version of azcmagent is installed.
On the Add servers with Azure Arc page, Download and run script tab, select Close.
The next step is to connect your non-Azure Linux server azcmagent to Azure Arc.
Copy and edit the following Bash script to include the required parameters in double quotes:
sudo azcmagent connect --resource-group "$resourceGroup" --tenant-id "$tenantID" --location "$location" --subscription-id "$subscriptionID" --cloud "$cloud" --correlation-id "$correlationId";
Tip
You can use the export (variables) entries from the agent install script you downloaded or copied to fill in the parameters required in the agent connect script.
When the script editing is complete, open a Bash console as an administrative (root) user on your non-Azure Linux machine and run the script.
The script tests connectivity to Azure endpoints and then requests you to sign in to https://microsoft.com/devicelogin and enter the supplied code to authenticate.

Open a Web browser and navigate to the address as directed, and paste or enter the code into the form and select Next to sign in.
On the Pick an account page, select your administrator account, and then select Next. Close browser tabs when complete.
In your Bash console, you should see an INFO Connected machine to Azure message.
Verify your non-Azure machine is connected to Azure Arc in the Azure portal by entering Arc in the Search resources, services, and docs search bar.
In Azure Arc, scroll down the left navigation menu to the Azure Arc resources section and select Machines. You should see your machine with an Arc agent Status of Connected.
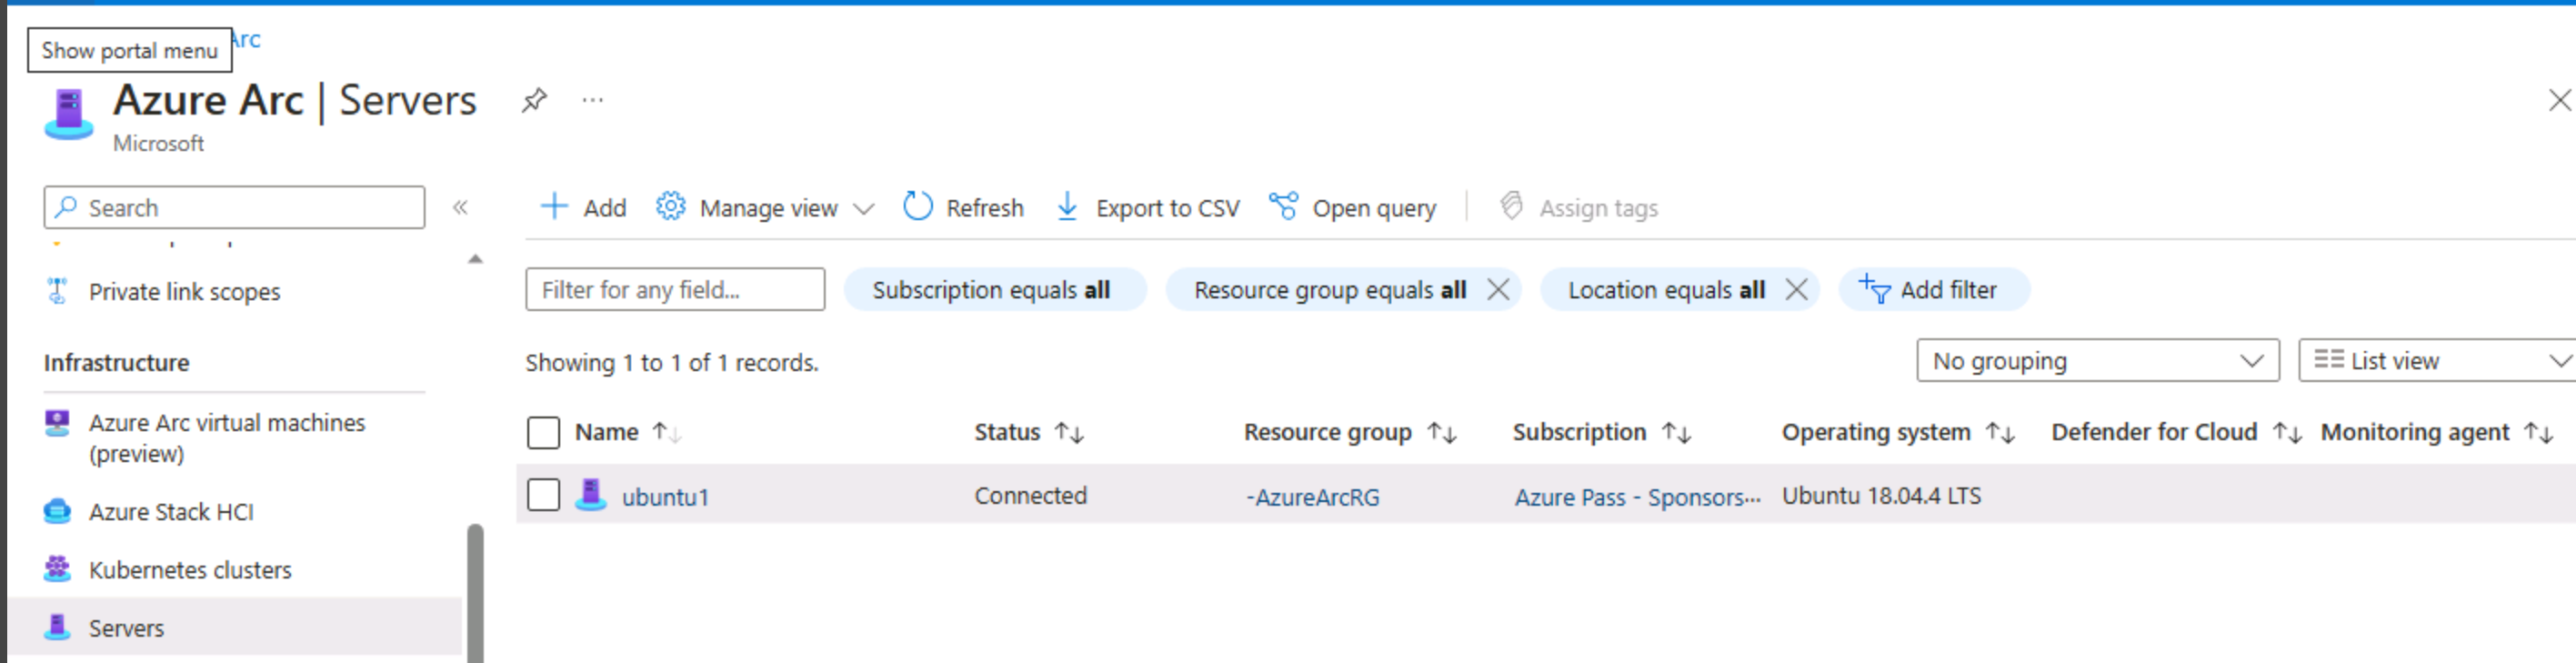
Note
Select Refresh if the Linux machine isn't displayed.
The next task is to add your newly connected Azure Arc Linux server to your previously created Data Collection Rule for Syslog.
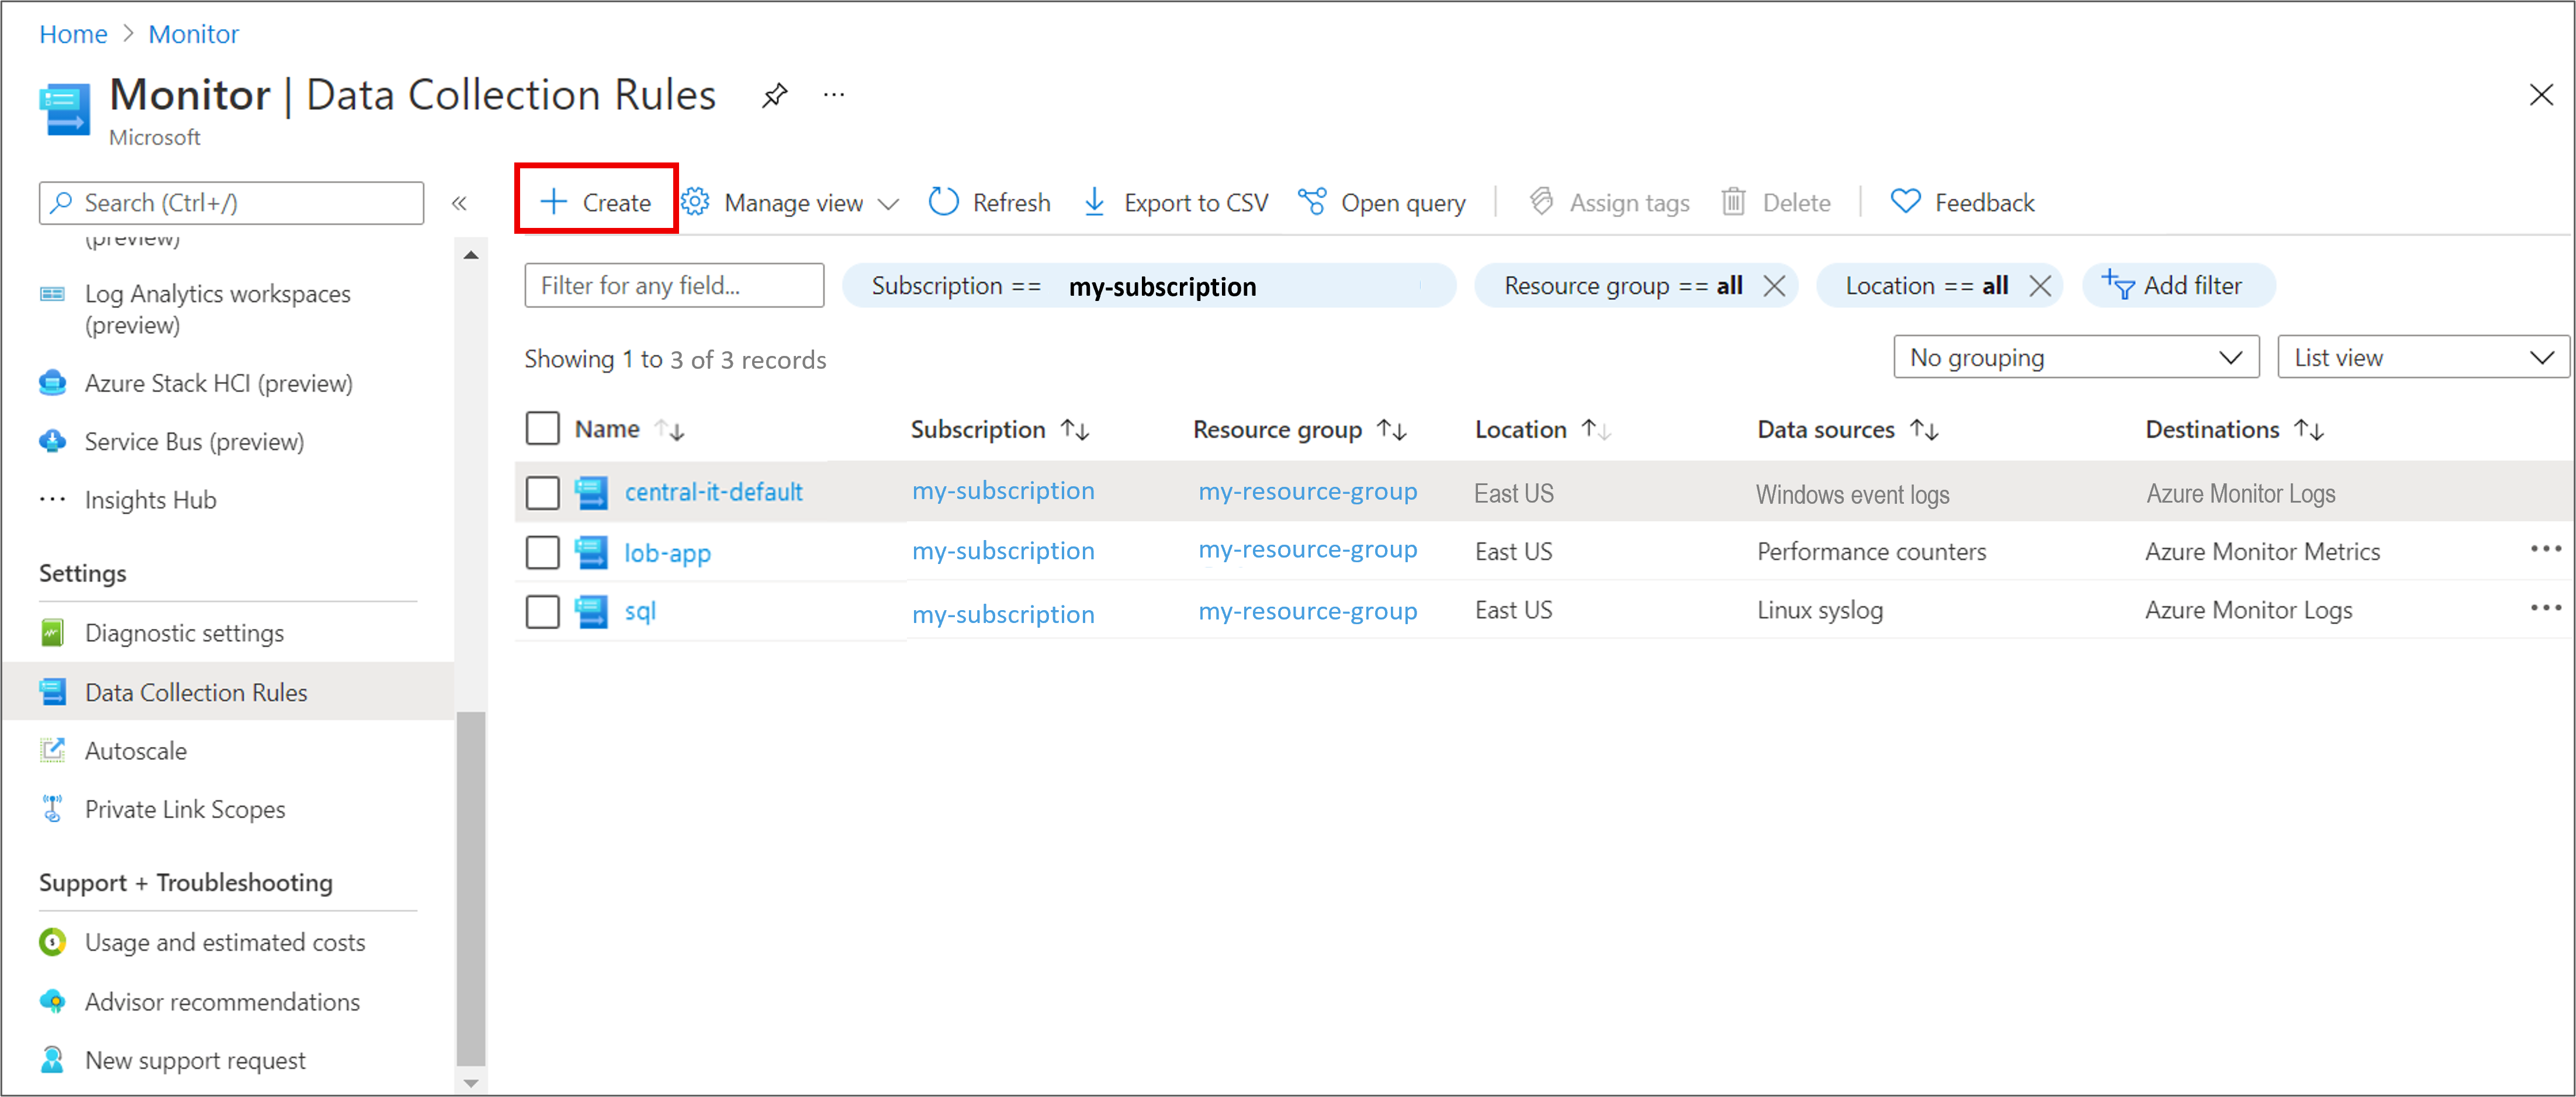
In the Azure portal, enter DCR in the Search resources, services, and docs search bar.
Select your Syslog Data Collection Rule
In your Data Collection Rule, scroll down the left menu to the Configuration section and select Resources.
In Resources select + Add
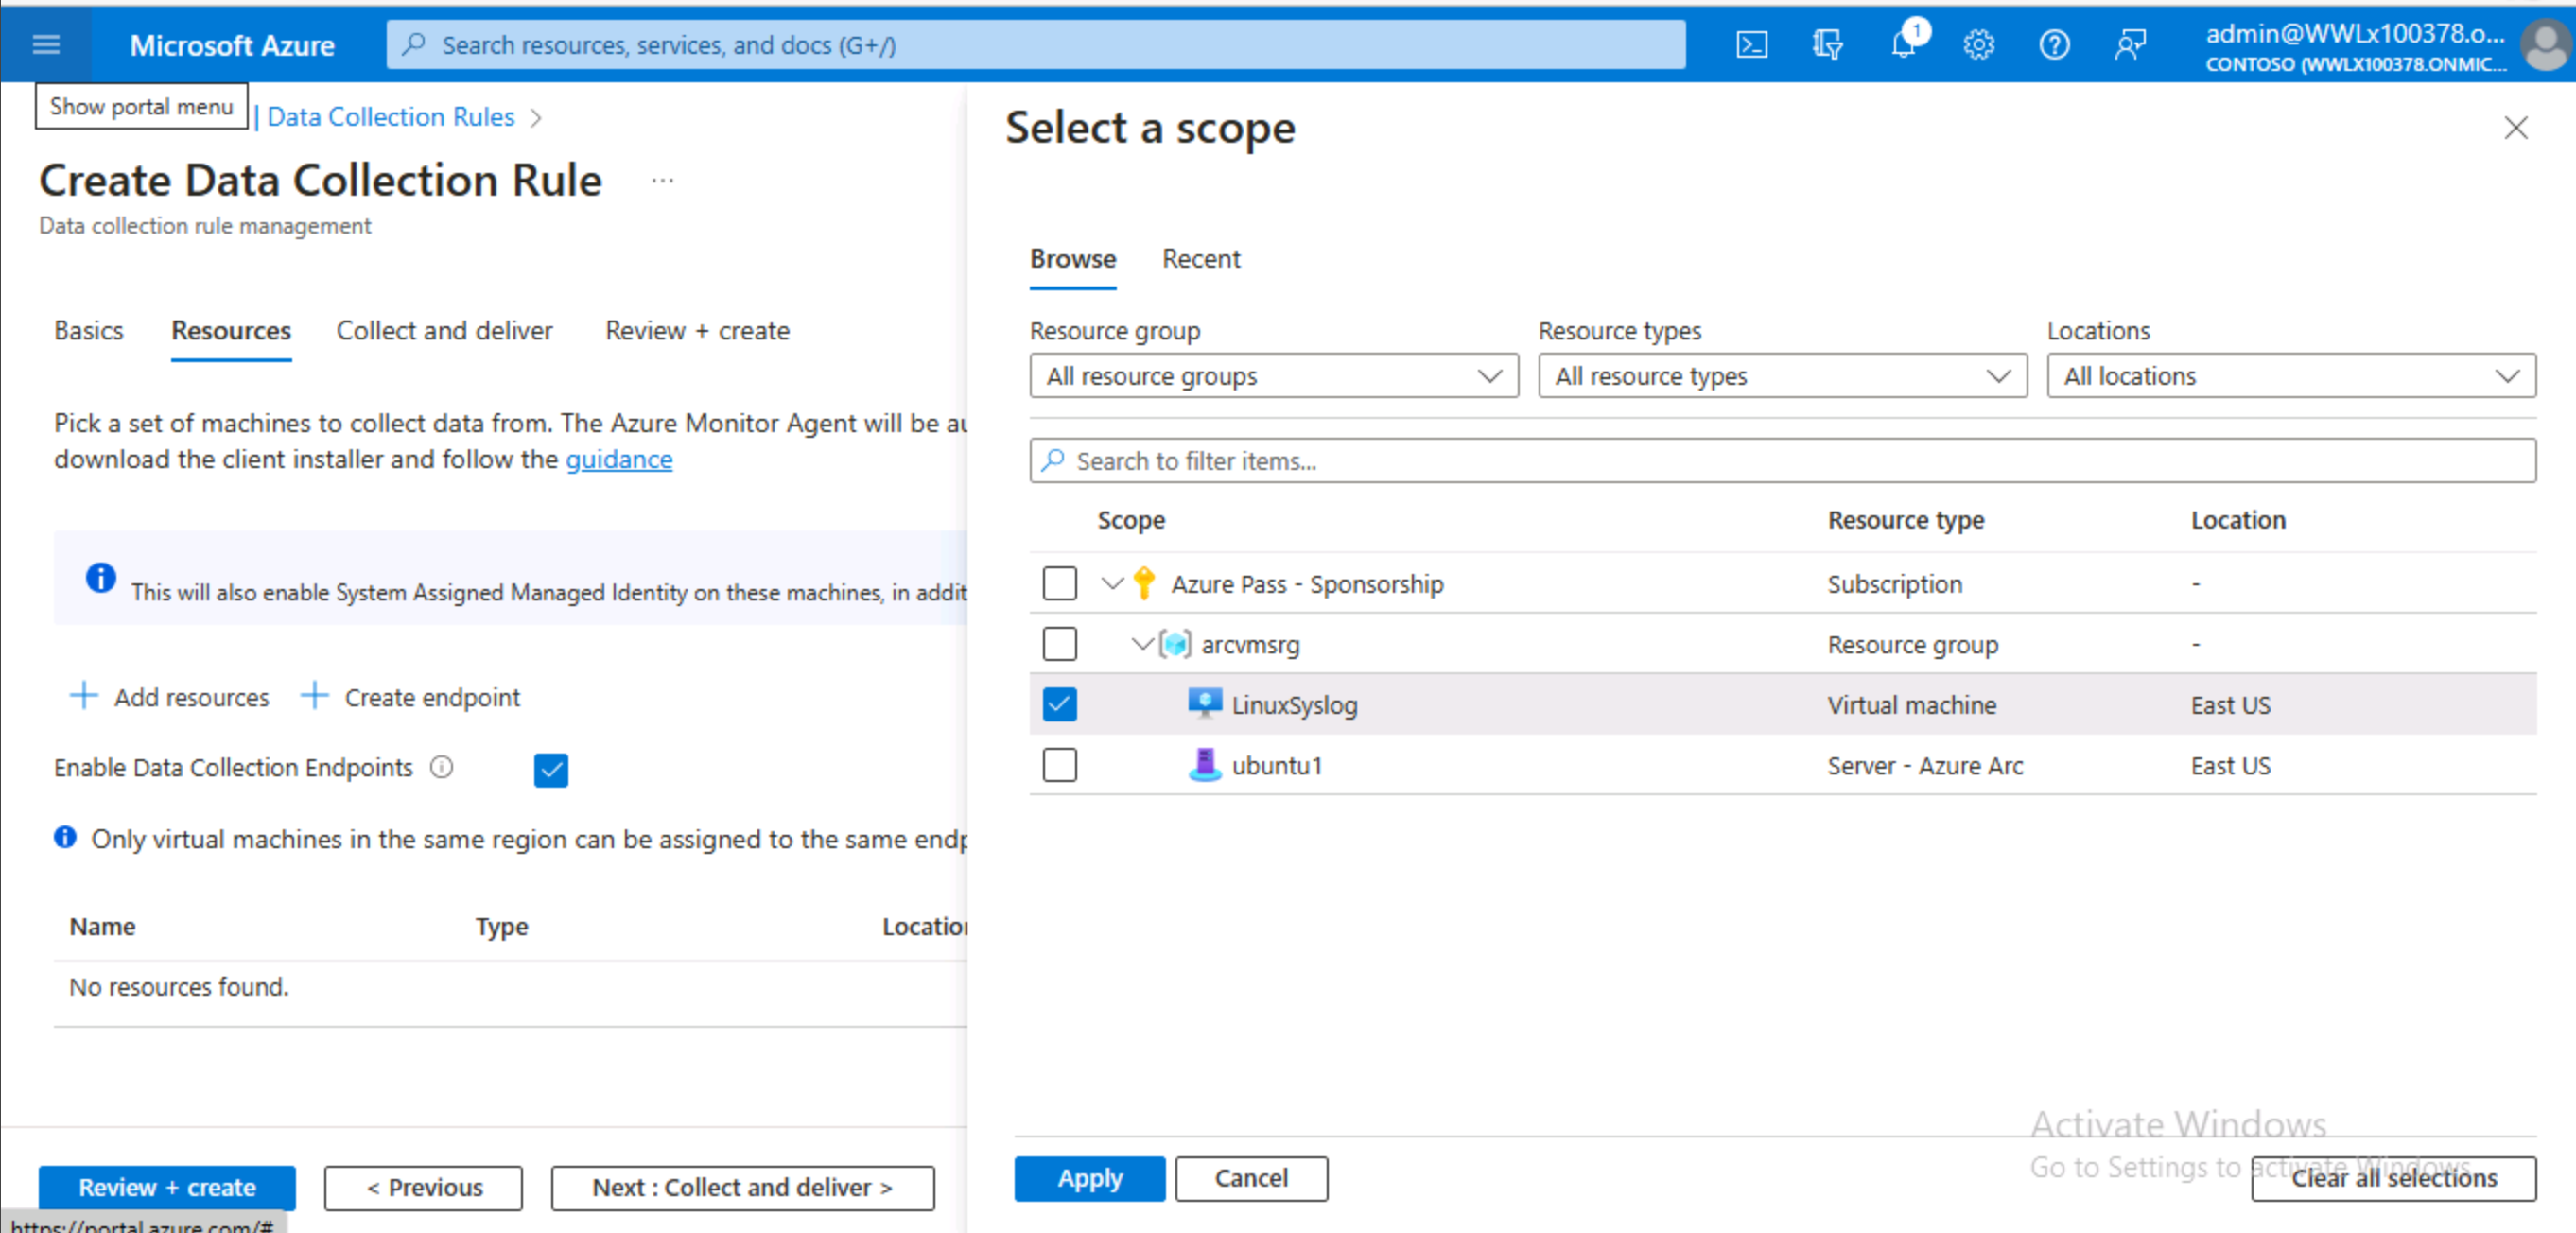
In the Select a scope page, expand the Scope column until your Server - Azure Arc Resource type newly connected Linux machine is displayed.
Select the Linux Azure Arc machine and select Apply
The Linux Azure Arc VM is now included as one of the Data Collection Rule Resources.