Connect a supported MCP client to a Dataverse MCP server
In the previous unit, you meet the scenario: Contoso's IT team already publishes a governed, read-only Dataverse MCP server over the equipment-provisioning tables, and a developer wants to reach it from their own tools. This unit is where you make that connection. You learn how a supported MCP client points at an existing Dataverse MCP server and completes the handshake, without building, registering, or modifying the server itself.
Recognize the server's connection point
Every Dataverse MCP server exposes its allow-listed tools at a predictable, per-environment address. The pattern looks like this:
https://{organization-name}.crm.dynamics.com/api/mcp
The {organization-name} segment identifies the Dataverse environment the server runs against. For Contoso's equipment-provisioning solution, that might be an address like https://contoso.crm.dynamics.com/api/mcp. You don't create or publish this endpoint. IT already stood it up, and your job as a developer is to supply that address to a client and let the client do the rest.
Match your client to a connection pattern
Not every MCP client connects the same way. Microsoft documents two broad shapes, and recognizing which one your client uses shapes what you do next.
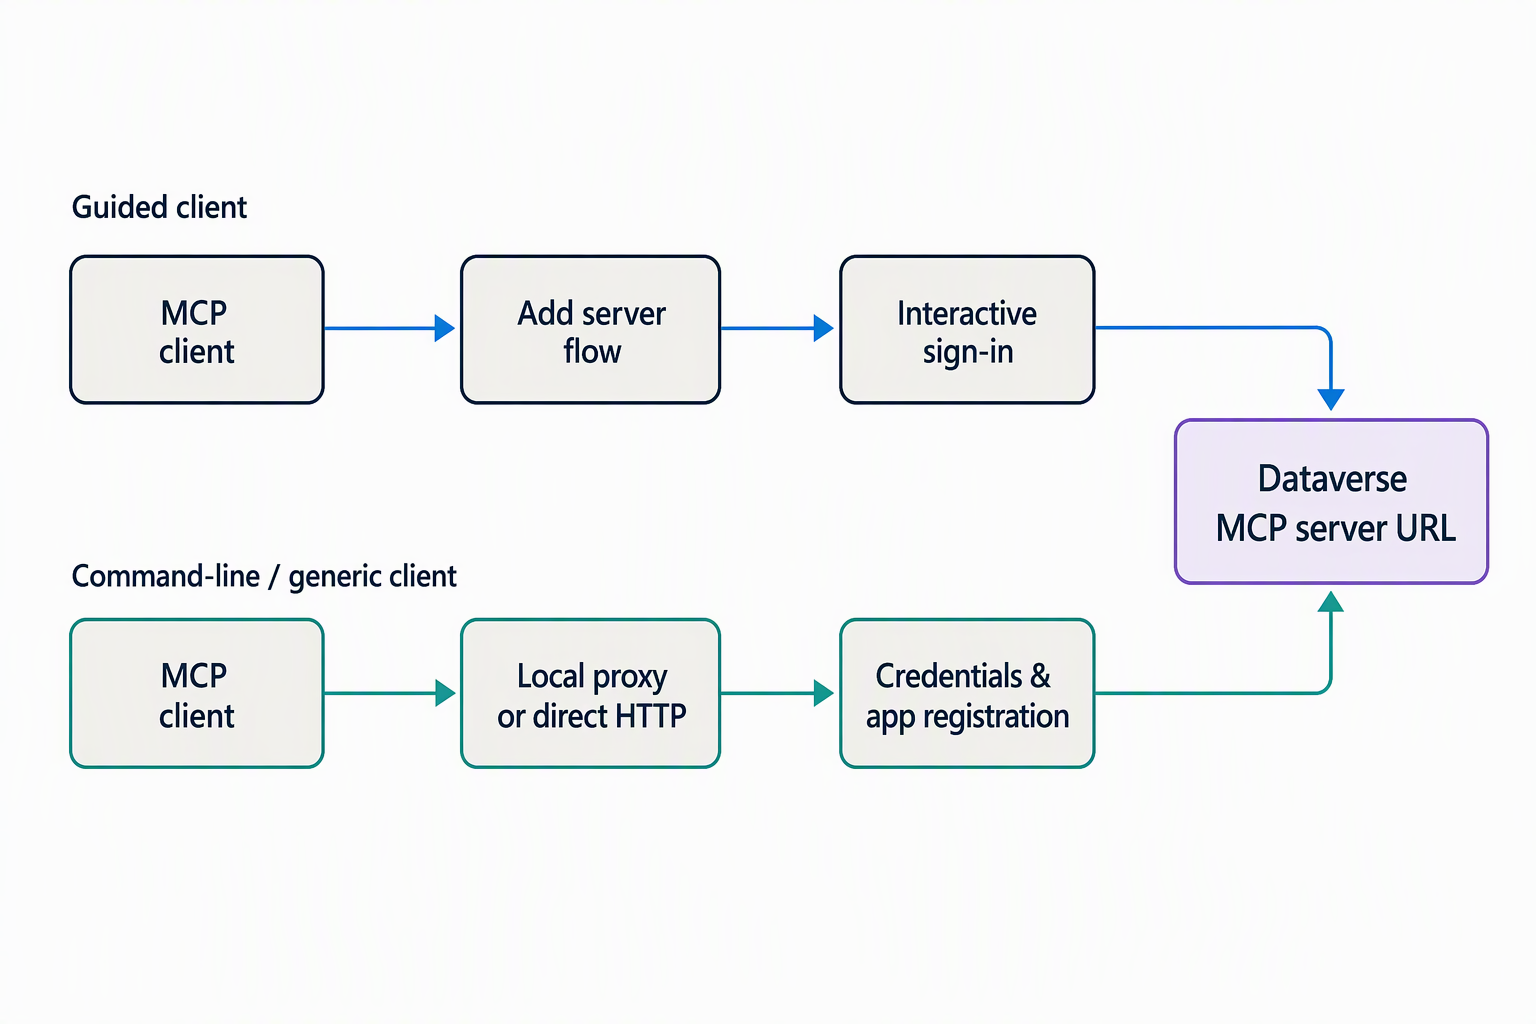
| Client shape | How it connects | What you supply |
|---|---|---|
| Built-in or first-party style client (for example, an IDE's AI chat extension) | Has a guided "add an MCP server" flow built into the client itself | The server's base URL; the client handles the MCP handshake and tool listing |
| Command-line or generic client (for example, a Node.js or Python-based tool) | Connects either through a short-lived local process that bridges standard input/output to the remote server, or by implementing the MCP protocol directly over HTTP | The server's base URL, plus credentials the client uses to authenticate |
With a built-in client, you don't manage the underlying protocol details at all: you paste in a URL, and the client takes care of discovering what the server offers. A command-line client asks more of you upfront.
Either it starts a small local process on your machine that acts as a go-between, authenticating on your behalf and relaying messages to the remote server. Or it connects straight to the remote endpoint and authenticates itself using credentials issued for that purpose. Either way, the client, not you, is responsible for speaking the MCP protocol correctly once the connection details are in place.
Supply what the client needs to connect
Regardless of which shape your client takes, every connection comes down to two things you provide:
- The server's base URL: the
/api/mcpendpoint for the Dataverse environment you're connecting to. - A way to authenticate: either an interactive sign-in the client prompts you for, or credentials and an app registration that IT already issued and allow-listed specifically for that client.
That second item matters more than it first appears. IT doesn't hand you a blank server and let you configure access however you like. Before you ever open your client, IT has already allow-listed which clients can connect, consented to the access those clients need, and issued the credentials that make authentication possible.
Your part is narrow by design: you plug in the URL, you authenticate with what IT has already provisioned, and you move on. Unit 4 covers how that governance mechanism works in depth. For now, the key distinction is that provisioning access is IT's job, and connecting with that access is yours.
The client route you pick can also carry a cost. Starting December 15, 2025, Dataverse MCP tools that an AI agent built outside Microsoft Copilot Studio accesses can consume Copilot Credits. A qualifying Dynamics 365 Premium license or a Microsoft 365 Copilot User Subscription License can exempt that agent's Dynamics 365 data access from this consumption.
The search_data tool draws against the Tenant graph grounding rate, while every other tool draws against the Text and generative AI tools (basic) per-10-response rate. You don't configure any of this billing yourself. But knowing that the client route you connect through can incur consumption is part of recognizing what you're signing up for before you authenticate.
Guiding question: Think about a command-line tool or IDE extension you already use. Does it have a built-in way to add a remote server, or would it need a local bridge process and separate credentials? Knowing which shape applies to your own tooling tells you what to expect the first time you connect.
Confirm the connection succeeded
You know the connection worked when your client can list the tools the server exposes. That list is the proof: the client reached the endpoint, authenticated successfully, and received back the set of operations it's allowed to call. If the connection fails, you don't get a partial list or a vague error about specific tables. You don't see tools at all. That usually points back to the URL or the authentication step, rather than anything about the data itself.
What appears in that list depends entirely on what IT allow-listed for the server, not on which client you used to connect. If IT excluded a tool, say, one that would let a caller update or delete a record, that tool never shows up for any client, no matter how it connects. The server doesn't reject a request to use it; the tool is absent from what the client ever sees.
That distinction between a tool that's missing from the list and one that's visible but refused at call time is small here. But it becomes central once you start working with the tools themselves.
Connecting a client is the foundation for everything else in this module. With the connection in place and a list of tools in front of you, you're ready to look more closely at what those tools do and how to call one. The next unit picks up exactly there: inspecting the tools Contoso's MCP server exposes and invoking a bounded, read-only operation against the equipment-provisioning data.