Exercise - Use client certificates to secure access to an API
You configure API Management to accept client certificates by using inbound policies.
Suppose your weather company has decided to secure its API through certificate authentication for certain clients who already use certificate authentication in other systems. This setup will allow those clients to use existing certificates to authenticate themselves against the API Management gateway.
In this exercise, you'll:
- Create a self-signed certificate.
- Configure the gateway to request client certificates.
- Get the thumbprint for the certificate.
- Edit the inbound policy to allow only clients with the specified certificate in their request.
- Call the API Management gateway and pass the certificate by using
curl.
Note
This exercise uses the resources that you set up in the previous exercise.
Create self-signed certificate
First, use Cloud Shell to create a self-signed certificate, which you'll then use for authentication between the client and the API Management gateway.
To create the private key and the certificate, run the following commands in Cloud Shell.
pwd='<Enter a secure password here>'
pfxFilePath='selfsigncert.pfx'
openssl req -x509 -sha256 -nodes -days 365 -newkey rsa:2048 -keyout privateKey.key -out selfsigncert.crt -subj /CN=localhost
To make this example easy to follow, the preceding commands include the password used to secure the private key. Whenever you generate a private key for your own use, make sure you generate a secure password and control access to it appropriately.
Now, convert the certificate to PEM format, which the
curltool can use, by running these commands:openssl pkcs12 -export -out $pfxFilePath -inkey privateKey.key -in selfsigncert.crt -password pass:$pwd openssl pkcs12 -in selfsigncert.pfx -out selfsigncert.pem -nodesWhen you're prompted, enter your secure password, and then press Enter.
Configure the gateway to request client certificates
Because you're using the Consumption tier for API Management, you must configure the gateway to accept client certificates. Follow these steps.
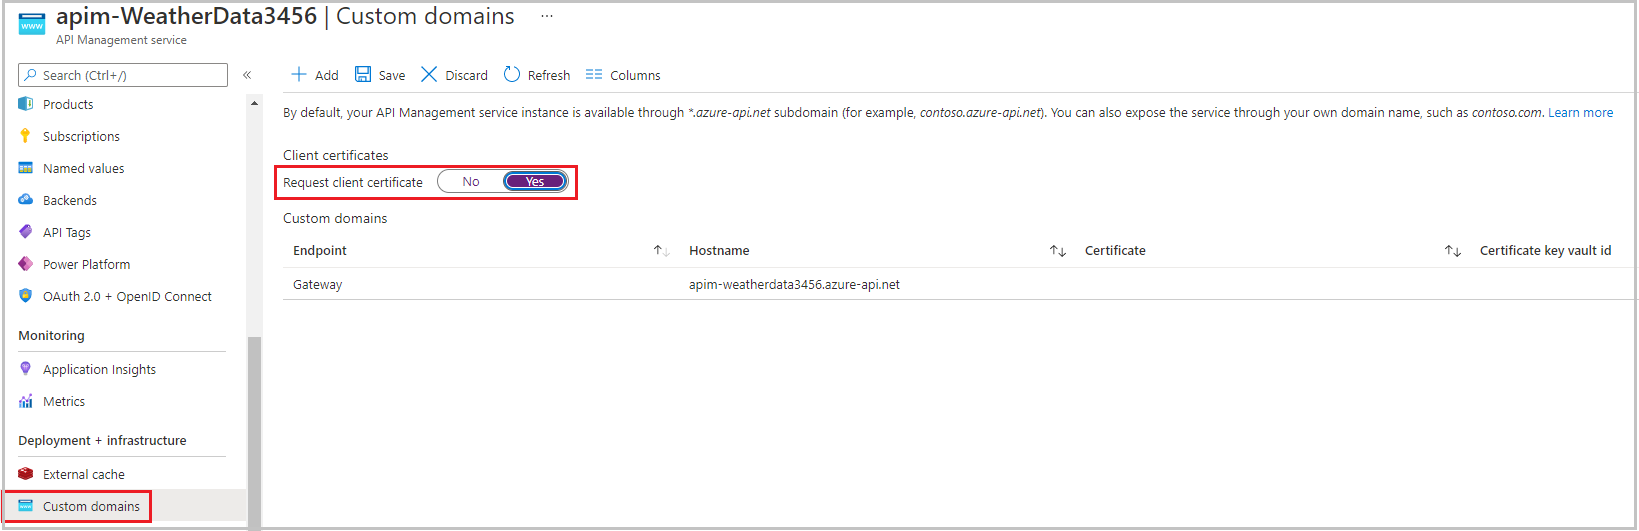
From the Azure portal that is already open, select your API Management service (apim-WeatherDataNNNN).
In the left menu pane, under Deployment and infrastructure, select Custom domains. The Custom domains pane for your API Management service appears.
For *Request client certificate, select Yes, and on the top menu bar, select Save.
Get the thumbprint for the certificate
In this section, you'll configure API Management to accept a request only if it has a certificate with a certain thumbprint (fingerprint). Let's get that thumbprint from the certificate.
Note
An SSL certificate thumbprint is also known as an SSL certificate fingerprint.
In Cloud Shell, run the following code.
Fingerprint="$(openssl x509 -in selfsigncert.pem -noout -fingerprint)"
Fingerprint="${Fingerprint//:}"
echo ${Fingerprint#*=}
Copy the complete output (a hexadecimal string) and paste this fingerprint value into a text file.
Edit inbound policy to only allow requests with a valid certificate
Now, create the authentication policy in the API Management gateway.
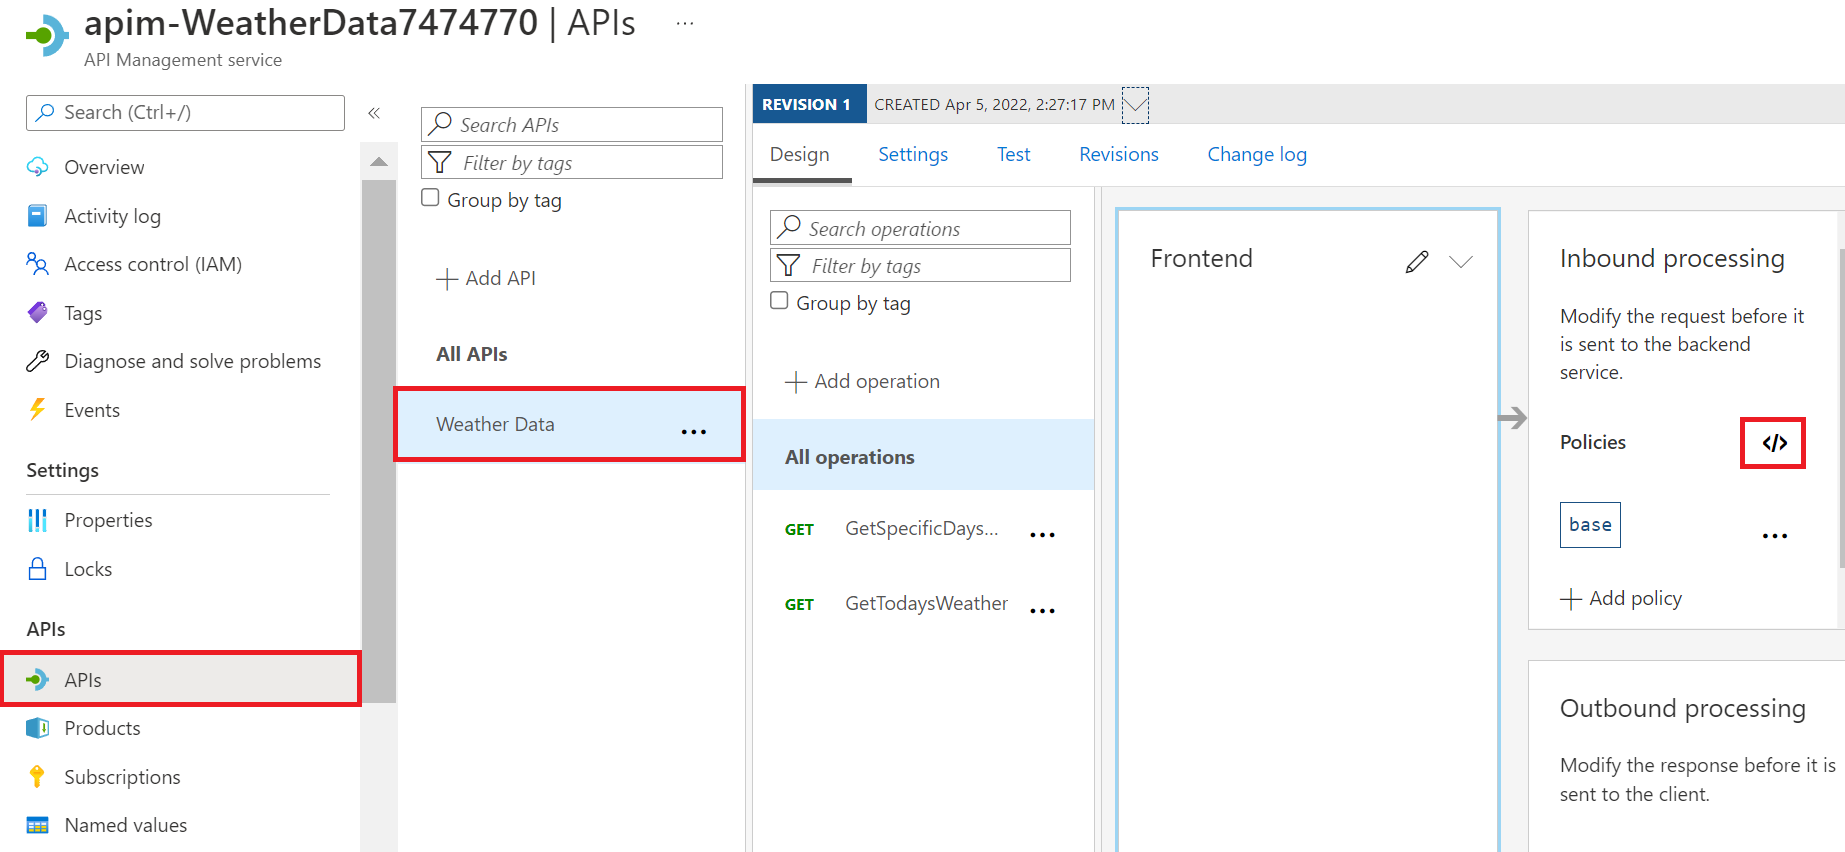
In the Azure portal, select your API Management service. If necessary, in the Azure resource menu, or from the home page, select All resources, and then select your API Management service.
In the left menu pane, under APIs, select APIs. The APIs pane for your API Management service appears.
In the secondary menu, select Weather Data.
In the Inbound processing box, select the </> icon to open Policies code editor. The HTML code for the policies node displays.
Replace the
<inbound>node of the policy file with the following XML, substituting the fingerprint you copied earlier for thedesired-fingerprintplaceholder:<inbound> <choose> <when condition="@(context.Request.Certificate == null || context.Request.Certificate.Thumbprint != "desired-fingerprint")" > <return-response> <set-status code="403" reason="Invalid client certificate" /> </return-response> </when> </choose> <base /> </inbound>Select Save.
Call the gateway and pass the client certificate
You can now test the new authentication policy with and without the certificate.
To test the API without the certificate, run the following command in Cloud Shell, replacing the placeholder values with your API gateway name and subscription key.
curl -X -v GET https://[api-gateway-name].azure-api.net/api/Weather/53/-1 \
  -H 'Ocp-Apim-Subscription-Key: [Subscription Key]'
This command should return a 403 Client certificate error, and no data will be returned.
In Cloud Shell, to test the API with the certificate, copy and paste the following cURL command, using the primary subscription key from the first exercise (you can also obtain this primary key from the Subscriptions pane for your WeatherData API Management service). Remember to include your API gateway name.
curl -X GET https://[api-gateway-name].azure-api.net/api/Weather/53/-1 \
  -H 'Ocp-Apim-Subscription-Key: [subscription-key]' \
  --cert-type pem \
  --cert selfsigncert.pem
This command should result in a successful response displaying weather data similar to the following.
{"mainOutlook":{"temperature":32,"humidity":34},"wind":{"speed":11,"direction":239.0},"date":"2019-05-16T00:00:00+00:00","latitude":53.0,"longitude":-1.0}