Run a schema conversion
With the environment prepared, you're ready to open the Migration Wizard and run the conversion. This unit walks through the complete Migration Wizard workflow, explains the scratch database's role in validation, and shows you how to interpret the conversion report.
Start the migration wizard
The migration wizard is the primary interface for configuring and running a conversion. Access it from the PostgreSQL extension panel in VS Code.
Create an Azure Database for PostgreSQL connection
Before you create a migration project, add a connection to your Azure Database for PostgreSQL flexible server in the PostgreSQL extension panel:
- In the PostgreSQL extension panel, select Add Connection.
- Enter the connection details: host, database name, username, and password.
- Test and save the connection.
This connection serves as the scratch database for validation and is the target for the generated DDL.
Open a workspace and create a migration project
The Migration Wizard stores all project files, including artifacts, reports, and generated DDL, in a local workspace folder. Organize migration projects in a dedicated folder rather than a generic workspace.
- Create a new folder on your local machine for the migration project.
- Open the folder in VS Code as a new workspace (File > Open Folder).
- In the PostgreSQL extension, go to the Migrations (preview) panel and select Create Migration Project.
- Enter a project name in the Migration Wizard, then select Next.
Configure the Oracle connection and load schemas
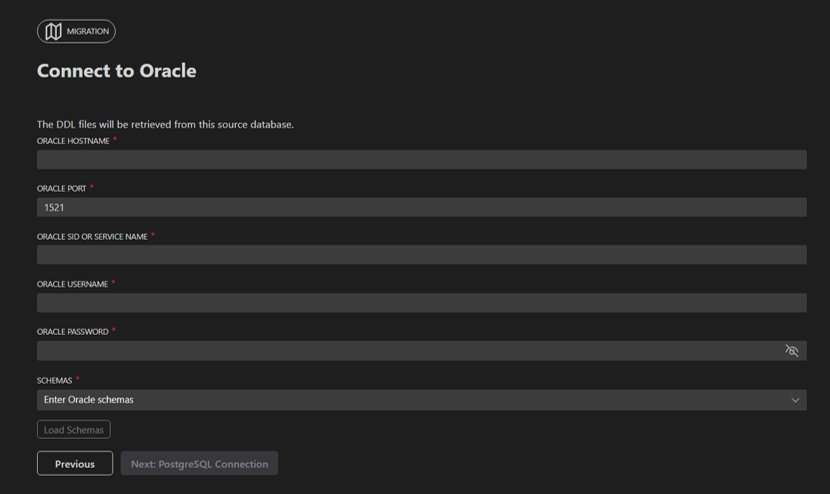
- Enter your Oracle connection details: host, port, database or service name, username, and password.
- Select Load Schemas. The tool tests the connection and, if successful, lists all user-defined schemas available in your Oracle database.
- Select one or more schemas to include in the conversion.
- Select Next.
The tool selects thin or thick client mode automatically based on your sqlnet.ora settings. If your environment requires thick mode and Oracle Instant Client isn't on the PATH, the connection fails at this step, a good reason to verify connectivity before opening the wizard.
Configure the scratch database
- Select the Azure Database for PostgreSQL connection you created earlier.
- Select the target database from the dropdown list.
- Select Next.
Note
The tool creates temporary schemas, named with the _mig_scratch_ prefix, in the selected database to validate converted DDL. These schemas are created and dropped automatically during the conversion run. The connecting user must have CREATE privileges on this database.
Configure Microsoft Foundry
- Enter your Microsoft Foundry endpoint URL (for example,
https://<your-resource>.services.ai.azure.com) and deployment name (the name you assigned to thegpt-5.2deployment in Microsoft Foundry). - Select the authentication method: API key or Microsoft Entra ID. If you select API key, enter the key. If you select Microsoft Entra ID, the tool acquires the token from your signed-in Azure Account session automatically.
- Select Test Connection to verify the configuration.
- After the connection test succeeds, select Create Migration Project.
Run the schema conversion
The Migration Wizard navigates to the main conversion panel.
- Select Migrate to start the schema conversion.
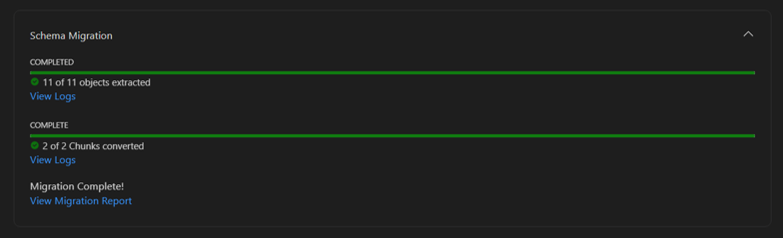
- Monitor progress in the VS Code interface. The wizard shows conversion stages and object counts as the pipeline runs.
The conversion processes objects in dependency-aware batches. Duration depends on schema size and complexity, and on the token-per-minute capacity of your Microsoft Foundry deployment. For large schemas with heavy PL/SQL, this stage can take several minutes to an hour or more.
Review what the scratch database validates
During the conversion run, scratch-schema validation confirms that the converted DDL is deployable. It verifies:
- Syntax correctness, the generated DDL is valid for the target PostgreSQL version
- Dependency order, objects are created in the correct sequence (types before tables, tables before foreign keys, functions before triggers that call them)
- Target-version compatibility, object definitions work with the specific PostgreSQL major version on the scratch server
- Extension dependencies, functions that depend on
orafceor other extension symbols resolve correctly
Objects that fail scratch-schema validation are flagged as review tasks rather than silently dropped or partially deployed.
Read the conversion report
After the conversion completes, the tool generates a set of reports in the session folder. Start with reports/customer_summary.md.
The customer summary tells you:
- Overall conversion status: how many objects converted successfully, how many were skipped, and how many are flagged for review
- Success percentage: the proportion of Oracle objects that converted to PostgreSQL DDL without requiring manual intervention
- Next actions: a prioritized list of what to do before deploying
Note
The success percentage reflects automated conversion coverage, not deployment readiness. Objects that convert automatically still require your validation before production. Review tasks represent the work remaining before the schema is ready for production promotion.
The reports/technical_conversion_report.md provides a detailed breakdown for DBAs and migration engineers: per-object conversion status, DDL snippets, and links to the generated PostgreSQL files.
The reports/review_tasks.md is an offline copy of the review tasks for reference and audit. Resolve tasks from the Schema Review pane in VS Code, not from this file.
After your first conversion run: Open reports/customer_summary.md and note your success percentage and the count of Mandatory review tasks. Use that baseline to plan the review and resolution work in the next stage.