Create Copilot Studio workflows as tools
Before you use a Copilot Studio workflow as a tool in an agent, you need to understand how to configure a workflow for tool use and when to create a new one.
Requirements for using Copilot Studio workflows as tools
While Copilot Studio workflows can run independently, you can also add them to agents as tools to build larger automation scenarios with consistent, predictable outcomes.
For a Copilot Studio workflow to work as a tool with agents, it needs to meet the following criteria:
- Have the When an agent calls the flow trigger and the response action of Respond to the agent.
- Be configured to respond in real time, not asynchronously.
- Respond to the agent within the 100 second action limit.
- Be in the same environment as the agent, and typically within a Dataverse solution for proper discovery and management.
Additionally, you must have a Copilot Studio license that supports workflows, but the workflow itself doesn't require a specific Copilot Studio plan.
Tip
Actions in the workflow that need to run longer can be placed after the Respond to Copilot action to continue to run up to the workflow run duration limit of 30 days.
By default, a workflow initiated by an agent or app fails if it takes longer than two minutes to respond to the calling agent or app. You must optimize workflow logic, queries, and returned data so that a typical run stays below this 100-second limit.
Note
If your workflow is breaching the limit, you can speed up workflow execution with express mode.
Create a workflow in Copilot Studio
You can create a workflow in Copilot Studio in two ways:
- Natural language: Create a workflow by describing what you need by using everyday language in one or more conversations. Copilot Studio interprets your intent and creates a workflow based on your description. You can edit the workflow in the designer to add more actions.
- Designer: Build a workflow by selecting and adding components on a canvas in the visual designer. You can add actions, conditions, and loops to create sophisticated automation scenarios. You can also use expressions to manipulate data and perform calculations in your workflows.
To create a workflow by using the designer:
Navigate to Copilot Studio.
Select an environment with assigned Copilot Studio capacity.
Select Flows in the left-hand navigation bar.
Select + New agent flow.
Trigger step
Change the trigger type to Connector and search for the When an agent calls the flow trigger.
Select the When an agent calls the flow as the trigger.
Input parameters
You use variables as input and output parameters to pass information between Copilot Studio workflows and Copilot Studio agents.
You add input parameters to the trigger step to pass information from the agent to the workflow.
Copilot Studio agents support only the following types of input and output parameters for workflows:
- Number
- String
- Boolean
You can now add the actions you want the workflow to perform.
Response action
To add the response action to a workflow:
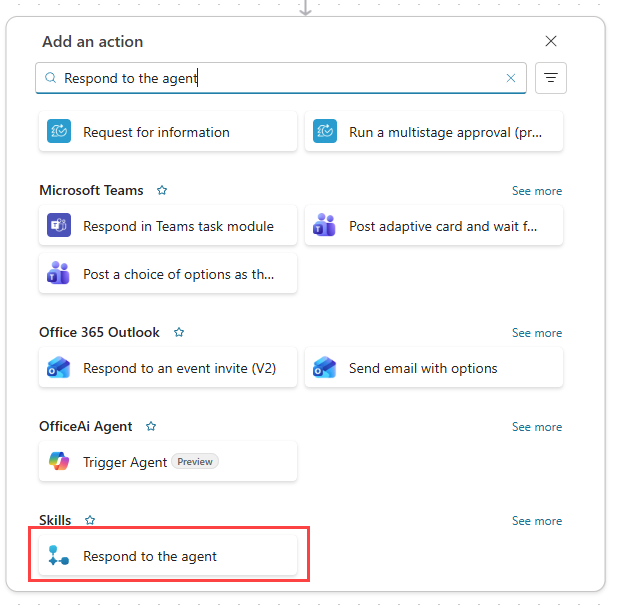
Select the plus sign (+) at the end of the workflow. The Add an action pane opens.
Under Add action, start typing the action that you want your workflow to perform, and then select it in the list. Depending on your selection, you'll need to provide additional information to complete the action.
After adding the action, select the action step, select the expand pane icon, and then select the Settings tab.
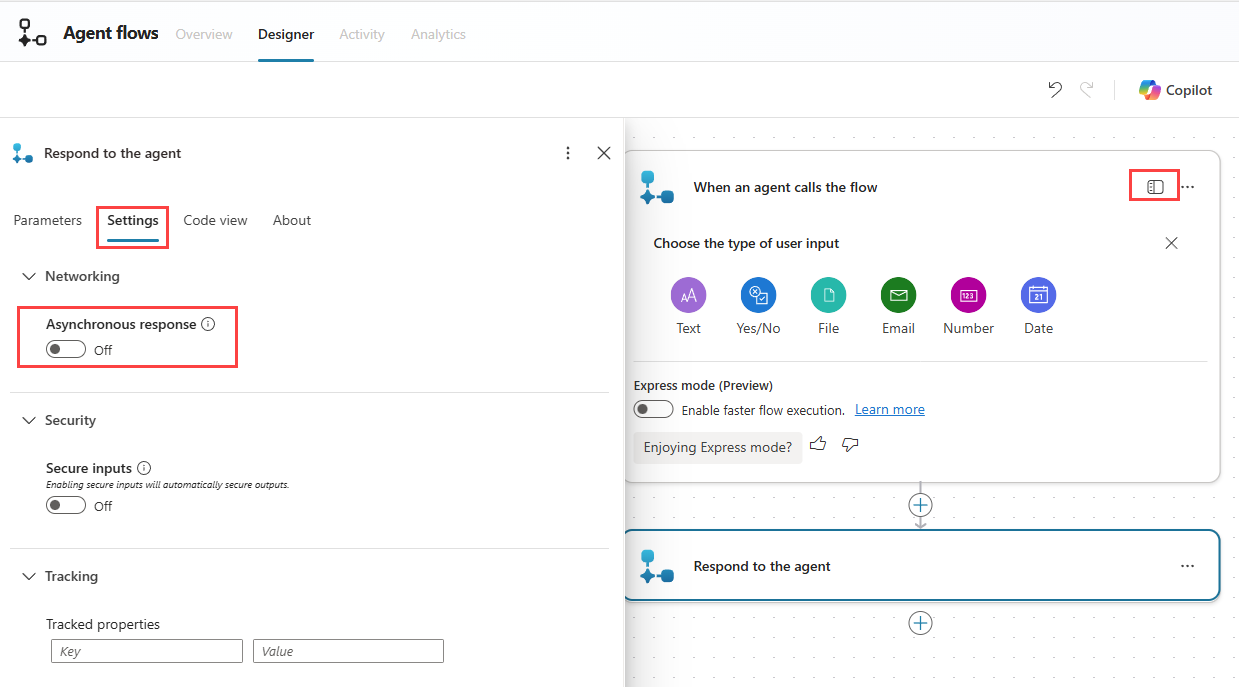
Ensure that Asynchronous response is set to Off.


Output parameters
You can add output parameters to the response action step to pass information from the workflow back to the agent.
Edit the name of the workflow
The workflow name becomes the tool name by default. Name it clearly to reflect what it does.
The orchestrator uses this name when determining how to answer a user's request. The name should be meaningful and unique.
In the Designer tab, select Save draft to preserve the steps in your workflow.
Select the Overview tab.
Select Edit in the Details section.
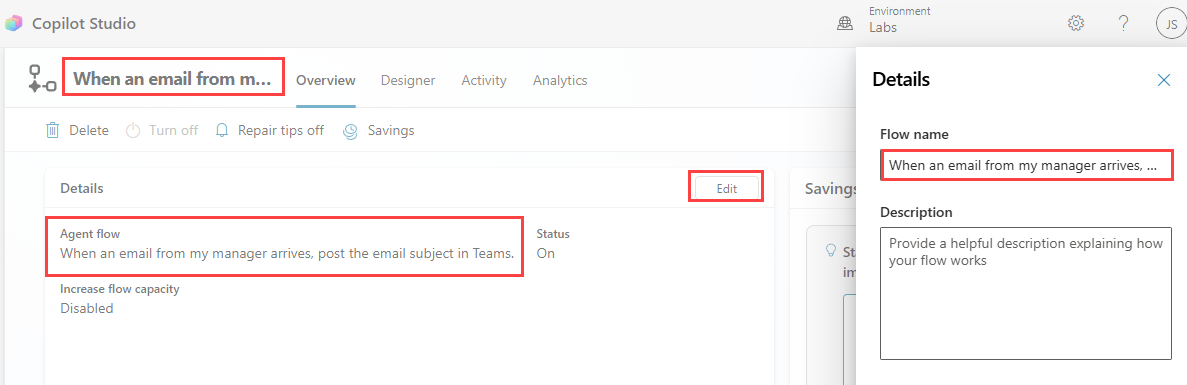
Enter a unique name.
Select Save.

Alternatively, you can select the name of the workflow in the top left of the designer to rename it.
Create a workflow as a tool in Copilot Studio
If you create a workflow from the Flows page in Copilot Studio, it is automatically listed in the tools registry under Tools in Copilot Studio.

Important
If the workflow that you want to add isn't listed under Tools, make sure that it has both the When an agent calls the flow trigger and a Respond to the agent action. If it doesn't, you can't add it as an action to an agent.
You can also create a workflow as a tool in Copilot Studio. To create a new workflow as a tool:
Navigate to Copilot Studio.
Select an environment with assigned Copilot Studio capacity.
Select Tools in the left-hand navigation bar.
Select + New tool.
Select the Agent flow tile.
The workflow is created with an When an agent calls the flow trigger and a Respond to the agent action.
Tip
If you're creating a workflow for use as a tool in an agent, it's more efficient to create the workflow under Tools in Copilot Studio because it automatically adds the When an agent calls the flow trigger and a Respond to the agent action to the workflow.
Next, we’ll explore how to manage the sequence of actions within a workflow.