Design Copilot Studio workflow tools
When you design and build workflows, execution is driven by triggers and the sequence of actions in the workflow.
Add and configure actions
Actions are individual steps a workflow performs.
To add an action to a workflow:
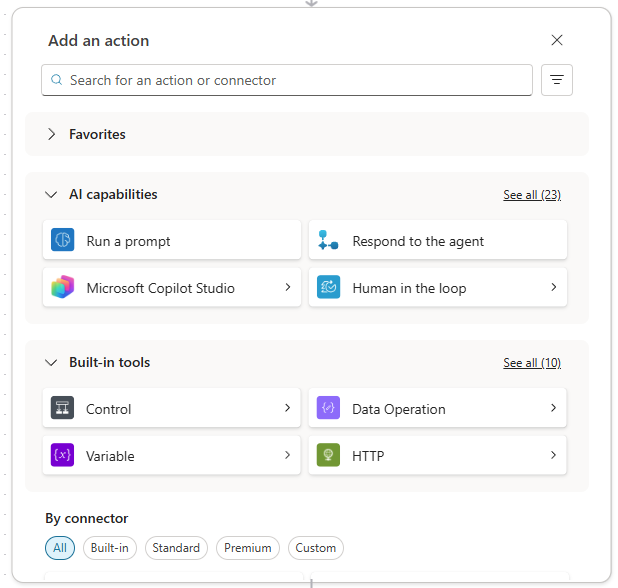
Below the step where you want to add the action, select the plus sign (+). The Add an action pane opens.
Under Add action, start typing the action that you want your workflow to perform, and then select it in the list. Depending on your selection, you'll need to provide additional information to complete the action.

Important
By default, every action inherits its name from the connector action. To make your workflow more readable and maintainable, you should rename each action. This helps you select the correct dynamic value and aid when building expressions.
Dynamic content
Dynamic content is data from the outputs of a workflow's triggers and actions. It holds information from previous steps, such as responses from API calls, that you can use as input in later workflow actions.
Here's how dynamic content works:
Every trigger and action in a workflow produces data. For example, a Get Record action pulls all the data for a specific record. This data is available for use in other steps as dynamic values.
In the visual designer for the workflow, you find a Insert dynamic content icon within each step's input fields. (It looks like a lightning bolt.)
The Dynamic content pane opens and displays a list of the available dynamic content from previous workflow steps.
You can search for and select the desired dynamic values to insert into the action's field.
Tip
You also can enter / in a field in an action step to open the dynamic content pane.
In this screenshot, the dynamic content pane is open for the Location field on the Get forecast for today action. The dynamic content pane is showing the input fields from the trigger, City and Country, and the previous action, Current time.

Note
Not all outputs are shown by default. You should use See more or use the Search option to find the dynamic value that you require.
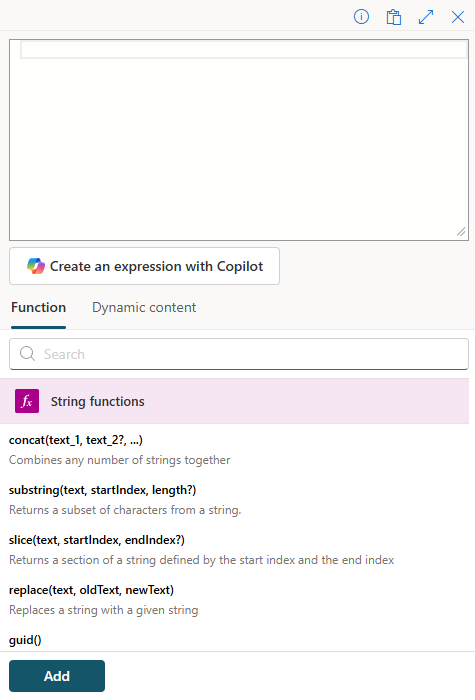
Expressions
Expressions are simple or complex functions that perform operations on the data in the workflow. You use them to calculate values, format text, make decisions, or extract specific information from inputs.
Expressions let you:
- Transform data: For example, change text to lowercase or extract part of a string.
- Format data: For example, combine names or format dates.
- Make decisions: Evaluate values for use in conditions.
To add an expression:
In the visual designer for the workflow, you find a fx icon within each step's input fields. You can also type
/and select Insert expression.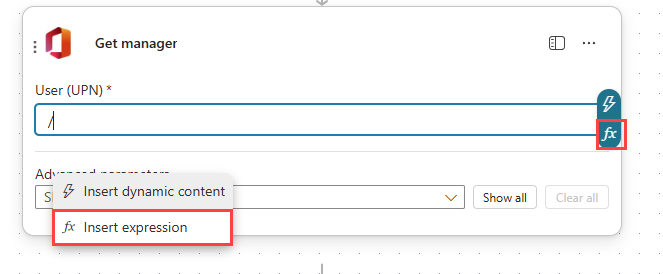
The Expression pane opens where you can select functions to use and dynamic values.


Tip
Copilot can be used to generate expressions.
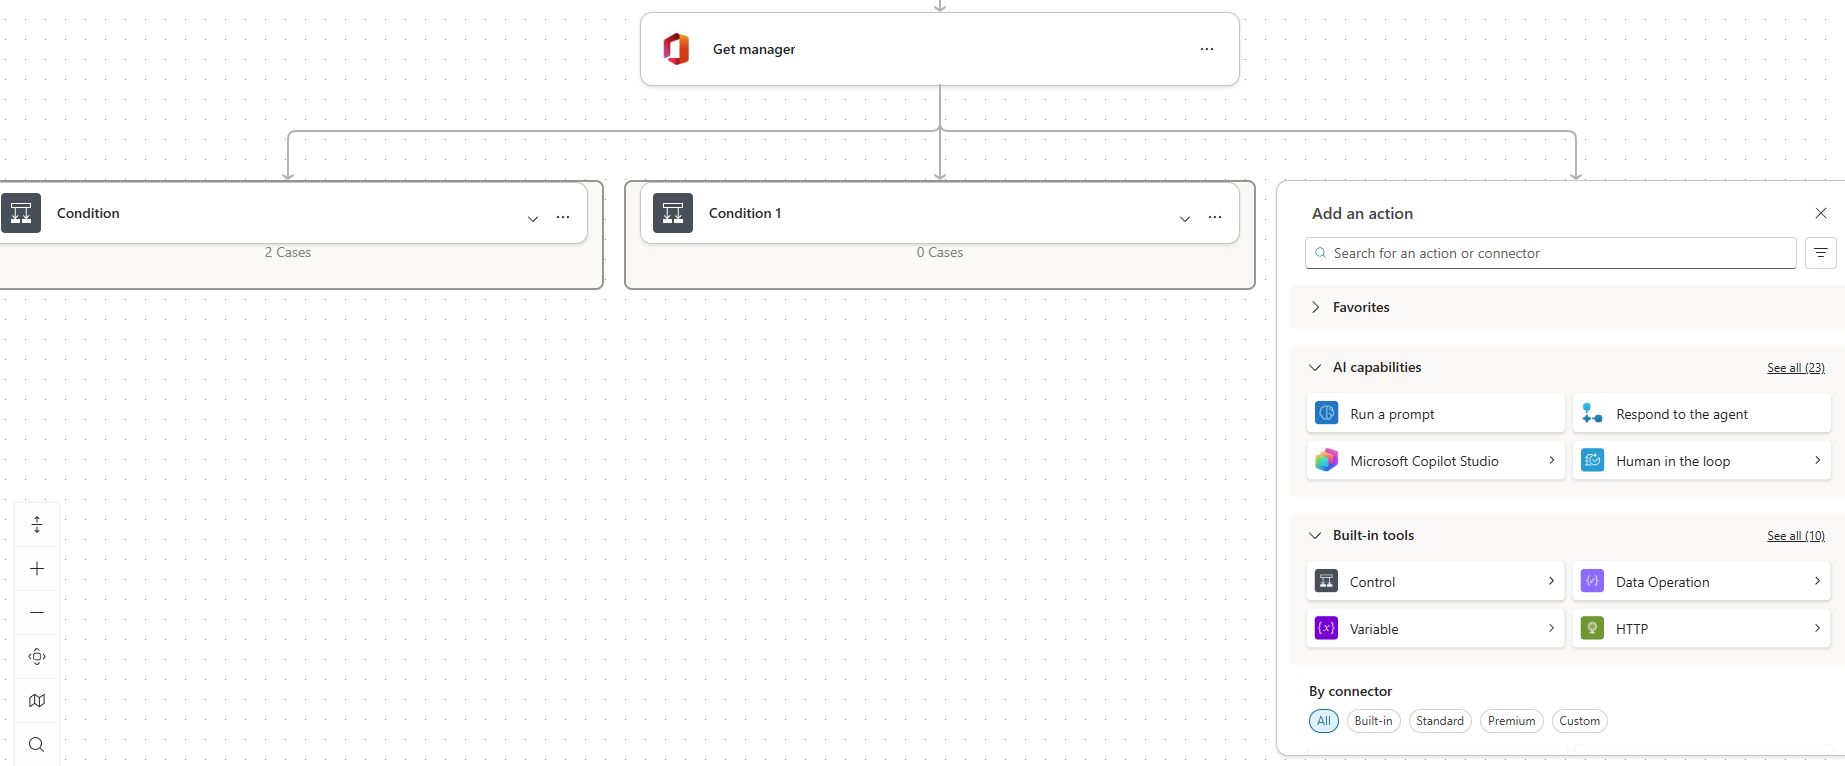
Conditions
Conditions are if...then...else statements and are one of the primary methods for controlling the sequence of actions performed by a workflow.
A condition creates branches in the workflow to perform different actions depending on whether a condition is true or false.
Conditions are a built-in action from the Control connector.

After adding a condition, you can use dynamic content and expressions in the left and right choose a value fields and select the operator.
In this screenshot, the from email address from the When a new email arrives trigger step is compared to the email address of the manager from the Get manager action. If the email address matches, the workflow follows the True branch and post a message to Teams, else the workflow follows the False branch.

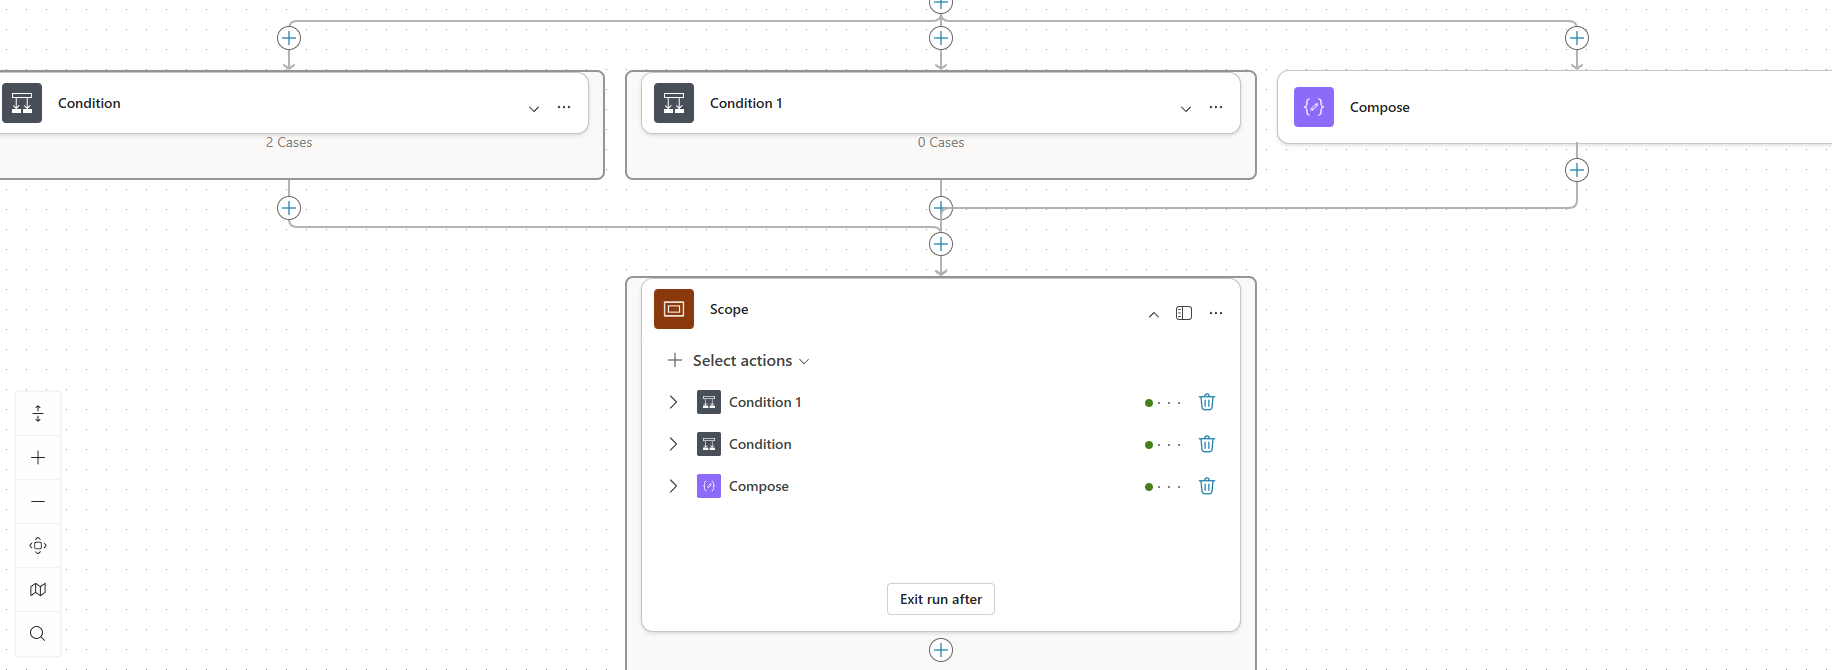
Branching
By default, actions in a workflow run sequentially. You can use conditions and switch to create branches where the workflow steps follow a single path.
To organize actions into separate branches and run those branches at the same time, you can create Parallel branches. With parallel branches, the actions are performed in each branch. You can use parallel branches to collect approvals concurrently instead of sequentially.
You can join the branches later in your workflow. The action after you join the branch waits for all branches to complete.
To add a parallel branch:
Below the step where you want to add the branch, right-click on the plus sign (+) and select Add a parallel branch.
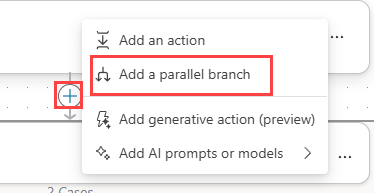
A branch is added to the workflow, and the Add an action pane opens for the new branch.
You can add more actions to each branch, or add more branches.
To join the parallel branches, add an action that runs after all branches complete. In this action, set the Run after property for the last action in each branch.
Note
You will use parallel branches with the Run after property configured to perform error handling in workflows.


Loops
Copilot Studio workflows support using loops to perform repeated actions. Workflows offer two methods to perform loop processing:
- Apply for each: A for-each loop construct that processes each item in an array.
- Do until: A while loop construct that processes items until an expression is true.
The Apply for each action can be used on any array, or list, of items. A common use of Apply for each is after a query action, such as a list records action that retrieves a set of records.
Apply for each takes a single parameter, the list of values, and processes the results. The following example sets Apply for each to process each contact retrieved by the List rows action.

Next, we’ll explore how to use a Copilot Studio workflow tool with a Copilot Studio agent.