Exercise - Create a custom connector for your copilot
Background
This exercise takes a step further from the Configure Azure OpenAI Service to generate information about your podcast exercise. Your tasks for this exercise are to create a .NET API by using the .NET Azure OpenAI SDK and to create a custom connector from Visual Studio.
Definitions
The following sections provide definitions for important elements that you need to know for this exercise.
.NET
.NET is a free, cross-platform, open-source developer platform for building many different types of applications. With .NET, you can use multiple languages, editors, and libraries to build for web, mobile, desktop, games, Internet of Things (IoT), and AI.
For more information, see Introduction to .NET.
.NET Azure OpenAI SDK
The Azure OpenAI client library for .NET is an adaptation of the REST APIs from OpenAI that provide an idiomatic interface and rich integration with the rest of the Azure SDK ecosystem. It can connect to Azure OpenAI resources or to the non Azure OpenAI inference endpoint, making it a great choice for non Azure OpenAI development.
For more information, see Azure OpenAI client library for .NET.
Microsoft Power Platform
Microsoft Power Platform helps organizations empower their team members to build their own solutions through an intuitive low-code or no-code set of services. These services help simplify the process of building solutions. With Microsoft Power Platform, you can build solutions in days or weeks, as opposed to months or years. Microsoft Power Platform is composed of five key products: Power Apps, Power Automate, Power BI, Microsoft Copilot Studio, and Power Pages.
For more information, see Microsoft Power Platform.
Custom connector
Microsoft Azure Logic Apps, Microsoft Power Automate, and Microsoft Power Apps offer over 1,000 connectors to connect to Microsoft and verified services. However, you might want to communicate with services that aren't available as prebuilt connectors. Custom connectors address this scenario by allowing you to create (and even share) a connector with its own triggers and actions.
For more information, see Custom connectors.
Prerequisites
For this exercise, make sure that you:
Download and install Visual Studio Community edition.
Download and install the latest version of .NET.
Add and configure a Power Apps Developer Plan. Make sure that it's set to the same email address as your Azure account.
Exercise steps
The following video goes through the steps for this unit's exercise.
Set up environment variables
To set up environment variables, follow these steps:
Open a command prompt, and then run the following commands one at a time:
 setx AZURE_OPENAI_KEY_WE "REPLACE_WITH_YOUR_WEST_EUROPE_KEY_VALUE_HERE"
 setx AZURE_OPENAI_ENDPOINT_WE https://podcastcopilotwe-{your initials}.openai.azure.com/
The preceding command would be for the West Europe resource key and endpoint.
 setx AZURE_OPENAI_KEY_SC "REPLACE_WITH_YOUR_SWEDEN_CENTRAL_KEY_VALUE_HERE"
 setx AZURE_OPENAI_ENDPOINT_SC "https://podcastcopilotsc-{your initials}.openai.azure.com/"
The preceding command would be for the Sweden Central resource key and endpoint.
setx BING_SEARCH_KEY "REPLACE_WITH_YOUR_KEY_VALUE_HERE"The preceding command would be for the Bing Search resource key.
After you set the environment variables, close the command prompt.
Create a new .NET Web API project
Your next task is to create a new .NET Web API project by following these steps:
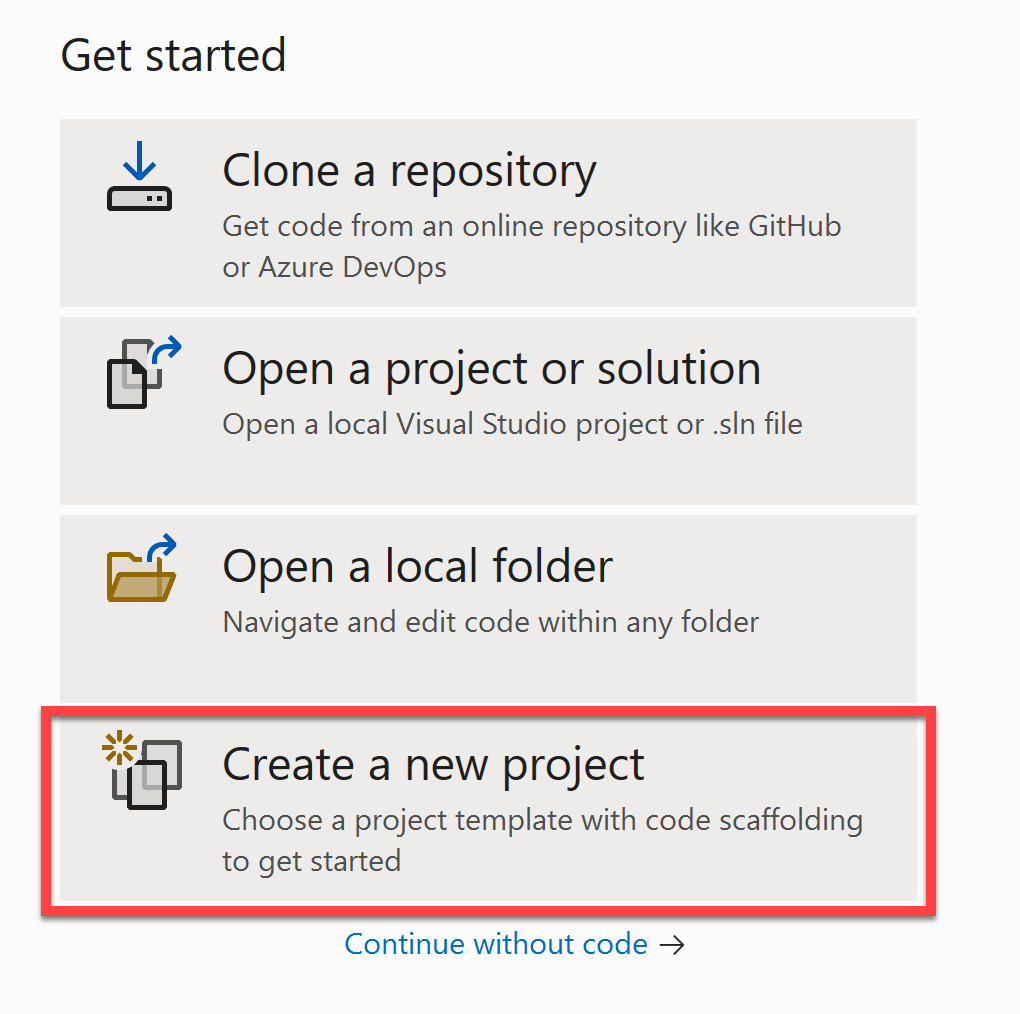
Open Visual Studio and select Create a new project.
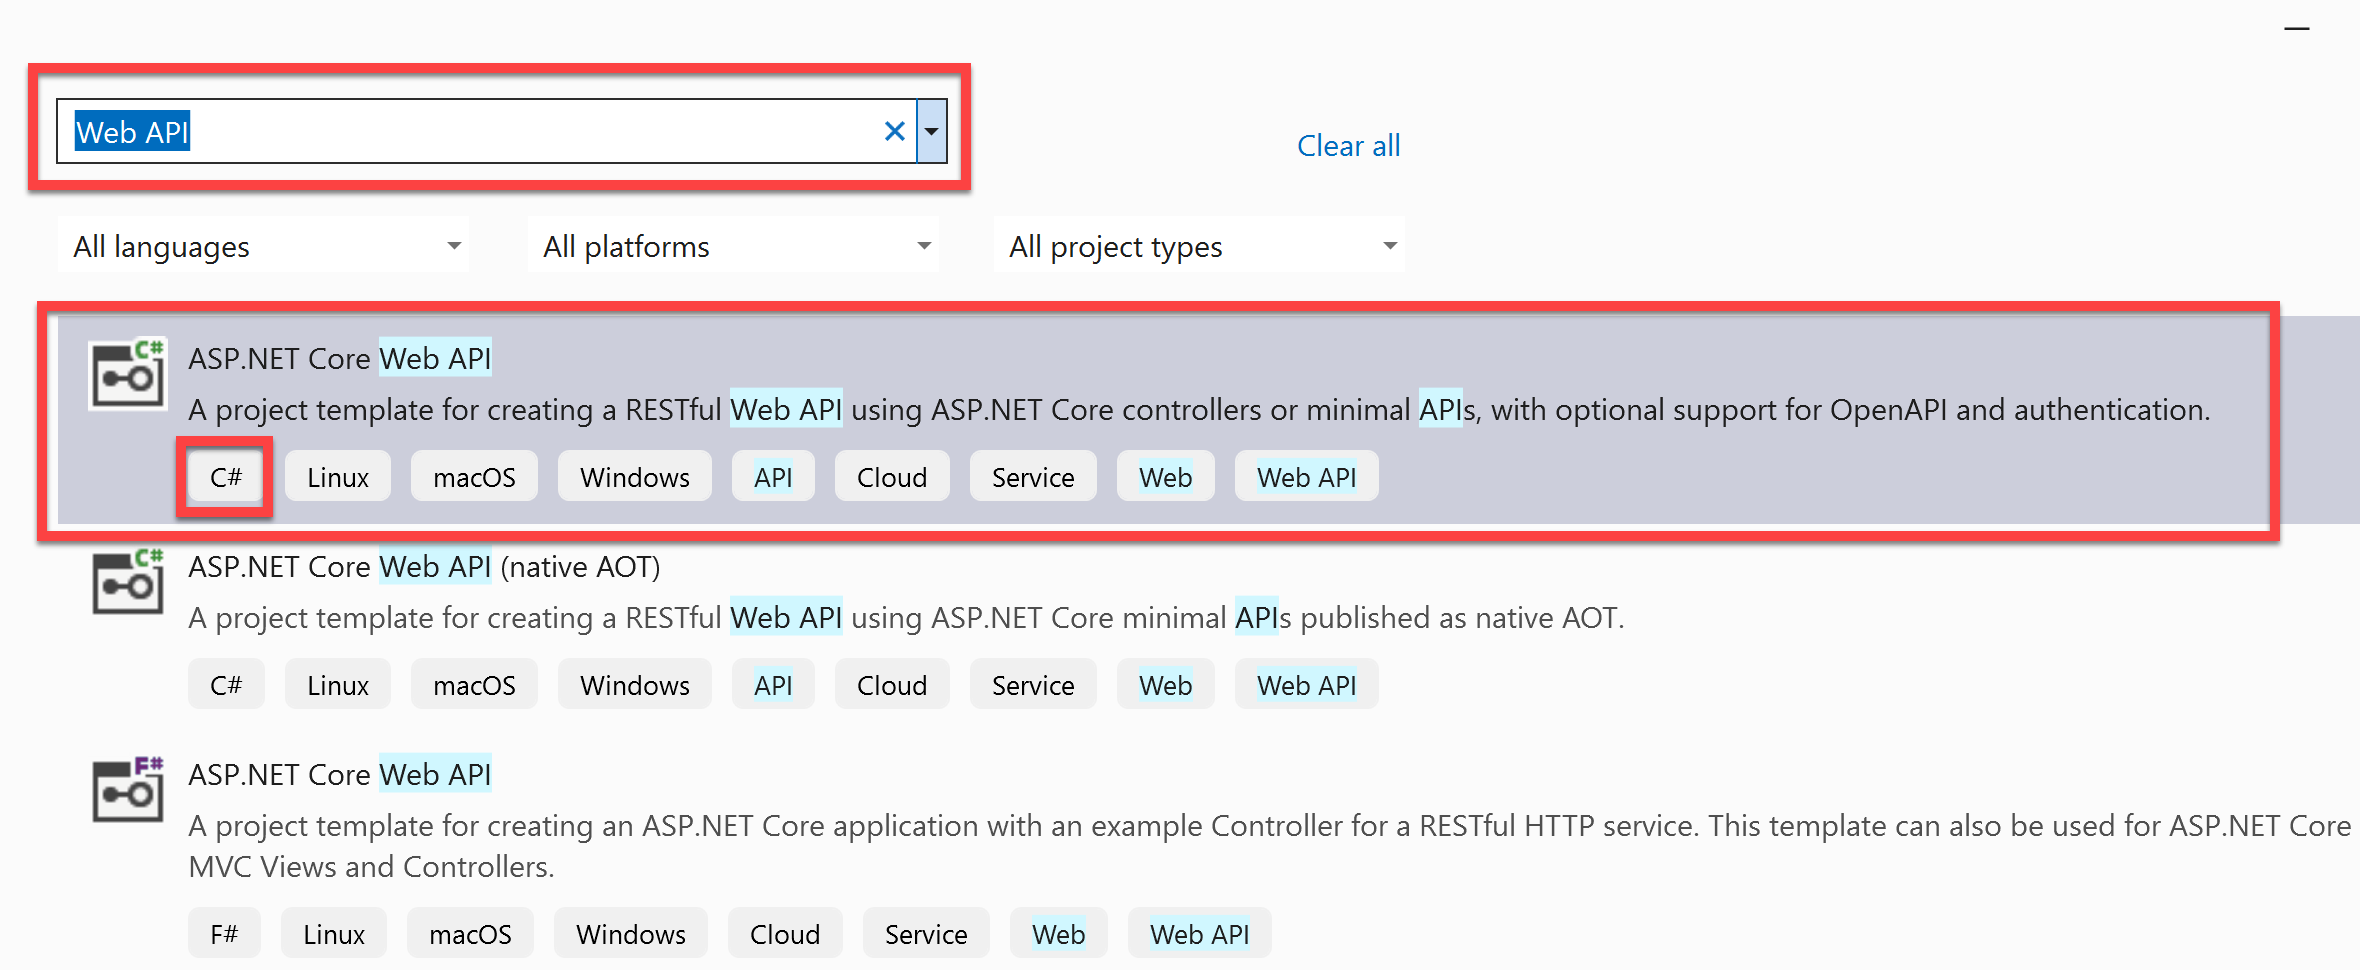
Search for Web API and select ASP.NET Core Web API. Make sure that you select the C# project template.
Select Next.
Name your project PodcastAppAPI and then select Next.
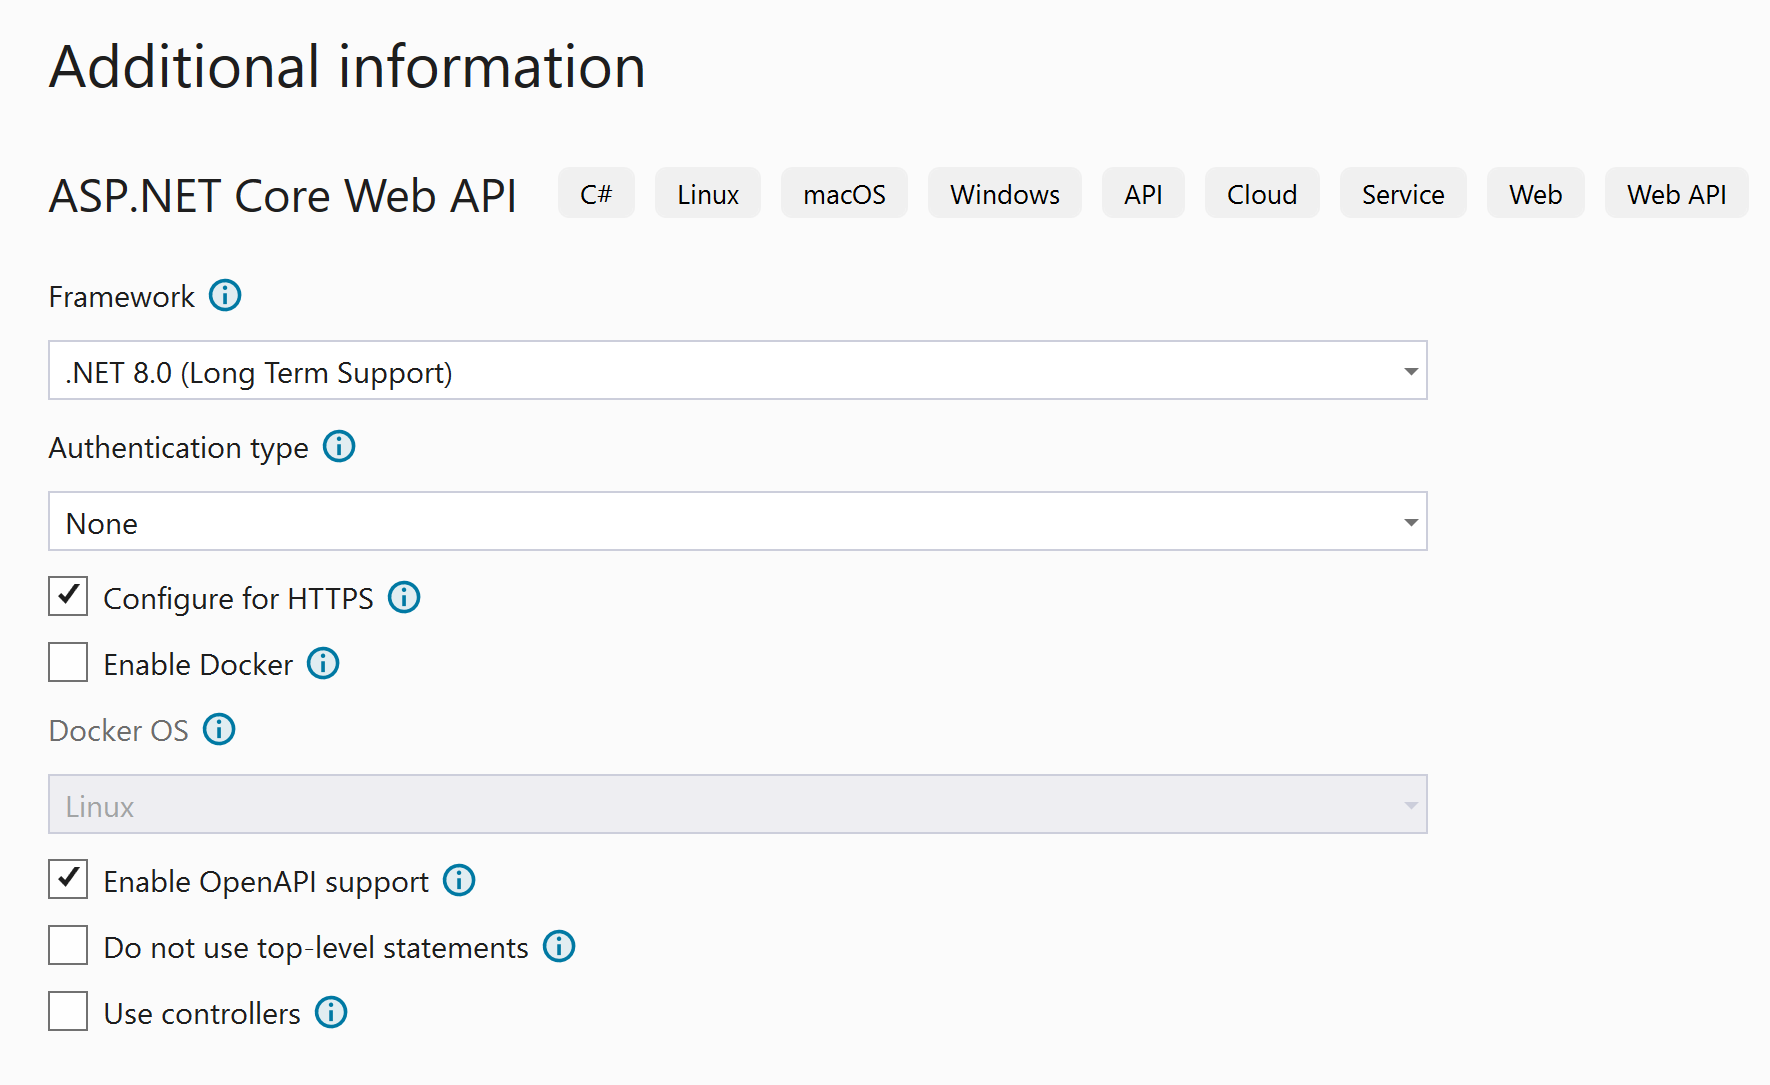
Make sure that the Framework is set to .NET 8, the Authentication type is set to None, and that the Configure for HTTPS option is selected. Select Create.
After the system creates the project, open Solution Explorer, right-click the PodcastAppAPI project to open the context menu, and then select Open in Terminal.
In the terminal window, run the following command to install the prerelease version of the Azure OpenAI SDK:
dotnet add package Azure.AI.OpenAI --version 1.0.0-beta.13Run the following command to install the Newtonsoft.Json package:
dotnet add package Newtonsoft.Json --version 13.0.3
Create the PodcastCopilot class
To create the PodcastCopilot class, follow these steps:
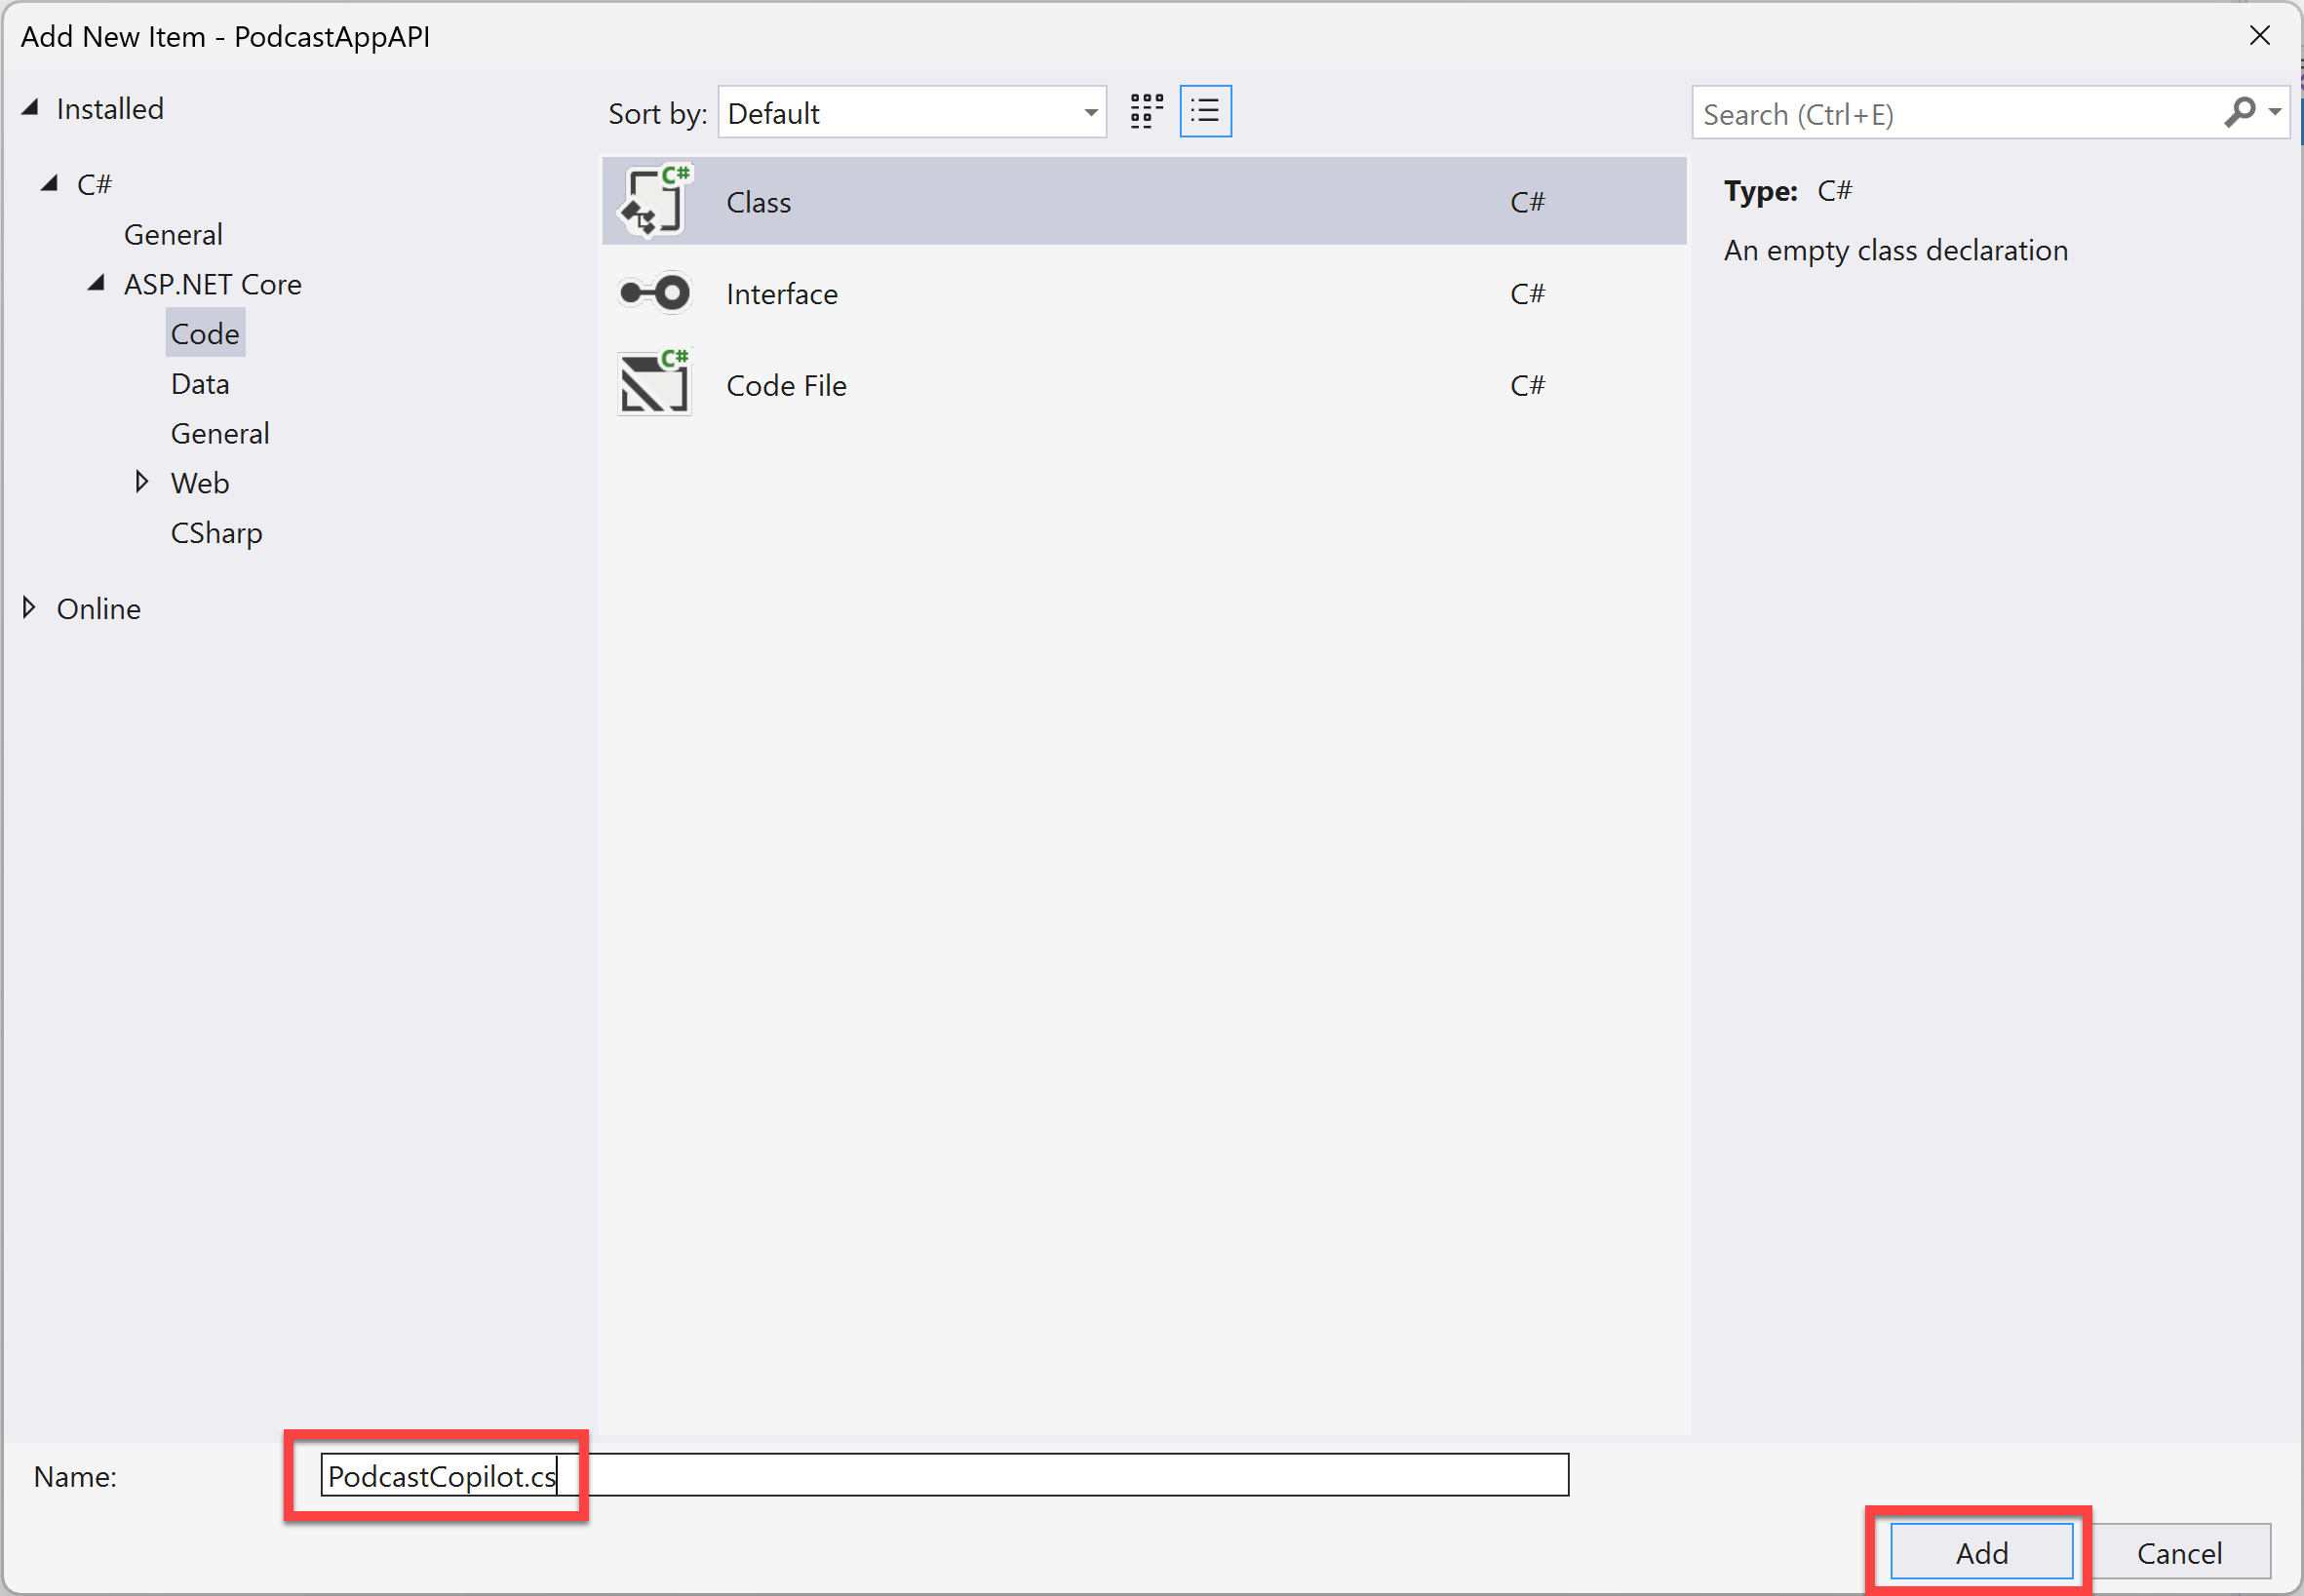
After the command completes, add a new class to the project by right-clicking the PodcastAppAPI project to open the context menu. Then, select Add > Class. Name the class PodcastCopilot.
Add the following using statements to the top of the PodcastCopilot class:
 using System.Web;
 using Azure.AI.OpenAI;
 using Azure;
 using Newtonsoft.Json.Linq;
Inside the PodcastCopilot class, add the following code:
 //Initializing the Endpoints and Keys
 static string endpointWE = Environment.GetEnvironmentVariable("AZURE_OPENAI_ENDPOINT_WE");
 static string keyWE = Environment.GetEnvironmentVariable("AZURE_OPENAI_KEY_WE");

 static string endpointSC = Environment.GetEnvironmentVariable("AZURE_OPENAI_ENDPOINT_SC");
 static string keySC = Environment.GetEnvironmentVariable("AZURE_OPENAI_KEY_SC");

 static string bingSearchUrl = "https://api.bing.microsoft.com/v7.0/search";
 static string bingSearchKey = Environment.GetEnvironmentVariable("BING_SEARCH_KEY");

 //Instantiate OpenAI Client for Whisper and GPT-3
 static OpenAIClient clientWE = new OpenAIClient(
     new Uri(endpointWE),
     new AzureKeyCredential(keyWE));

 //Instantiate OpenAI Client for Dall.E 3
 static OpenAIClient clientSC = new OpenAIClient(
     new Uri(endpointSC),
     new AzureKeyCredential(keySC));
Below the preceding code, add the following code to perform Audio Transcription:
 //Get Audio Transcription
 public static async Task<string> GetTranscription(string podcastUrl)
 {
     var decodededUrl = HttpUtility.UrlDecode(podcastUrl);

     HttpClient httpClient = new HttpClient();
     Stream audioStreamFromBlob = await httpClient.GetStreamAsync(decodededUrl);

     var transcriptionOptions = new AudioTranscriptionOptions()
     {
         DeploymentName = "whisper",
         AudioData = BinaryData.FromStream(audioStreamFromBlob),
         ResponseFormat = AudioTranscriptionFormat.Verbose,
         Filename = "file.mp3"
     };

     Response<AudioTranscription> transcriptionResponse = await clientWE.GetAudioTranscriptionAsync(
         transcriptionOptions);
     AudioTranscription transcription = transcriptionResponse.Value;

     return transcription.Text;
 }
Add the following code to perform Guest Name Extraction:
 //Get Audio Transcription
 public static async Task<string> GetTranscription(string podcastUrl)
 {
     var decodededUrl = HttpUtility.UrlDecode(podcastUrl);

     HttpClient httpClient = new HttpClient();
     Stream audioStreamFromBlob = await httpClient.GetStreamAsync(decodededUrl);

     var transcriptionOptions = new AudioTranscriptionOptions()
     {
         DeploymentName = "whisper",
         AudioData = BinaryData.FromStream(audioStreamFromBlob),
         ResponseFormat = AudioTranscriptionFormat.Verbose,
         Filename = "file.mp3"
     };

     Response<AudioTranscription> transcriptionResponse = await clientWE.GetAudioTranscriptionAsync(
         transcriptionOptions);
     AudioTranscription transcription = transcriptionResponse.Value;

     return transcription.Text;
 }
Add the following code to the PodcastCopilot class to perform Guest bio extraction from Bing:
 //Get Guest Bio from Bing
 public static async Task<string> GetGuestBio(string guestName)
 {
     var client = new HttpClient();

     client.DefaultRequestHeaders.Add("Ocp-Apim-Subscription-Key", bingSearchKey);

     HttpResponseMessage response = await client.GetAsync($"{bingSearchUrl}?q={guestName}");

     string responseBody = await response.Content.ReadAsStringAsync();

     // Parse responseBody as JSON and extract the bio.
     JObject searchResults = JObject.Parse(responseBody);
     var bio = searchResults["webPages"]["value"][0]["snippet"].ToString();

     return bio;
 }
Add the following code to perform the next step of the PodcastCopilot process: Create a Social Media Blurb.
 //Create Social Media Blurb
 public static async Task<string> GetSocialMediaBlurb(string transcription, string bio)
 {
     var completionOptions = new ChatCompletionsOptions()
     {
         DeploymentName = "gpt35turbo",
         Messages =
         {
             new ChatRequestSystemMessage(
                 @"You are a helpful large language model that can create a
                 LinkedIn promo blurb for episodes of the podcast
                 Behind the Tech, when given transcripts of the podcasts.
                 The Behind the Tech podcast is hosted by Kevin Scott.\n"
             ),
             new ChatRequestUserMessage(
                 @"Create a short summary of this podcast episode
                 that would be appropriate to post on LinkedIn to
                 promote the podcast episode. The post should be
                 from the first-person perspective of Kevin Scott,
                 who hosts the podcast.\n" +
                 $"Here is the transcript of the podcast episode: {transcription} \n" +
                 $"Here is the bio of the guest: {bio} \n"
             )
         },
         Temperature = (float)0.7
     };

     Response<ChatCompletions> completionsResponse = await clientWE.GetChatCompletionsAsync(
         completionOptions);
     ChatCompletions completion = completionsResponse.Value;

     return completion.Choices[0].Message.Content;
 }
Add the following code to perform the next step of the PodcastCopilot process: Create a Dall.E prompt.
 //Generate a Dall-E prompt
 public static async Task<string> GetDallEPrompt(string socialBlurb)
 {
     var completionOptions = new ChatCompletionsOptions()
     {
         DeploymentName = "gpt35turbo",
         Messages =
     {
         new ChatRequestSystemMessage(
             @"You are a helpful large language model that generates
             DALL-E prompts, that when given to the DALL-E model can
             generate beautiful high-quality images to use in social
             media posts about a podcast on technology. Good DALL-E
             prompts will contain mention of related objects, and
             will not contain people or words. Good DALL-E prompts
             should include a reference to podcasting along with
             items from the domain of the podcast guest.\n"
         ),
         new ChatRequestUserMessage(
             $@"Create a DALL-E prompt to create an image to post along
             with this social media text: {socialBlurb}"
         )
     },
         Temperature = (float)0.7
     };

     Response<ChatCompletions> completionsResponse = await clientWE.GetChatCompletionsAsync(
     completionOptions);

     ChatCompletions completion = completionsResponse.Value;

     return completion.Choices[0].Message.Content;
 }
Add the following code to perform the next step of the PodcastCopilot process: Generate the social media image from DallE.
 //Create social media image with a Dall-E
 public static async Task<string> GetImage(string prompt)
 {
     var generationOptions = new ImageGenerationOptions()
     {
         Prompt = prompt + ", high-quality digital art",
         ImageCount = 1,
         Size = ImageSize.Size1024x1024,
         Style = ImageGenerationStyle.Vivid,
         Quality = ImageGenerationQuality.Hd,
         DeploymentName = "dalle3",
         User = "1",
     };

     Response<ImageGenerations> imageGenerations =
         await clientSC.GetImageGenerationsAsync(generationOptions);

     return imageGenerations.Value.Data[0].Url.ToString();
 }
You've now created the PodcastCopilot class, which contains the methods to perform the process that takes a podcast URL and returns a social-media post and image for that podcast. You're now ready to create the SocialMediaPost class.
Create the SocialMediaPost class
Your next task is to create the SocialMediaPost class.
Begin by right-clicking the PodcastAppAPI project to open the context menu. Then, select Add > Class. Name the class SocialMediaPost, and then add the following code to the class:
```
public class SocialMediaPost
{
    public string ImageUrl { get; set; }
    public string Blurb { get; set; }
}
```
The class should resemble the following example.
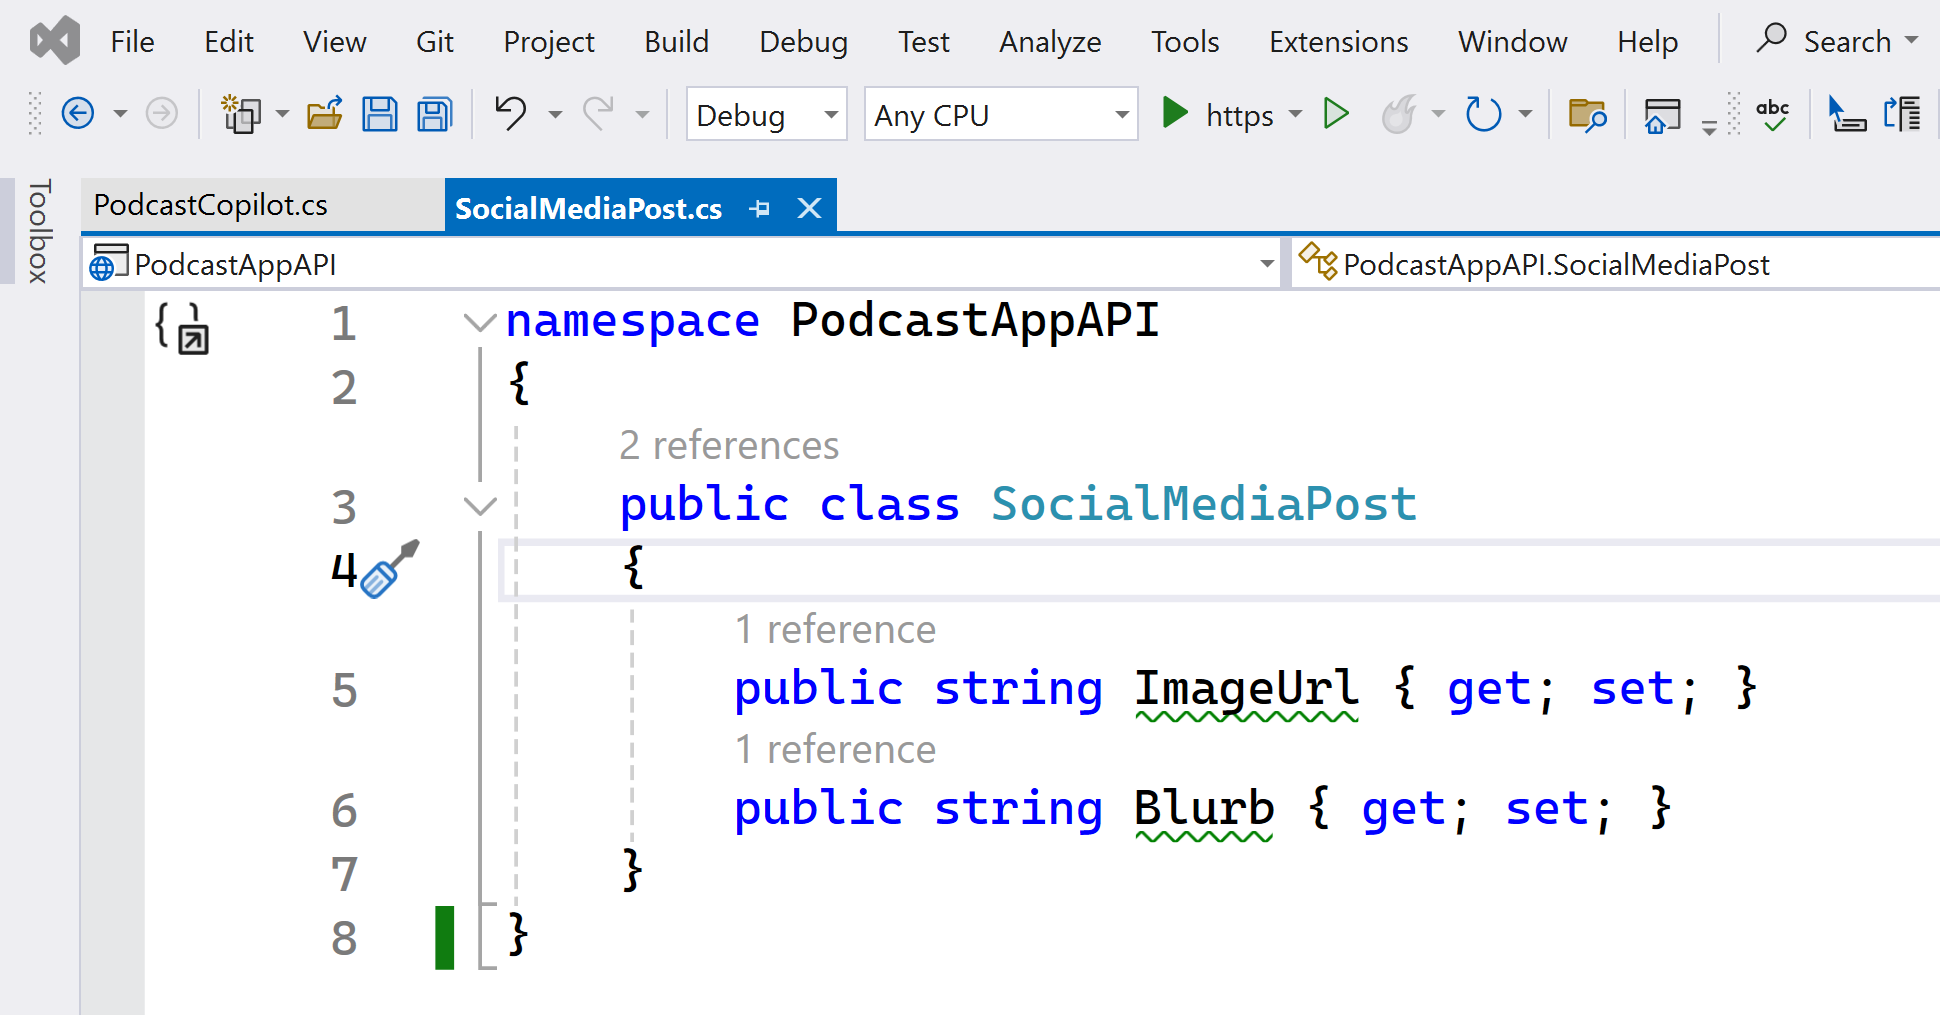
Now that you've created the SocialMediaPost class, you can add one more method to the PodcastCopilot class to return a SocialMediaPost object.
Update the PodcastCopilot class
To update the PodcastCopilot class, open the PodcastCopilot class and add the following method to the class:
```
public static async Task<SocialMediaPost> GenerateSocialMediaPost(string podcastUrl)
{
    var transcription = await GetTranscription(podcastUrl);
    var guestName = await GetGuestName(transcription);
    var guestBio = await GetGuestBio(guestName);
    var generatedBlurb = await GetSocialMediaBlurb(transcription, guestBio);
    var dallePrompt = await GetDallEPrompt(generatedBlurb);
    var generatedImage = await GetImage(dallePrompt);

    var socialMediaPost = new SocialMediaPost()
    {
        ImageUrl = generatedImage,
        Blurb = generatedBlurb
    };

    return socialMediaPost;
}
```
You're now ready to update the Program.cs file so that you can implement the Minimal API.
Update the Program.cs file with the Minimal API implementation
Your next task is to Update the Program.cs file with the Minimal API implementation.
To do so, start by opening the Program.cs file. Then, replace all code in this file with the following code:
```
var builder = WebApplication.CreateBuilder(args);

// Add services to the container.
// Learn more about configuring Swagger/OpenAPI at https://aka.ms/aspnetcore/swashbuckle
builder.Services.AddEndpointsApiExplorer();
builder.Services.AddSwaggerGen();

var app = builder.Build();

// Configure the HTTP request pipeline.
if (app.Environment.IsDevelopment())
{
    app.UseSwagger();
    app.UseSwaggerUI();
}

app.UseHttpsRedirection();

//Implement Minimal APIs

app.Run();
```
You're now ready to turn your API into a custom connector so that you can use it in Microsoft Power Platform.
Create a custom connector from Visual Studio
To create a custom connector from Visual Studio, follow these steps:
In Solution Explorer, right-click the Connected Services node to open the context menu. Then, select Add > Microsoft Power Platform.
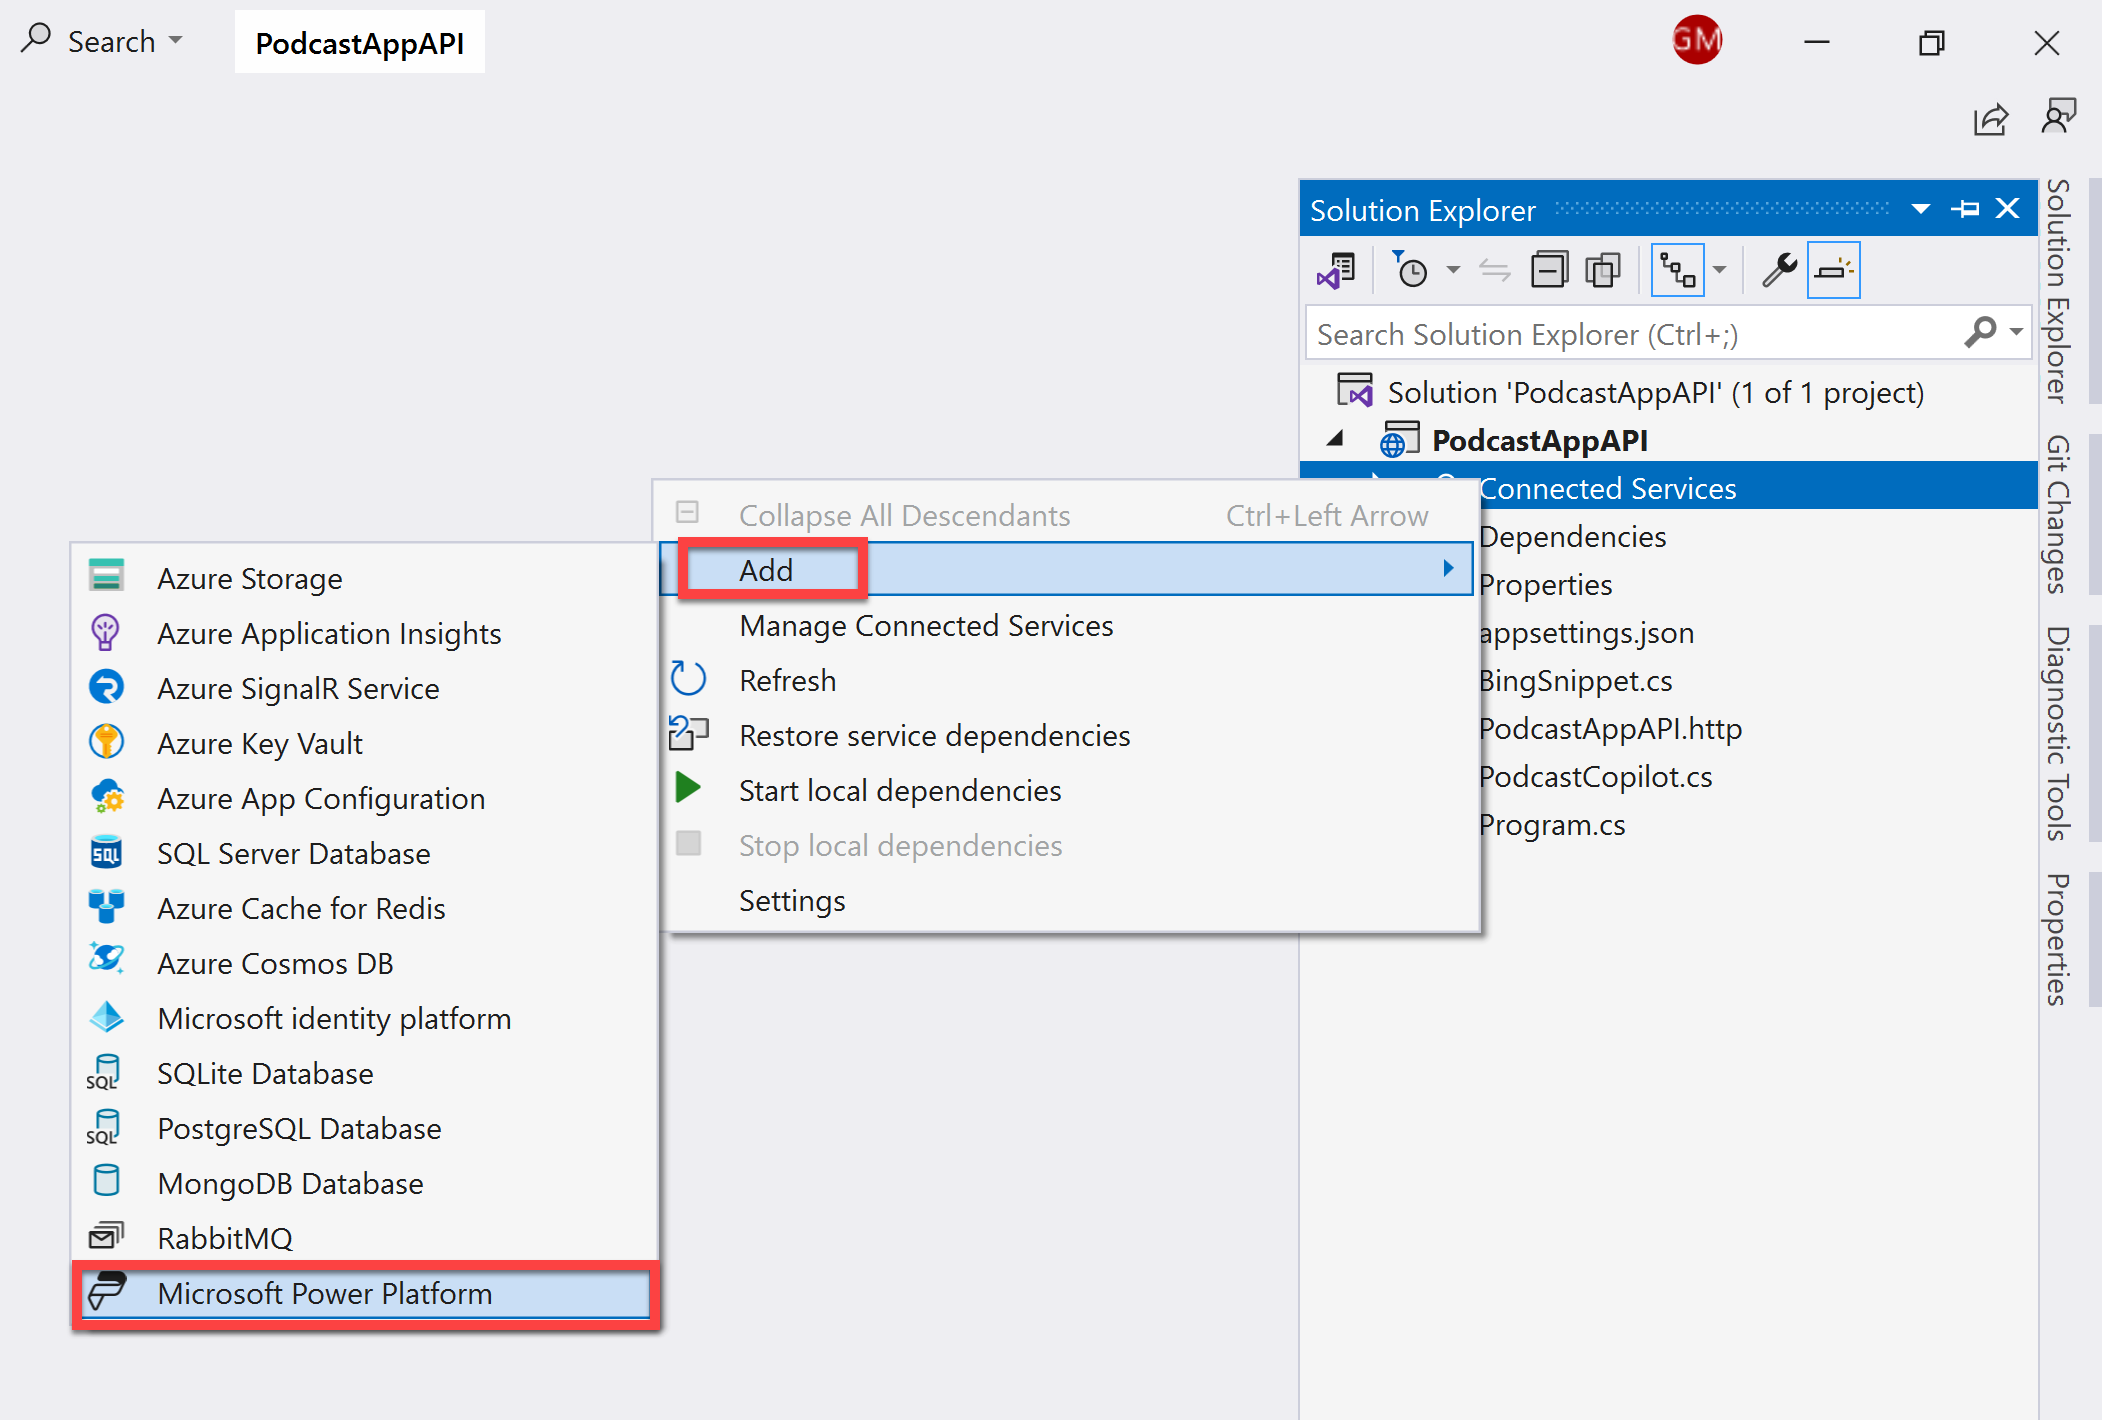
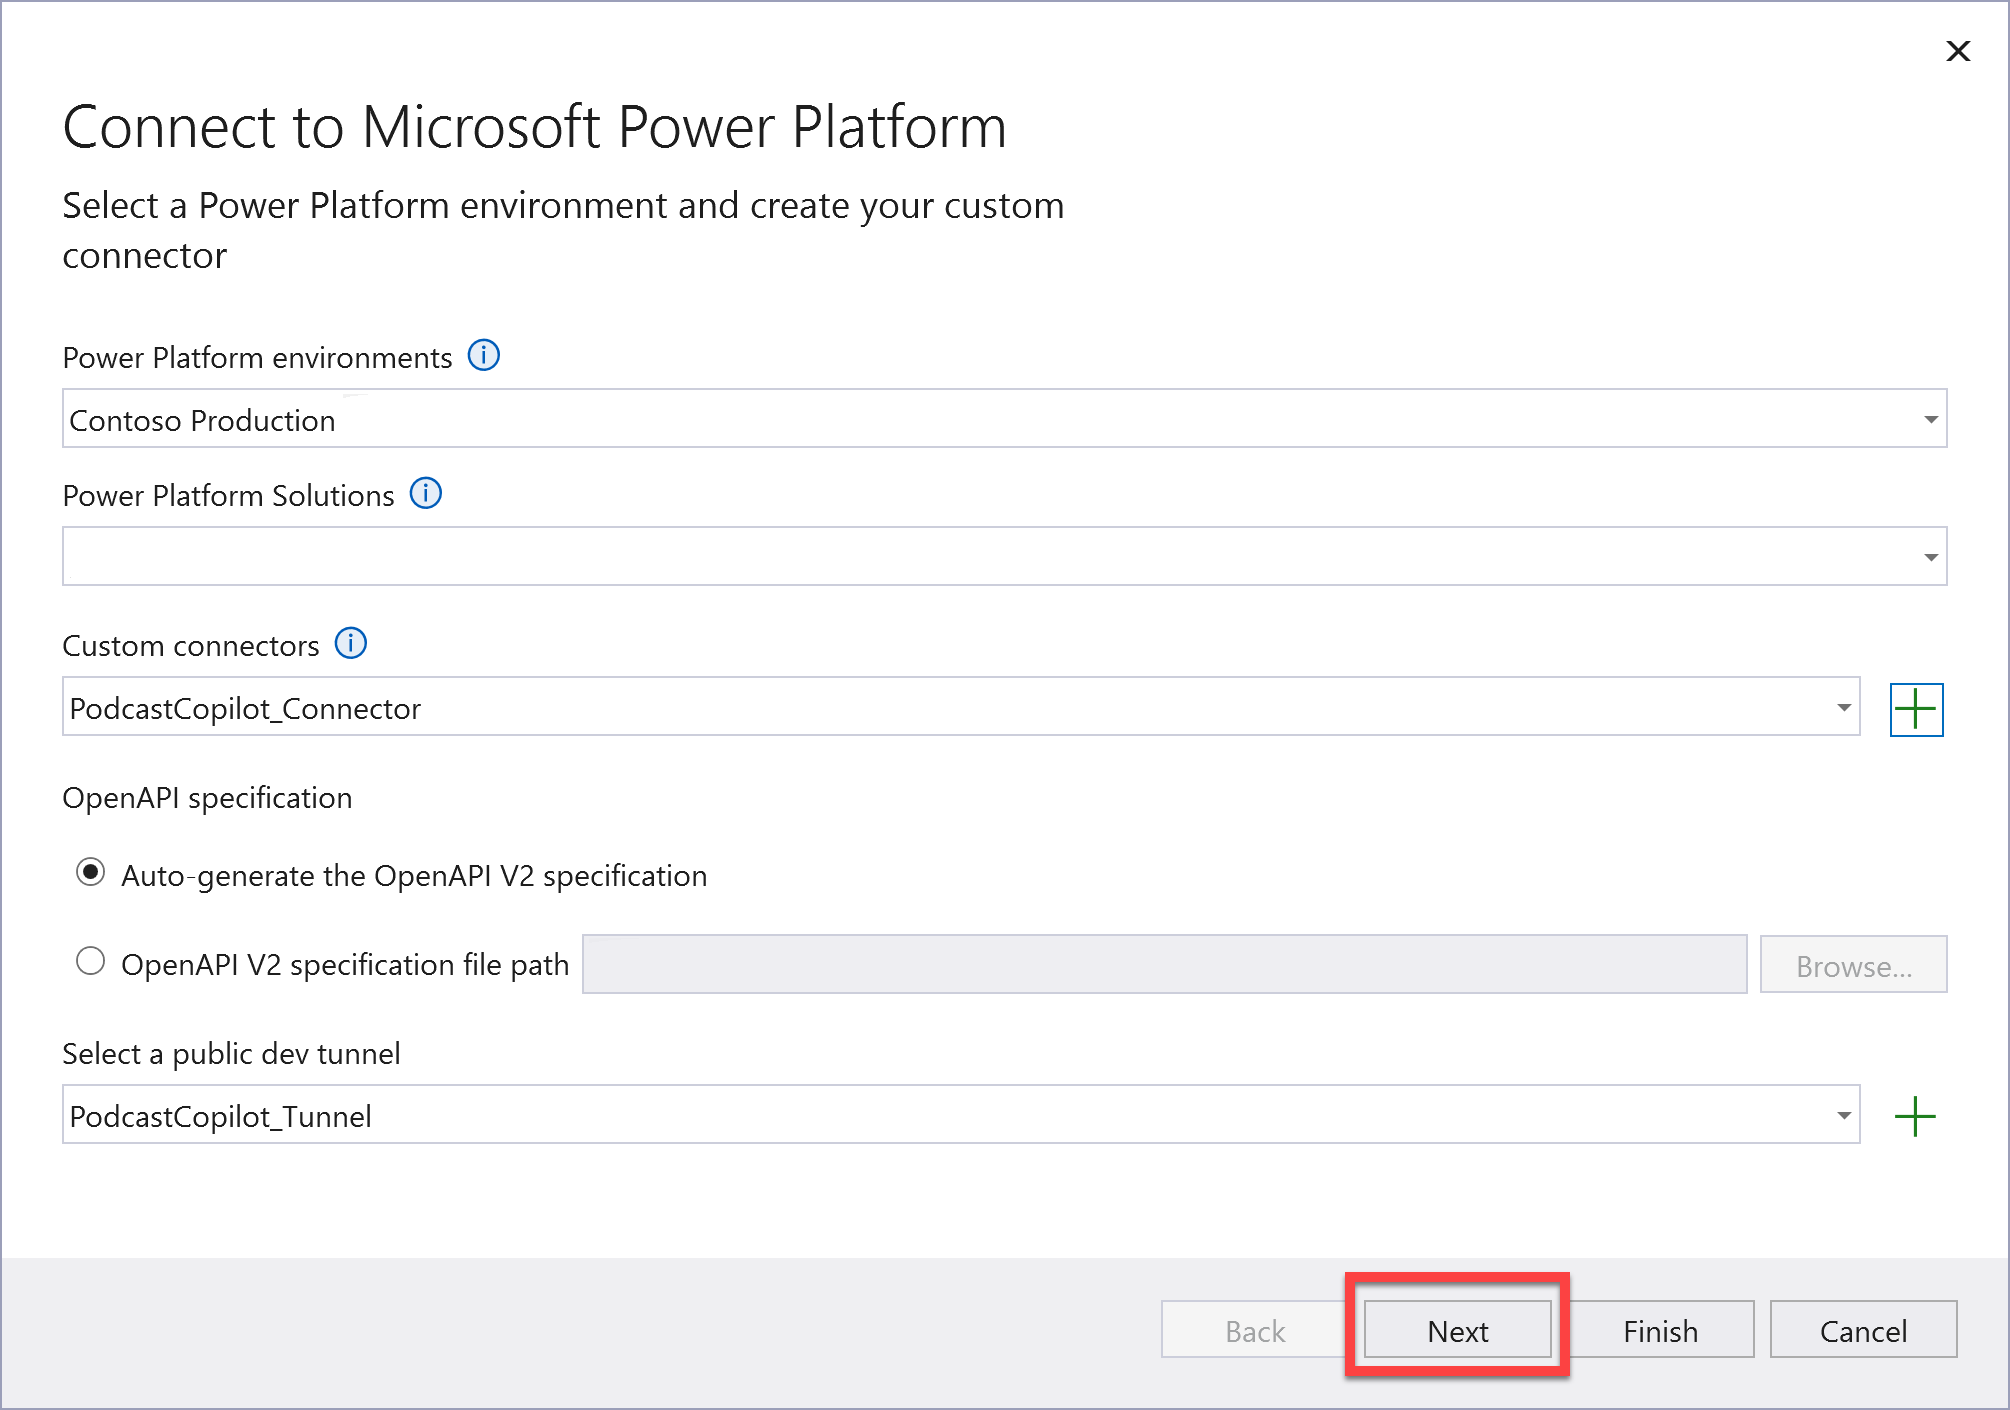
Ensure that you're signed in with the same account as your Power Apps Developer Plan. Then, on the Connect to Microsoft Power Platform pop-up window, configure the following settings:
Power Platform environments - Select an environment of your choosing.
Power Platform Solutions - Select a solution of your choosing.
Custom connectors - Create a new custom connector and call it PodcastCopilot_Connector.
OpenAPI specification - Select the Auto-generate the OpenAPI V2 specification option.
Select a public dev tunnel - Create a new dev tunnel and call it PodcastCopilot_Tunnel.
Select Next > Finish.
After the Dependency configuration process completes, close the pop-up window.
Run the application. If you receive the following message in the browser window, select Continue to connect to your developer tunnel.
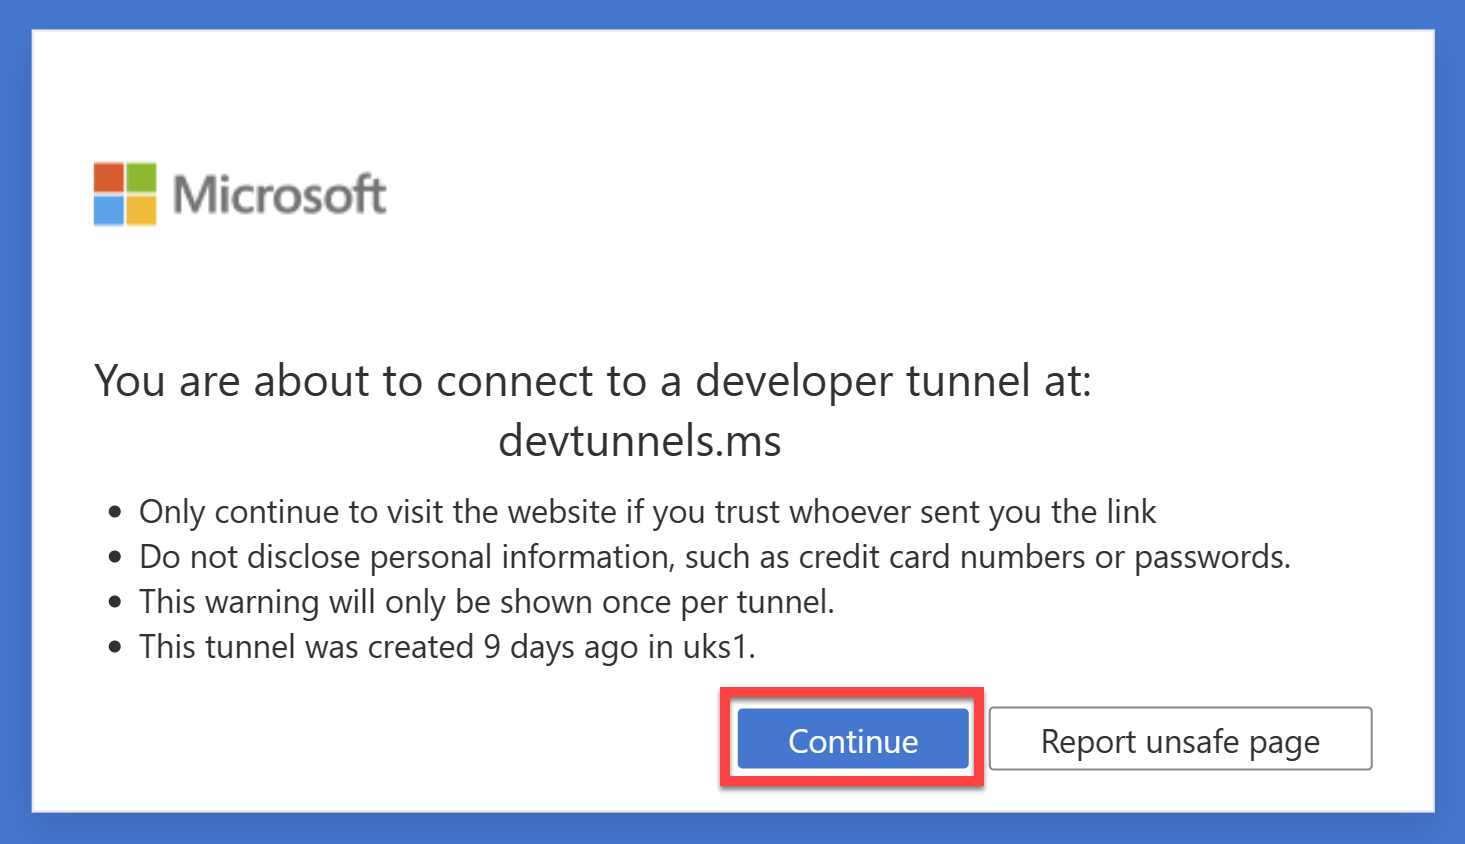
After the developer tunnel connects, the system displays a single API operation that you can test to determine whether it's working correctly or not.
Select the GenerateSocialMediaPost operation to expand it, and then select the Try it out button.
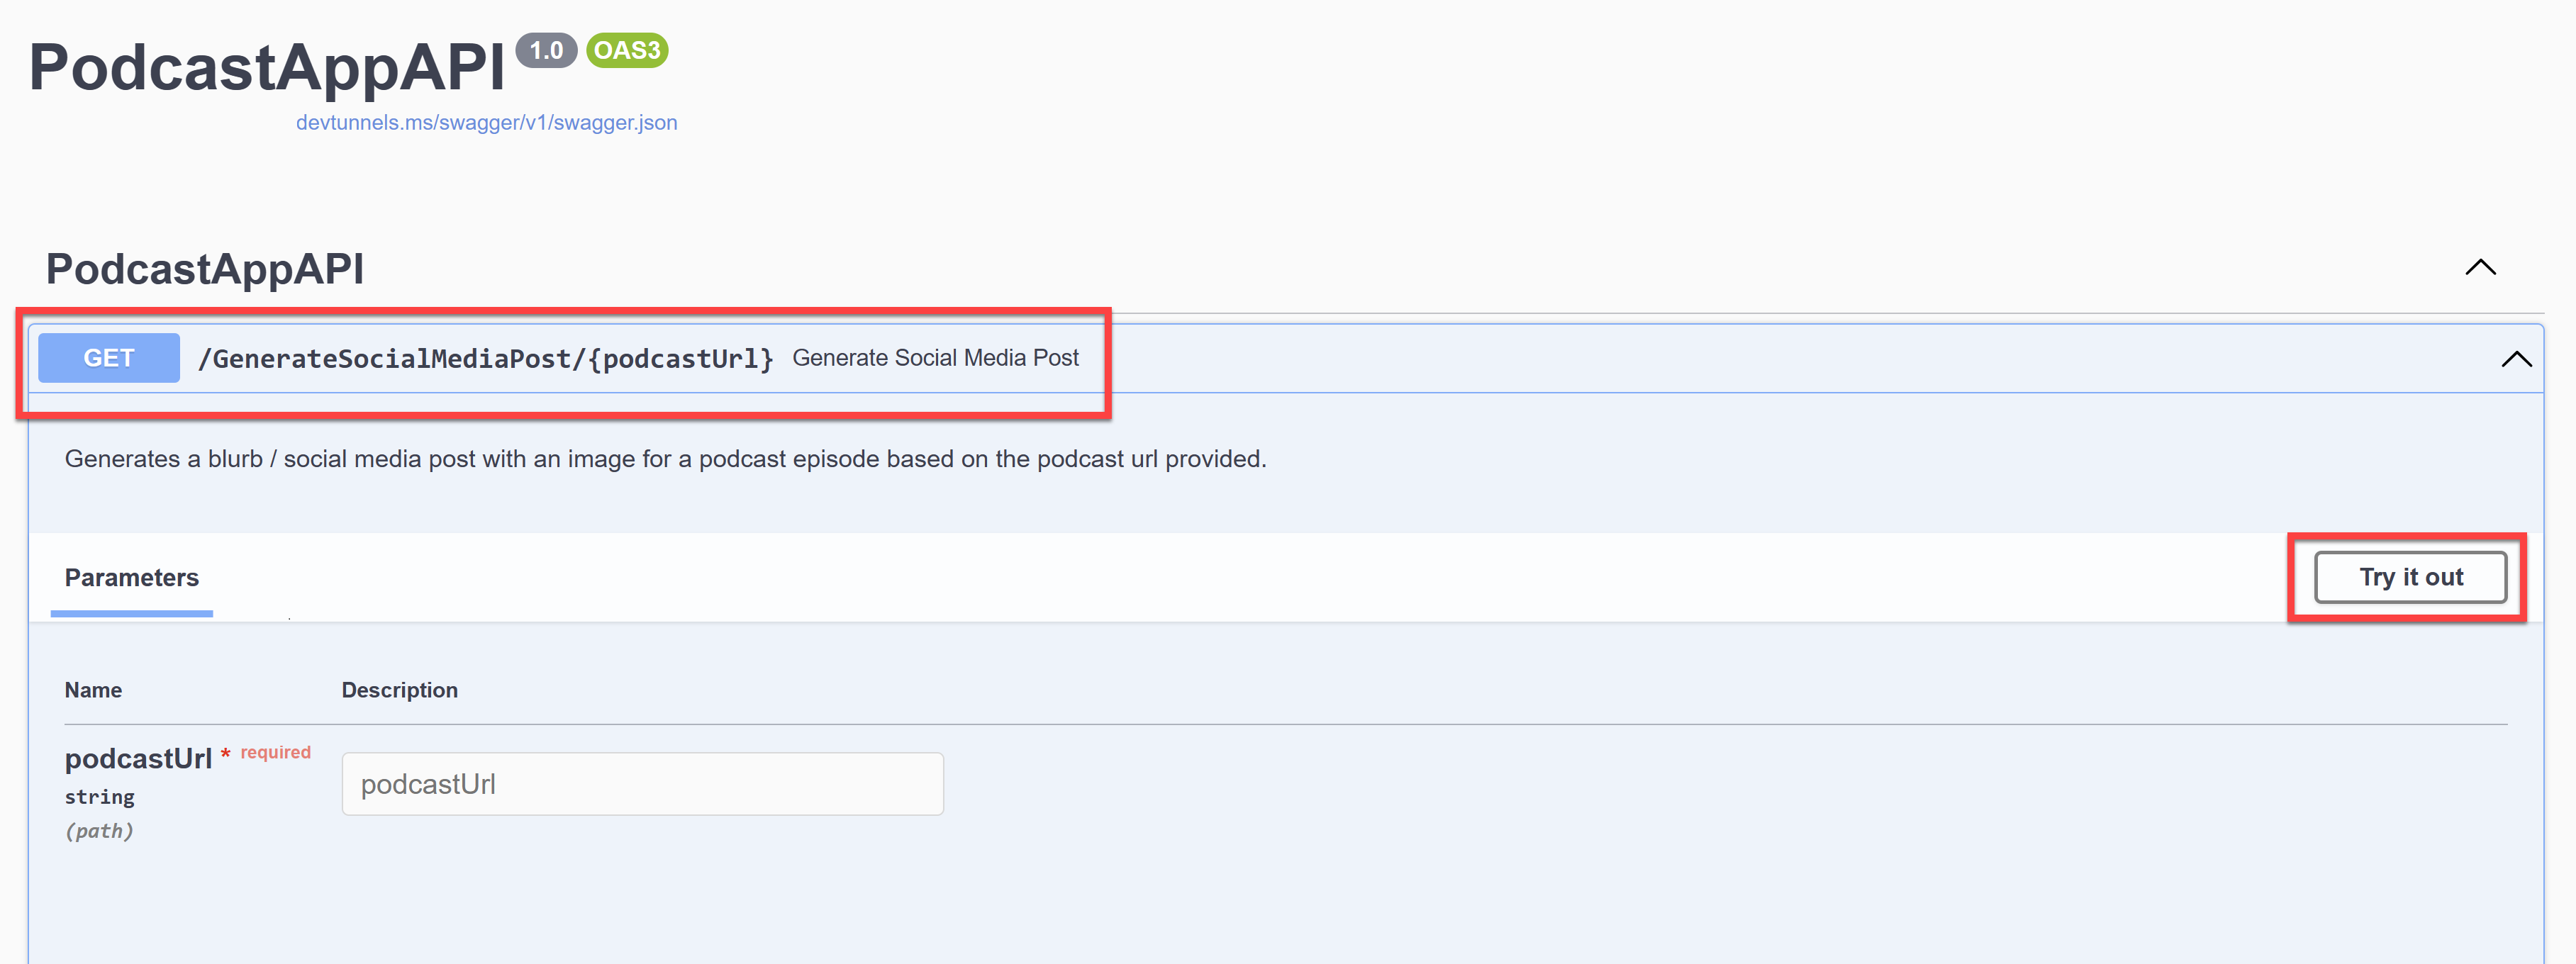
Enter the URL of the podcast episode that you uploaded to Azure Blob Storage in the previous exercise, and then select Execute.
Watch for a response from the API operation that depicts an image URL and a social media blurb that the system generates from the podcast audio with Azure OpenAI.

You've now created a .NET API by using the .NET Azure OpenAI SDK, and you also created a custom connector from Visual Studio. Now, you can use the API in Microsoft Power Platform.
Next steps
You've learned how to create a .NET API and related custom connector. Next, you learn how to integrate this custom connector in Microsoft Power Platform tools.