Exercise - Create a calculated column
In this exercise, you'll add a column called Price to hold the price for a passenger on the cruise. Then, you'll add a second column called Tax and add a calculation to determine the tax to charge for each ticket.
Sign in to Power Apps.
Select Tables > Cruises.
Select + New > Column in the menu, enter the following into the new Column Panel columns, and then save.
Enter Price in the Display Name field.
Select the Data type drop-down and select Currency.
Now let's add our second column, a calculated column, which will be based on our Price column. Select + New > Column in the menu.
Enter Tax in the Display Name field.
Select the Data type drop-down and select Currency.
Select the Behavior drop-down and select Calculated.
Select the Save button so you can define the calculation.
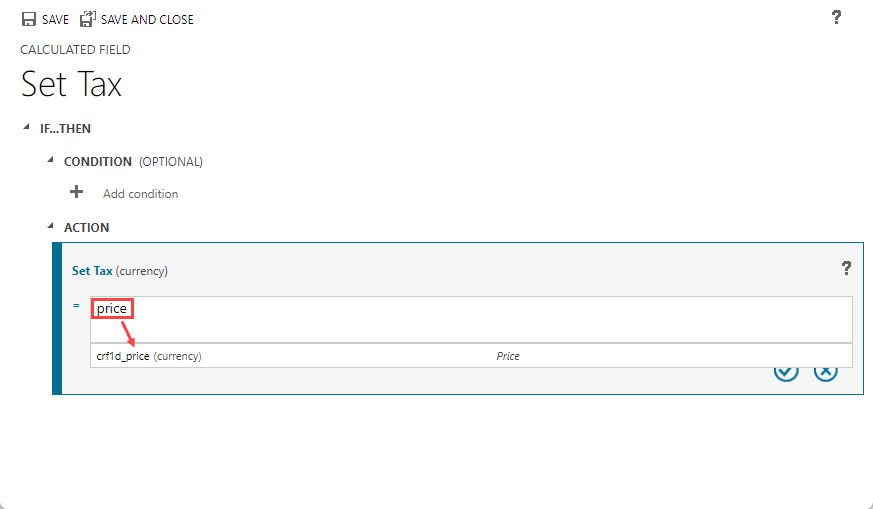
The Cruises table will save, and a browser popup opens so you can define the tax calculation. The process might take a few moments to open the calculation screen, so be patient. When it does open, you'll see your calculated field with options to Set Tax. Under Action select + Add action
In the Set Tax action formula field, search for your price field by entering "price" in the formula field. (Note, your field name won't match the image pasted below, but it should include "_price" in the name.) Select your price data column that appears below the formula entry field.
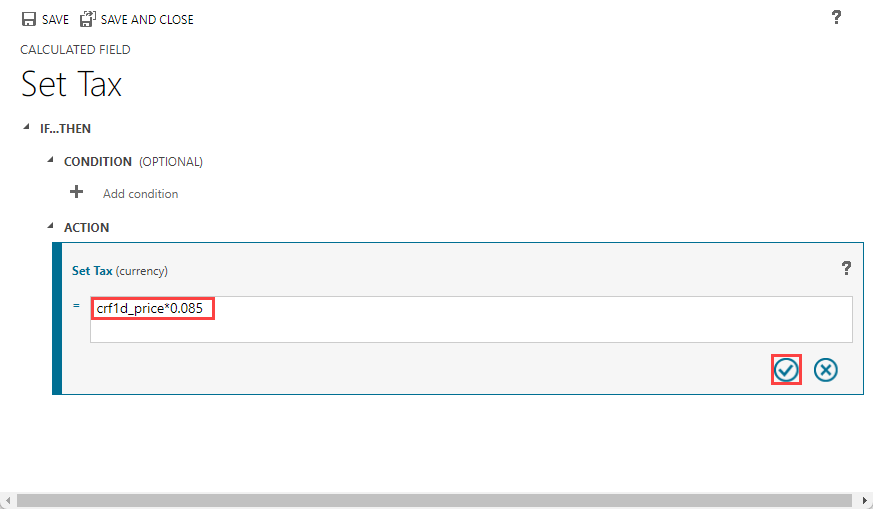
Complete the tax calculation by multiplying the price by .085. Add the multiplication operator "*" and the rate of .085, as shown in the following screenshot, and then select the check mark button to finish creating the calculation.
Select the Save and Close button at the top of the window to save your calculation and close the popup.
You now have Price and Tax columns available in the Cruises table.
Note
Each currency field in your Dataverse table that you add gets a Base column added as well. The reason for the two entries is that Microsoft Dataverse supports many different currencies. You can deploy a solution that is globally built with Dataverse and convert local currency to a common base currency. Our added currency columns might be dollars or euros in the Price and Tax columns, but a common currency is used in the Currency (base) and Tax (base) columns. Dataverse calculates the conversion rate so that you can collect information in a standard currency (base columns) regardless of the local currency that is used in your solution. You can read more about currency conversion by following a link provided in the Summary unit of this module. Let's take a look at your data to see this.
Select the +[n] more button in your Cruises columns and data pane (where [n] represents an integer describing how many other columns are in your data). A Show existing column popup appears where you can see a list of all of the columns in your table, with a checkmark next to the ones that are currently displayed.
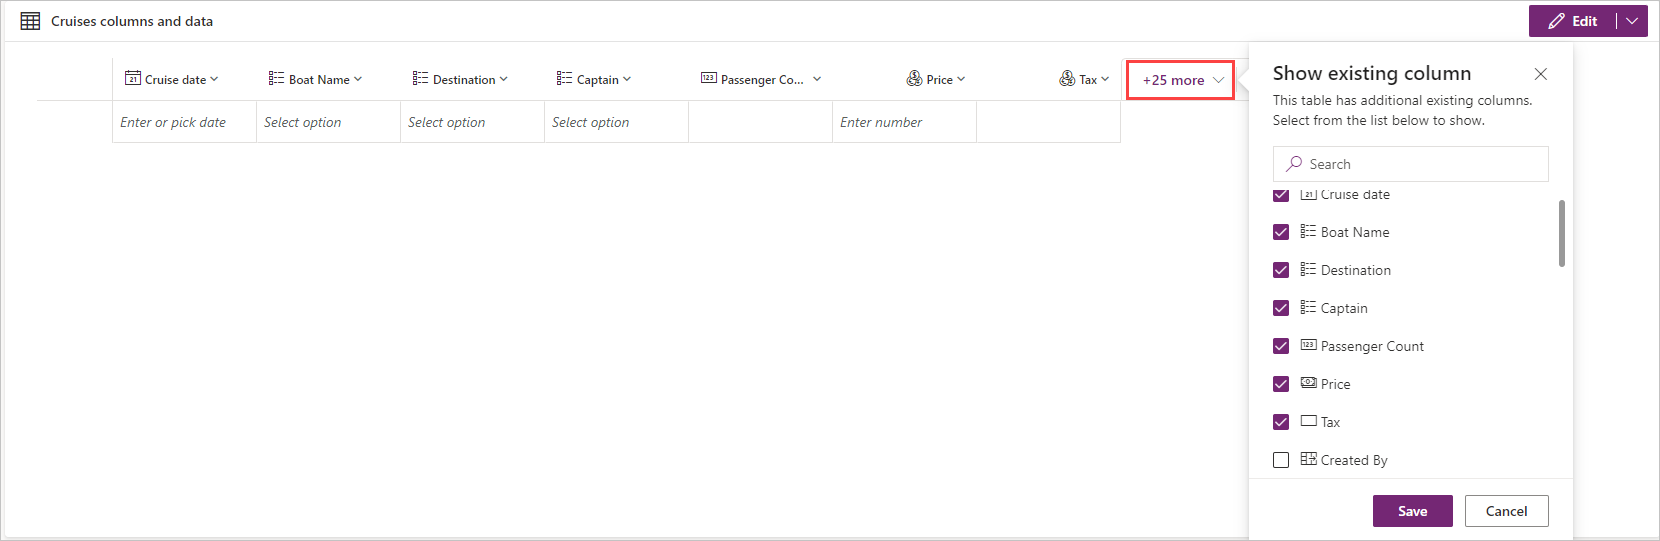
Enter Price in the search field. Notice how your existing list narrows to Price (which has the display box checked) and Price (base) unchecked. You can clear the search field and enter Tax and you'll see similar results.
Select the checkbox next to your Price (base) column so you can see that in your table view.
Finish the exercise by adding some data into the Cruises table to test out the calculations for your Tax column. You can do it directly in your Cruises columns and data pane. When you enter a value, notice how your Tax value and your Price (Base) columns automatically populate.

Congratulations, now you understand how to add a calculated column to your table. Next, let's check your knowledge.