Exercises
Add columns to a custom table
In this exercise, you add a few columns to the custom table PC Manufacturers. If you haven't created the custom table as a part of this learning path, you can complete the steps here to create this table.
In your browser, go to https://make.powerapps.com, From the left navigation menu, select Tables. If you don't see Tables on the left, you can select More, then in the flyout menu find and select Tables.
Select the custom table PC Manufacturers from the list of tables.
Tip
You can enter the table title in the search window in the top right of the maker portal command bar.
Selecting the table opens the Table view screen showing panes like the image below.
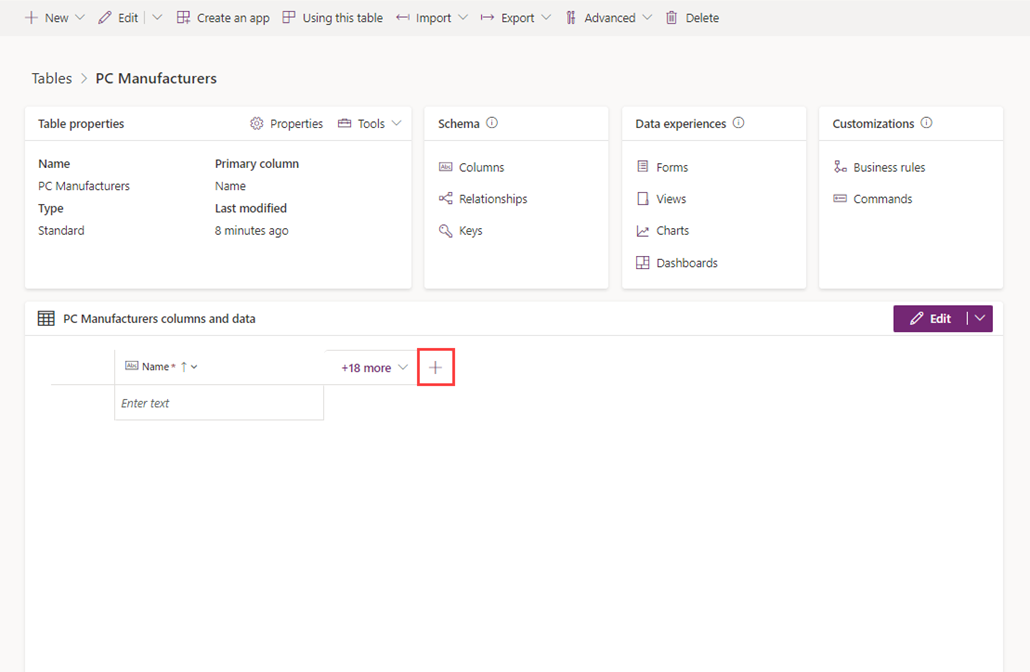
Select the + button in the columns and data pane to add another column next to your Name column.
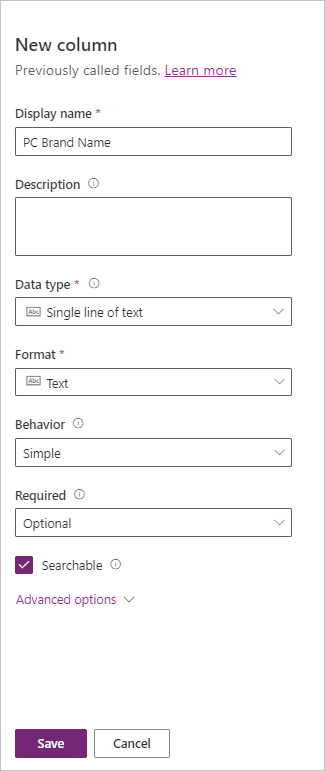
Type PC Brand Name in the Display name column.
Keep the Searchable check box selected.
Select Save.
Select + in the columns and data pane to add another column.
Type Description in the Display name column.
Select Text area in the Data type. Notice how the Data type now displays Single line of text and the Format displays Text area. Leave the other fields as they are.
Select the Save button.
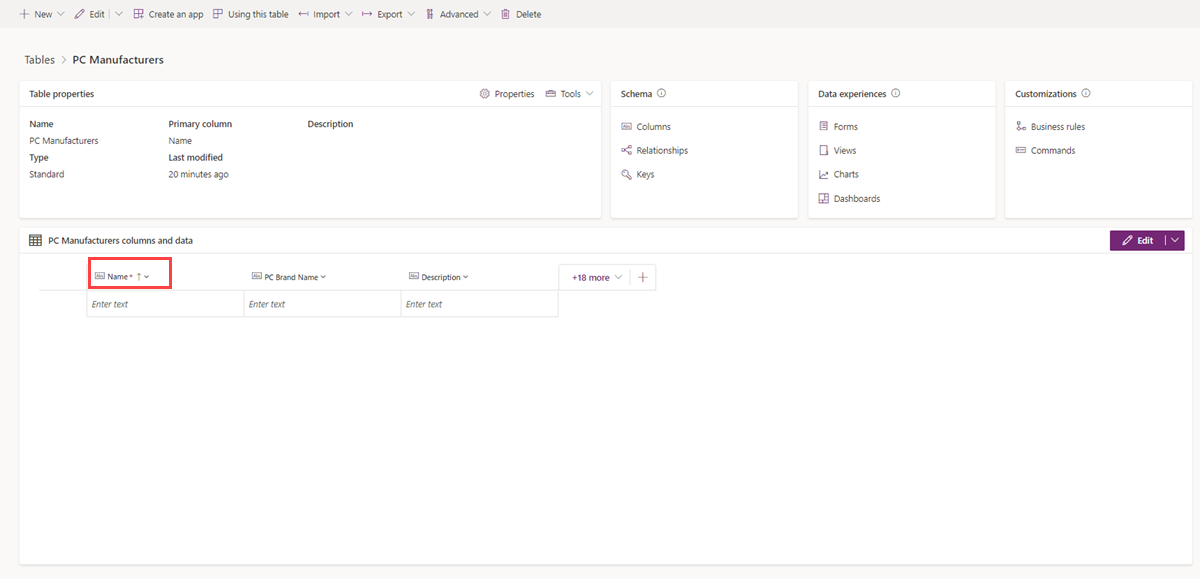
Your PC Manufacturers table should now include the newly added columns, PC Brand Name and Description.
Rename a primary column
Next we'll rename the primary column called Name that was created by default when you created the custom table PC Manufacturers.
If needed, reaccess your PC Manufacturers table.
In the Tables > PC Manufacturers editor window, you should now see PC Manufacturers displayed. The columns and data pane in the bottom half of the screen shows your Name column. Go ahead and select the column, then select Edit column.
In the popup Edit column pane, notice that this column is both Searchable and Business Required. Update the Display Name field to PC Model Name, as shown in the following image.

Select Save.
Add an autonumber column
Next, let's add an autonumber column to help identify the manufacturer record in the custom table.
If needed, reaccess your PC Manufacturers table.
Add a column in your columns and data pane by selecting the + button.
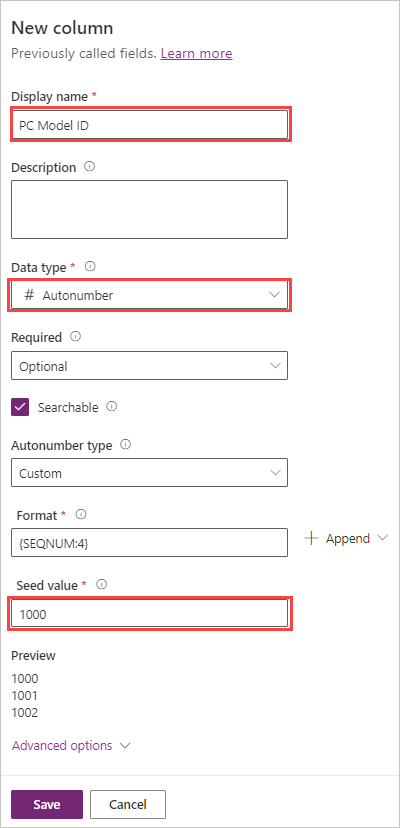
On the New column popup pane on the right, enter PC Model ID for the Display name and select Autonumber for the Data type.
Under Autonumber type, select Custom.
Leave the Format as the default of {SEQNUM:4}.
Customize a Seed value or keep the default value of 1000.
Select Save.
Create a key
Create a key to ensure that the value is unique and indexed.
If you're not already in your Tables editor screen, follow the earlier steps to get to your PC Manufacturers table.
In the Schema pane near the top-middle of the Tables editor screen, select Keys.
Your browser navigates to the Keys screen. Select + New Key from the command bar at the top.
Enter PC Key in the Display name column.
Select the check box next to the PC Model Name column.
Note
A key can be made up of one or many columns. If you select multiple columns, then the key is called a compound key.
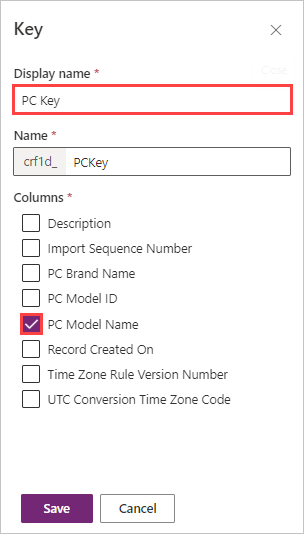
Select Save.
After a few moments, you'll see the new key added to the keys list for this table. You can create up to five keys for each table. All values in the key are unique.
Nice work! Next, let's review what we've learned.