Create an Azure storage accounts baseline
An Azure Storage account provides a unique namespace where you can store and access your Azure Storage data objects.
Azure Storage account security recommendations
The following sections describe the Azure Storage recommendations that are in CIS Microsoft Azure Foundations Security Benchmark v. 3.0.0. Included with each recommendation are the basic steps to complete in the Azure portal. You should complete these steps for your own subscription and by using your own resources to validate each security recommendation. Keep in mind that Level 2 options might restrict some features or activity, so carefully consider which security options you decide to enforce.
Require security-enhanced transfers - Level 1
This is a step you should take to ensure the security of your Azure Storage data is to encrypt the data between the client and Azure Storage. The first recommendation is to always use the HTTPS protocol. Using HTTPS ensures secure communication over the public internet. To enforce the use of HTTPS when you call REST APIs to access objects in storage accounts, turn on the Secure transfer required option for the storage account. After you turn on this control, connections that use HTTP are refused. Complete the following steps for each storage account in your subscription.
Sign in to the Azure portal. Search for and select Storage accounts.
In the Storage accounts pane, select a storage account.
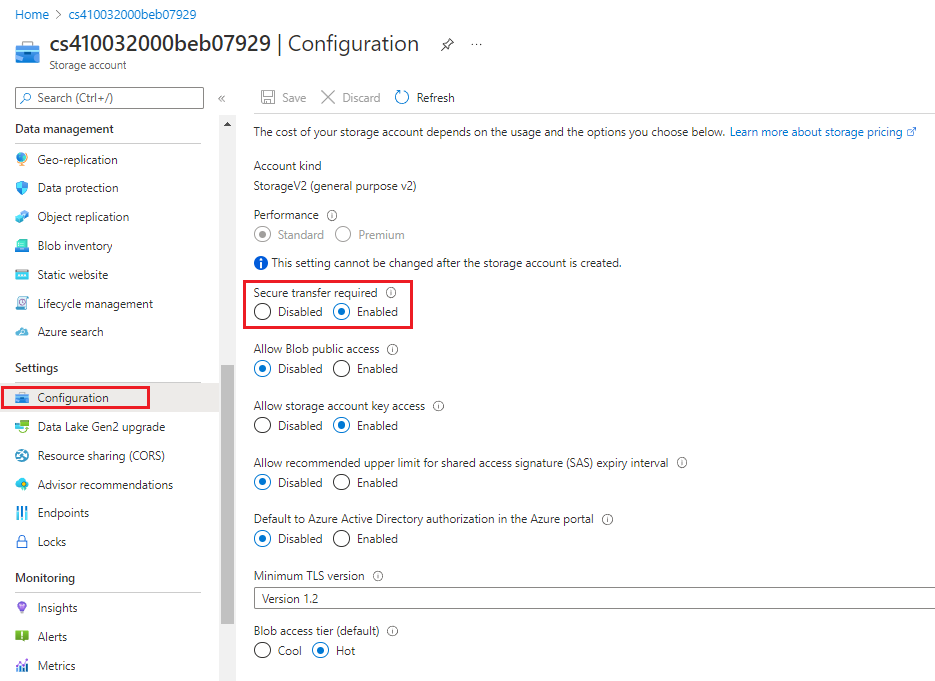
In the left menu under Settings, select Configuration.
In the Configuration pane, ensure that Secure transfer required is set to Enabled.
If you change any settings, select Save in the menu bar.
Enable binary large object (blob) encryption - Level 1
Azure Blob Storage is the Microsoft object storage solution for the cloud. Blob Storage is optimized to store massive amounts of unstructured data. Unstructured data is data that doesn't adhere to a specific data model or definition. Examples of unstructured data include text and binary data. Storage service encryption protects your data at rest. Azure Storage encrypts your data as it's written in its datacenters, and it automatically decrypts it for you as you access it.
Sign in to the Azure portal. Search for and select Storage accounts.
In the Storage accounts pane, select a storage account.
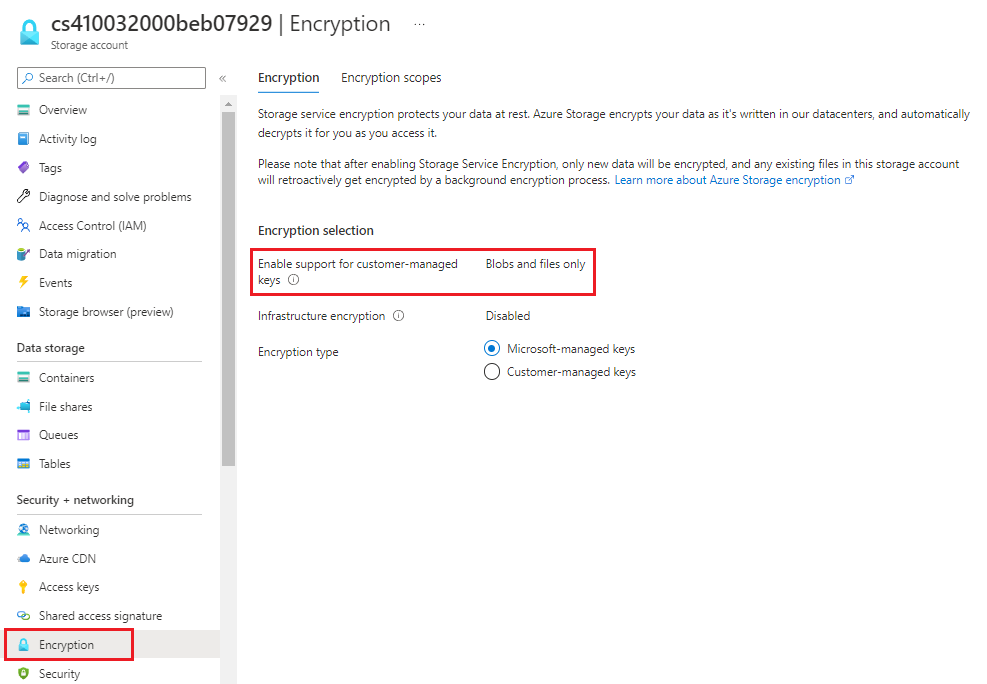
In the left menu under Security + networking, select Encryption.
In the Encryption pane, note that Azure Storage encryption is enabled for all new and existing storage accounts and that it can't be disabled.
Periodically regenerate access keys - Level 1
When you create a storage account in Azure, Azure generates two 512-bit storage access keys. These keys are used for authentication when the storage account is accessed. Rotating these keys periodically ensures that any inadvertent access to or exposure of these keys is limited by time. Complete the following steps for each storage account in your Azure subscription.
Sign in to the Azure portal. Search for and select Storage accounts.
In the Storage accounts pane, select a storage account.
In the left menu, select Security + networking, then select Access keys.
Review the Last rotated date for each key.
If you aren't using Azure Key Vault with key rotation, you can select the Rotate key button to manually rotate your access keys.
Require shared access signature tokens to expire within an hour - Level 1
A shared access signature is a URI that grants restricted access rights to Azure Storage resources. You can provide a shared access signature to clients that shouldn't be trusted with your storage account key, but to whom you want to delegate access to certain storage account resources. By distributing a shared access signature URI to these clients, you can grant them access to a resource for a specified period of time, with a specified set of permissions.
Note
For the recommendations in CIS Microsoft Azure Foundations Security Benchmark v. 3.0.0, shared access signature token expiry times can't be automatically verified. The recommendation requires manual verification.
Require shared access signature tokens to be shared only via HTTPS - Level 1
Shared access signature tokens should be allowed only over HTTPS protocol. Complete the following steps for each storage account in your Azure subscription.
Sign in to the Azure portal. Search for and select Storage accounts.
In the Storage accounts pane, select a storage account.
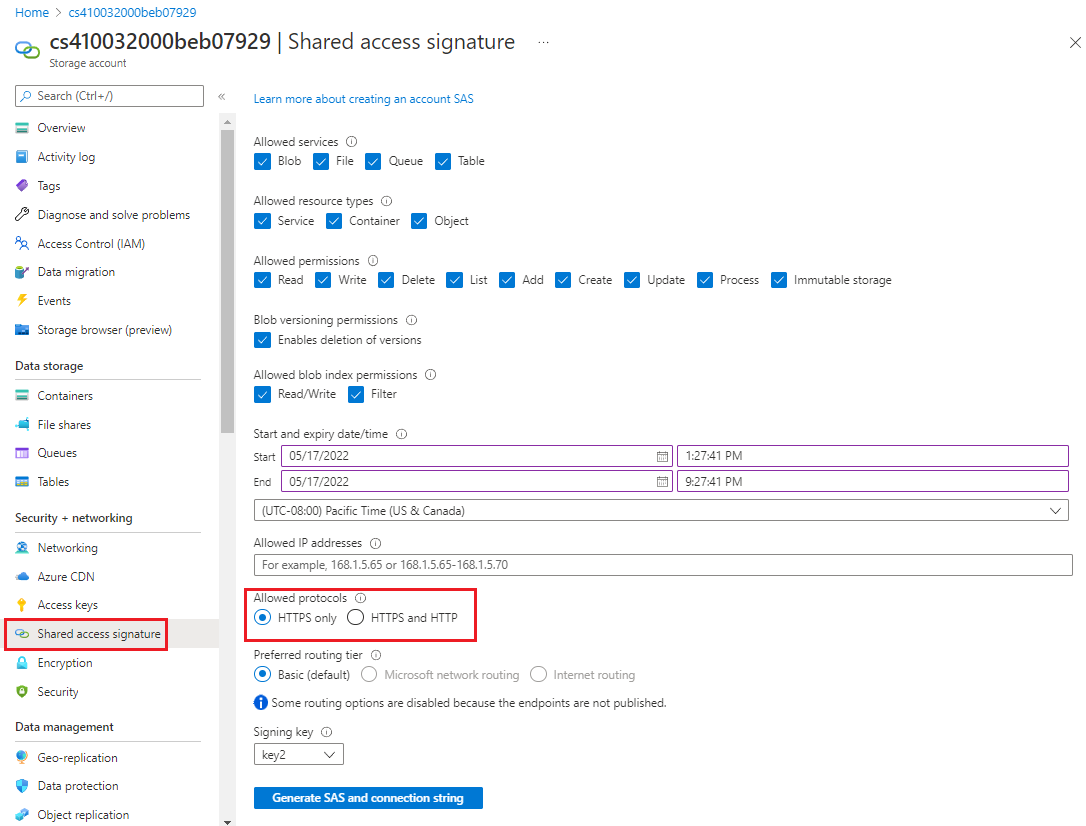
In the menu under Security + networking, select Shared access signature.
In the Shared access signature pane, under Start and expiry date/time, set the Start and End dates and times.
Under Allowed protocols, select HTTPS only.
If you change any settings, select the Generate SAS and connection string button at the bottom of the screen.
Configure shared access signature features in the next sections.
Enable Azure Files encryption - Level 1
Azure Disk Encryption encrypts the OS and data disks in IaaS VMs. Client-side encryption and server-side encryption (SSE) are both used to encrypt data in Azure Storage. Complete the following steps for each storage account in your Azure subscription.
Sign in to the Azure portal. Search for and select Storage accounts.
In the Storage accounts pane, select a storage account.
In the left menu under Security + networking, select Encryption.
In the Encryption pane, note that Azure Storage encryption is enabled for all new and existing blob storage and file storage, and that it can't be disabled.
Require only private access to blob containers - Level 1
You can enable anonymous, public-read access to a container and its blobs in Azure Blob Storage. By turning on anonymous, public-read access, you can grant read-only access to these resources without sharing your account key, and without requiring a shared access signature. By default, a container and any blobs within it might be accessed only by a user that has been given appropriate permissions. To grant anonymous users read access to a container and its blobs, you can set the container access level to public.
However, if you grant public access to a container, anonymous users can read blobs within a publicly accessible container without the request being authorized. A security recommendation is to instead set access to storage containers to private. Complete the following steps for each storage account in your Azure subscription.
Sign in to the Azure portal. Search for and select Storage accounts.
In the Storage accounts pane, select a storage account.
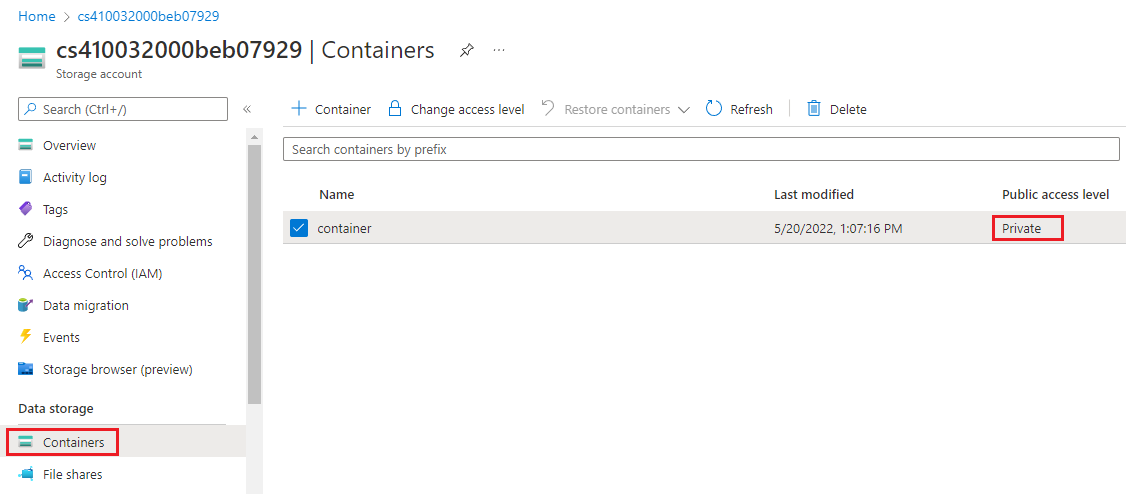
In the left menu under Data storage, select Containers.
In the Containers pane, ensure that Public access level is set to Private.